Managing databases through dashboards can quickly become repetitive, creating tables, updating schemas, writing queries, and constantly switching contexts.
Instead of clicking through the UI, what if you could just tell an AI agent what to do?
In this guide, we’ll show how to manage your Supabase projects using Claude Code and Composio—entirely through natural language.

Here’s how you can manage your Supabase projects with Claude Code, using no UI, no clicking, and just pure, natural human language.
What’s Covered?
Supabase MCP server by Composio
How to configure Claude so that you can manage Supabase projects through your terminal
Prompting Claude to create projects, run SQL queries to create a table, and fetch the data.
What is Supabase MCP?
Supabase MCP is a tool interface that uses the Supabase API in a format that Claude (and other Agents) can understand. MCP, here’s a way to describe tools (like APIs or CLI commands) so language models can use them like real assistants.
With Supabase MCP, Claude can:
Create or update tables.
Create or update functions.
Update an SSO provider.
And more… all from chat/prompts.
However, all this can be accomplished using other MCP tools. Where does Composio come in?
Here’s where Composio comes in
Let’s say that you’re building a SaaS app, and you want your users to use some AI Agent to manage a Supabase project from your app. You could try connecting your app directly to a Supabase MCP, but then you’d have to handle:
Auth (OAuth, service keys, etc.)
Sessions and token storage
Writing tool specs manually
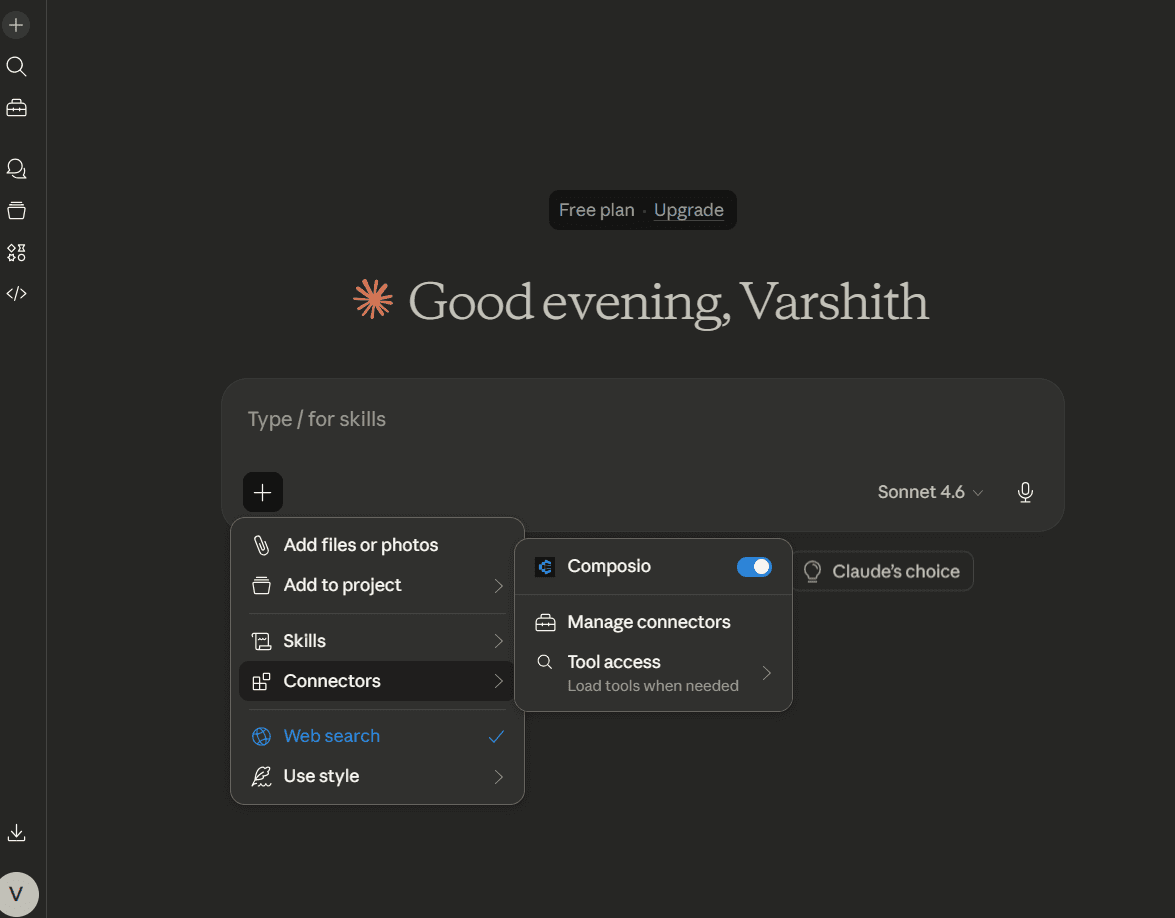
That’s a lot of work to do. Composio handles all that for you. It manages tool connections and auth as an integration layer, so all you do is log in, pick Supabase, and boom, everything is readily available inside Claude (or Cursor, or Windsurf, or your agent).
Not only that, but if you have other MCP server requirements, such as Jira, Figma, Asana, etc. You can create a custom MCP server with only the select few MCP tools that you need, which significantly reduces the surface area of security risks. You don't have to crowd the LLM context window with random tools you will never need.
Setup using Composio Connect (Recommended)
With the new setup, you no longer need to configure MCP servers manually or run CLI commands.
Step 1: Open Composio Connect
Go to: https://connect.composio.dev/

Step 2: Enable Supabase Integration
Search for Supabase
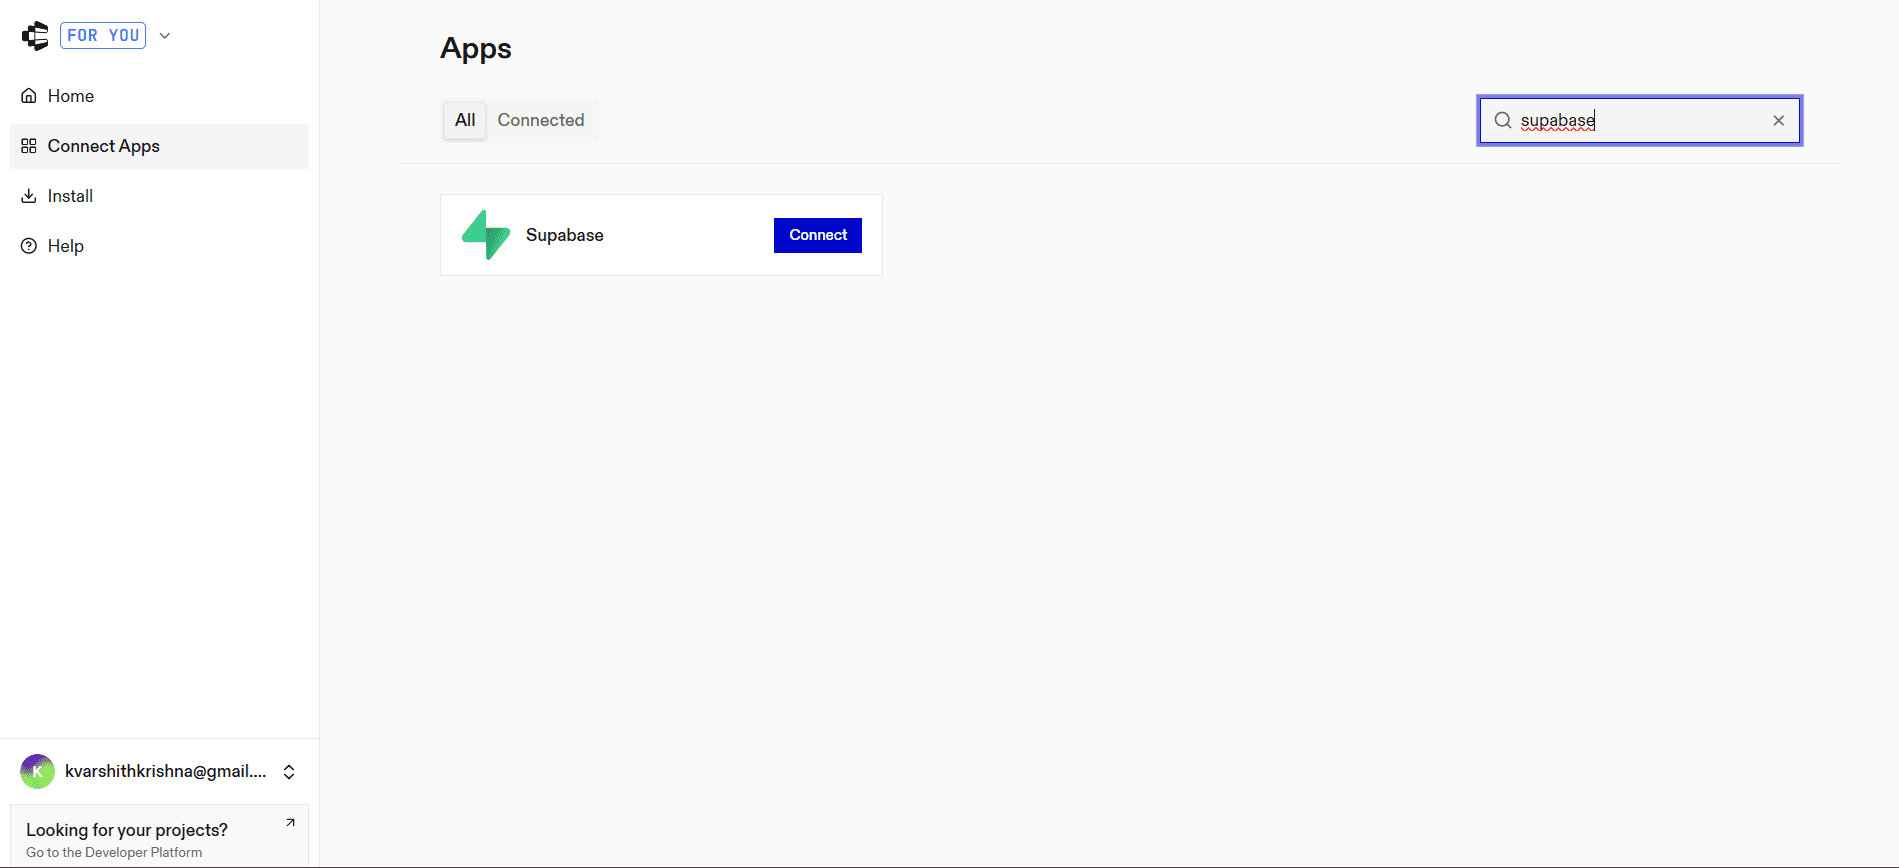
Click Integrate
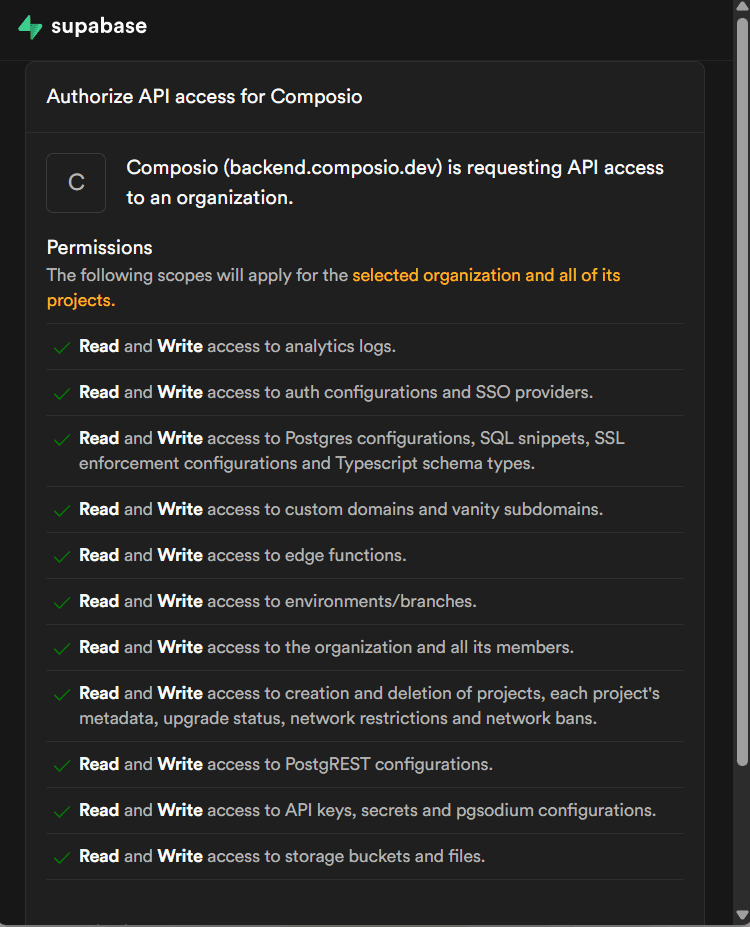
Authenticate your Supabase account
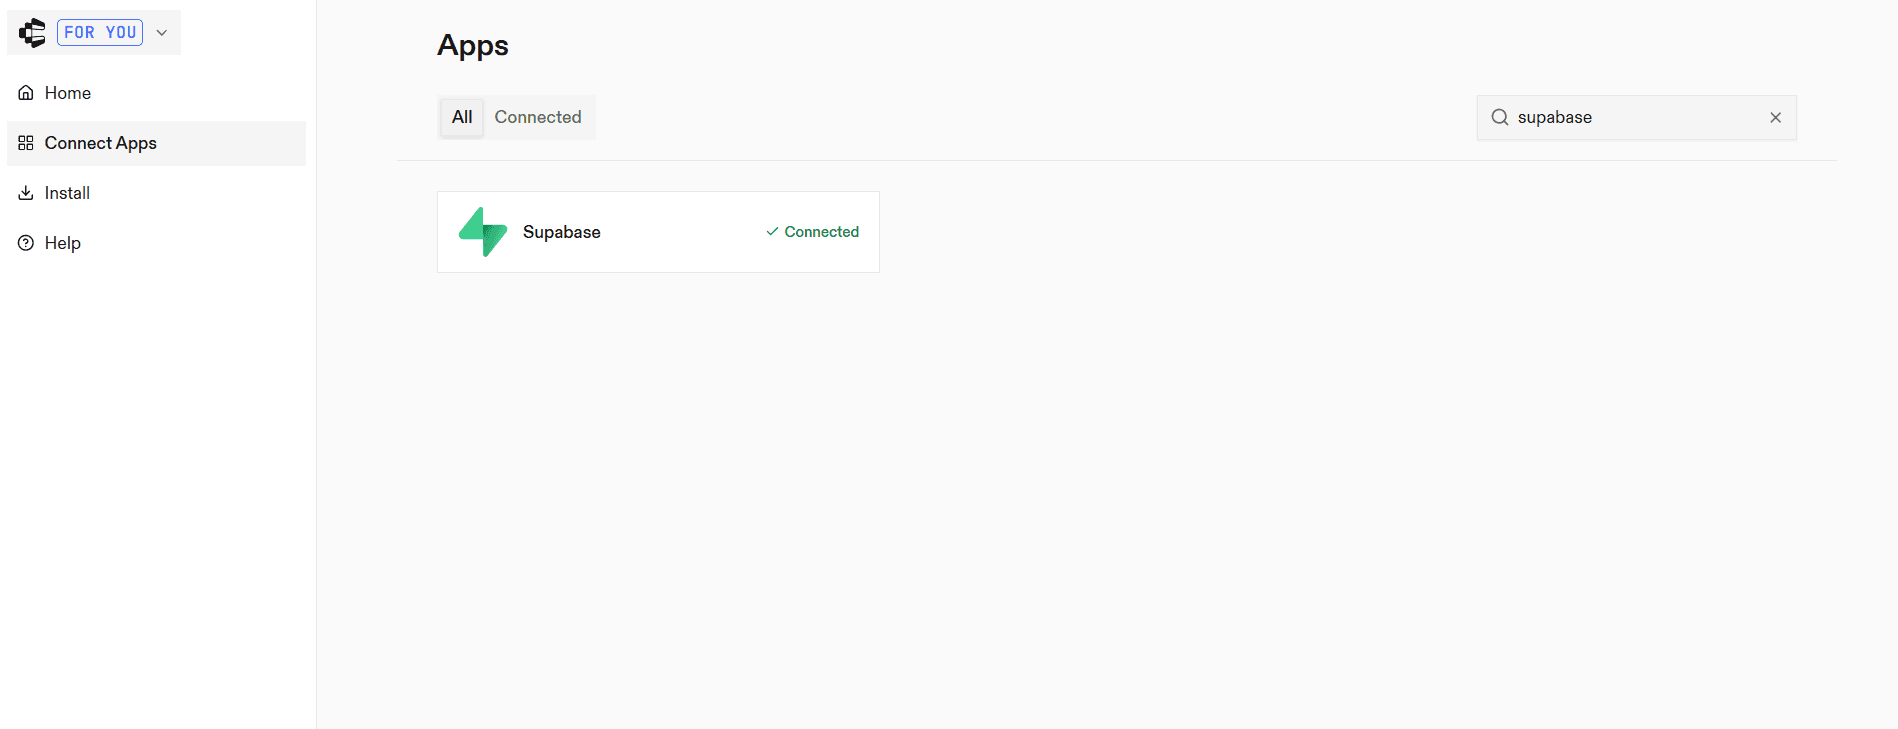
Once connected, your integration is ready to use.
Open Connectors in Claude Desktop
Launch Claude Desktop
Go to Settings
Select Connectors
Step 3: Add the MCP server
Click Add custom connector
Enter the URL:
https://connect.composio.dev/mcp
This connects Claude to all applications linked through Composio.
Step 4: Authorise access
A browser window will open. Sign in to your Composio account and approve the connection. Once completed, the integration becomes active.
Using Supabase with Claude Code
Once your Supabase integration is connected via Composio Connect, you can start managing your database directly using Claude Code.
For example, you can prompt:
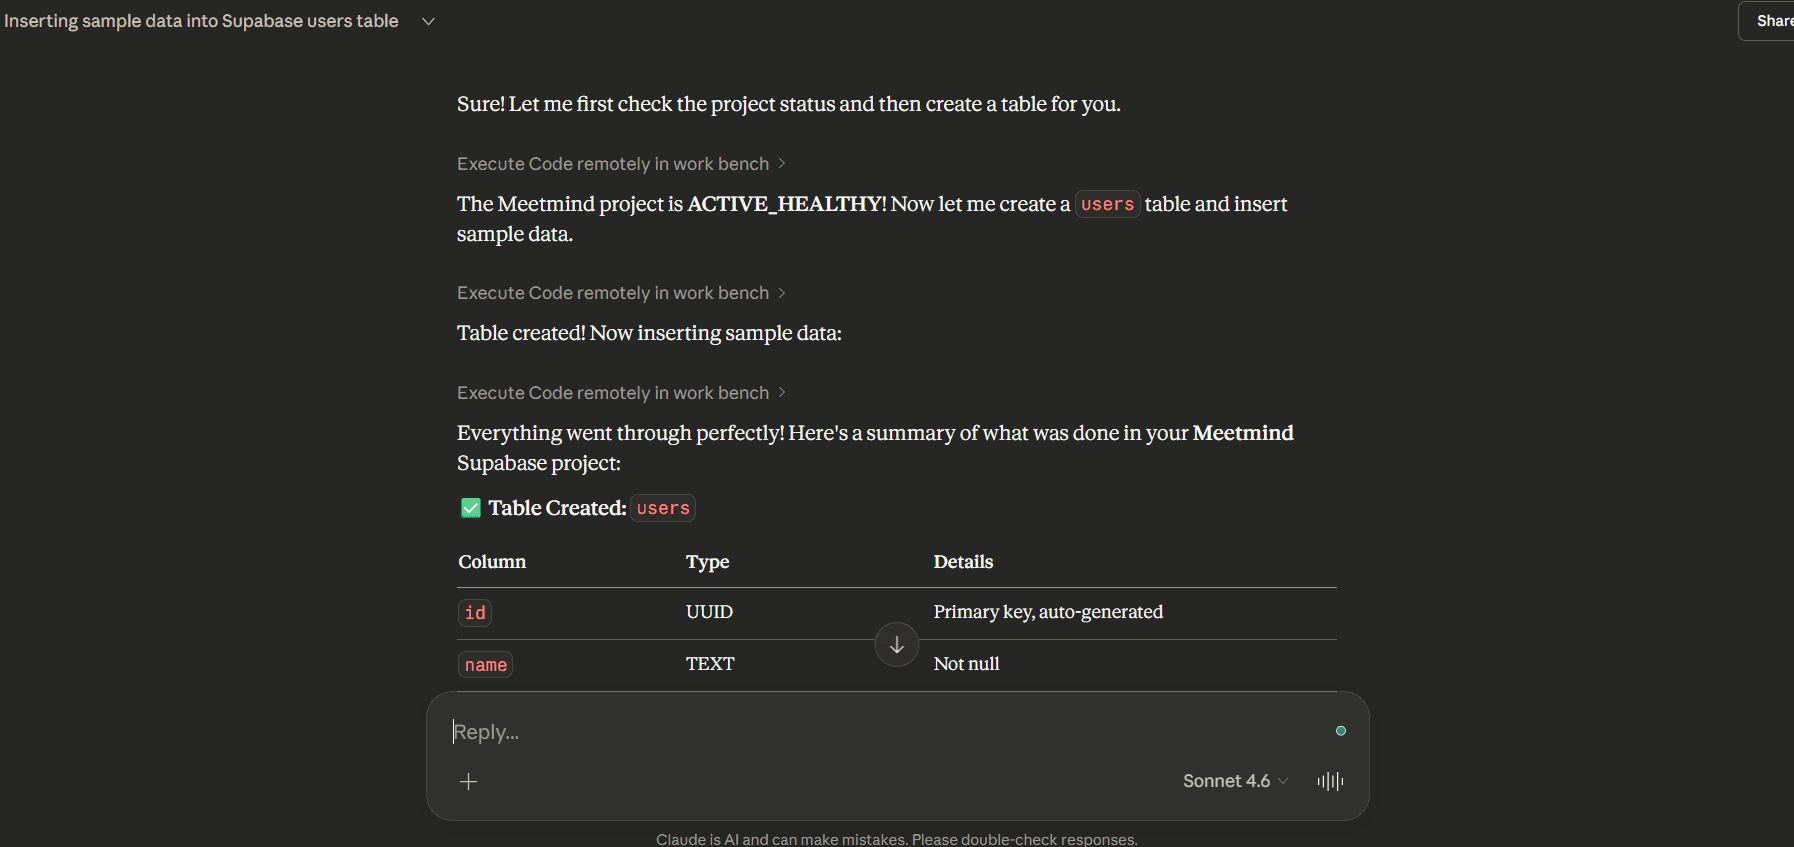
“Create a new table called users with id, name, and email.”
“Insert sample data into the users table.”
“Fetch all records from the users table.”
“Update a user’s email based on their id.”
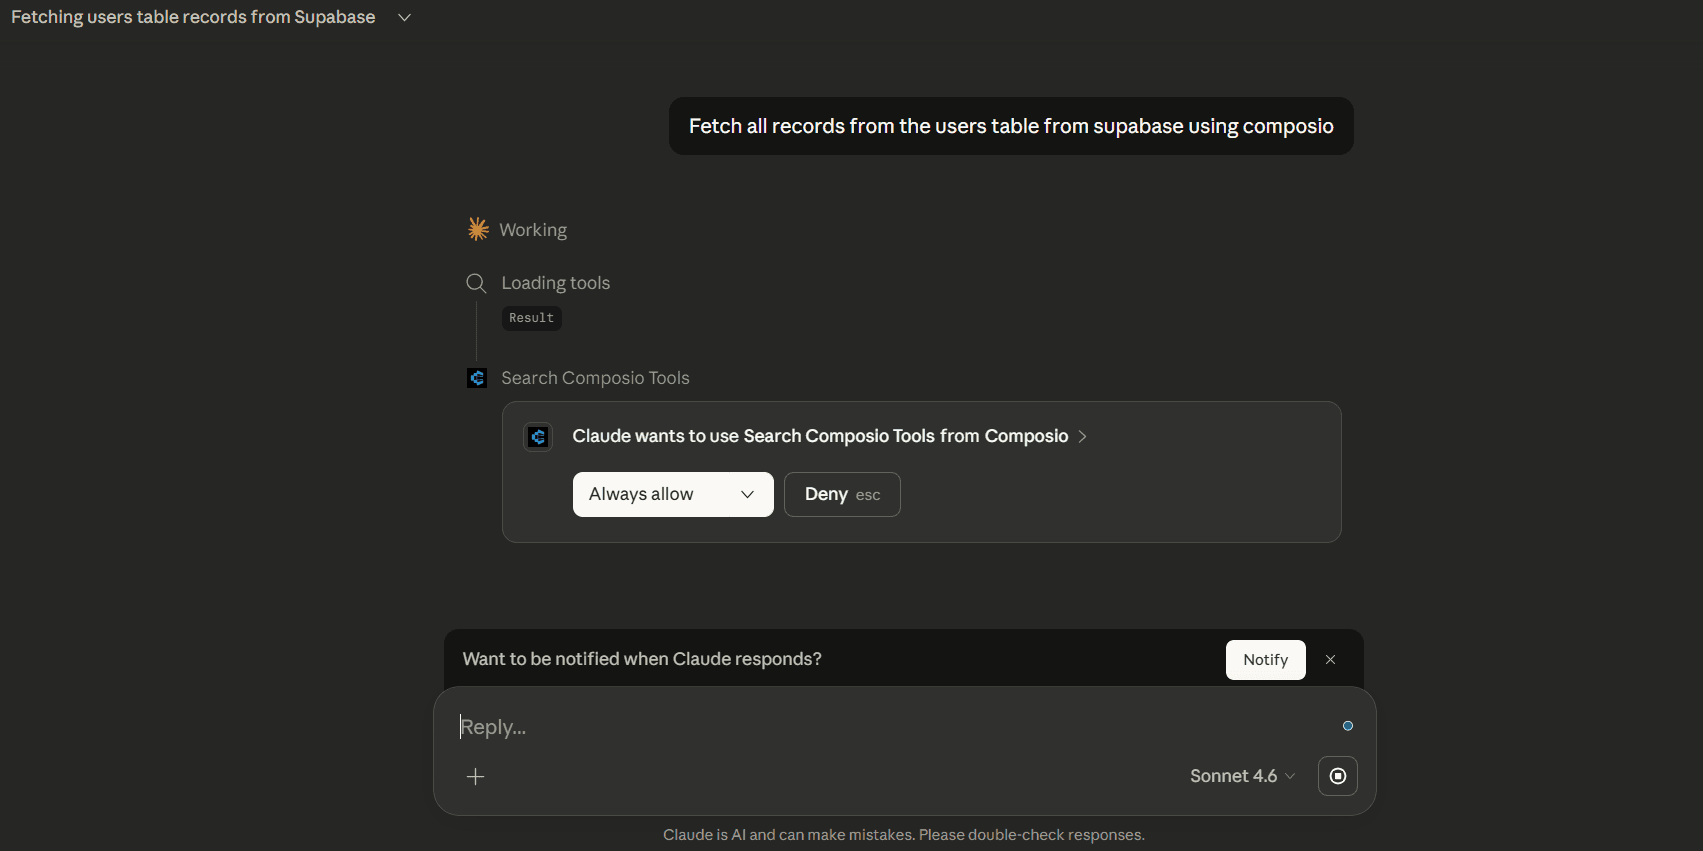
Claude will automatically execute the required actions and return structured results.
Best Practices
Be explicit with your prompts for better accuracy
Specify actions clearly (e.g., “create table”, “run query”)
Validate results before applying changes in production
Conclusion
Managing Supabase manually can slow you down as your project grows.
With Composio Connect, you can remove manual setup and directly integrate Supabase with Claude Code.
By simply connecting your account and authenticating, you can manage your database using natural language and build faster with fewer interruptions.