




Grok Bot is the bot builder from xAI. You use it to make a personal agent. The agent keeps context, runs skills, and connects to your apps through plugins. It runs on a cloud computer, and the desktop and mobile apps are thin clients for chat and approvals.
Related: A complete guide to Grok Bot
MCP is the protocol that lets an agent call tools in other apps. Grok Bot has no config file for MCP servers, and the settings screen has no place to paste a server URL. There are two ways to add one:
Install a plugin from the marketplace. The vendor has already packaged the server. I have rounded up some of the most useful plugins.
Ask your bot to add the server in chat. The bot registers it on your account.
The second way works for any MCP server, remote or stdio. This guide covers both ways, with Composio as the remote example and sequential-thinking as the stdio example.
Before you start
Make sure that you have these items:
A Grok Bot account. Grok Bot uses your Cursor account and your Cursor plugin library.
A bot, or make a new one.
For a remote server: the
httpsURL from the vendor docs.For a stdio server: the
npxoruvxcommand and its arguments.
One thing to know first. The bot runs on a cloud computer and it cannot reach your laptop. A URL such as http://localhost:8000/mcp does not work. A command such as npx -y some-mcp-server does work, because the bot runs it on its own computer.
Option 1. Install a plugin from the marketplace
Use this option when a vendor already lists a plugin. Composio is one example. It gives the bot one connection to Gmail and to more than 1,000 other apps.
1. Open Plugins
Open the Grok bot app. Click on Plugins.
2. Find the plugin
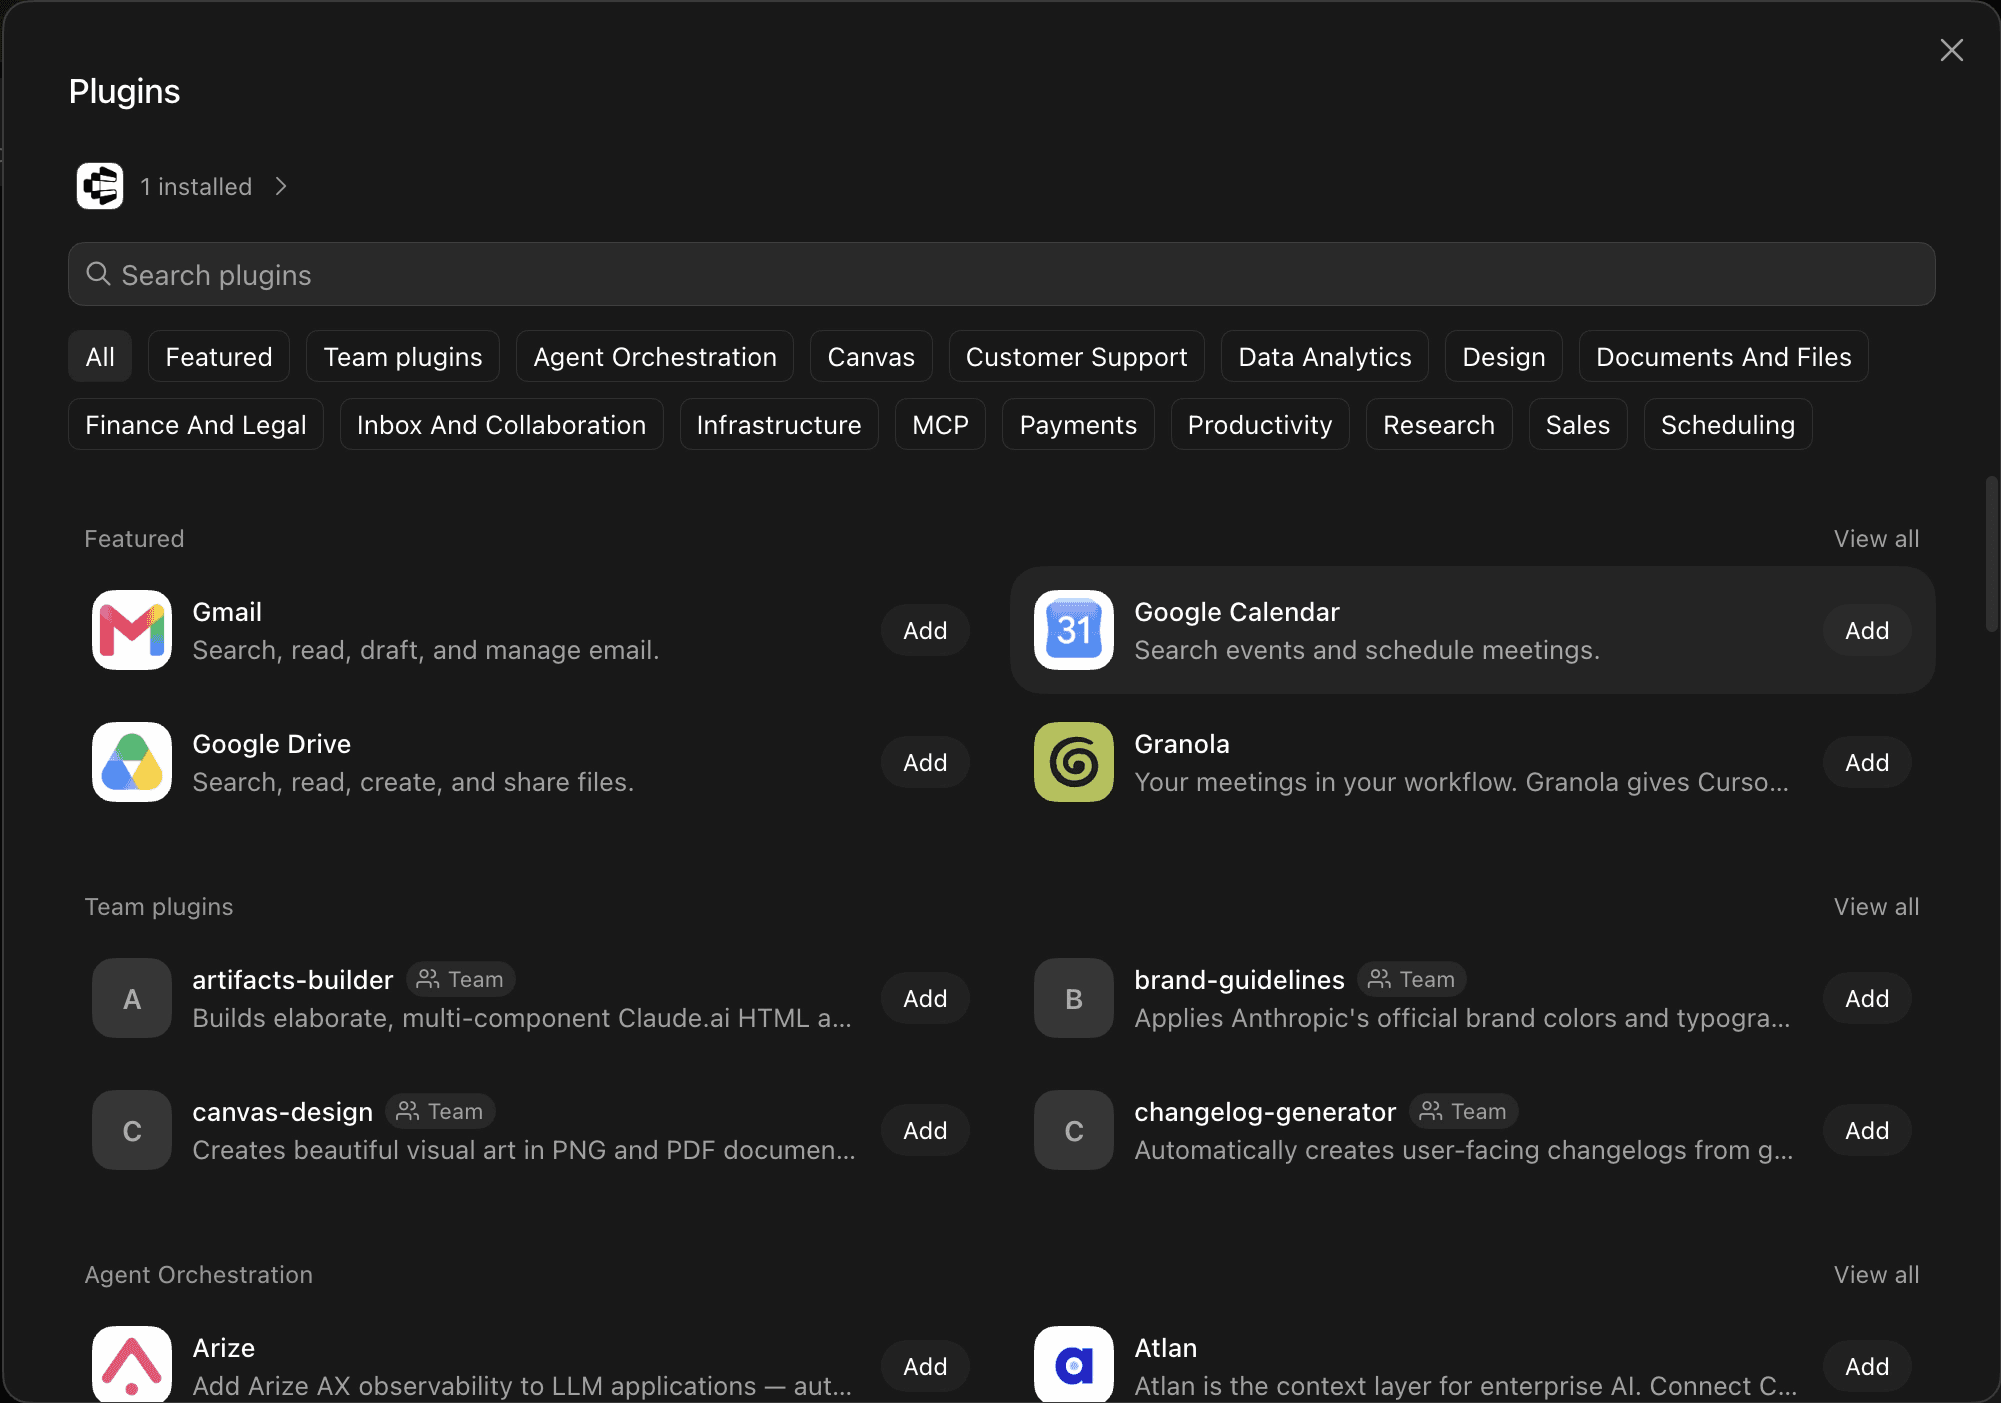
Type the name in the Search plugins box, for example Composio. Click Add on the result.
3. Open the installed plugin
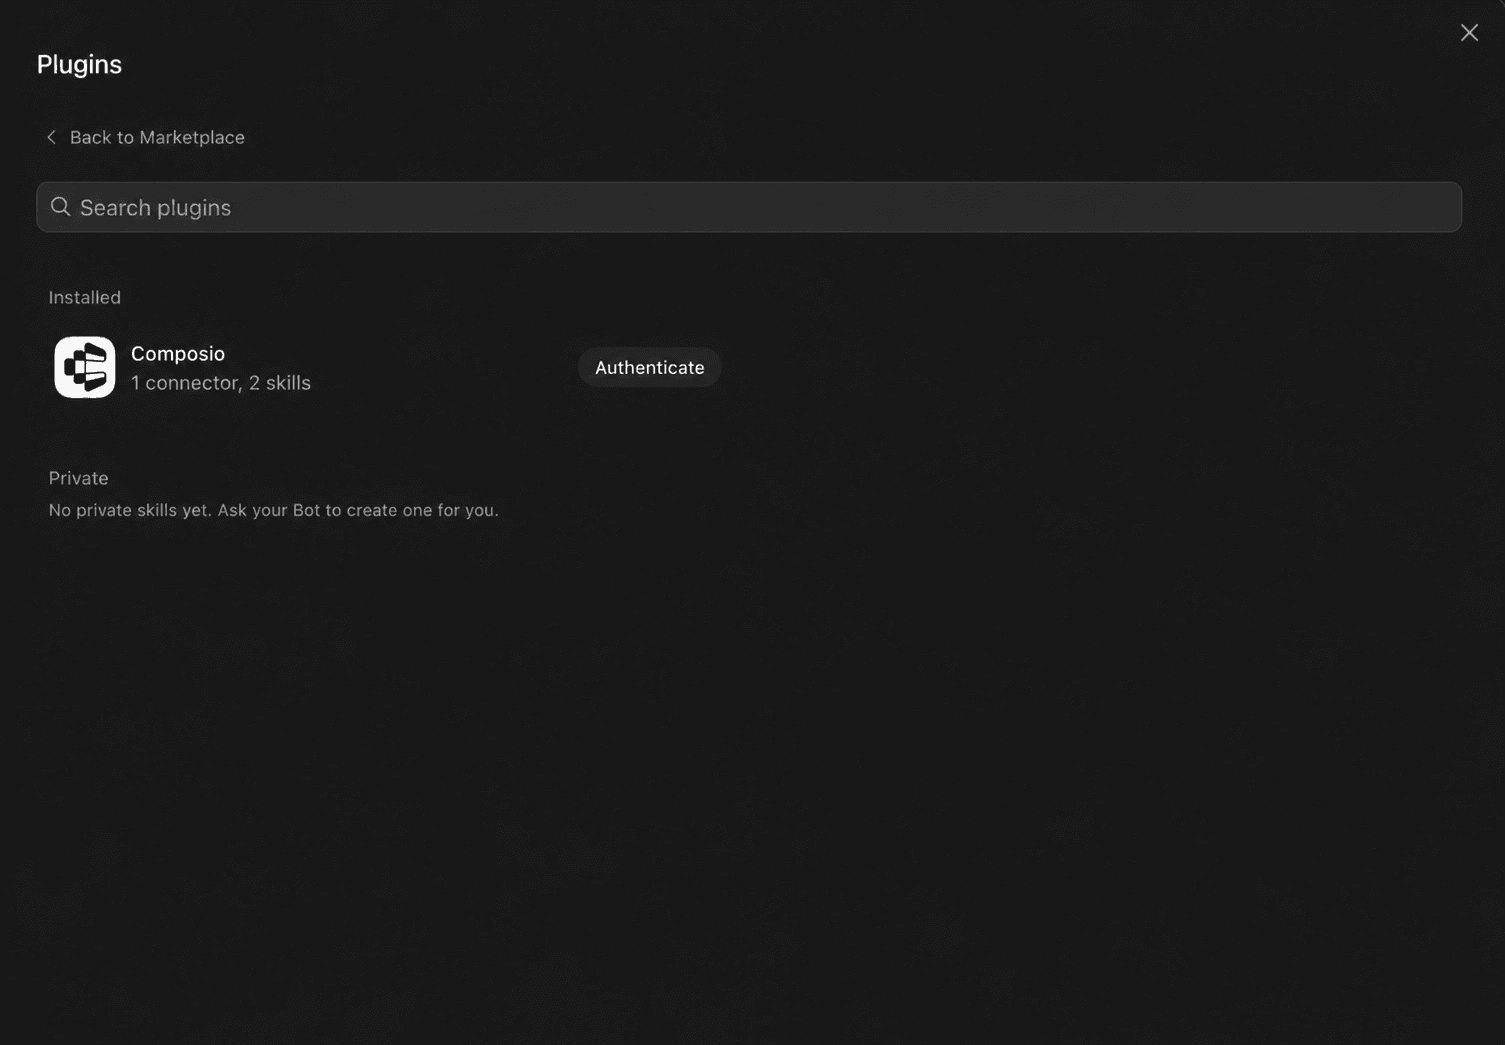
Go to the Installed section. Click the plugin entry. The page shows the connector and the skills that come with it, for example 1 connector, 2 skills.
4. Authenticate
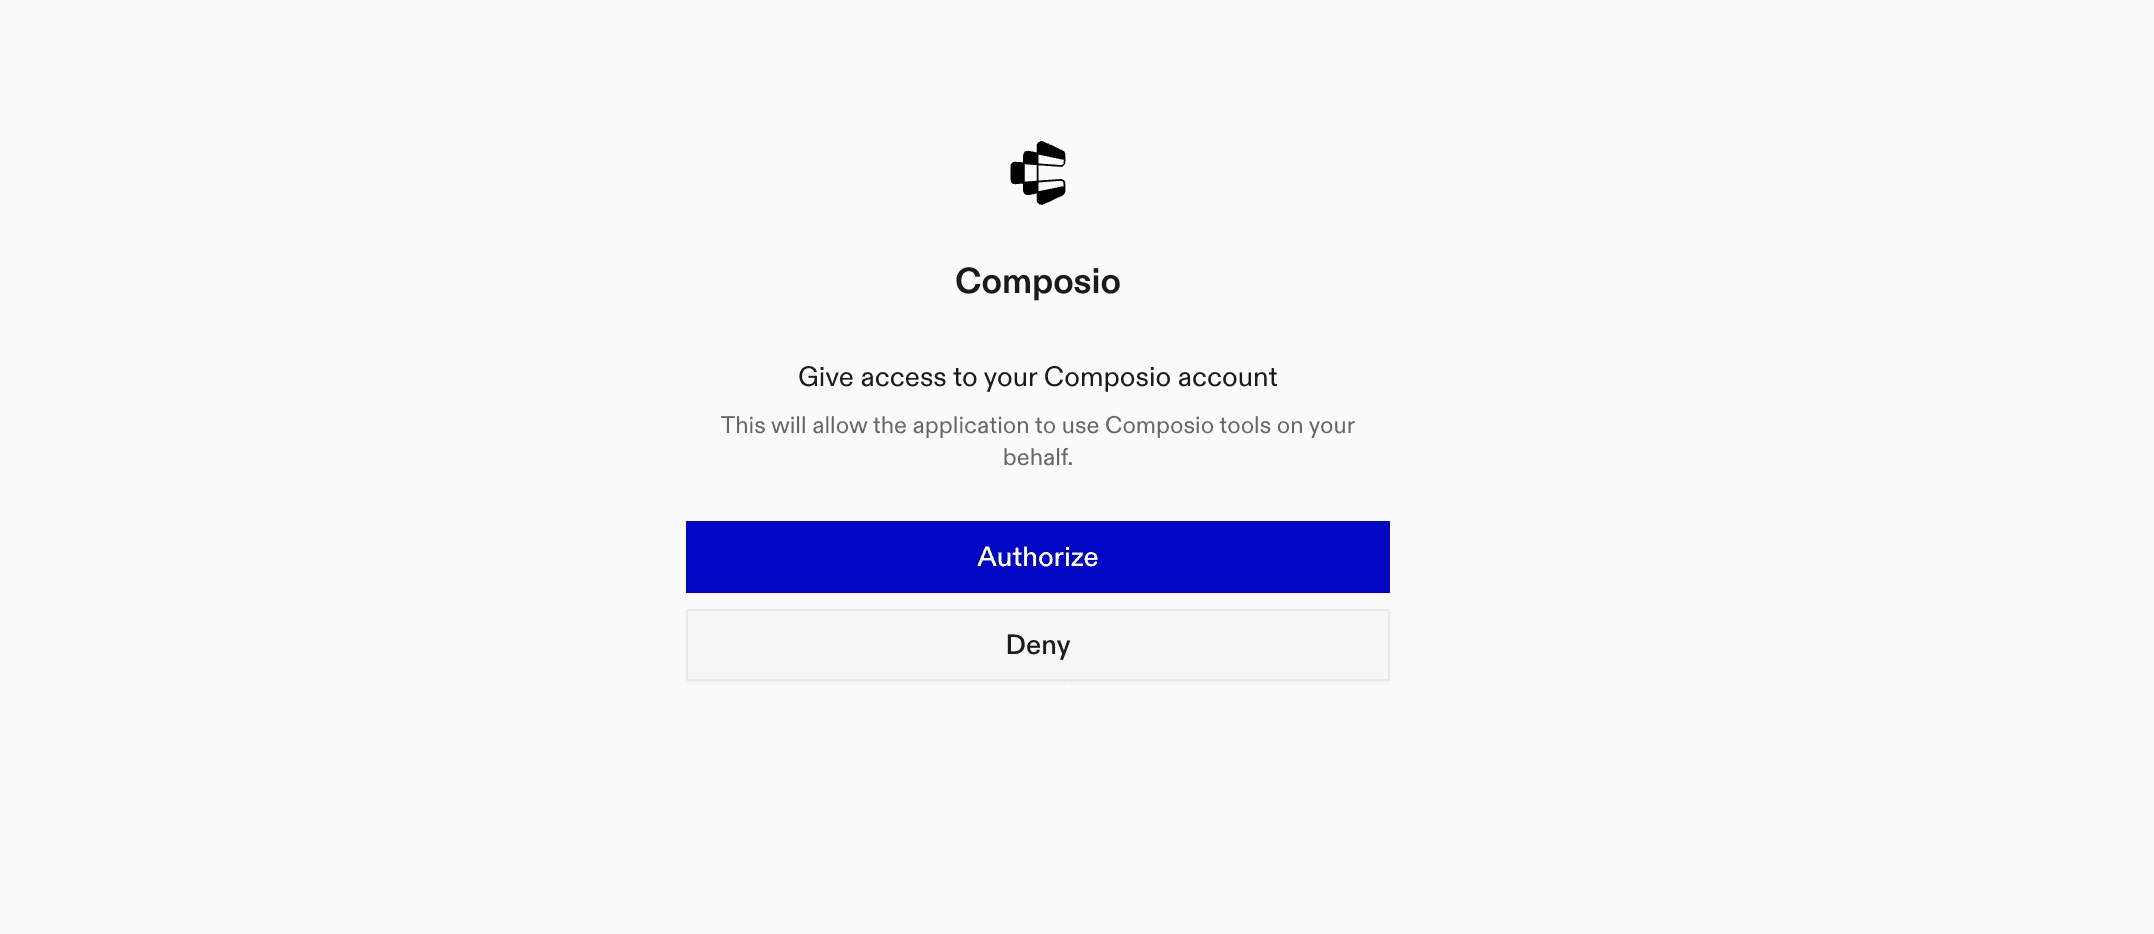
Click Authenticate. The consent screen opens in your browser. Read the access that it asks for. Click Allow access. The OAuth token stays on the connector backend. The bot calls tools and never sees the token.
5. Use it in the chat
Go back to the chat. Type @ and attach the plugin to the task. Then give the bot a task that uses one of its tools. For Composio, ask the bot to connect to Gmail, or ask it to summarize unread emails from this morning. The bot sends you to sign in to Gmail on the first call.
Option 2. Ask the bot to add a custom server
Use this option for a server that is not in the marketplace, or when you want the vendor's own endpoint instead of the catalog connector. You only need to describe the server in chat.
Add a remote server (Composio MCP)
Composio has a plugin in the marketplace, and it also has a hosted MCP endpoint at https://connect.composio.dev/mcp. This example adds the endpoint as a custom server. It uses OAuth, so you see the connect card flow.
1. Tell the bot what you want
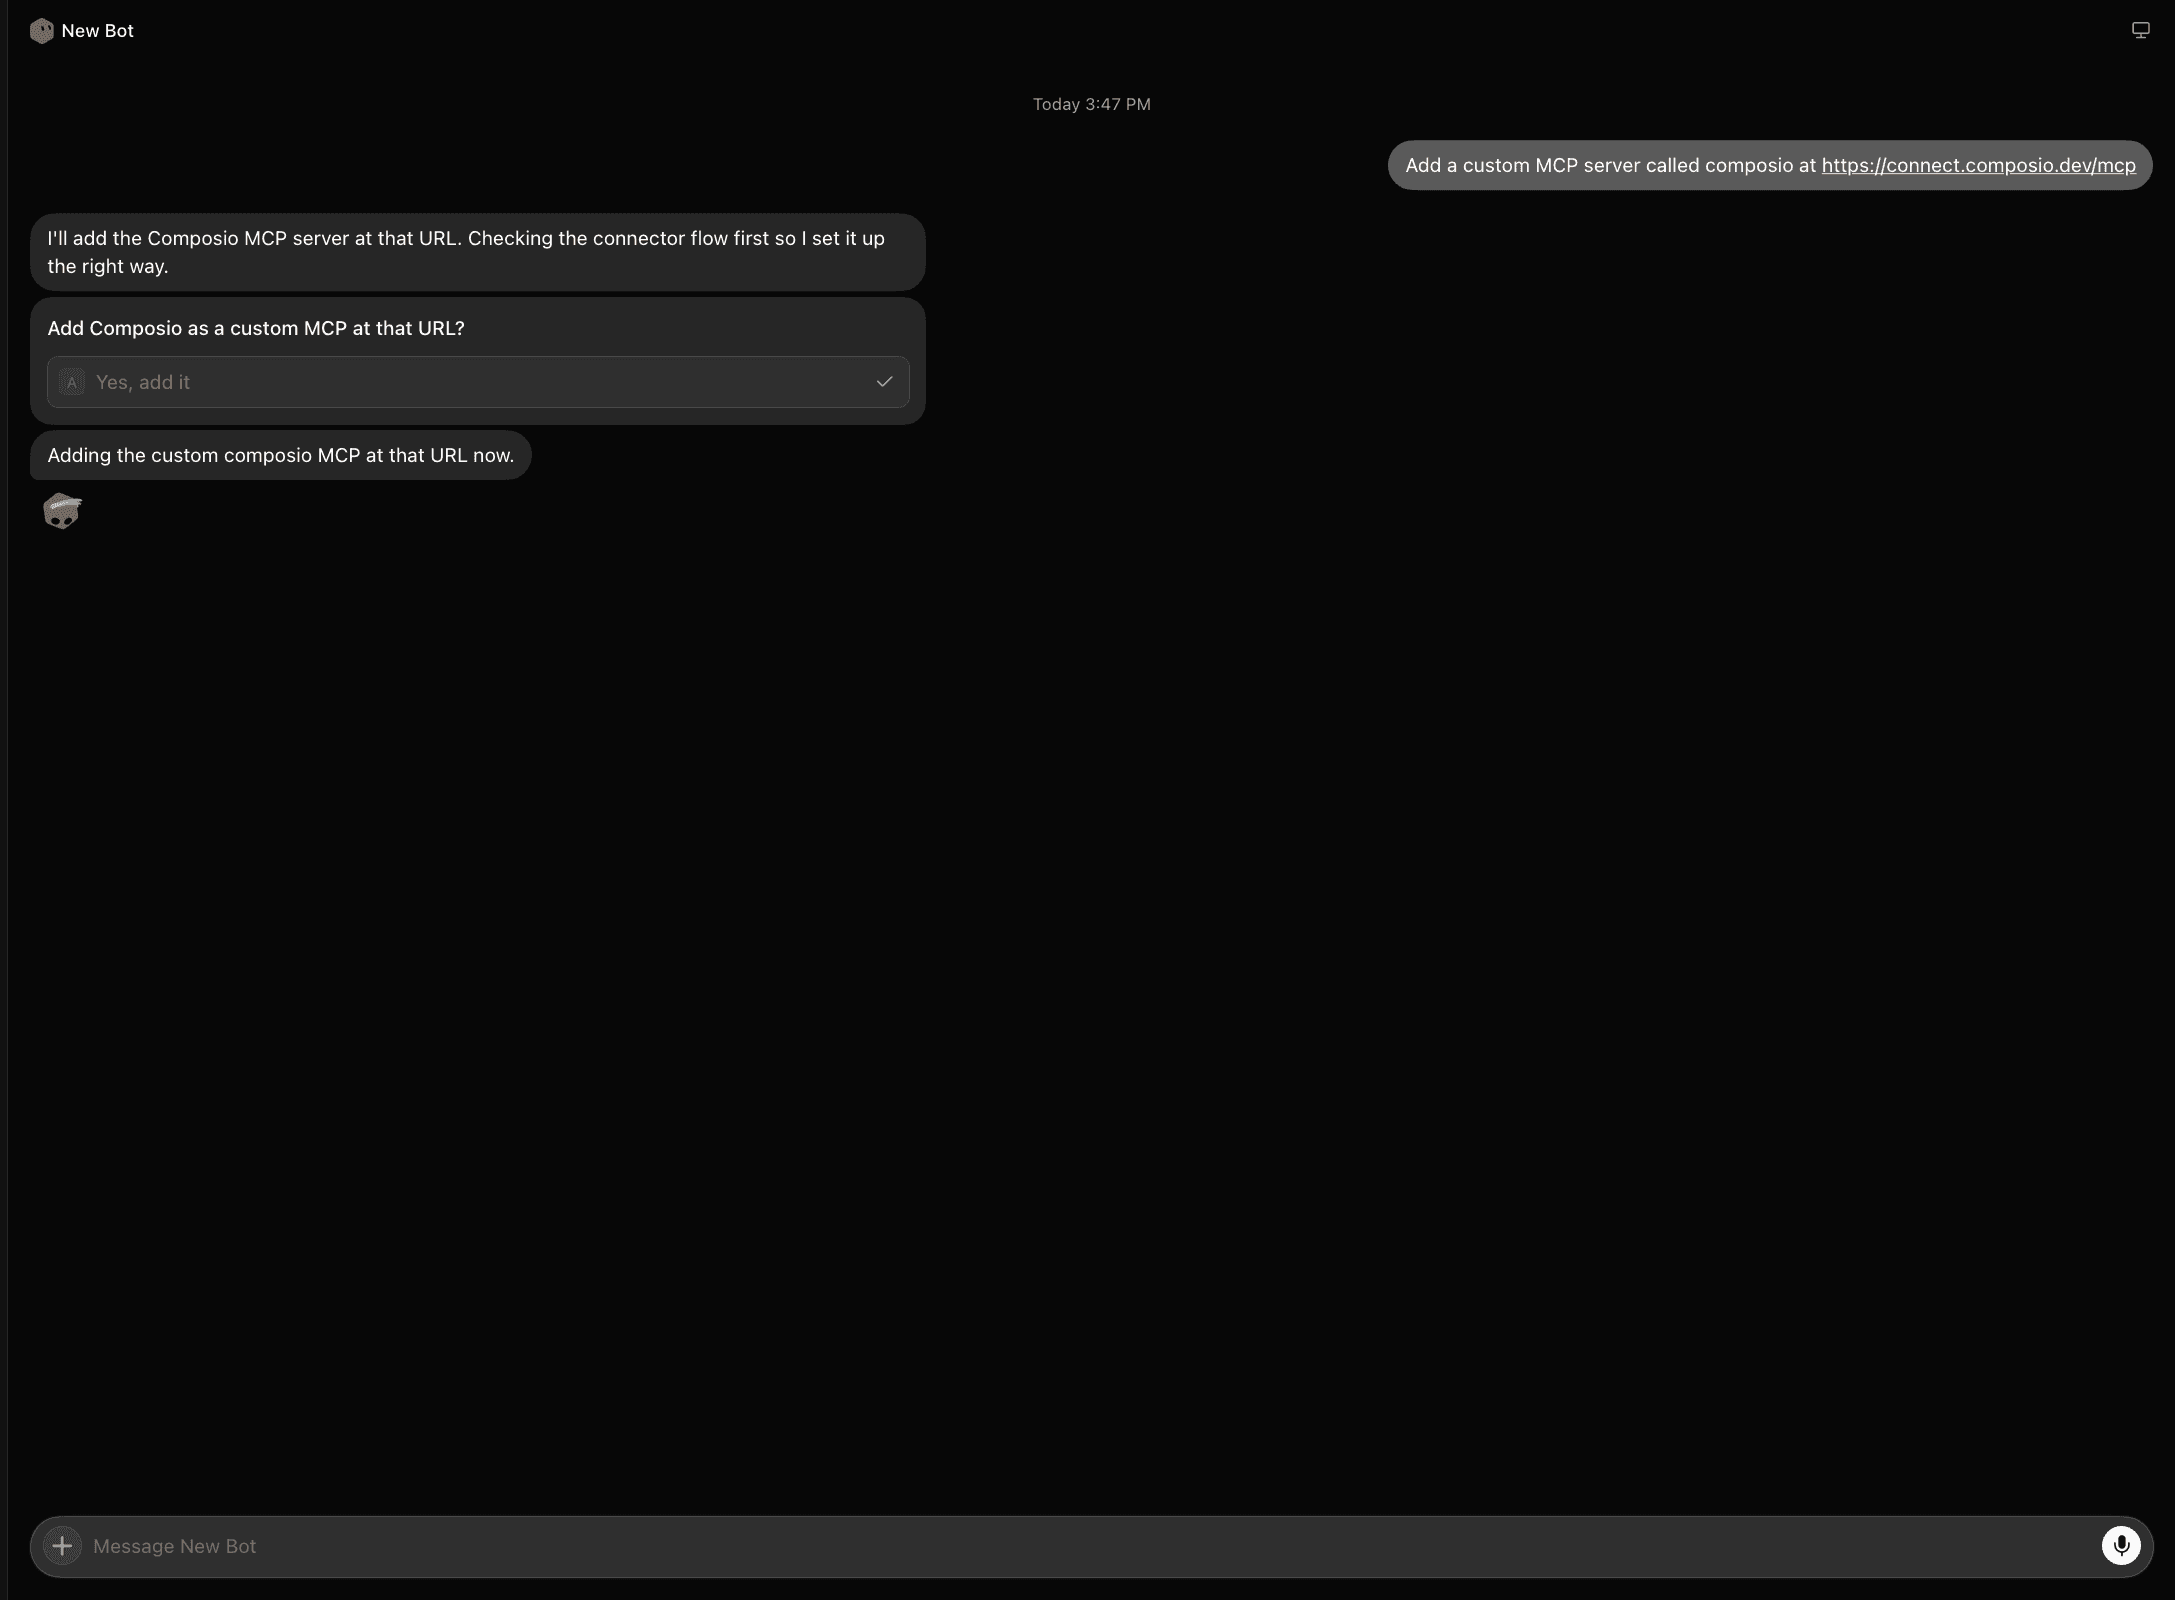
Type a message like this:
Add a custom MCP server called composio at https://connect.composio.dev/mcp
Say "custom server". Composio is in the catalog, and without that word the bot installs the catalog plugin instead. If you do not know a vendor's URL, ask the bot to look it up. It searches the vendor docs and reports the URL before it adds anything.
2. Confirm
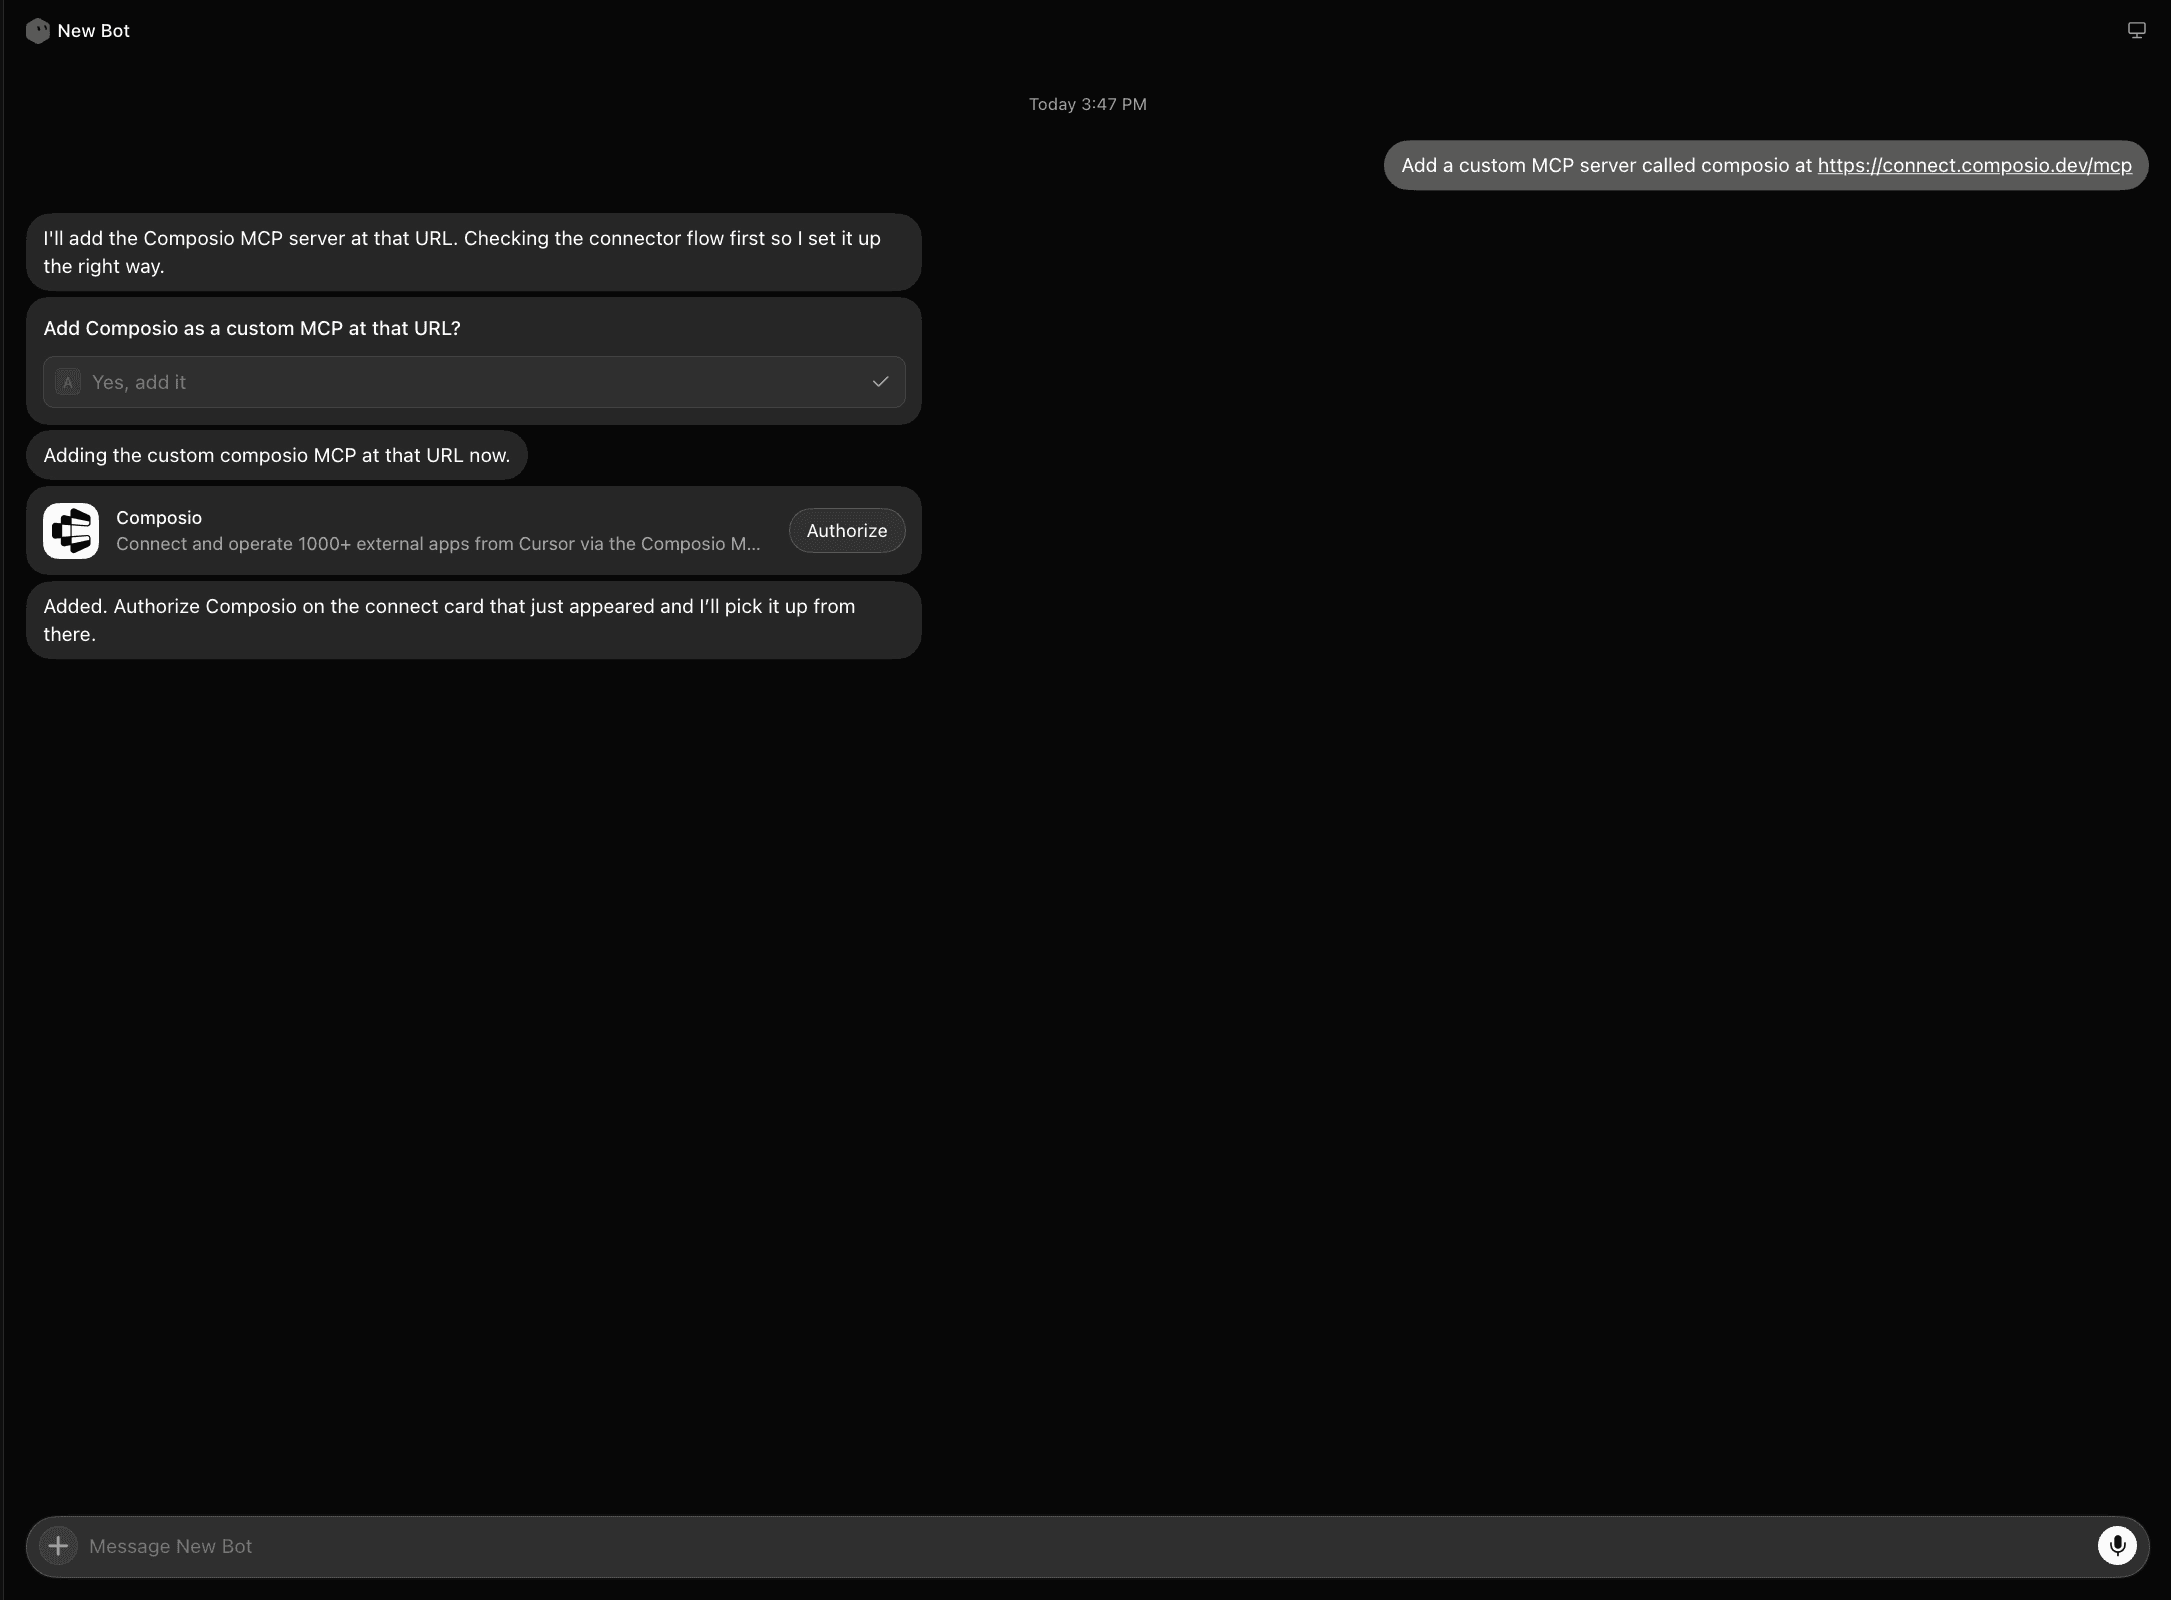
The bot shows the name and the URL and asks you to confirm. Check the URL against the vendor docs. Click Add it.
3. Sign in
The bot registers the server and posts a connect card in the chat. Click “Authorize” on the card and complete the sign-in in your browser. Click Allow access on the Composio consent screen. The tools appear after you sign in.
If a server has no auth, there is no card and the bot just reports the tool count. If a server needs an API key, tell the bot the header name and the key. The bot stores it as a header on the server entry. The key never goes in the URL.
4. Use it
Type @ in the chat and attach composio. Then ask the bot to connect to Gmail, or give it a Gmail task. The bot sends you to sign in to Gmail on the first call. Composio loads the Gmail tools on demand through the same endpoint, and the same works for Slack, Notion, and the rest of its 1,000+ apps.
Add a stdio server (sequential-thinking)
1. Tell the bot the command
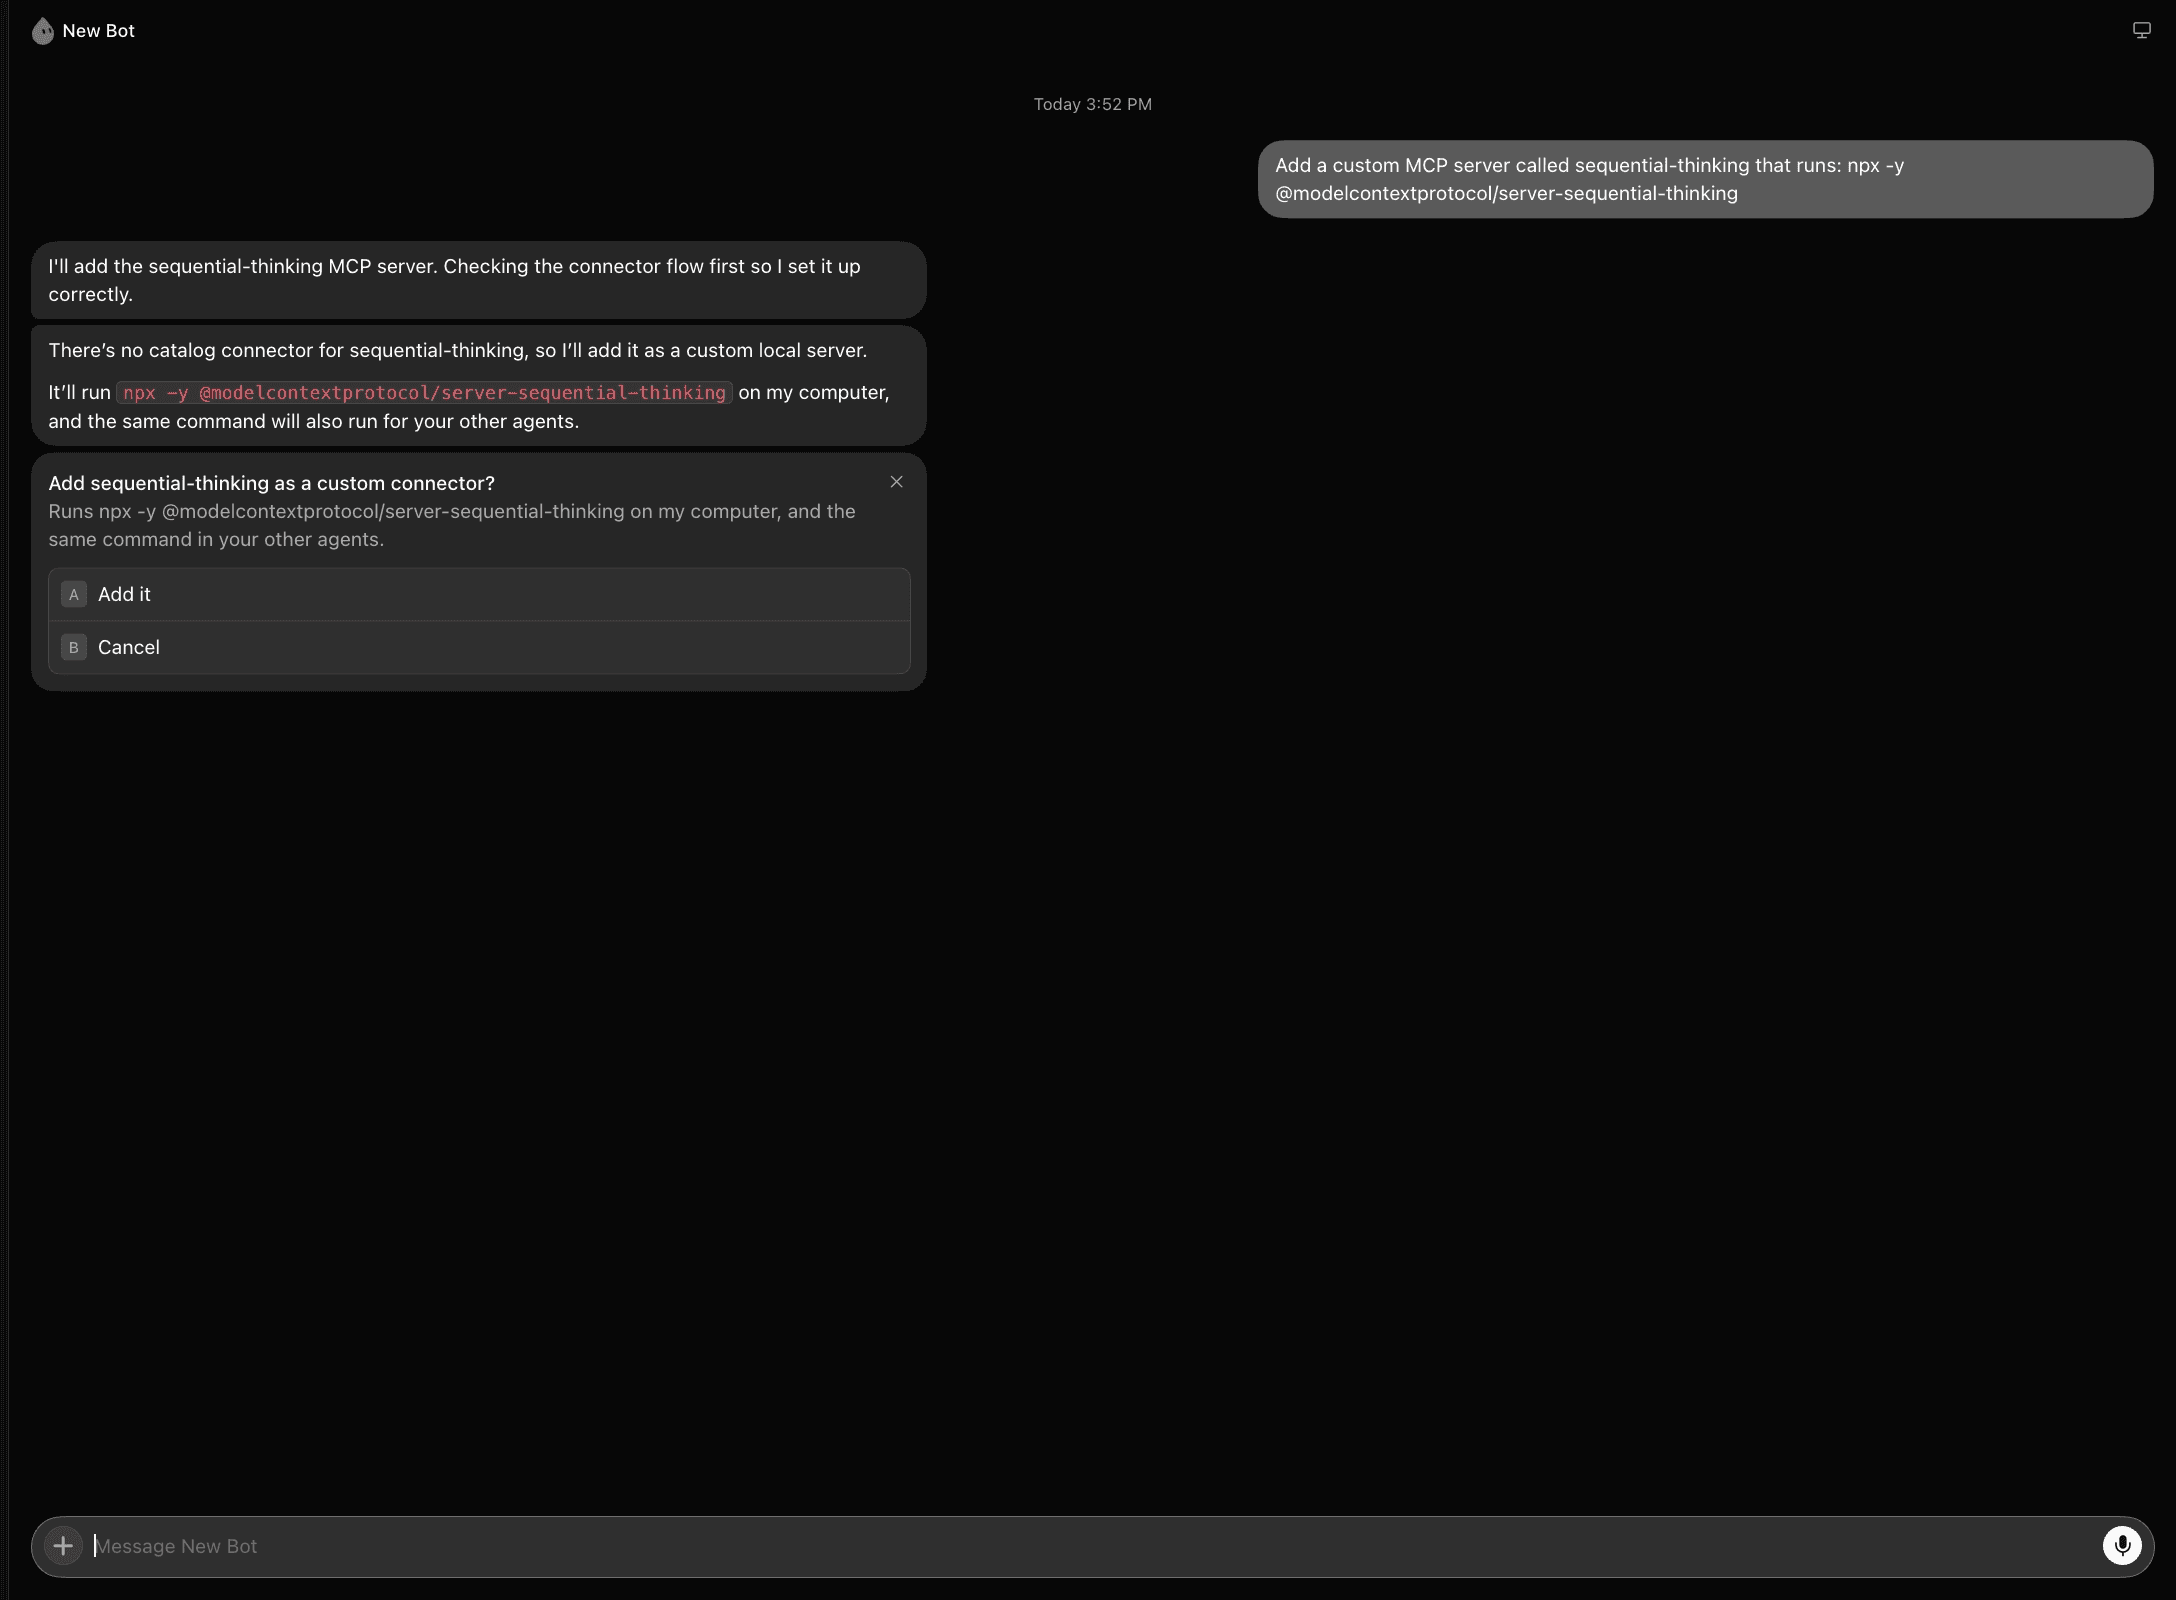
Type a message like this:
Add a custom MCP server called sequential-thinking that runs: npx -y @modelcontextprotocol/server-sequential-thinking
This package needs no API key, so it is a good first test.
2. Confirm
The bot repeats the name, the command, and the arguments. Click Add it.
3. Check the result
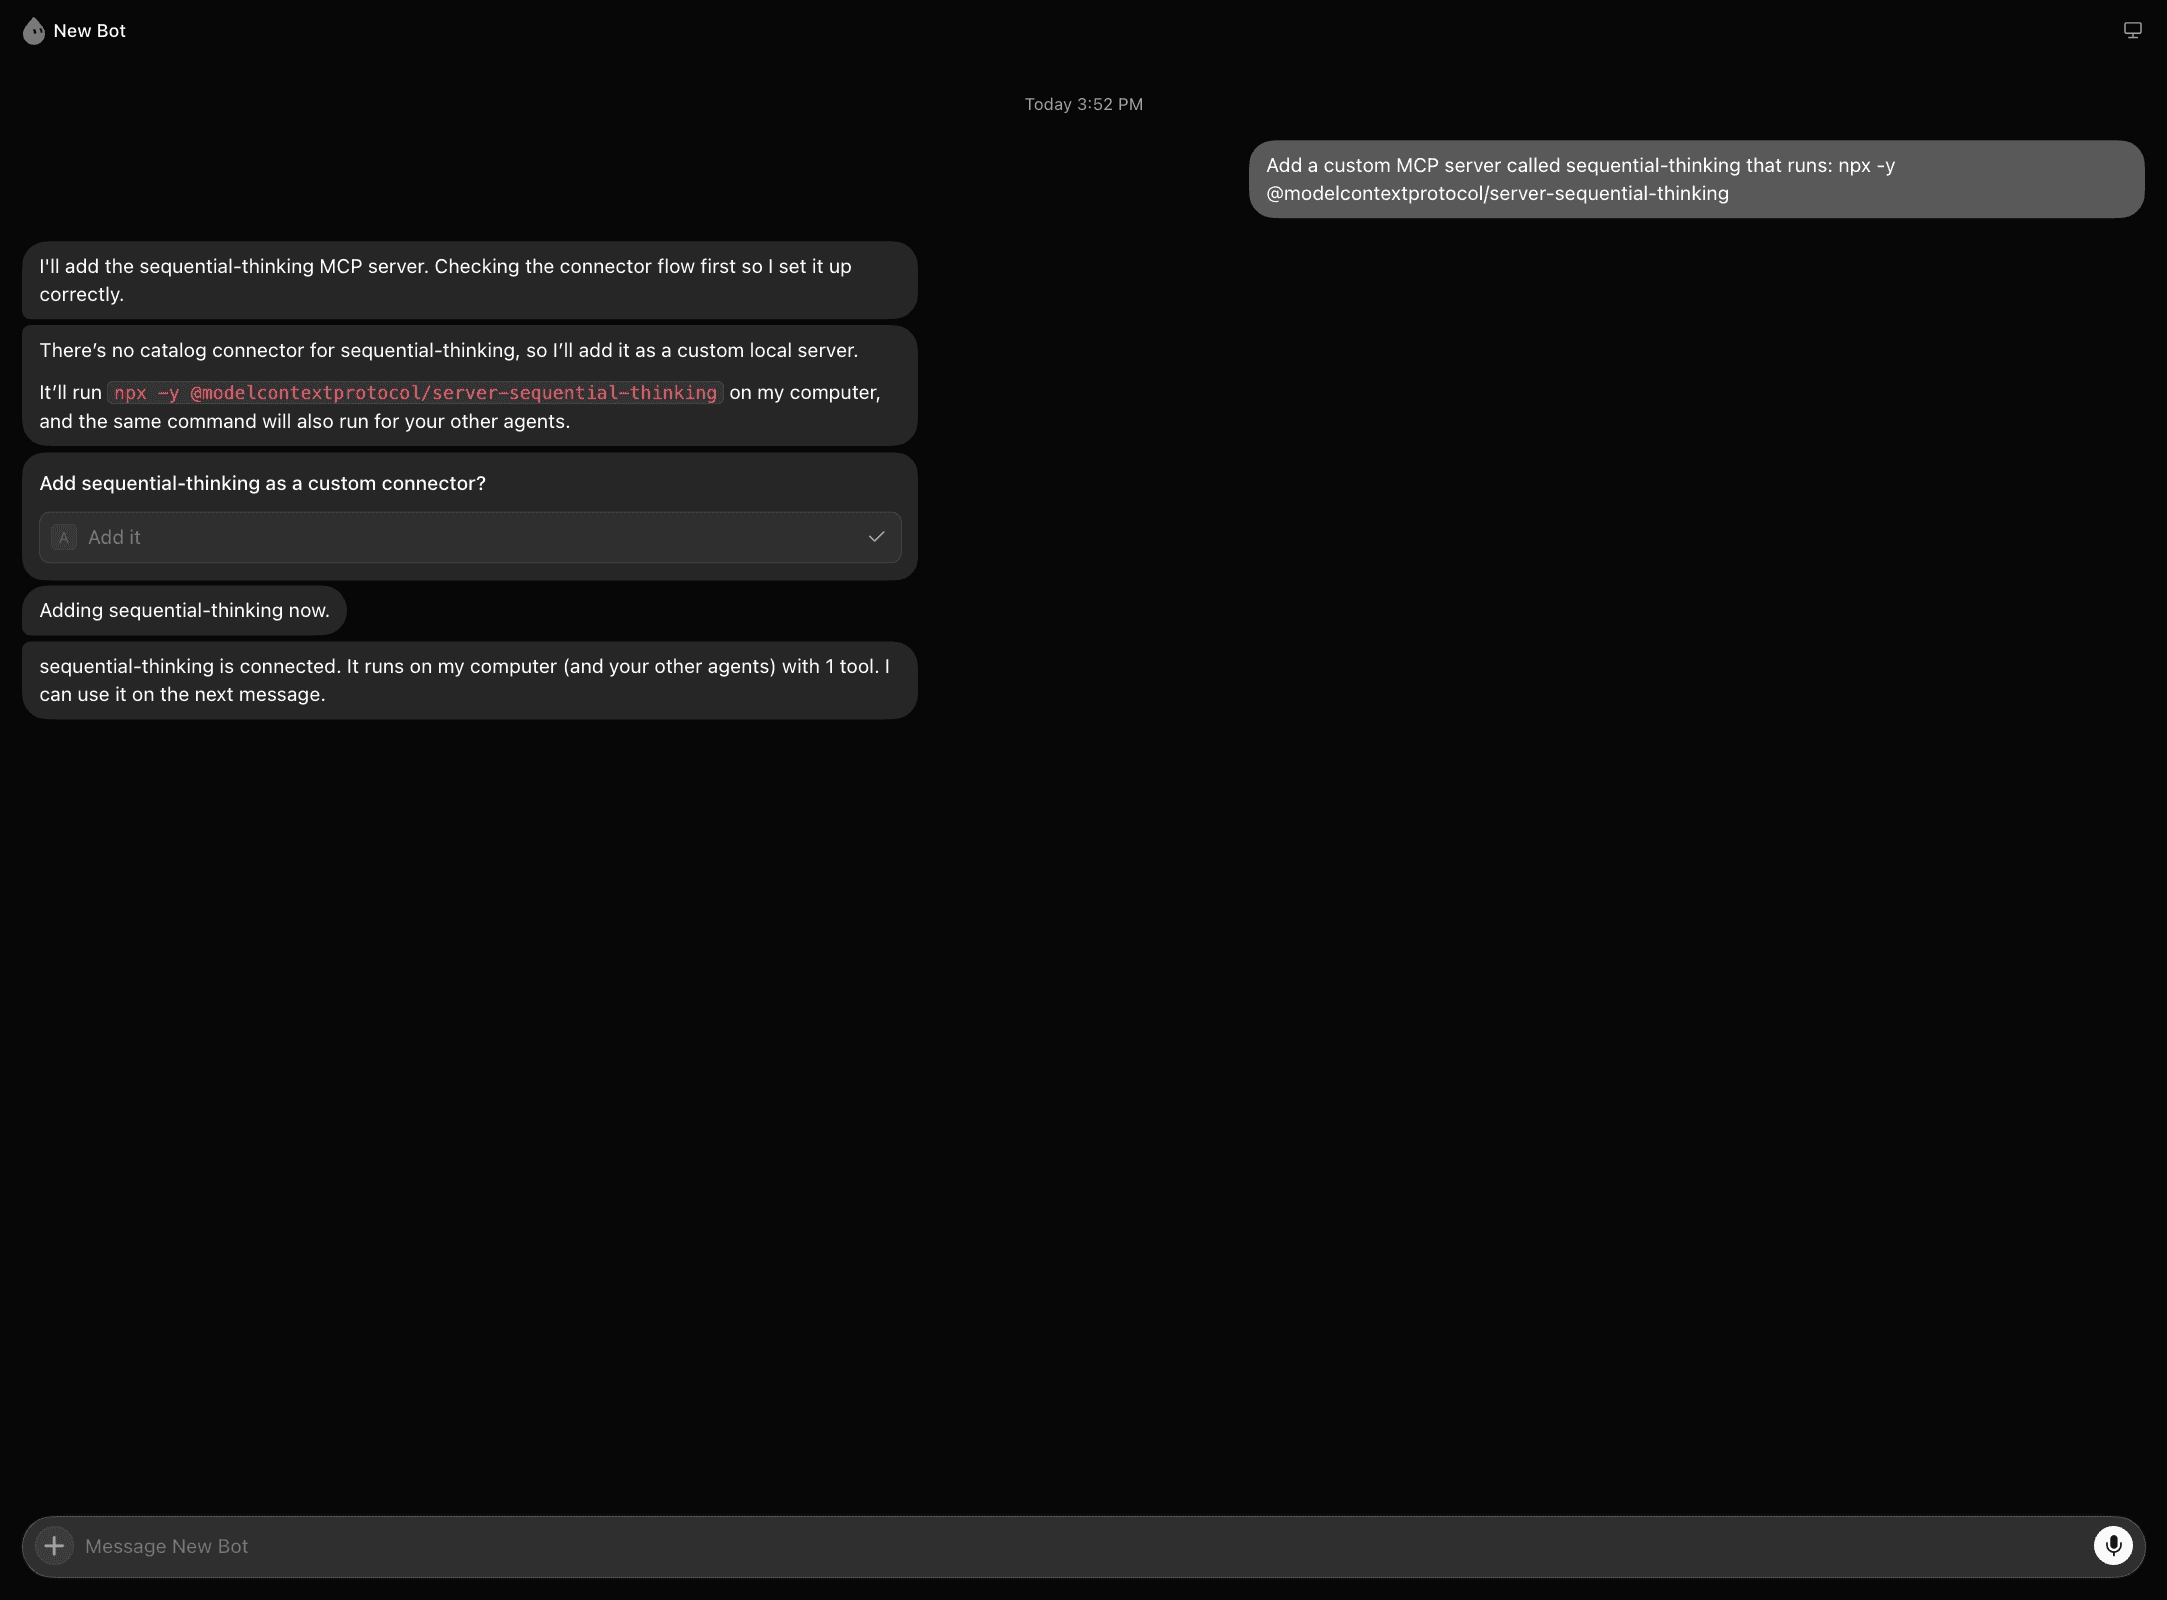
The bot starts the process on its cloud computer and reports the tool count. For this server it reports one tool. There is no sign-in step.
If the server needs an API key, tell the bot the variable name and the value. The bot stores it as an environment variable on the server entry.
4. Use it
Type @ in the chat and attach the server, or just ask the bot to think through a problem step by step.
Check what you added
Go to Settings, then Plugins, then Yours. Both servers are listed there.
Both options are account-wide
A plugin or a server that you add is available to every bot on your account. You do not repeat the setup for each bot. A stdio process runs on the shared cloud computer, so it is also available to your other agents on that computer.
Do not mix up the three Grok products
xAI has three products that connect to MCP servers. Each one has its own setup, and the steps do not carry over.
Product | What it is | Where you add MCP servers |
|---|---|---|
Grok Bot | Bot builder for personal agents | Marketplace plugins, or ask the bot in chat |
Grok chat | The assistant at grok.com | grok.com/connectors → New Connector → Custom |
Grok Build | Terminal coding agent |
|
If a guide tells you to run grok mcp add or to edit a .toml file, that guide is for Grok Build. If it tells you to paste a URL into a settings form, that guide is for Grok chat.
Troubleshooting
The bot adds the catalog connector and I wanted the vendor endpoint. Say "custom server" in the message. The bot asks for the URL and adds that instead.
The plugin shows "Disabled by team admin." Your team MCP policy blocks that server. Ask the admin to enable it on the team plugins page and to add the server URL to the MCP allowlist. Then restart the app.
The bot does not see the tools. Open Plugins, then Yours, and check that the server is enabled. Then type @ in the chat and attach it to the task.
Every call fails with a permission error. Some vendors limit their MCP endpoint to their own admins. Check the vendor docs.
The OAuth card does not open a window. Check for a blocked pop-up in your browser. Then ask the bot to call the tool again.
The server works in Cursor but not in Grok Bot. A server in your Cursor settings or in ~/.cursor/mcp.json stays in Cursor. Add it again in Grok Bot with Option 2. If it is a localhost URL, host it or give the bot the start command instead.
The stdio server starts but reports zero tools. The package may need an argument or a variable. Check the package README and give the bot the missing piece.
Frequently asked questions
Can I add more than one server?
Yes. Ask the bot once for each server. Attach the one you need with @ in the chat.
Does a server I added in Cursor show up in Grok Bot?
No. The account, the plugin library, and the team MCP policy are shared. The Cursor MCP config file is not.
Can I use a server on my own machine?
Not by URL. The bot cannot reach your laptop. Give it the npx or uvx command and it runs the server on its cloud computer.
Where does my API key go?
For a remote server, in a header on the server entry. For a stdio server, in an environment variable on the server entry. Never in the URL and never in the chat after the bot has stored it.
Summary
Install a marketplace plugin from Settings → Plugins, or tell the bot to add a custom server with its URL or its start command. Confirm, sign in from the connect card if the server uses OAuth, and attach the server with @ in the chat. That is the full process.

 Get started