MCP is the talk of the town. And if you're here, there's a high chance you have encountered some of the great use cases in Cursor or Claude on the internet, and this blog post discusses how to connect Cursor with 100+ MCP servers to automate complex workflows from your IDE within minutes.
Check out how you can do the same within VS Code and Google Antigravity.
Let's jump in.
What is covered?
In a nutshell, we are covering these topics in detail.
What is Model Context Protocol (MCP)?
A step-by-step guide on how to connect Cursor to 100+ fully managed MCP servers with built-in Auth.
Practical use cases with examples.
I will be using Composio for MCP servers because it has built-in authentication and comes with fully managed servers.
1. What is Model Context Protocol (MCP)?
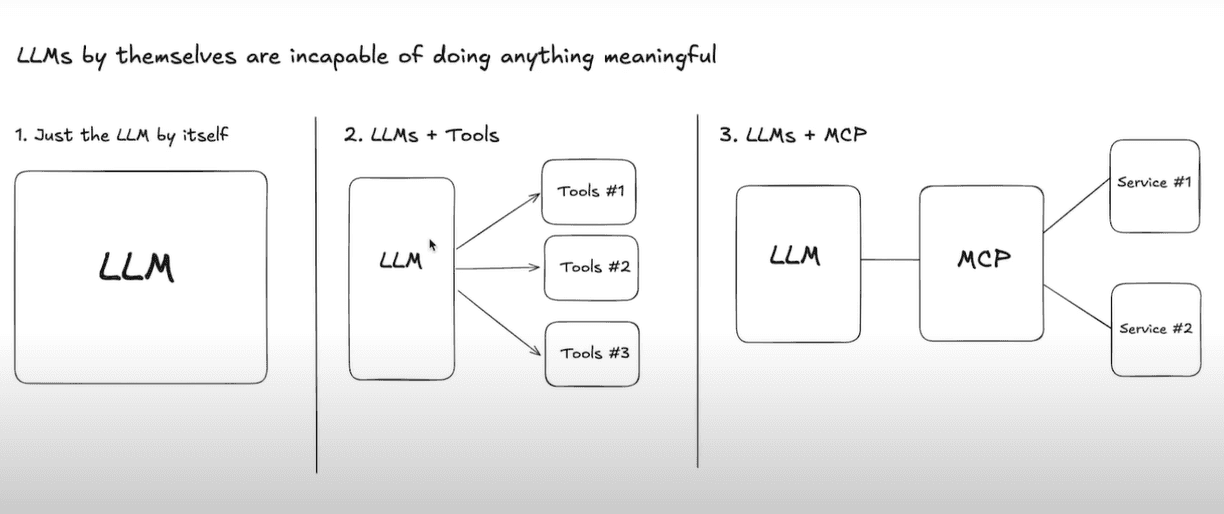
Model Context Protocol (MCP) is a new open protocol that standardizes how applications provide context and tools to LLMs.
Think of it as a universal connector for AI. MCP works as a plugin system for Cursor, which allows you to extend the Agent’s capabilities by connecting it to various data sources and tools.
Credits go to Greg Isenburg on YouTube
MCP helps you build agents and complex workflows on top of LLMs.
For example, an MCP server for Notion helps AI assistants search and read notes from your Obsidian vault.
Your AI agent can now:
Send emails through Gmail
Create tasks in Linear
Search documents in Notion
Post messages in Slack
Update records in Salesforce
All while you chat naturally with it.
Think about what this means for productivity.
Tasks that used to require context switching between 5+ apps can now happen in a single conversation with your agent.

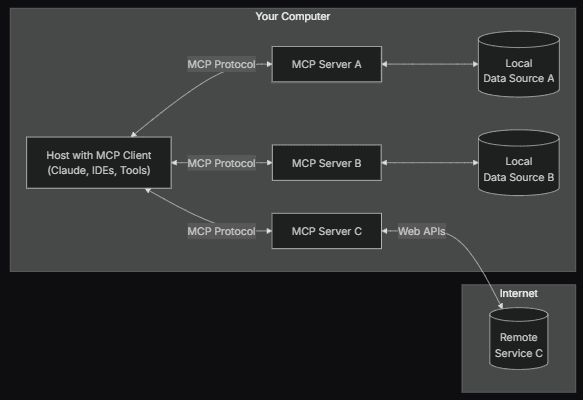
At its core, MCP follows a client-server architecture where a host application can connect to multiple servers.
There is an exciting blog that explains architecture in depth, the lifecycle, the protocol, drawbacks, and the behind-the-scenes of MCP.
If you're looking for a perfect video that explains why MCP matters, check this out!
What MCP Servers Are Not
A lot of people are confused about it, so let's clarify things:
❌
Cannot replace APIs- MCP can use APIs, but it's a standardised interface and not a replacement for specific API functionalities.❌
Not complex to createDevelopers can create MCP servers using straightforward protocols. Templates, videos, and other resources are available on the Internet.❌
It's not a direct DB- MCP servers don't directly store data; they act as bridges.
And it's not only restricted to remote servers. You can operate it locally as well.
2. A step-by-step guide on how to connect Cursor to 100+ fully managed MCP servers with built-in Auth.
In this section, we will be exploring how to connect Cursor with MCP servers.
Read the official documents to learn how to add and use custom MCP servers within Cursor.
Step 1: Prerequisites.
Install Node.js and ensure npx it is available in your system.
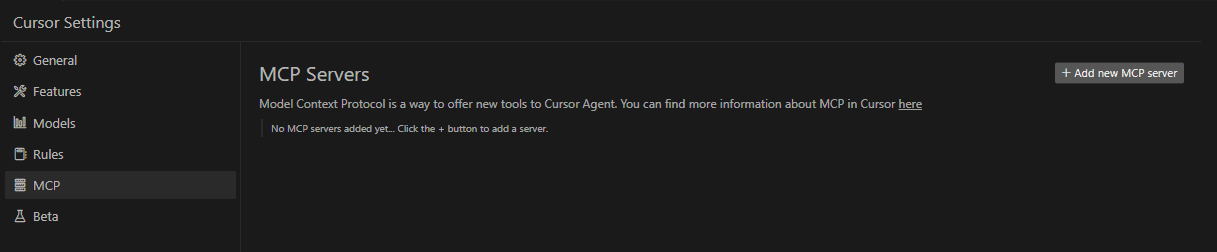
Step 2: Enable the MCP server in Cursor.
You can open the command palette with the Cursor with Ctrl + Shift + P and search for cursor settings.

You will find an MCP option on the sidebar.
Step 3: Using a pre-defined MCP server.
Composio offers pre-built MCP servers. The list is at composio.dev/toolkits. You can also use other MCP clients like Claude, Windsurf, and even OpenAI Agents SDK.
⚡ Built-in Auth supports OAuth, API keys, JWT and Basic Auth. This means you don't have to create your own login system.
⚡ Fully managed servers eliminate the need for complex setups, making it easy to integrate AI agents with tools like Gmail, Slack, Notion, Linear, and more.
⚡ Better tool-calling accuracy allows AI agents to interact smoothly with integrated apps.
It also means less downtime and fewer maintenance problems.
You can easily integrate with useful MCP servers without writing any code.
Each option shows the total active users, its current version, how recently it was updated, and all the available actions.
You can also choose between Claude (macOS), Windsurf (macOS), TypeScript, and Python for your integration.
What makes Composio stand out
Fully managed servers with built-in authentication (as explained earlier).
Supports over 900+ toolkits, including Slack, Notion, Gmail, Linear, and Salesforce.
Provides 20,000+ pre-built API actions for quick integration without coding.
It can operate locally or remotely, depending on your configuration needs.
Composio is compatible with AI agents, meaning it can connect them to tools for tasks like sending emails, creating tasks, or managing tickets in a single conversation.
Suppose you're interested in creating an MCP from scratch. Here's how you can do it (TypeScript SDK).
You will need to install the SDK package by using this command.
npm install @modelcontextprotocol/sdkThis is how you can create a simple MCP server that exposes a calculator tool and some data.
import { McpServer, ResourceTemplate } from "@modelcontextprotocol/sdk/server/mcp.js";
import { StdioServerTransport } from "@modelcontextprotocol/sdk/server/stdio.js";
import { z } from "zod";

// Create an MCP server
const server = new McpServer({
  name: "Demo",
  version: "1.0.0"
});

// Add an addition tool
server.tool("add",
  { a: z.number(), b: z.number() },
  async ({ a, b }) => ({
    content: [{ type: "text", text: String(a + b) }]
  })
);

// Add a dynamic greeting resource
server.resource(
  "greeting",
  new ResourceTemplate("greeting://{name}", { list: undefined }),
  async (uri, { name }) => ({
    contents: [{
      uri: uri.href,
      text: `Hello, ${name}!`
    }]
  })
);

// Start receiving messages on stdin and sending messages on stdout
const transport = new StdioServerTransport();
await server.connect(transport);
Below are some of the core concepts that will help you understand the above code:
⚡ Server - McpServer is your core interface to the MCP protocol. It handles connection management, protocol compliance and message routing.
⚡ Resources - This is how you expose data to LLMs. They're similar to GET endpoints in a REST API.
⚡ Tools - Tools let LLMs take actions through your server. Unlike resources, tools are expected to perform computation and have side effects.
⚡ Prompts - Prompts are reusable templates that help LLMs easily interact with your server.
You can run your server by using stdio (for command-line tools or direct integrations) and HTTP with SSE (for remote servers).
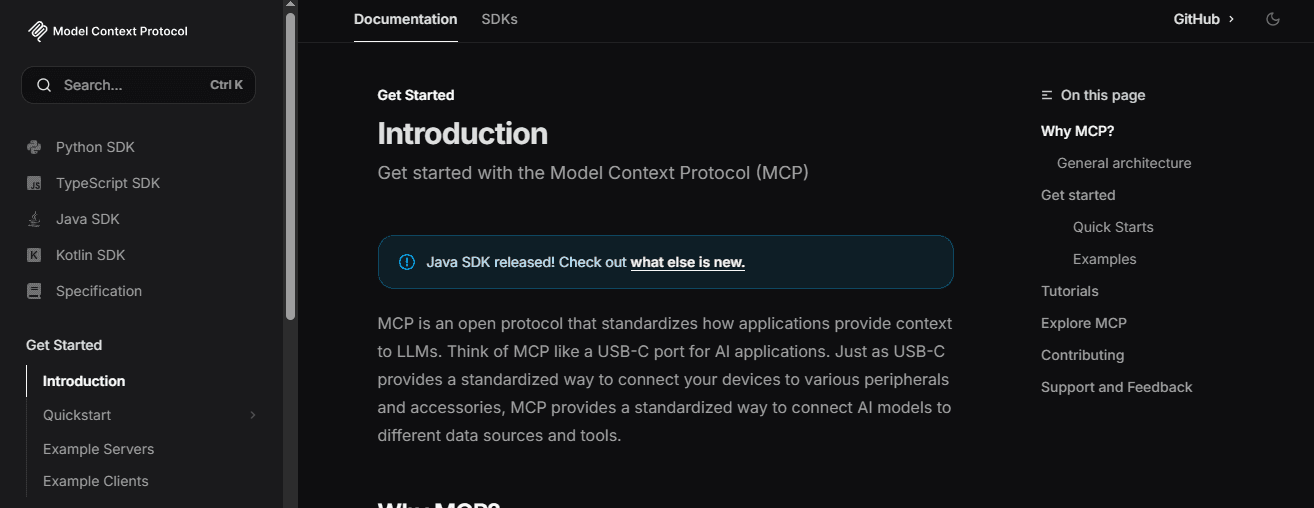
On the official website of MCP, which is available at modelcontextprotocol.io, you will find TypeScript SDK, Python SDK, Java SDK and Kotlin SDK. Once you visit the repository, you will find all the necessary details in the README.
If you're looking for a good blog, check out MCP Server: A step-by-step guide to building from scratch.
Step 4: Integrating the MCP server.
It's time to integrate one with the cursor. For now, we will use the HackerNews MCP server.
If you don't know, Hacker News is a tech-focused news aggregator by Y Combinator. It features user-submitted stories and discussions on startups, programming, and awesome projects.
Cursor changed this method just a couple of days ago. I'm explaining the new and previous methods to avoid confusion.
Newer version.
Go to connect.composio.dev
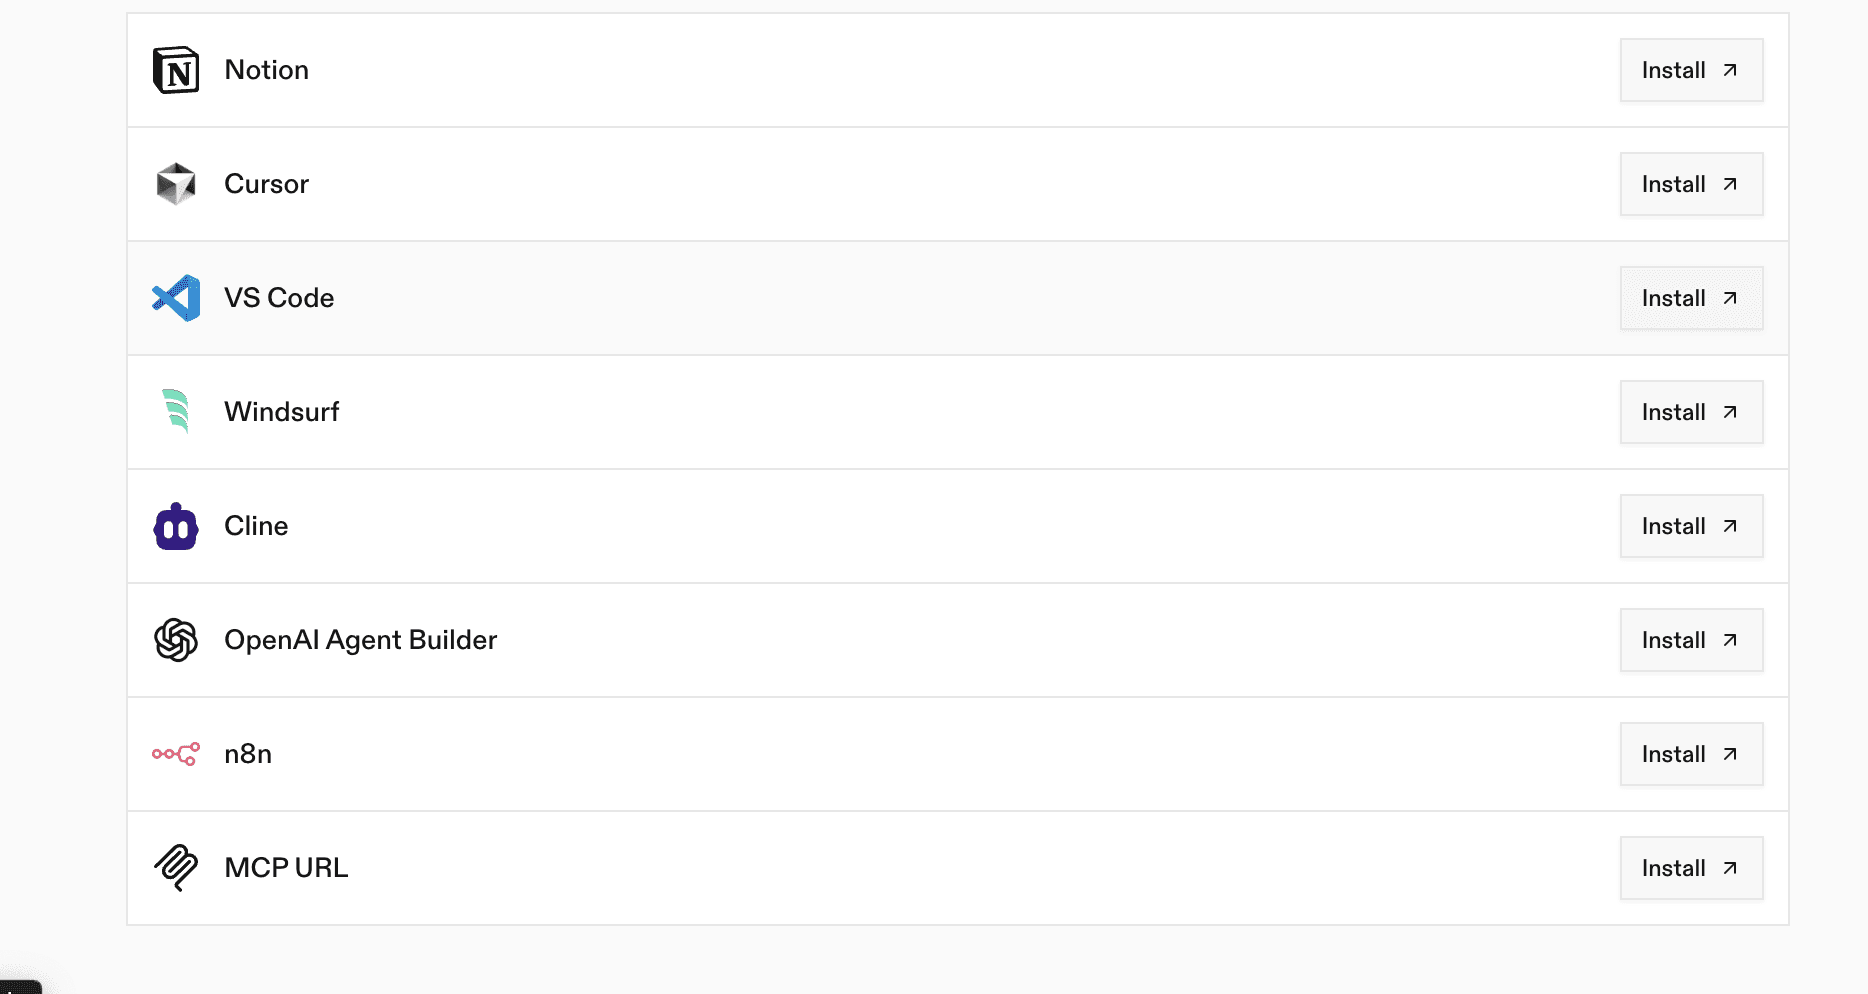
Click on Install on the left panel
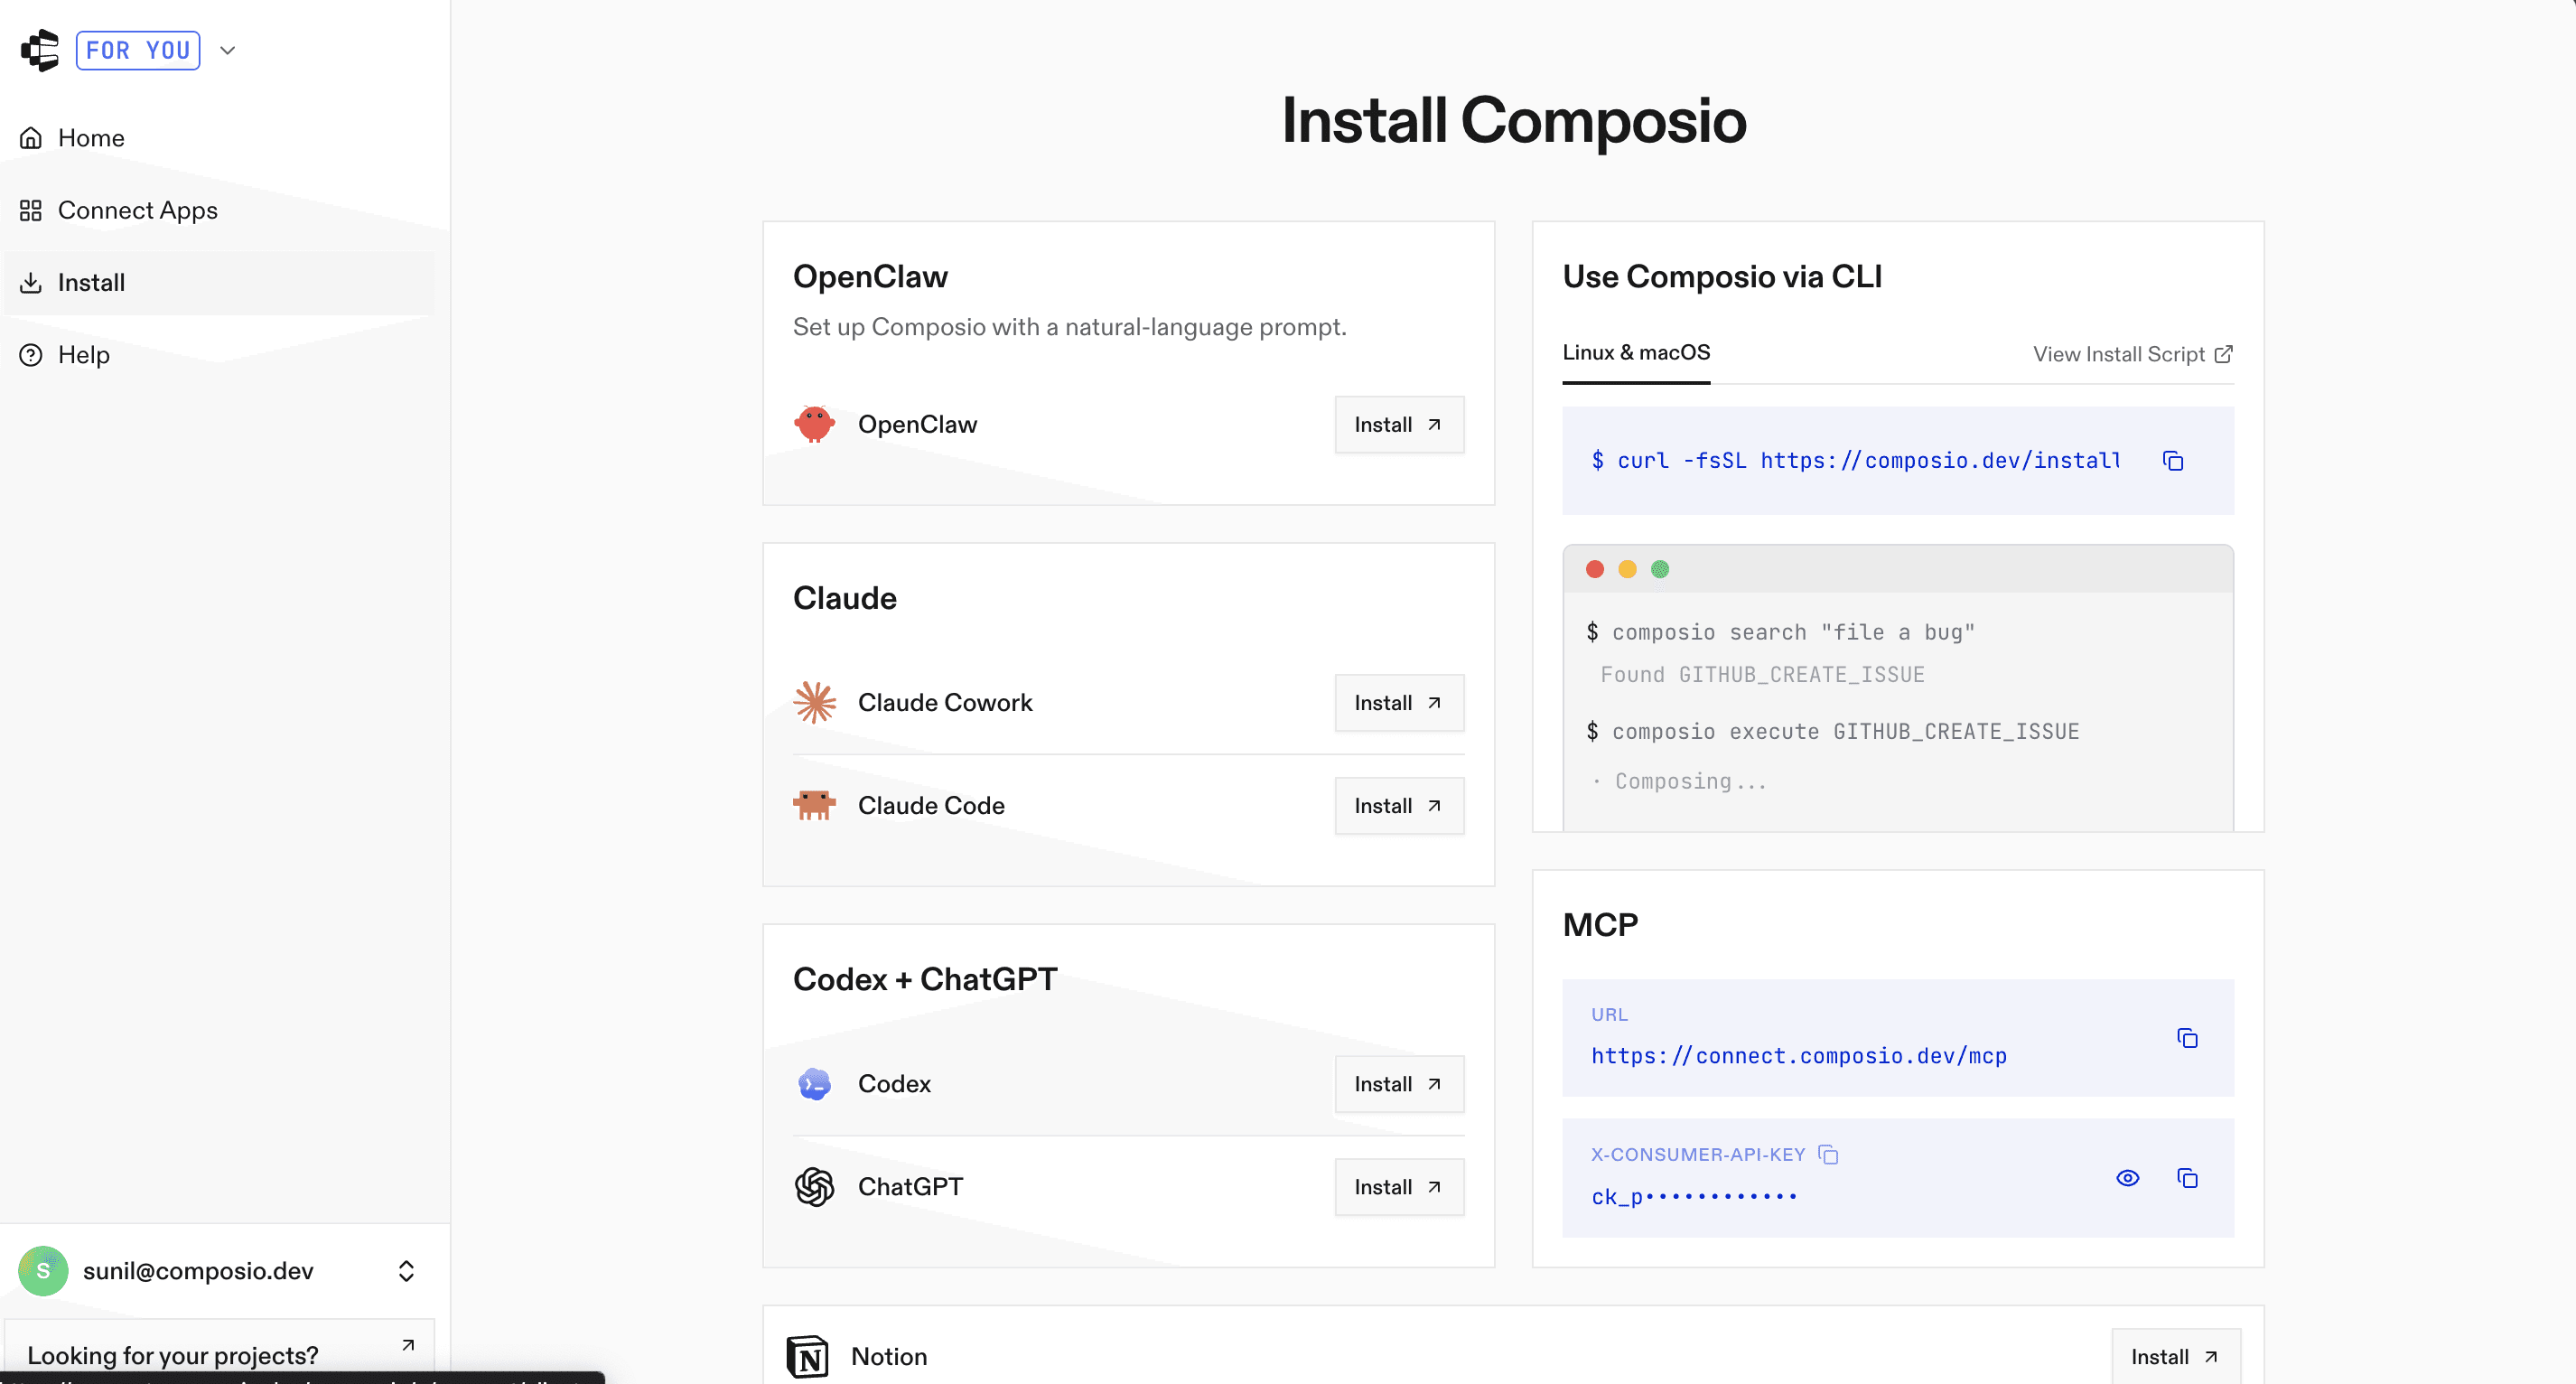
Scroll down and click on the " Install corresponding to the Cursor logo.
You will be redirected to Cursor, now complete the authentication and you're all set.
Step 5: Using the server directly within the Agent.
You can open the Chat using the Ctrl + I command. Then you can ask anything related to Hacker News, like find hackernews top posts of today.

newer version

Congrats! 🎉 That’s how simple it really is to use the MCP servers of your choice.
Hackernews was a simple case, but if it’s something different like GitHub, where it requires a personal token, you will need to put a slightly detailed prompt like create a new repo named composio mcp and add readme with a brief info about mcp servers.
Now that we know how to integrate MCP servers into the cursor. In the next section, we will explore many real-world examples.
3. Practical use cases with examples.
You can build lots of innovative stuff using these, so let’s explore a few that stand out. Some of these include source code (GitHub repository).
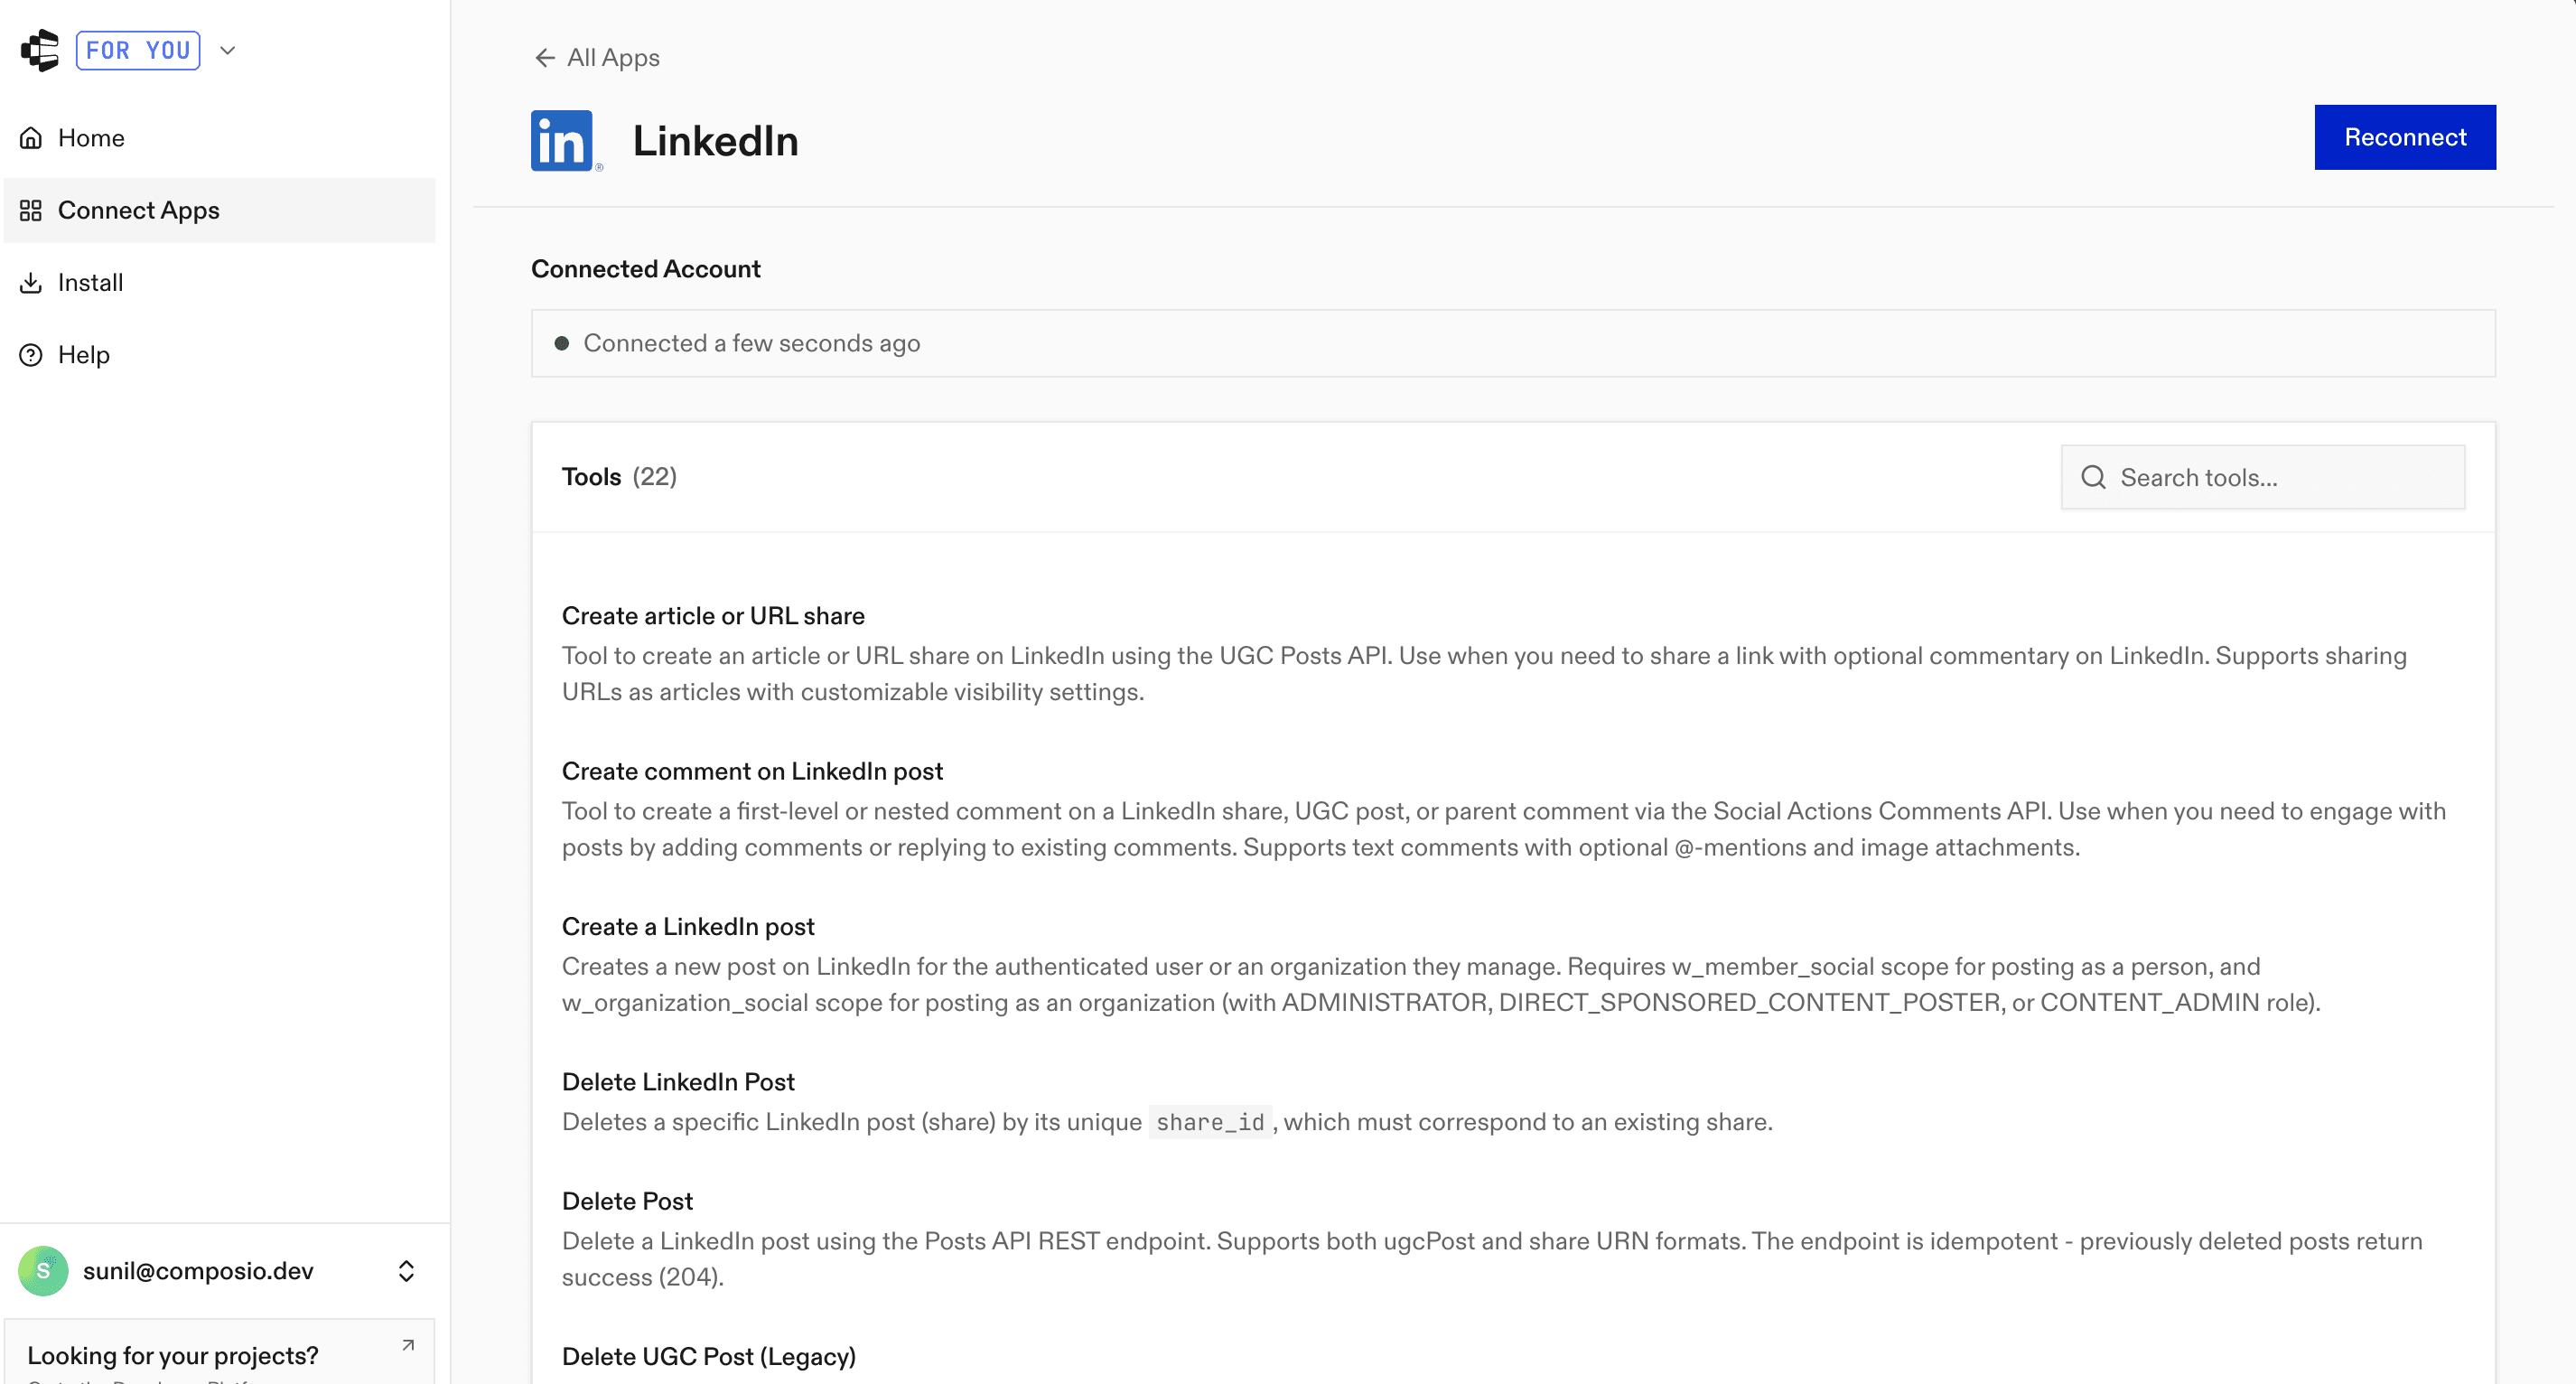
LinkedIn MCP server
You will see many options after adding this to the cursor MCP servers list. However, some need to initiate a connection to avoid overloading the input response.
Now, authenticate by copying the OAuth URL in the browser.
You will get a confirmation message once it’s done.
You can also check that based on the server’s actions. As you can see, there is an active connection.
Linear MCP Server
Another interesting server that can power your coding workflow. This server allows you to fetch tickets, make tickets, update tickets, and much more. You can easily fetch tickets and ask the cursor agent to work on them. Once you’re done, update the ticket.
Notion MCP Server
Notion is another service that can make your life easier as a developer if you use it often. You can get the PRD from Notion and build the features directly with the Cursor agent. You can take this a step further by adding a linear server for ticket management.
Follow the same steps as before.
Initiate an authentication with the Notion server
Complete the OAuth flow by clicking and granting permissions
Ask about the tasks you want to accomplish
These are a few examples; you can do much more with the Composio MCP server if you are interested in the Cursor vs. Windsurf compatibility comparison for the MCP.
See also: Supabase and Jira MCP inside Cursor
Frequently Asked Questions (FAQ)
Why connect Cursor to 100+ MCP servers?
Connecting the Cursor to multiple MCP servers dramatically expands what your agent can do. It lets you access and control tools like Notion, Slack, GitHub, or Linear directly from your development environment, turning Cursor into a true AI-powered automation hub.
How does the setup process work?
The setup involves enabling MCP support in Cursor, adding or selecting MCP servers, and authenticating with each connected tool. Once configured, you can access those servers directly inside Cursor to execute actions or fetch data through your AI assistant.
What types of authentication are supported?
MCP supports several authentication methods, including OAuth, API keys, JWT tokens, and custom credentials. Many MCP servers offer built-in authentication flows that simplify setup and remove the need for complex manual configuration.
Can I use pre-built MCP servers instead of creating my own?
Yes. Pre-built MCP servers are available for popular tools, and they can be added in just a few clicks. These servers come preconfigured with tool definitions and authentication options, so you can start using them without writing any backend code.