
How to connect ApexVerify to Claude

Connect Claude Web, Desktop and Cowork to ApexVerify MCP. Validate new signup emails before import, normalize phone numbers for crm records, and more using natural language, with authentication handled for you.

ApexVerify logoApexVerify
Api Key

ApexVerify is a contact-data validation service for emails and phone numbers. Use it to normalize, verify, and clean leads before they enter your systems.

10 Tools

Introduction

Claude is Anthropic's AI assistant, available on the web, in the desktop app, and on mobile. Cowork is its agent for knowledge work, and it runs on all of those surfaces too. Connected to your apps, Claude can work with your files and services to accomplish complex tasks on your behalf.

This guide walks you through the easiest and most secure way to connect your ApexVerify account to Claude via Composio Connect, enabling it to validate new signup emails before import, normalize phone numbers for CRM records, check batch contacts for invalid data, and more such actions on your behalf without compromising your account security.

Setup is the same on Claude Web, Desktop, and Cowork, and you only need to do it once. The connector is tied to your account, so it's available in all three.

Also integrate ApexVerify with

Connecting ApexVerify to Claude Web, Desktop, and Cowork

Two ways to add the Composio connector. Pick whichever you prefer.

1. Add with one click

Click the button. Claude opens with the Composio connector filled in. Click Add, then go to step 2.

Add to Claude

Add manually

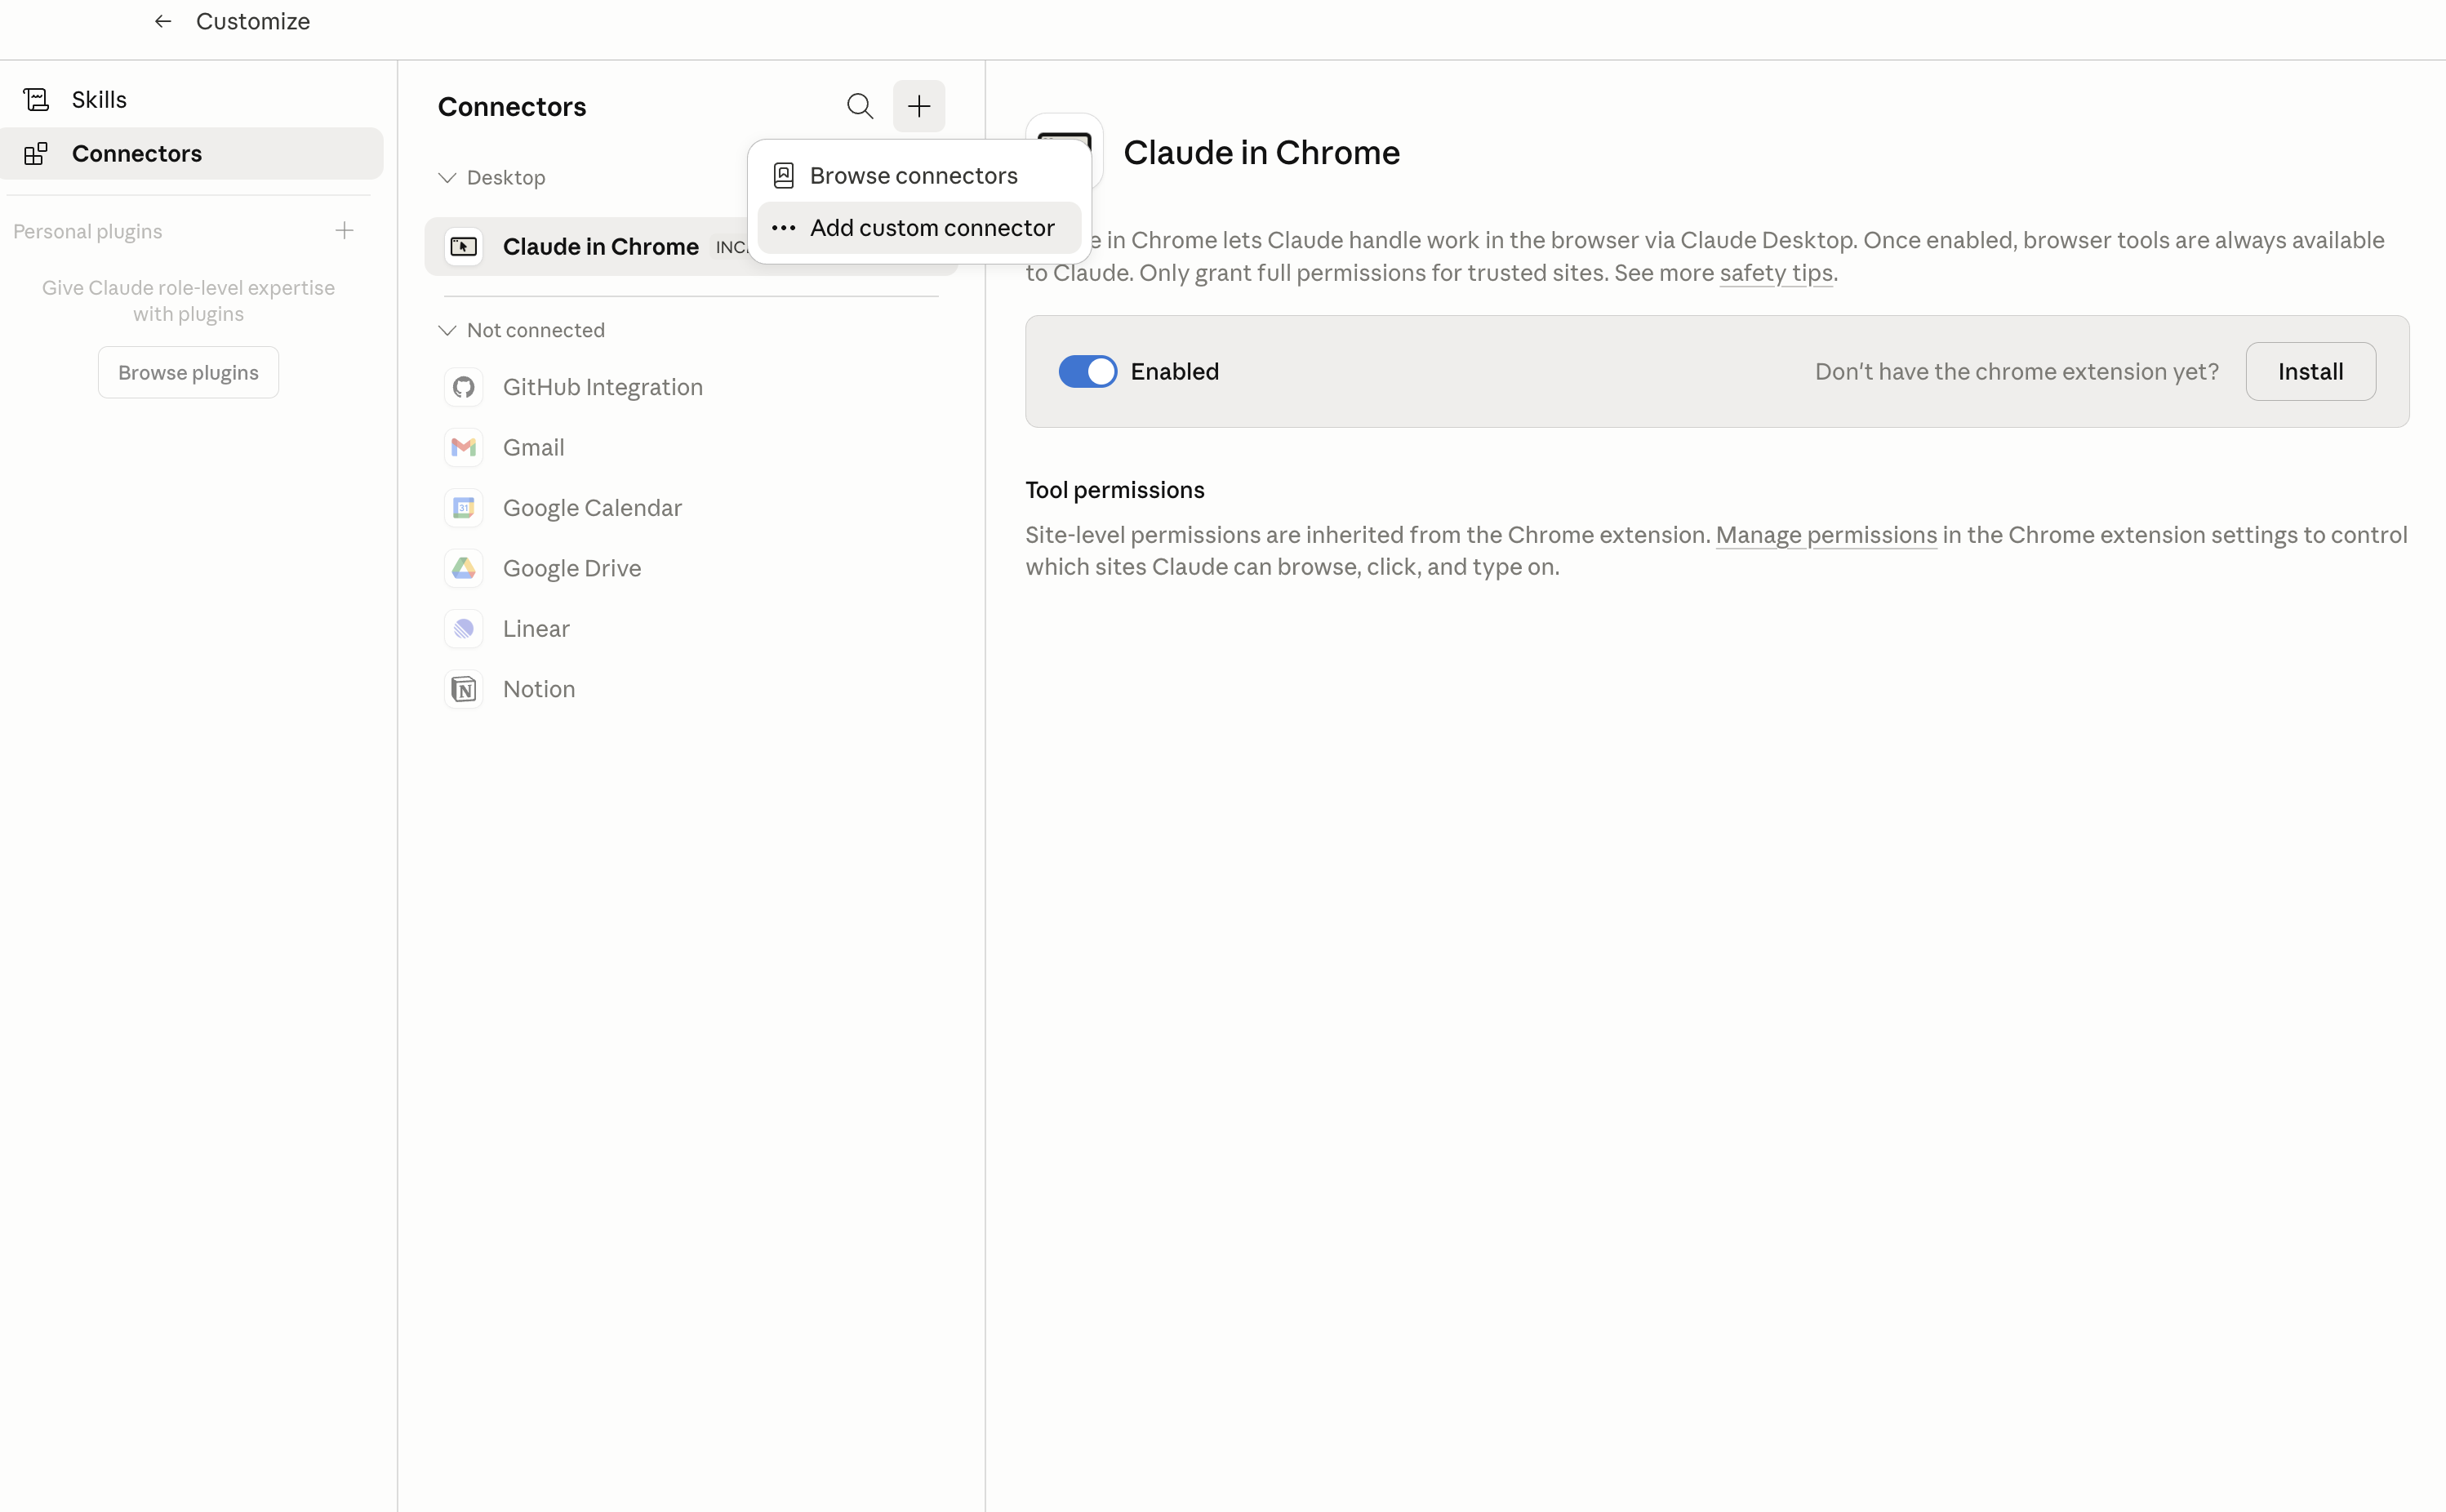
In Claude Desktop, click Customize in the left sidebar, then select Connectors and click the + icon at the top.

Claude Desktop connectors screen with Add custom connector selected

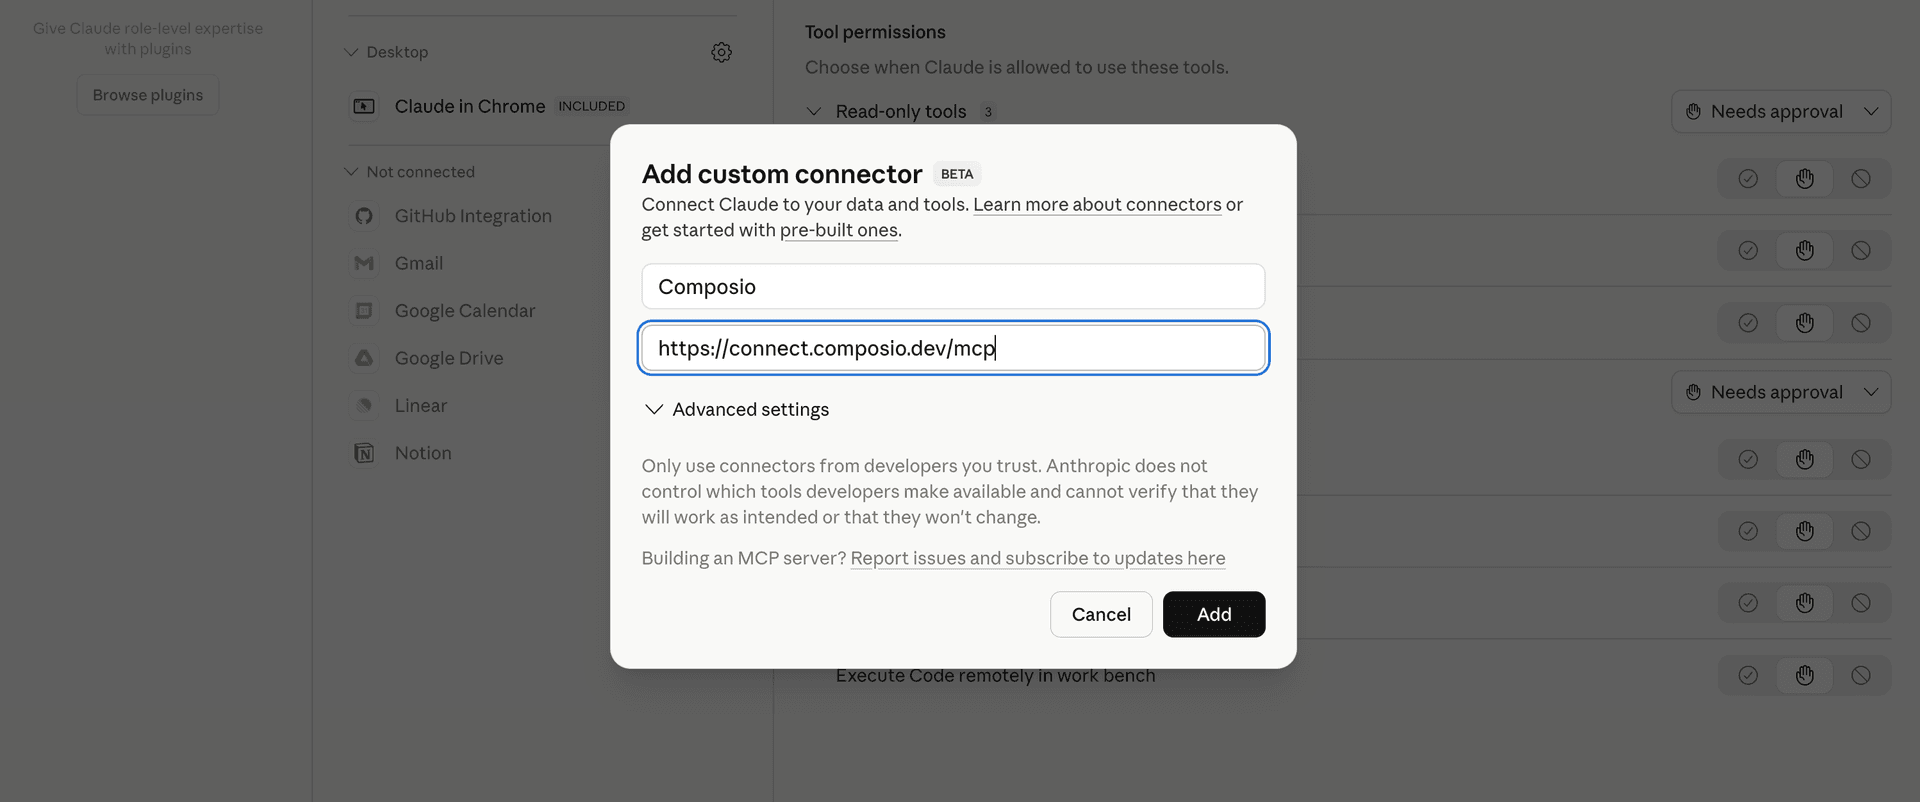
Click Add custom connector and paste in the Composio MCP server URL:

bash
https://connect.composio.dev/mcp
Add custom connector dialog with Composio MCP server URL

2. Authorize in your browser

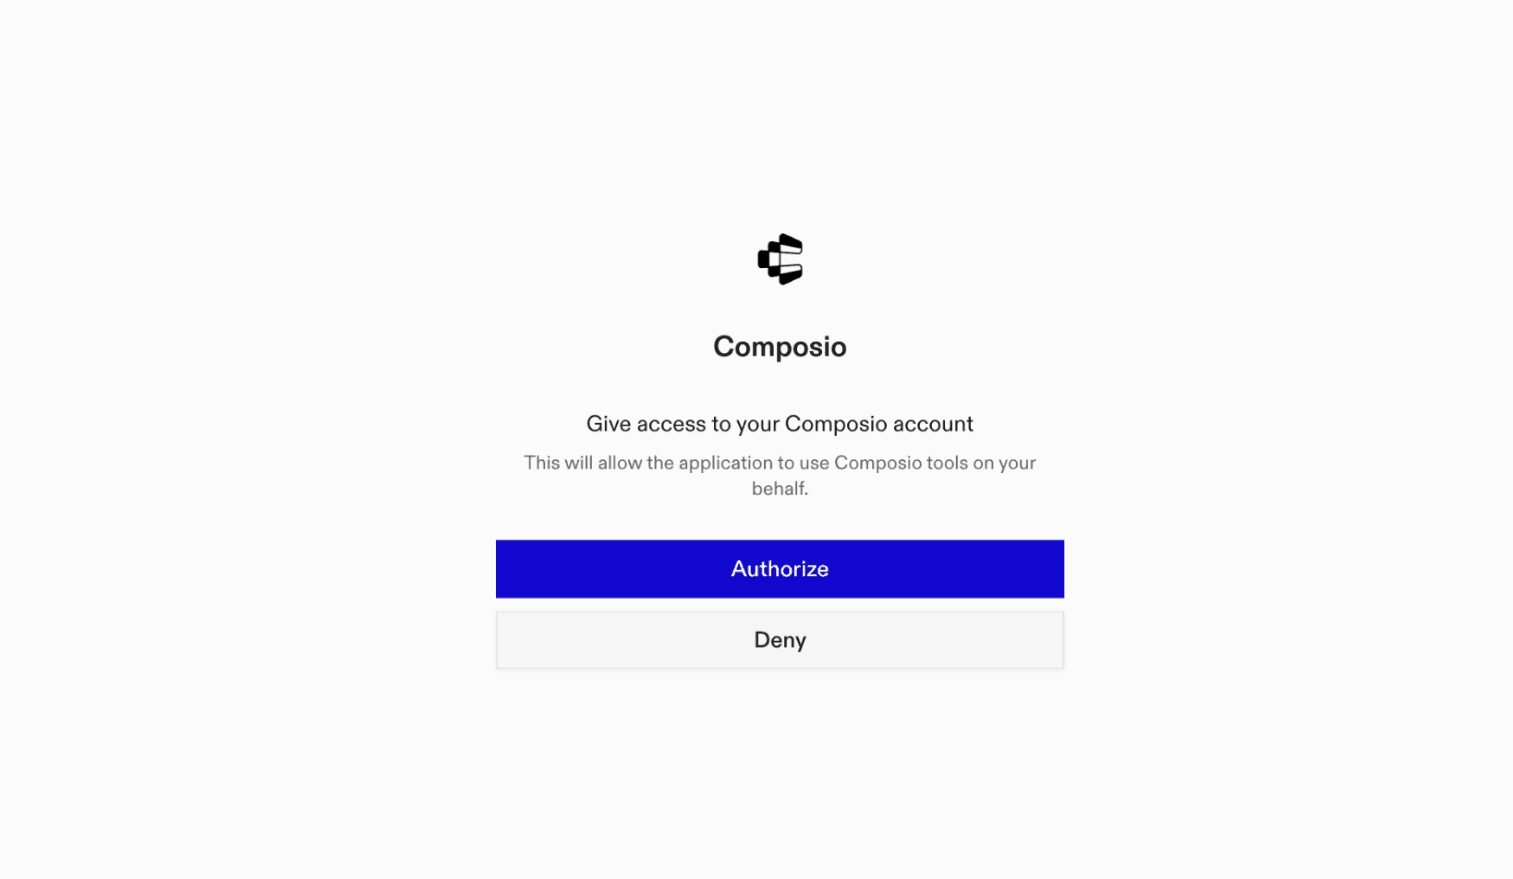
Click Connect. You'll be redirected to a browser window where you can authorize Composio to continue.

Composio authorization screen for Claude Web, Desktop, and Cowork

3. Connect your ApexVerify account

Back in Claude, ask it to connect to ApexVerify or give it any ApexVerify-related task.

For example, ask Claude to:

  • "Validate new signup emails before import"
  • "Normalize phone numbers for CRM records"
  • "Check batch contacts for invalid data"

It will prompt you to authenticate and authorize access.

That's it. Composio's tools are now available in Claude, and your ApexVerify account is ready to use.

What is the ApexVerify Claude Connector, and what's possible with it?

The ApexVerify MCP server is an implementation of the Model Context Protocol that connects your AI agent and assistants like Claude, Cursor, etc directly to your ApexVerify account. It provides structured and secure access so your agent can perform ApexVerify operations on your behalf.

Troubleshooting

1. Why does Claude not use the Composio connector for ApexVerify?

The connector can show as connected, but Claude must use it in each ApexVerify conversation.

  • Click + at the lower left of the chat, or type /.
  • Hover Connectors.
  • Turn on Composio.
  • Ask Claude to connect to ApexVerify again.

2. Why does Claude show an MCP server error before ApexVerify connects?

Claude can show Couldn't reach the MCP server or Authorization with the MCP server failed when you add the connector for ApexVerify.

  • Check that the connector URL is https://connect.composio.dev/mcp.
  • Connectors run from Anthropic's cloud, so your device network is usually not the problem.
  • Add the connector again from Customize > Connectors, then ask Claude to connect ApexVerify.
  • If it fails again, send the error and the ofid_ reference id to support@composio.dev.

3. Why does the ApexVerify authorization link not work?

The Composio connector is one server. Your ApexVerify account connects separately when Claude asks for it.

  • If the browser does not open, or the link expires, ask Claude to retry the ApexVerify connection.
  • Composio creates a fresh ApexVerify authorization link.
  • Open that link in your browser and finish the ApexVerify sign-in.

4. Why do ApexVerify actions fail after they worked before?

The ApexVerify connection can expire or lose permission.

  • Ask Claude to inspect the ApexVerify connection.
  • If the connection is unhealthy, disconnect it when Claude prompts you.
  • Reconnect the ApexVerify account and retry the action.
  • If Claude shows a permission prompt, approve it before Claude changes data in ApexVerify.
  • If the action still fails with a permission error, check that the connected account has that permission in ApexVerify itself.

5. How do I switch to a different ApexVerify account?

Claude can manage the ApexVerify connection for you.

  • Ask Claude to disconnect or delete the current ApexVerify account.
  • Ask Claude to connect ApexVerify again.
  • Open the new Composio authorization link for ApexVerify.
  • Sign in with the other ApexVerify account in the browser.
  • After the account connects, ask Claude to retry the ApexVerify task.

6. Why is my ApexVerify connection missing in Claude Desktop or on a Team plan?

The connector belongs to your Claude account, so your ApexVerify connection works in Claude Web, Desktop, and Cowork.

  • In Claude Desktop, open Customize > Connectors.
  • Next to Composio, click ⋮ and click Clear cache.
  • If ApexVerify tools still do not appear, click ⋮, disconnect, remove the connector, and add it again.
  • On Team or Enterprise, an Owner or Primary Owner must enable the connector before you can connect ApexVerify.
TOOLS

Supported Tools

Every ApexVerify action and event your agent gets out of the box.

Delete Batch

Permanently delete one ApexVerify batch by its exact UUID.

Export Batch Results

Export a completed batch as structured JSON for analysis or as a downloadable XLSX workbook.

Get Account Credits

Return the connected ApexVerify account's available email and phone verification credit balances.

Get Batch Details

Get an ApexVerify batch's status, metadata, parsed-content counts, estimated verification cost, parameters, and final statistics.

Launch Batch Verification

Launch paid verification for a prepared batch.

List Batches

List verification batches, optionally restricted by creation time, one offset-controlled page at a time.

Normalize Data File

Normalize email addresses or phone numbers from a line-delimited TXT file without performing verification or consuming verification credits.

Prepare Batch

Start or repeat asynchronous parsing, deduplication, format cleanup, and verification-cost calculation for an uploaded batch.

Upload Verification Batch

Create an ApexVerify verification batch from a line-delimited TXT file.

Verify Email or Phone

Verify one email address or phone number in real time.

FAQ

Frequently asked questions

With a standalone ApexVerify MCP server, the agents and LLMs can only access a fixed set of ApexVerify tools tied to that server. However, with the Composio Tool Router, agents can dynamically load tools from ApexVerify and many other apps based on the task at hand, all through a single MCP endpoint.

Yes, you can. Claude Cowork fully supports MCP integration. You get structured tool calling, message history handling, and model orchestration while Tool Router takes care of discovering and serving the right ApexVerify tools.

Yes, absolutely. You can configure which ApexVerify scopes and actions are allowed when connecting your account to Composio. You can also bring your own OAuth credentials or API configuration so you keep full control over what the agent can do.

All sensitive data such as tokens, keys, and configuration is fully encrypted at rest and in transit. Composio is SOC 2 Type 2 compliant and follows strict security practices so your ApexVerify data and credentials are handled as safely as possible.

Start with ApexVerify.It takes 30 seconds.

Managed auth, hosted MCP servers, and every ApexVerify tool your agent needs.Free to start.

Start building