I have a Notion page for everything. Specs, product ideas, meeting notes, feedback, random thoughts that made sense at 2 AM. It’s all in there. But every time I try to actually use that content to do something useful, I end up copying half the page into a prompt, trimming it down, and hoping the AI picks up what I mean.

I have done this way too many times, and it never feels smooth.
But we’re in a pretty wild timeline. We’ve got LLMs, smart agents, and now MCPs that can connect tools in ways that actually make life easier.
Lately, I have been using Notion MCP server, and it just works. It gives my tools live access to the docs I already use, without any copying or syncing.
In this blog post, I’ll show you how to set up the Notion MCP and use it to turn your pages into something tools like Cursor Cowork and Claude can work with directly.
What is Covered?
Configuring Composio Notion MCP (This is the cleanest way to connect Notion. Seriously, it just works.)
Use the Notion MCP server to provide tools with real-time access to your documents. (Works great with Claude and Cursor Cowork, but Cowork is my personal favorite for working with text-heavy pages.)
Connect Notion to Claude Cowork using MCP
Claude Cowork is Anthropic’s desktop AI workspace designed for handling multi-step knowledge tasks. It works across local files and connected tools, allowing it to operate within real workflows.
Notion can be connected through Composio, which provides a direct link between Claude and your workspace. This allows Claude to read and update pages, databases, and content without any manual setup steps.
Prerequisites
Claude Desktop: Install it from claude.ai/download. Cowork is available inside the app alongside Chat and Code.
**Claude Pro or Max plan: **Required to access Cowork, with higher limits available in Max.
Composio account: Create an account at dashboard.composio.dev to manage integrations
Notion account: Required to connect and access your pages and databases
Step 1: Link Notion in Composio
Log in to your Composio dashboard: dashboard.composio.dev

Open Connect Apps from the sidebar
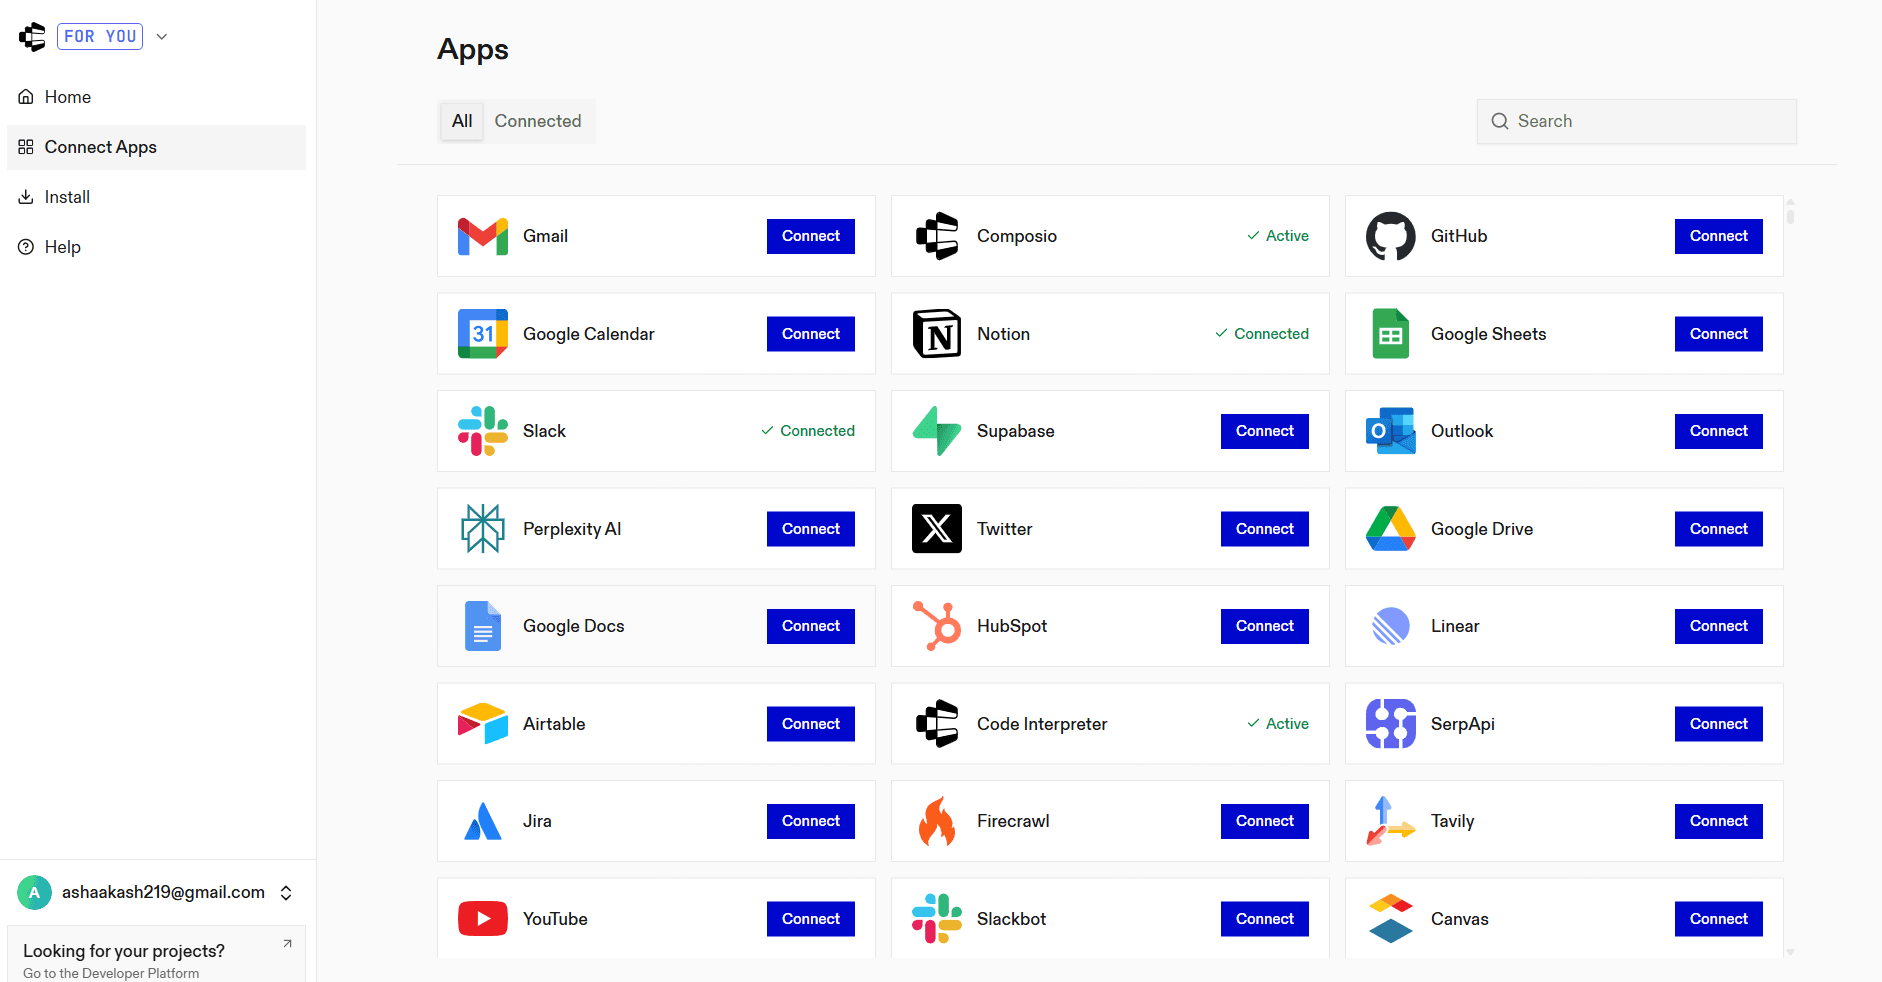
Search for Notion and select it
Complete the authentication flow and grant access to your workspace
Notion will then appear in your connected apps list.
Step 2: Open Connectors in Claude Desktop
Launch Claude Desktop
Go to Settings
Select Connectors
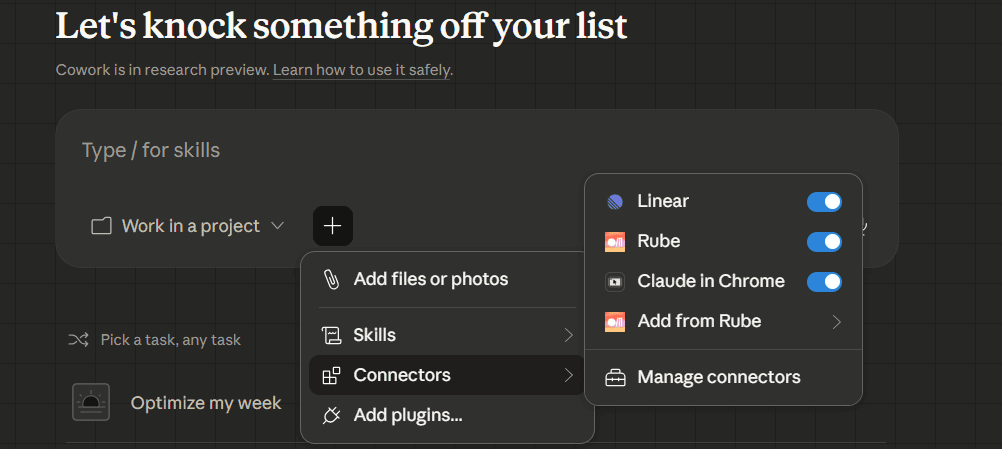
Step 3: Add the MCP server
Click Add custom connector
Enter the URL:
https://connect.composio.dev/mcp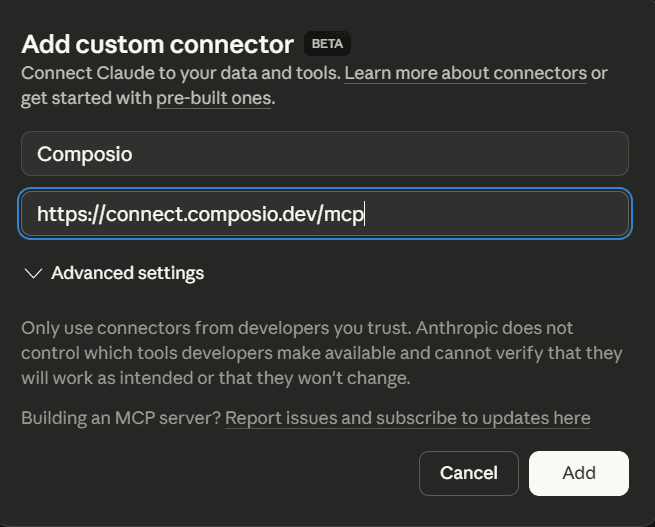
This connects Claude to all tools linked through Composio.
Step 4: Authorize access
A browser window will open. Sign in to your Composio account and approve the connection. Once confirmed, the integration becomes active.
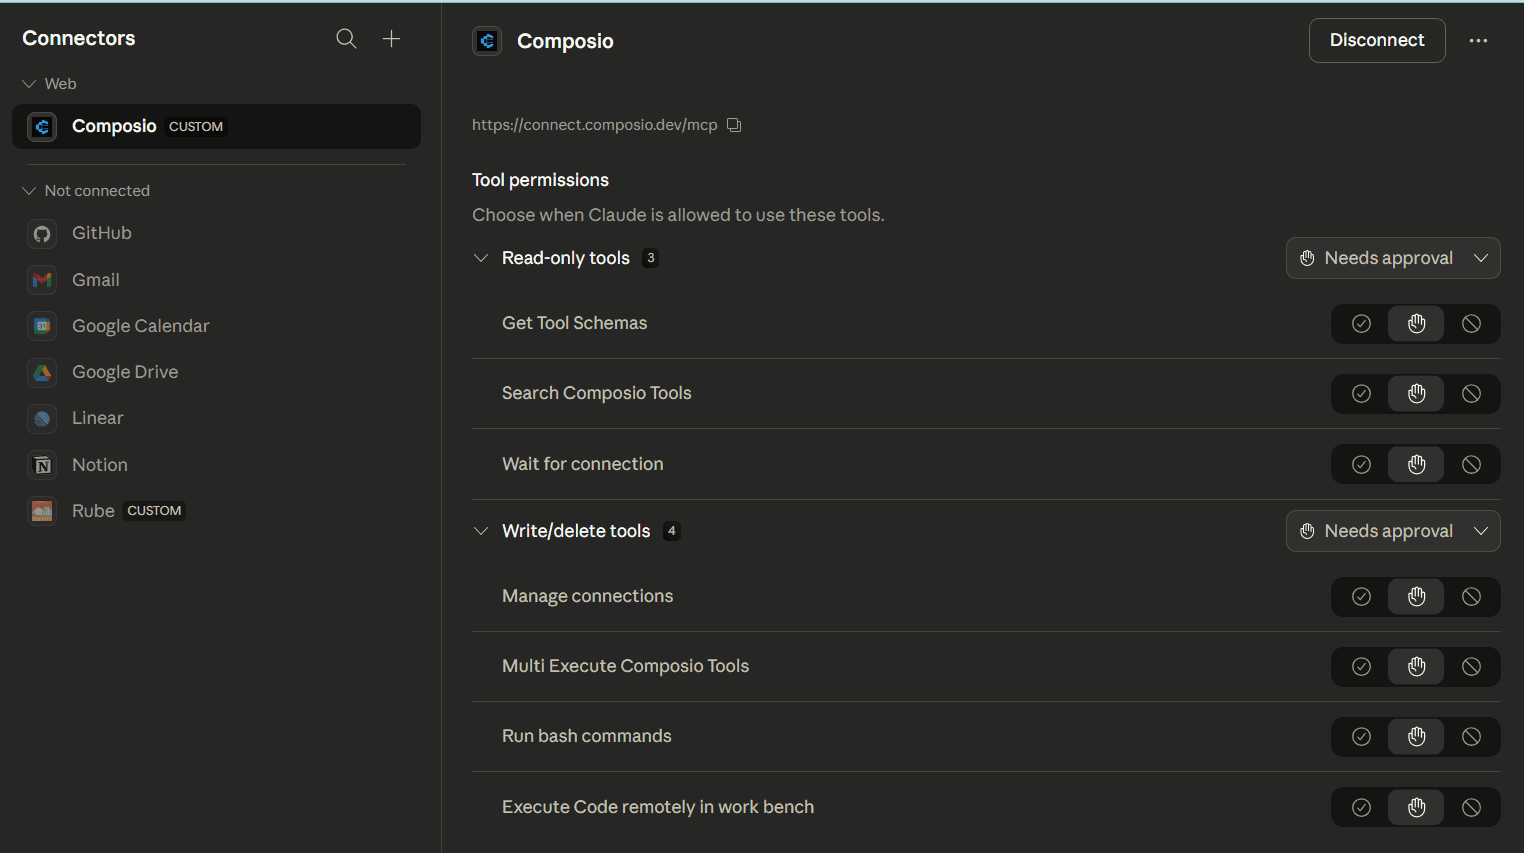
Step 5: Start using Notion in Claude
Notion is now available inside Claude Cowork. You can read pages, update content, create entries in databases, and organise information using live workspace data.
Use Case 1: Generate a Product Brief from Notion in Claude
Now let’s look at a writing-focused workflow, turning notes or research in Notion into a structured product brief using Claude.
In this setup:
Notion holds the source content (research, notes, feature ideas)
Composio MCP connects your Notion workspace to Claude
Claude uses the live content to generate summaries or briefs based on what’s actually written
Instead of copying raw notes into the chat window or explaining context manually, you can let Claude read the document directly and respond with something meaningful.
“Create a product brief based on the Notion page titled ‘Q3 Planning”
Watch it work in the video
Connect Notion to Cursor using MCP
Cursor can be connected to Notion through Composio using MCP. This setup allows Cursor to access your Notion workspace directly, so it can read pages, update content, and work with databases using real data.
You can configure this connection in two ways: OAuth or API key.
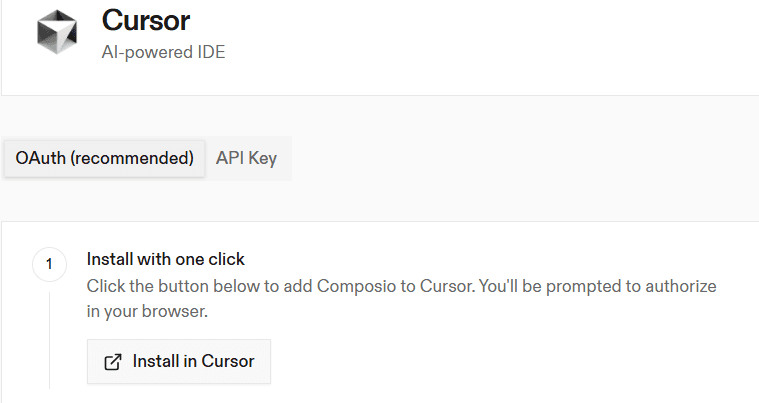
Method 1: OAuth (Recommended)
Step 1: Install in Cursor
Go to your Composio dashboard https://dashboard.composio.dev/

Navigate to the MCP section
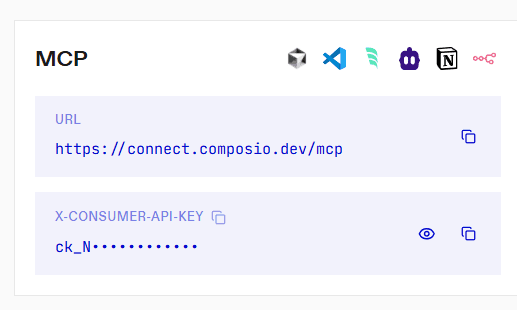
Click on the Cursor icon
You will see the Install in Cursor button.Click Install in Cursor
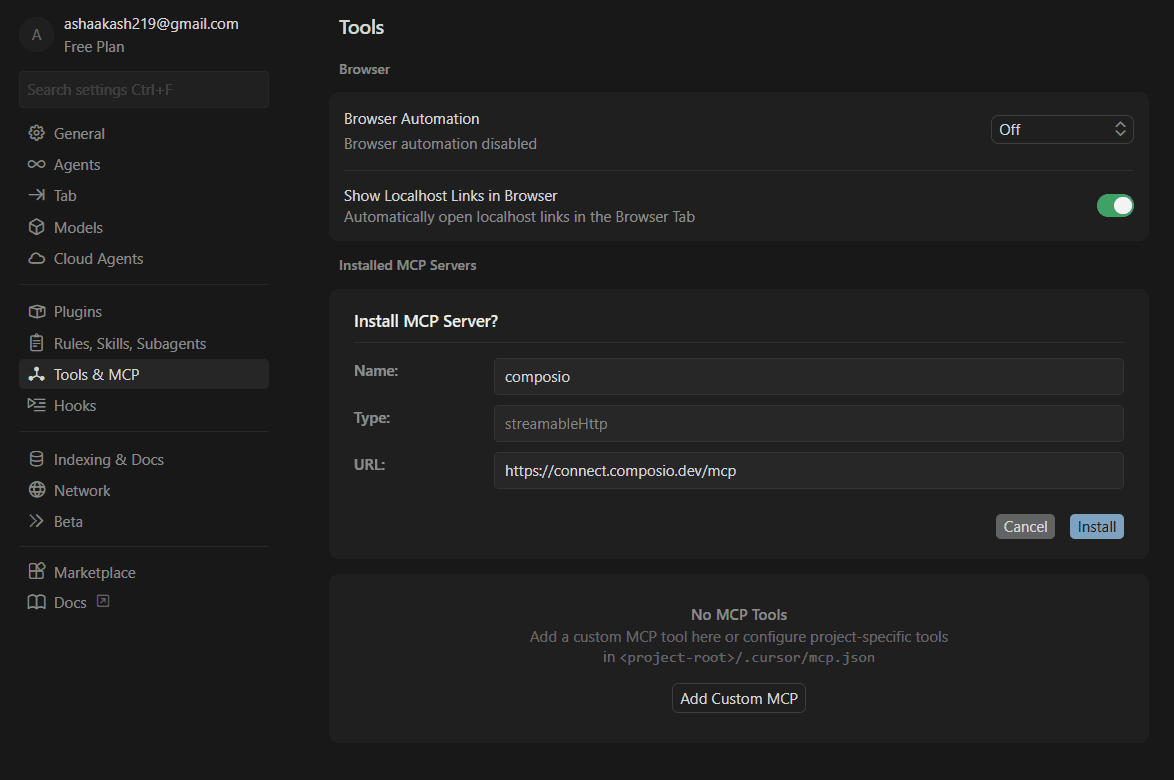
You will be redirected to Cursor’s MCP tools settings
Click Install to complete the setup
Step 2: Add manually (optional)
If you prefer manual setup:
Open
.cursor/mcp.jsonin your project root*(or~/.cursor/mcp.jsonfor global setup)*Add the following configuration:
{
  "mcpServers": {
    "composio": {
      "url":"https://connect.composio.dev/mcp"
    }
  }
}
Step 3: Authorise in the browser
Restart Cursor
Go to MCP Tools settings
Click Connect next to Composio
A browser window will open for authorisation. Once completed, the connection becomes active.
Method 2: API Key
Step 1: Install in Cursor
Click Install in the Cursor
This will add Composio using your API key
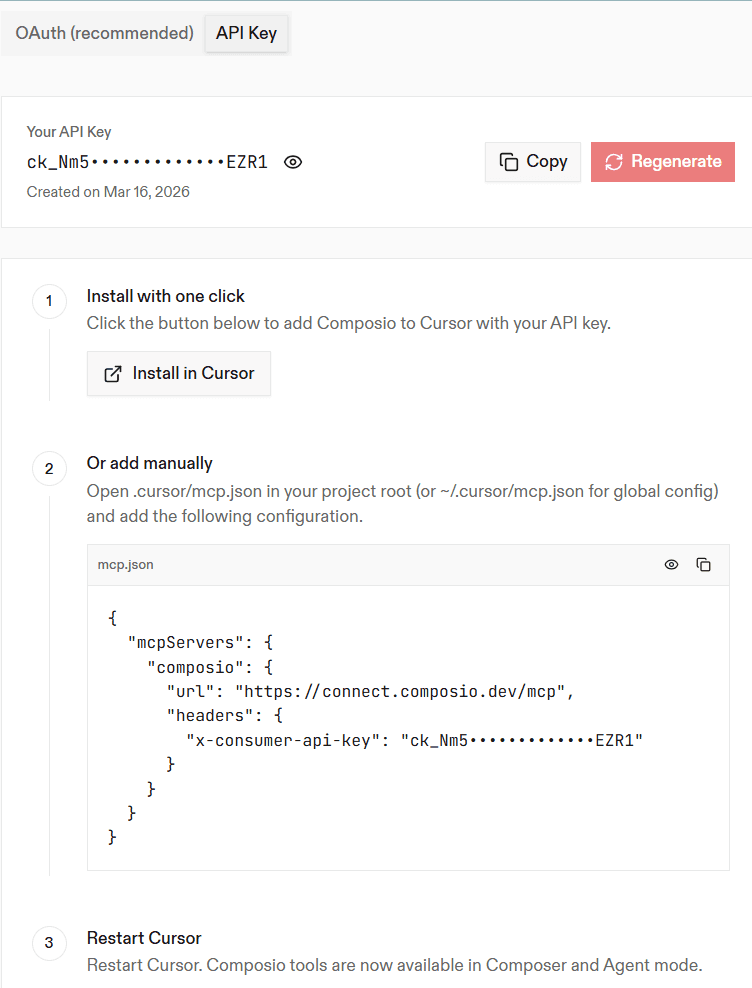
You will be redirected to Cursor’s MCP tools settings
Click Install to complete the setup
Step 3: Restart Cursor
Restart the Cursor application
Composio tools will now be available in Composer and Agent mode
Use Case 2: Generate an Onboarding Flow from Notion in Cursor
Let’s start with a practical workflow: building a workflow flow based on a product spec written in Notion.
In this setup:
Notion holds the product requirements document (PRD)
Composio MCP connects that PRD to your local environment
Cursor uses the live Notion content to generate code based on the latest version
Instead of copying specs into prompts or guessing what changed, you can ask Cursor directly:
“Generate the onboarding UI flow based on the Notion page ‘Onboarding PRD’.”
Watch it work in the video
The video below shows this full flow in action. From writing the PRD in Notion, to setting up Composio, to watching Cursor generate real, working code based on a live document.
Conclusion
Your team’s thinking already lives inside Notion, but getting that knowledge into AI tools has often been a slow and clumsy process. Composio’s Notion MCP server changes that by giving tools like Claude and Cursor direct access to your live documents, with full structure and context.
This approach keeps your workflow cleaner and more reliable. Instead of relying on outdated copies or reformatting content manually, your tools can work with the most current information available.
FAQs
1. Can I point Claude or Cursor to a specific Notion page?
Yes. Once the MCP server is connected, you can reference any page by its title in your prompt. Make sure the page is shared with Composio and that you’ve enabled the right actions (like Search Notion Page and Fetch Block Children).
2. What happens if I update the Notion page?
The tools will always pull the latest version when they access it. No need to re-sync or re-run anything. If the page content changes, the output will reflect that next time it's used.
3. Can I use the same MCP server with both Claude and Cursor?
Yes. You can run the same setup script in both environments. One server can serve both tools as long as you’ve set it up with the right actions.
4. How do I know the connection worked?
In Cursor, you’ll see responses based on live Notion content immediately. In Claude, check the developer settings; your MCP server should show up as a connected source. You can also test with a simple prompt like:
“Summarize the Notion page titled ‘Getting Started’.”
5. Do I need to rerun the script every time?
No. Once the script is run and the config is saved, your tool remembers the connection. You only need to run it again if you change the server or reset your setup.