In the previous blog post on building with Agent Builder, we learnt how to create a YouTube QA agent with OpenAI Agent Builder and used it.
In this blog post, we will go through how to deploy the agent in ChatKit. We'll create a customer support agent, deploy it and embed it for general usage.
Let’s get started!
Note: You can follow the same process for YouTube Agent also, but to keep things fresh, we will build a customer support agent from scratch!
TL;DR
This blog walks through building and deploying a full AI customer support agent using OpenAI Agent Builder, ChatKit, and Rube MCP.
You start by creating a multi-agent workflow that classifies queries into support, sales, or general categories.
Each type is handled by a different agent with its own logic and tools.
The workflow is then connected to OpenAI ChatKit for one-click deployment to a website or product.
You can customise the frontend using ChatKit’s starter template and quickly ship a working support system.
Workflow Explanation
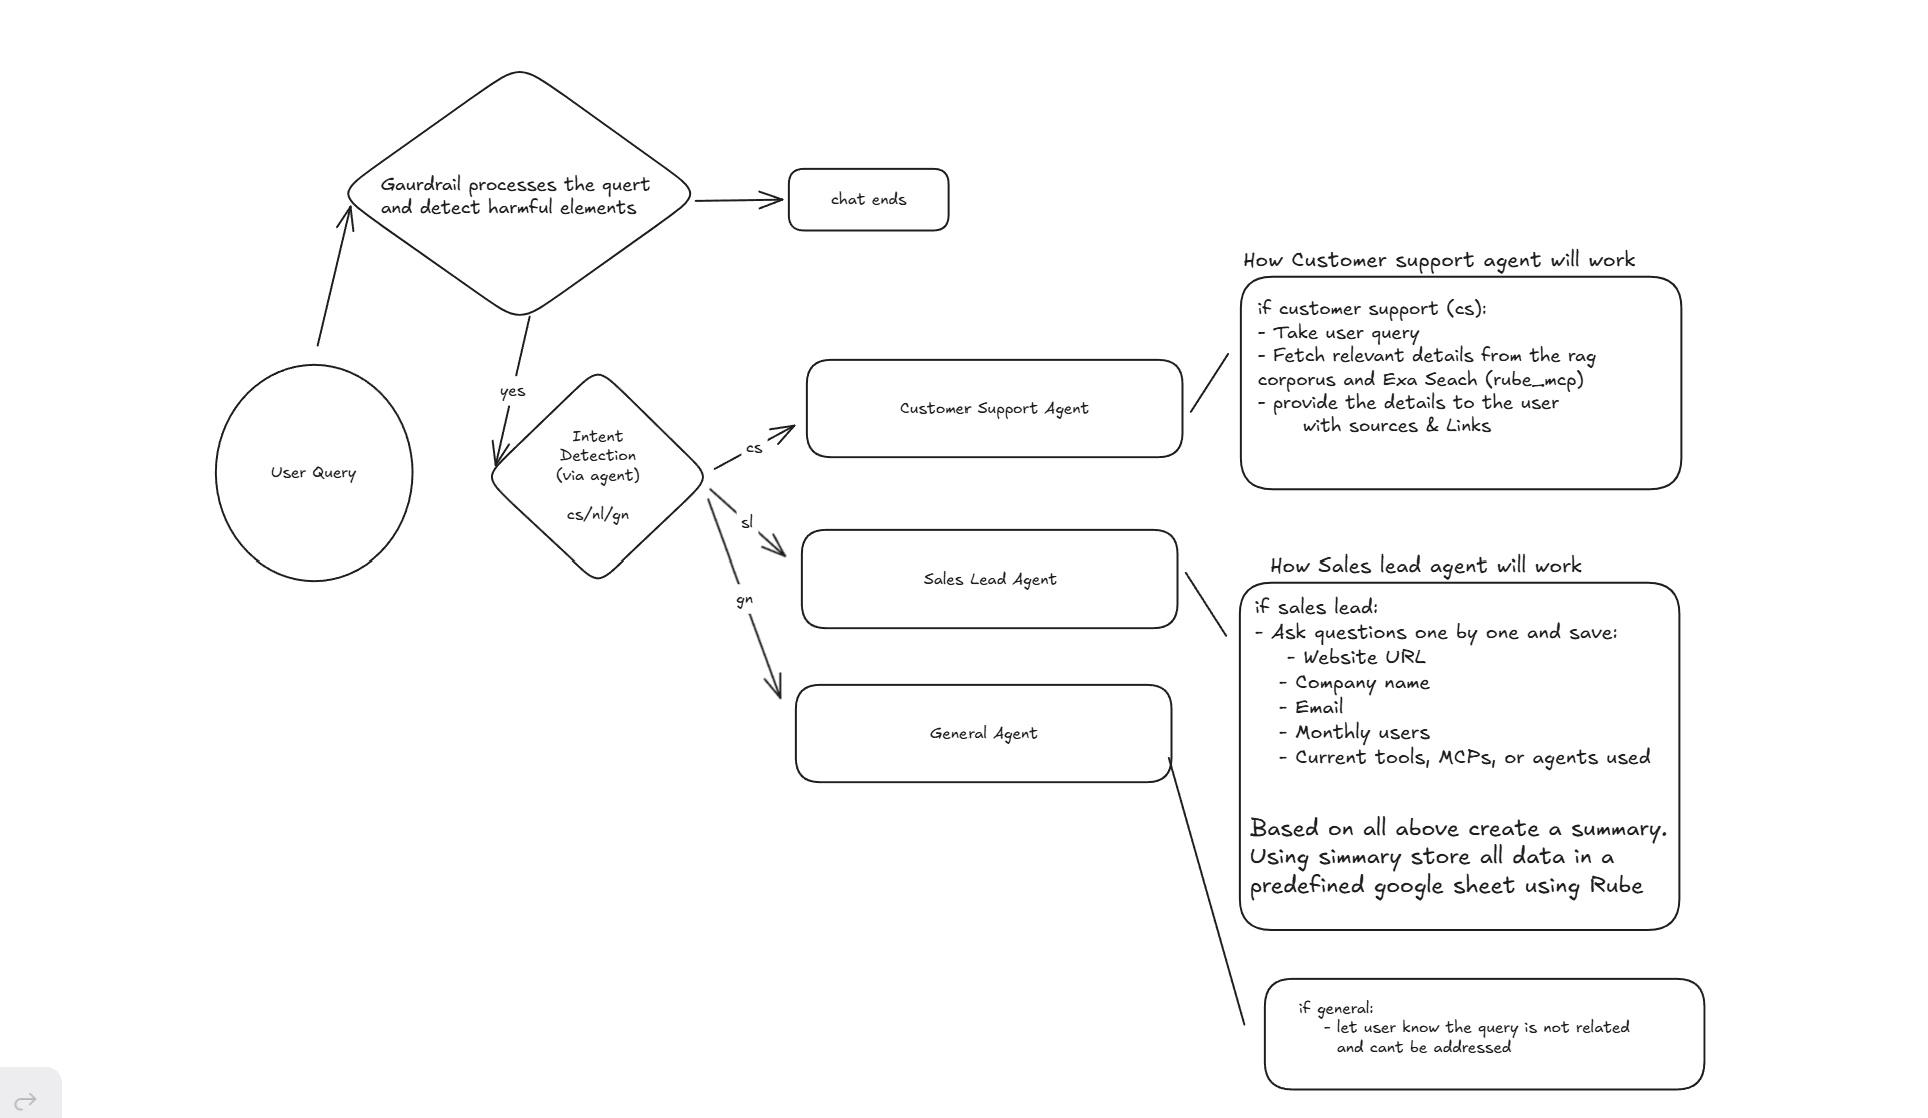
Before diving into Builder, it's good to have a mental model first. So here is the flow we will follow:
User asks the query.
Guardrails process the query and find harmful elements.
If nothing found (no) → passed to Intent Classifier Agent
If yes, → process ends,
Intent classifier processes the query and detects the query intent into:
Customer Support: Queries related to product usage, documentation, API integrations, etc
New-Lead: Queries related to business inquiries, partnership or adoption
General: For general queries unrelated to the product.
The intent is then passed to a decision block, which routes to the respective agent with different functionality:
Customer Support Agent - Takes in the query, searches the vector store, independently performs web research, merges the search result, if nothing is found, asks the user to contact support at the specified email.
Sales Agent -Takes in the query, systematically asks for details, appends it to the predefined spreadsheet using Rube MCP, and thanks the user
General Agent - Hates seeing unrelated queries, tells users they can't be addressed, and ends.
A sample workflow diagram to help understand the flow better:
With the mental model ready, it's time to dive into the OpenAI agent builder and build the flow!
Build Workflow
Note: This section will be a brief one, as the blog focuses ChatKit, but for detailed explanation of each node and workings, feel free to check out the OpenAI Agent Builder blog!
To get started, head to OpenAI Agent Builder, log in and create a new workflow. For simplicity, I am going just to point out how to connect and get this up and running:
Start Node: Sets the entry point, keep as it is
Guardrail Node: Enable Moderation (⚙️ → all), Jailbreak (default),
fail path: end node
pass path: intent detector (Agent Node)
Agent Node: Intent detector, add intent detection prompt, Set output format response schema with property:
Name: intent
Type: ENUM
Description: can leave blank
Value: customer-support, new-lead, general
If Else Node: Set it using CEL as:
if:input.output_parsed.intent == "customer-support"→ for Customer Support Agentelif:input.output_parsed.intent == "new-lead", → for Sales Lead Agentelse: no checks here → for General Agent
Agent Node 1: Customer Support, add customer support prompt, enable chat history, select reasoning effort to high / medium & set the following tools:
Vector Store: Click the ➕ → File Search, upload all the necessary files, →
Attach. For reference, I am using Composio’s llm.txtMCP: Click + again, select MCP →
+ ServerAnd fill in the following details:URL, https://rube.app/mcp
Name: put
rube_mcpAuthentication: API Key → Get it from:
Going to the Rube app,
Selecting Install Rube
Navigating to Agent Builder
Generate Token
& Copy and Paste
Then go to Rube → Marketplace → Connect Google Sheet (oAuth) and Exa (API Token for Exa).
Save
Agent Node 2: Sales Lead, add sales lead prompt, enable chat history, select reasoning effort to medium set following tools:
MCP: Add Rube MCP, follow the above to set it up. Use the Auth Token from the Chat Support Rube integration.
Agent Node 3: General, add general prompt. No tools needed.
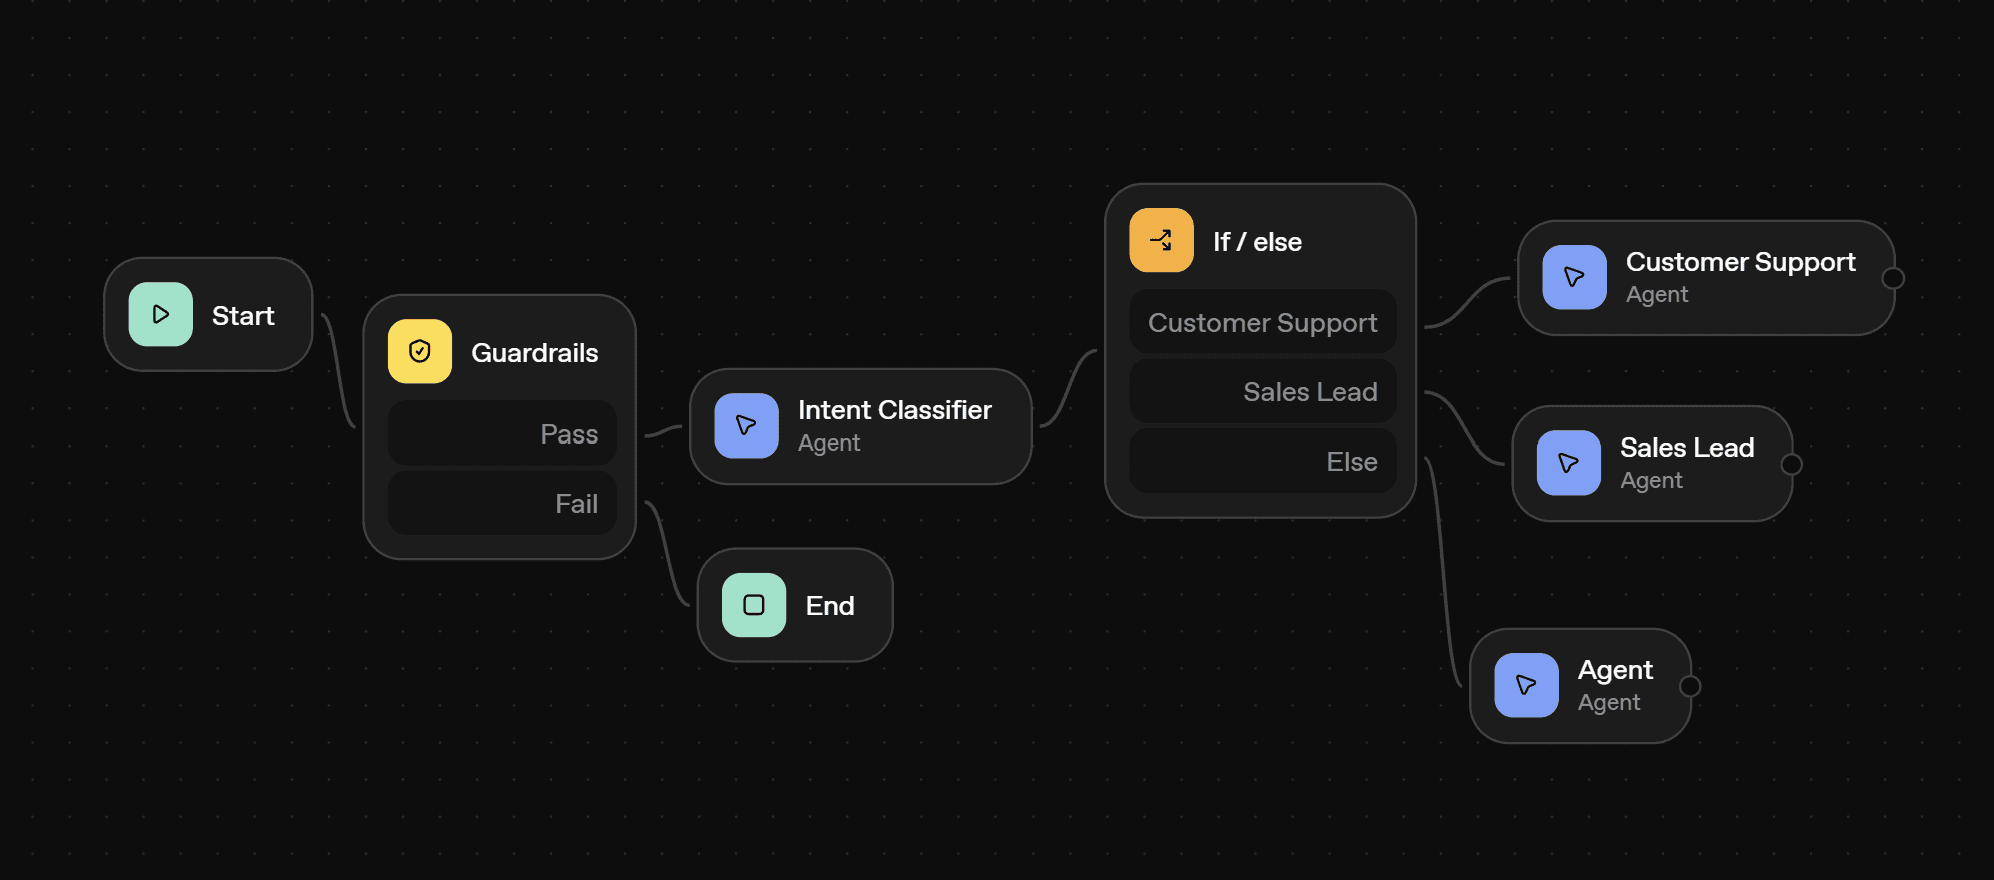
And we are done; here is how it all looks combined!
Now let’s first test it in a browser, to find flaws before hitting production. Hit preview and in chat pass different prompts to test. Here is a sample demo at work:
Amazing, this works great. All query intents are correctly shown, passed to the right agent, and each agent reasons and processes them according to logic.
With all things working as expected. Time to hit production!
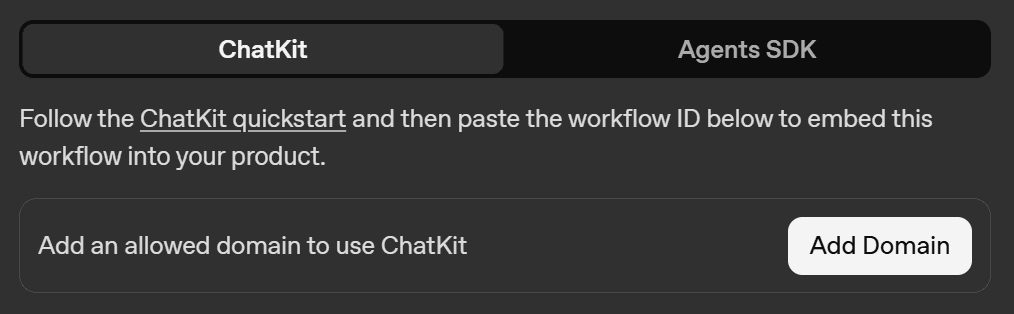
Connect Workflow with OpenAI ChatKit
First of all, hit Publish to make the workflow live. Then head to Code and copy the “workflow-id” and save it somewhere.
Now, head to the ChatKit’s Starter Template and clone the repo by pasting in the terminal:
git clone https://github.com/openai/openai-chatkit-starter-appNow navigate to the downloaded folder:
cd openai-chatkit-starter-appWe will use this app for this demo, but you are free to create your own. However, in that case, make sure to add <openai-chatkit> web component and session endpoints(refer app/api/create-session/route.ts). For this one, it comes preconfigured!
Anyways, replace the env.local with .env And add the following env variables:
OPENAI_API_KEY=openai-api-key
NEXT_PUBLIC_CHATKIT_WORKFLOW_ID=workflow-id-here
You can get your OpenAI API key from the OpenAI API Keys page.
Next, head to the terminal and run:
npm install
npm run dev
Once done, head to the URL given in the terminal output and test the workflow. Here is a sample demo at work:
Amazing, this works as expected. But if you are not satisfied with your frontend/backend, you are free to modify the following files based on your needs:
App.tsx- to modify the main layout and theme wrapperlayout.tsx- to customise document structure and global layoutglobals.css- to add or modify global CSS stylesChatKitPanel.tsx- to customise/modify the chat interface appearance, update the event handlers and integrate product analytics or storage.ErrorOverlay.tsx- to change how errors are displayeduseColorScheme.ts- Modify theme and color scheme logictailwind.config.ts- to Customize Tailwind theme colors and design tokens
Also, for functionality modification:
lib/config.ts- to adjust starter prompts, greeting text, placeholder text and chatkit theme. Yes, you can create your custom theme and component as well!component.tsx- to
Once happy, run
npm run build& use the generated build folder to deploy as any live site.
In case you are facing any domain issue, make sure to put the website URL in the allow list of ChatKit.
With this, we are done building. Time to reflect!
Final Thoughts
In this article, we changed the agentic workflow in OpenAI agent builder into a production-ready app with a simple Next.js UI using OpenAI Chatkit.
With Agent Builder and OpenAI Chakit, transforming an idea into a working product is now effortless - even for non-coders.
The key takeaway is understanding how to break down the process into Agents, Tools, and MCP, and knowing where your own responsibilities lie.
Agent Builder is still in beta, with new updates every week. Building and integrating agents has never been easier or more essential.
So, head to Agent Builder & start building your own agents, or if you've already done that, customise using OpenAI ChatKit today.
Frequently Asked Questions
Can I use this setup for other use cases besides customer support?
Yes. The same workflow can be adapted for sales, onboarding, internal documentation, or even YouTube support (as shown in the previous post). You need to adjust the agent prompts and logic.
Do I need coding skills to deploy this with ChatKit?
Not really. The ChatKit starter app uses simple environment variables and basic setup commands. If you can follow a README and copy a few keys, you’re good.
How do I connect my data or knowledge base to the agent?
Upload documents directly into the Agent Builder’s vector store or connect external tools like Google Sheets or Exa via Rube MCP. This lets your agent answer context-specific questions.
Is this solution scalable for production use?
Yes. ChatKit is designed for real-time, production-level deployment with built-in support for performance, observability, and customisation. You can embed it on any site and scale as your traffic grows.