Ministral 3B from the French lab Mistral is one of the most interesting models out there. It's small, compact and packs a solid punch. And if you're a builder looking for an LLM to run on edge devices, this one is it.
It is multi-modal, multi-lingual, supports calling tools, and runs in your browser using webGPU. These alone make it one of the most valuable models for many problems where running an LLM on edge devices is really important.
In this blog post, I'll walk you through how to run it on WebGPU and host it locally on Ollama, and configure it to use both local and hosted MCP servers.
So, let's goo.

What’s Covered?
In this hands-on guide, you’ll learn about the Ministral 3 3B model, how to run it locally, and how to get it to perform real tool calls using Open WebUI, first with local tools and then with remote MCP tools via Composio.
What you will learn: ✨
What makes Ministral 3 3B special
How to run the model locally using Ollama (including pulling a quantised variant)
How to launch Open WebUI using Docker and connect it to Ollama
How to add and test local Python tools inside Open WebUI
How to work with remotely hosted MCP tools in Open WebUI
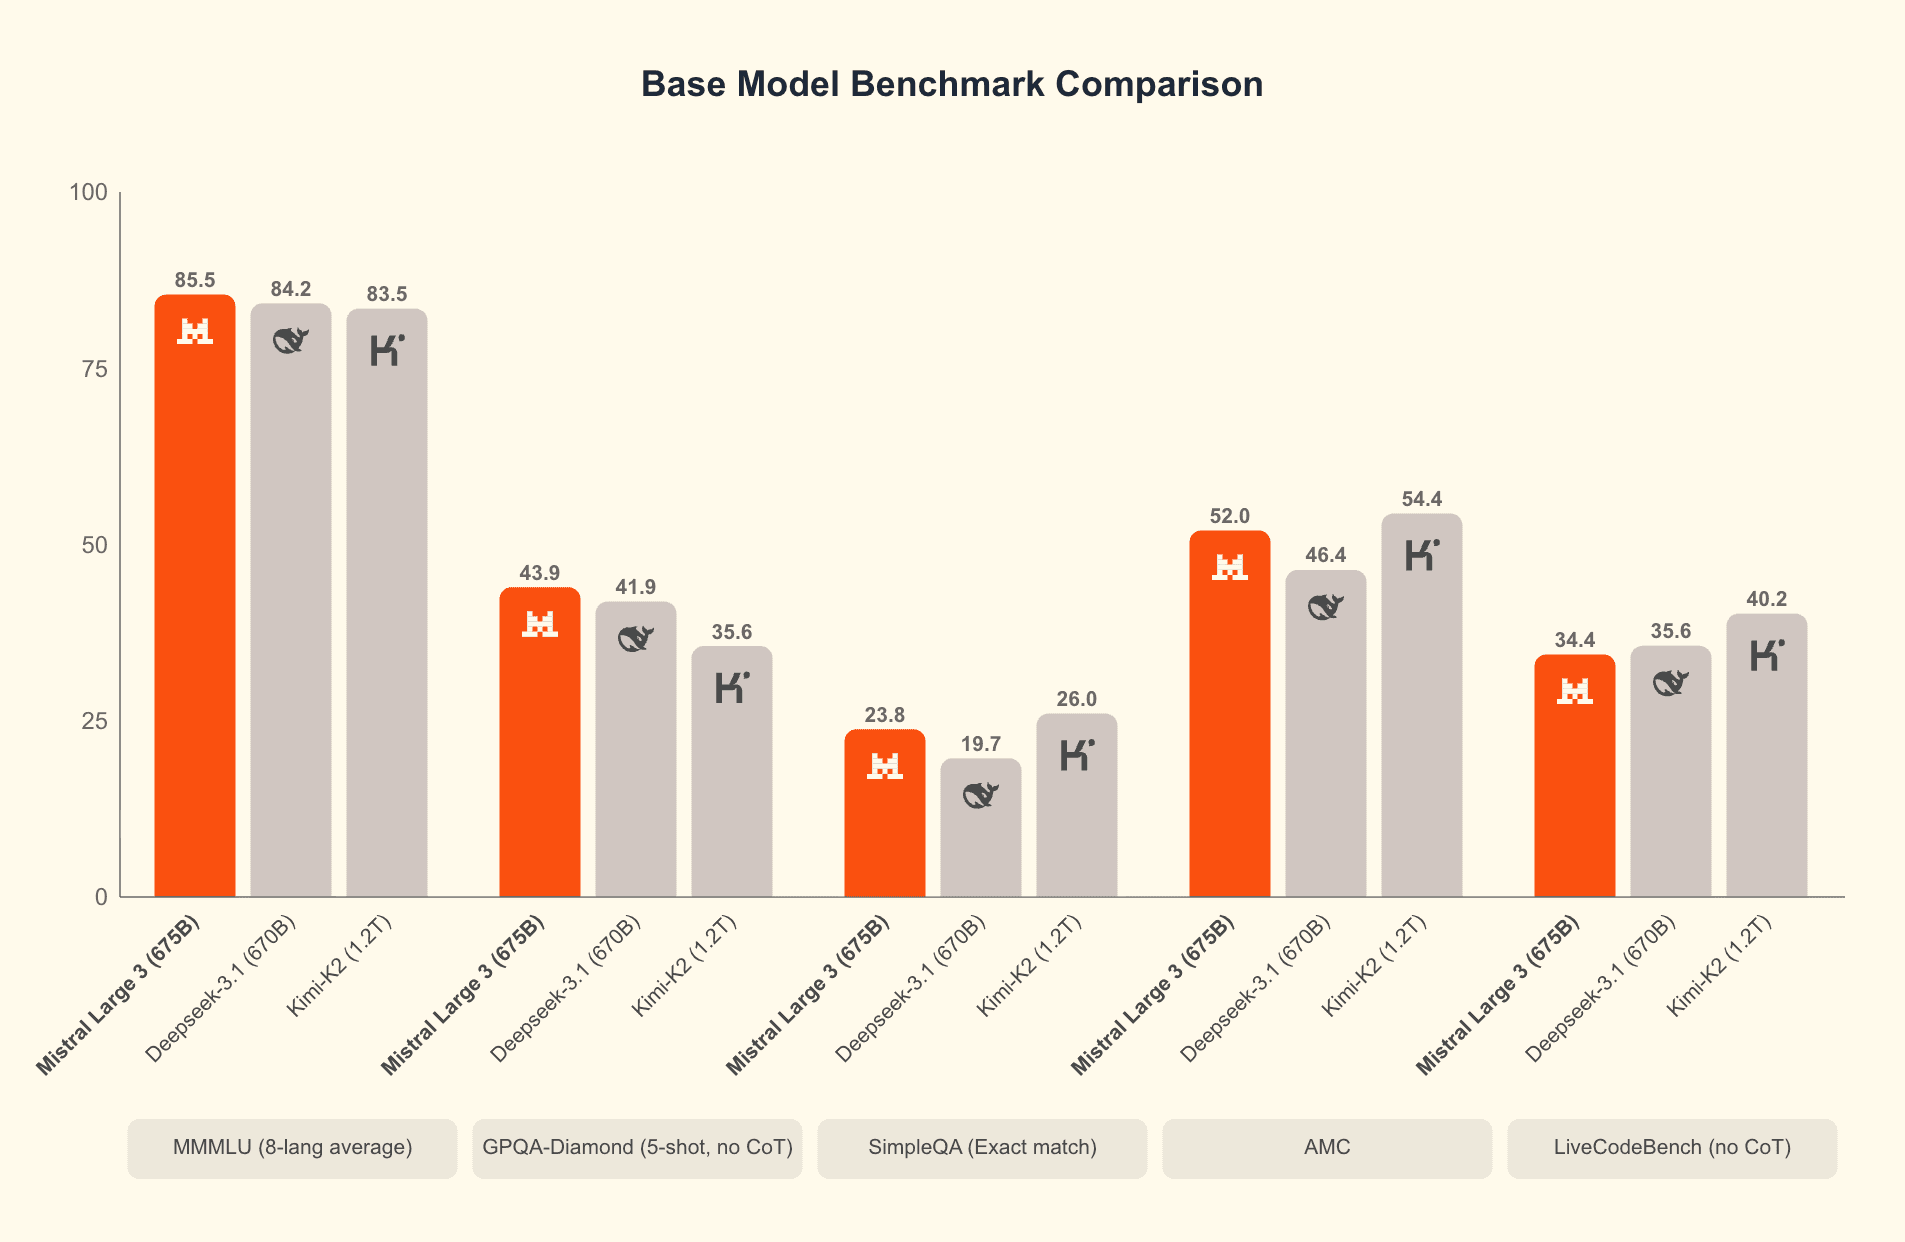
⚠️ NOTE: This isn’t a benchmark post. The idea is to show a practical setup for running a small local model with real tools, then extending it with remote MCP servers.
What's so Special?
Ministral 3 3B is the smallest and most efficient model in the Ministral 3 family. Mistral 3 includes three state-of-the-art small-dense models: 14B, 8B, and 3B, along with Mistral Large 3, the most capable model to date from Mistral. All models in this family are open source under the Apache 2.0 license, which means you can fine-tune and use them commercially for free.
But the topic of our talk is the Ministral 3 3B model. At such a small size, it comes with function calling, structured output, vision capabilities, and most importantly, it is one of the first multimodal models capable of running completely locally in the browser with WebGPU support.
As Mistral puts it, this model is both compact and powerful. It is specially designed for edge deployment, offering insanely high speed and the ability to run completely locally, even on fairly old or low-end hardware.
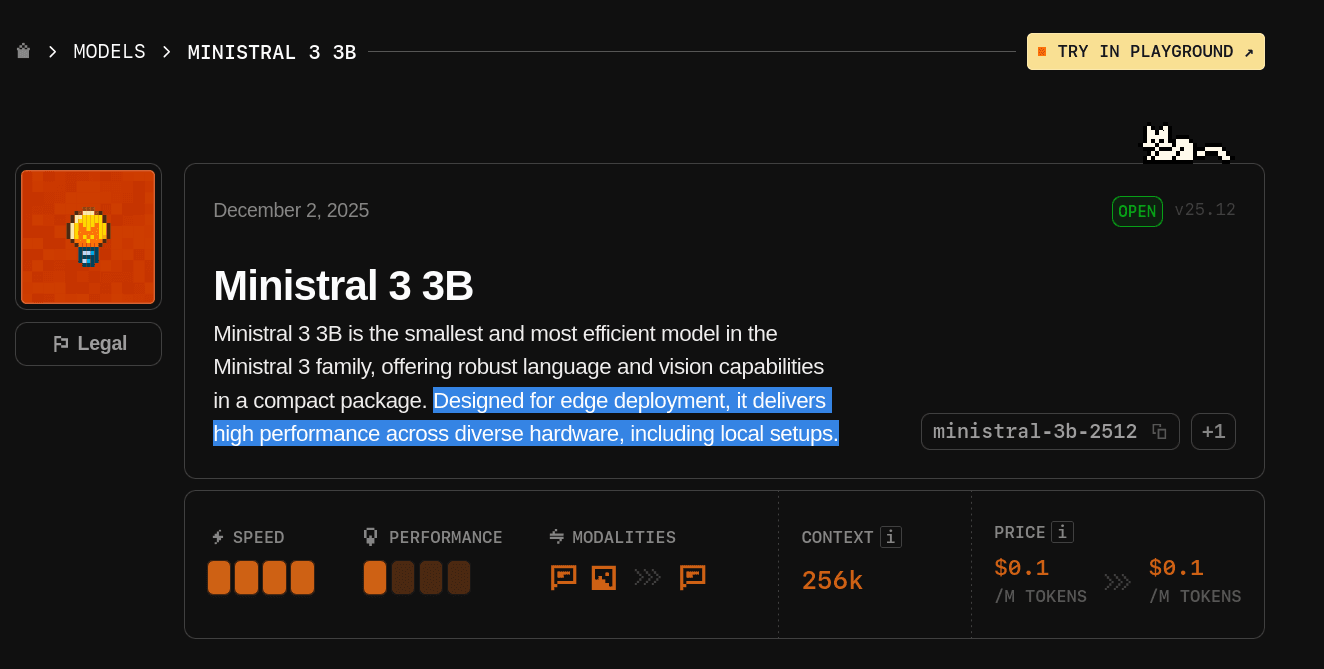
Here is the model’s token context window and pricing.
Token Context Window: It comes with a 256K token context window, which is impressive for a model of this size. For reference, the recent Claude Opus 4.5 model, explicitly built for agentic coding, comes with a 200K-token context window.
Pricing: Because it is open source, you can access it for free by running it locally. If you use it through the Mistral playground, pricing starts at $0.1 per million input tokens and $0.1 per million output tokens, which is almost negligible. It honestly feels like the pricing is there just for formality.
Besides its decent context window and fully open-source nature, these are the major features of Ministral 3 3B.
Vision: Enables the model to analyze images and provide insights based on visual content, in addition to text.
Multilingual: Supports dozens of languages, including English, French, Spanish, German, and more.
Agentic: Offers strong agentic capabilities with native function calling and JSON output, which we will cover shortly.
Local: Runs completely locally in your browser with WebGPU support.
Here is a small demo of the model running directly in the browser:
rapidsave.com_ministral_webgpu_run_mistrals_new_multimodal-vwrcg6vk9t4g1.mp4
To actually get a feel for running a model locally in the browser, head over to this Hugging Face Space: mistralai/Ministral_3B_WebGPU
💡 NOTE: For most users, this will work out of the box, but some may encounter an error if WebGPU is not enabled or supported in their browser. Make sure WebGPU is enabled based on the browser you are using.
When you load it, the model files, roughly 3GB, are downloaded into your browser cache, and the model runs 100 per cent locally with WebGPU acceleration. Transformers.js powers it, and all prompts are handled directly in the browser. No remote requests are made. Everything happens locally.
How cool is that? You can run a capable multimodal model entirely inside your browser, with no server involved.
Running Ministral 3 3B Locally
In the above example, you see how the model performs so well with vision capabilities (live video classification). Now, let's see how well this model makes tool calls. We will test it by running the model locally on our system.
For this, there are generally two recommended approaches:
vLLM: Easy, fast, and cheap LLM serving for everyone.
Good old Ollama: Chat & build with open models.
You can go with either option, and generally speaking, the vLLM approach is a lot easier to get started with, and that's what I'd suggest, but...

I kept hitting a CUDA out-of-memory error, so I went with Ollama with the quantised model. I have had a great experience with Ollama so far. The model will be sufficient for our use-case demo.
Step 1: Install Ollama and Docker
If you don't already have Ollama installed, install it on your system by following the documentation in the Ollama Installation Guide.
It's not compulsory, but we will use the OpenWebUI through the Docker container, so if you plan to follow along, make sure you have Docker installed.
You can find the Docker installation guide here: Docker Installation.
Step 2: Download Ministral 3 3B Model and Start Ollama
Now that you have Ollama installed and Docker running, let's download the Ministral 3 3B model and start Ollama.
ollama pull ministral-3:3b⚠️ CAUTION: If you don't have sufficient VRAM (Virtual RAM) and decent specs on your system, your system might catch fire when running the model. 🫠
If so, go with the quantised model instead, as I did.
ollama pull ministral-3:3b-instruct-2512-q4_K_MNow, start the Ollama server with the following command:
ollama serveOnce the model is downloaded and the server is running, you can quickly test it in the terminal itself.
ollama run ministral-3:3b-instruct-2512-q4_K_M "Which came first, the chicken or the egg?"If you get a response, you are good to go.
Step 3: Run Ollama WebUI
To just talk with the model, the CLI chat ollama run works perfectly, but we need to add some custom tools to our model.
For that, the easiest way is through the Ollama WebUI.
Download and run the Ollama WebUI with the following command:
docker run -d --network=host \\
            -e OLLAMA_BASE_URL=http://127.0.0.1:11434 \\
            -v open-webui:/app/backend/data \\
            --name open-webui --restart always \\
            ghcr.io/open-webui/open-webui:main
That command starts Open WebUI in Docker and sets it up to talk with the local Ollama server we just started with the ollama serve command.
docker run -druns the container in the background (detached).—network=hostputs the container on the host network, so it can reach services on your machine using127.0.0.1(localhost).-e OLLAMA_BASE_URL=http://127.0.0.1:11434Tells Open WebUI where your Ollama server is.-v open-webui:/app/backend/dataCreates a persistent Docker volume to keep your Open WebUI chat history.--name open-webuiName the container.—-restart alwaysMakes it auto-start again after reboots or crashes.ghcr.io/open-webui/open-webui:mainis the image being run (themaintag).
To see if it all worked well, run this command:
docker psIf you see a container with the name open-webui and the status Up, You are good to go, and you can now safely visit: http://localhost:8080 to view the WebUI.
Step 4: Add Custom Tools for Function Calling
Once you're in, you should see the new model ministral-3:3b-instruct-2512 in the list of models. Now, let's add our custom tools.
First, let's test it with local tools, which are smaller Python functions that the model can call.
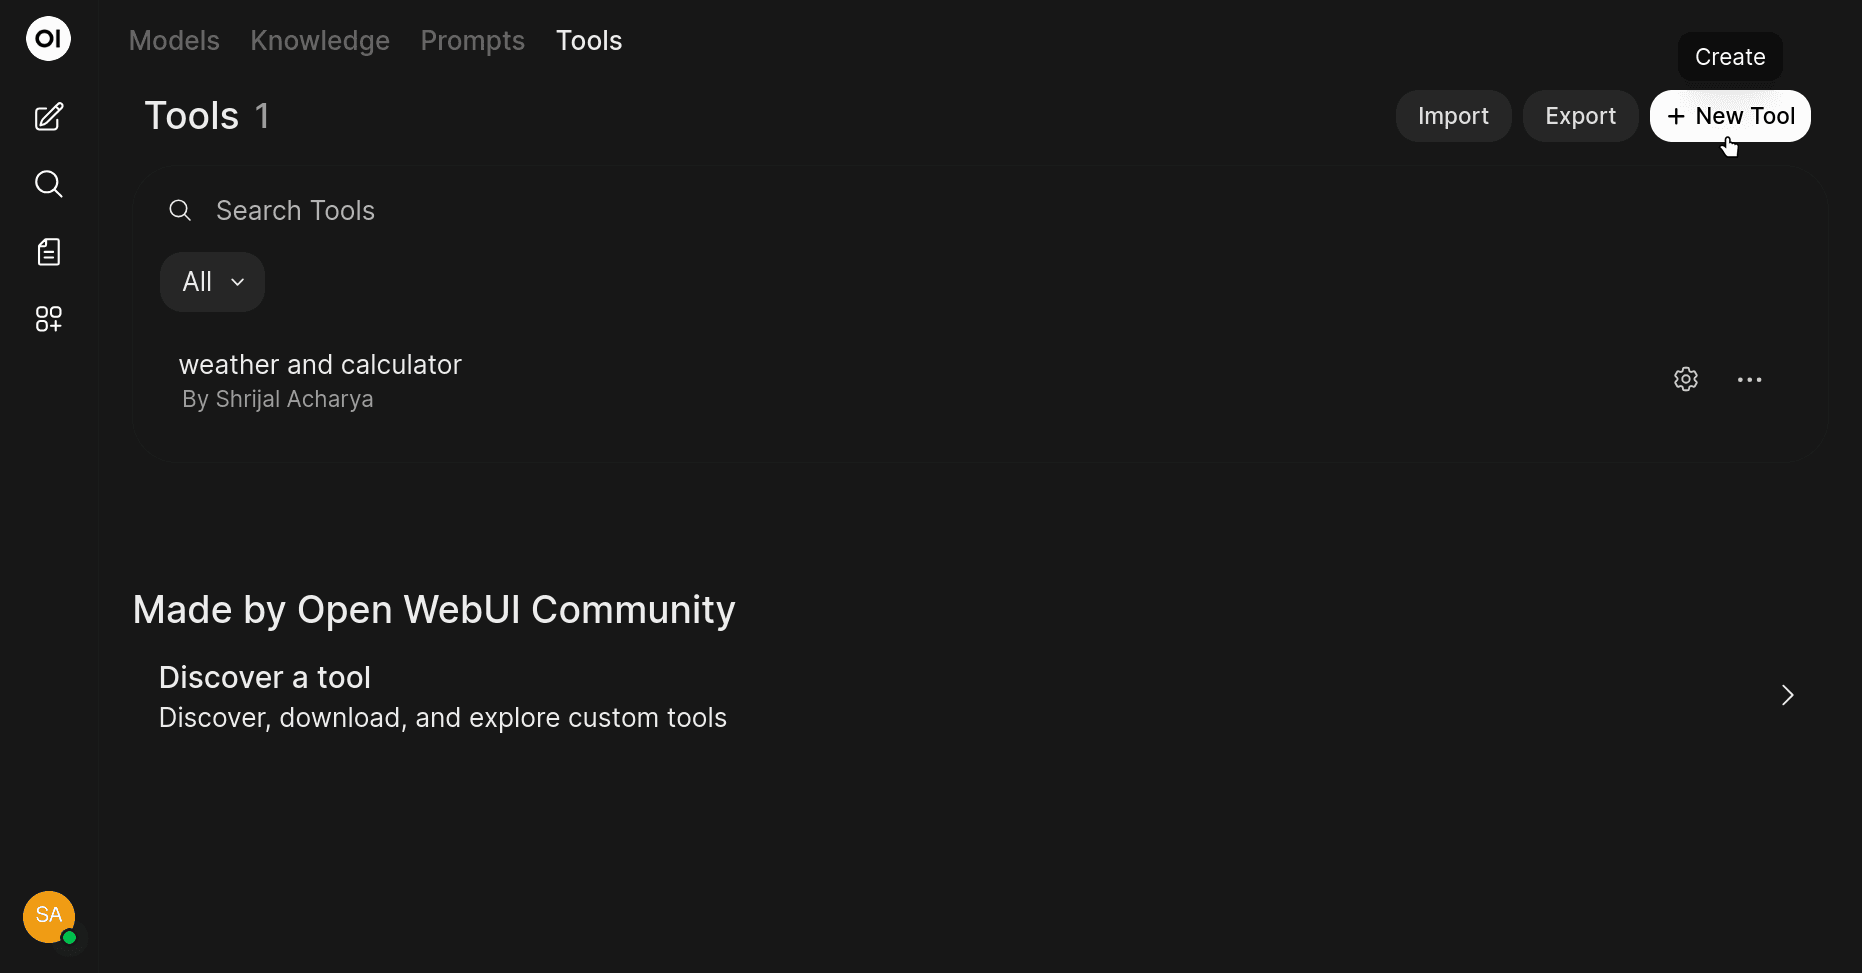
Head over to the Workspace tab in the left sidebar, and in the Tools section, click on the "+ New Tool" button, and paste the following code: Local Tools
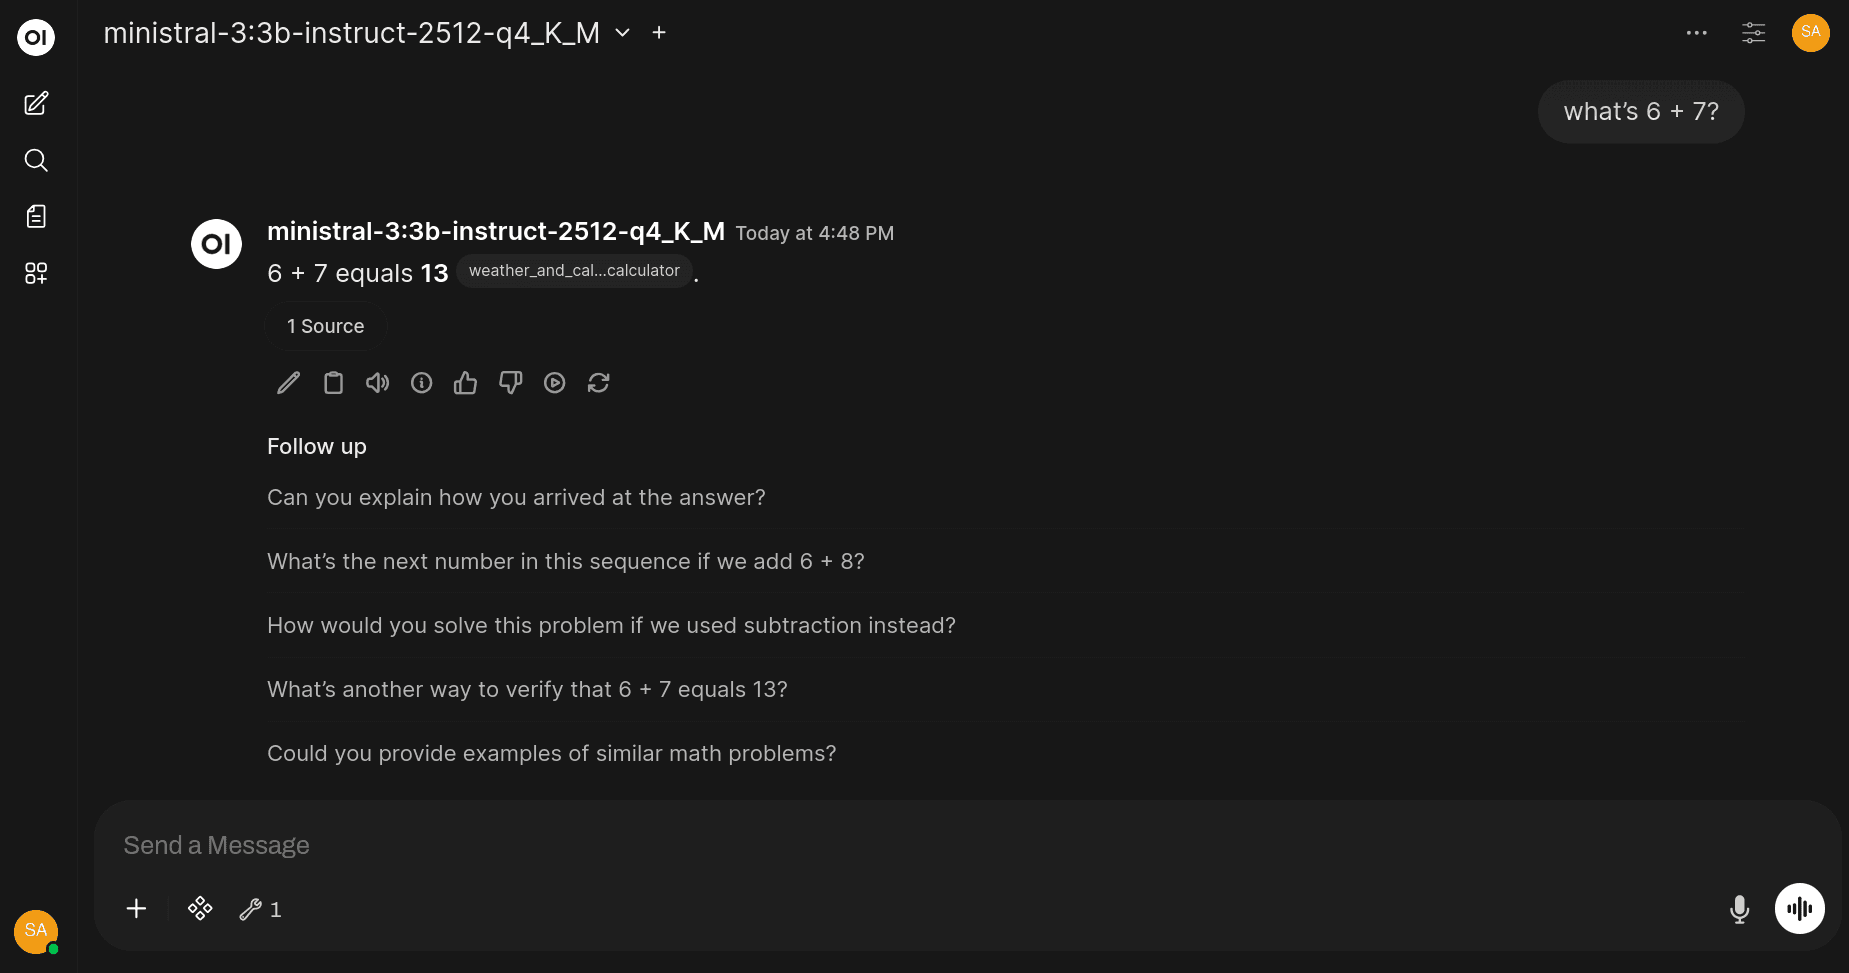
Now, in a new chat, try saying something like:
"What's 6 + 7?"
The model should use our added tool to answer the question.
Step 5: Add Remote MCP Tools for Function Calling
But that's not fun. 😪 We want to use tools that are hosted remotely, right?
For that, we can use Composio MCP, which is well-maintained and supports over 500 apps, so why not?
Now we need the MCP URL... For that, head over to the Composio API Reference.
Add your API key and the user ID, and make a request. You should receive the MCP URL in JSON format. Keep a note of the URL.
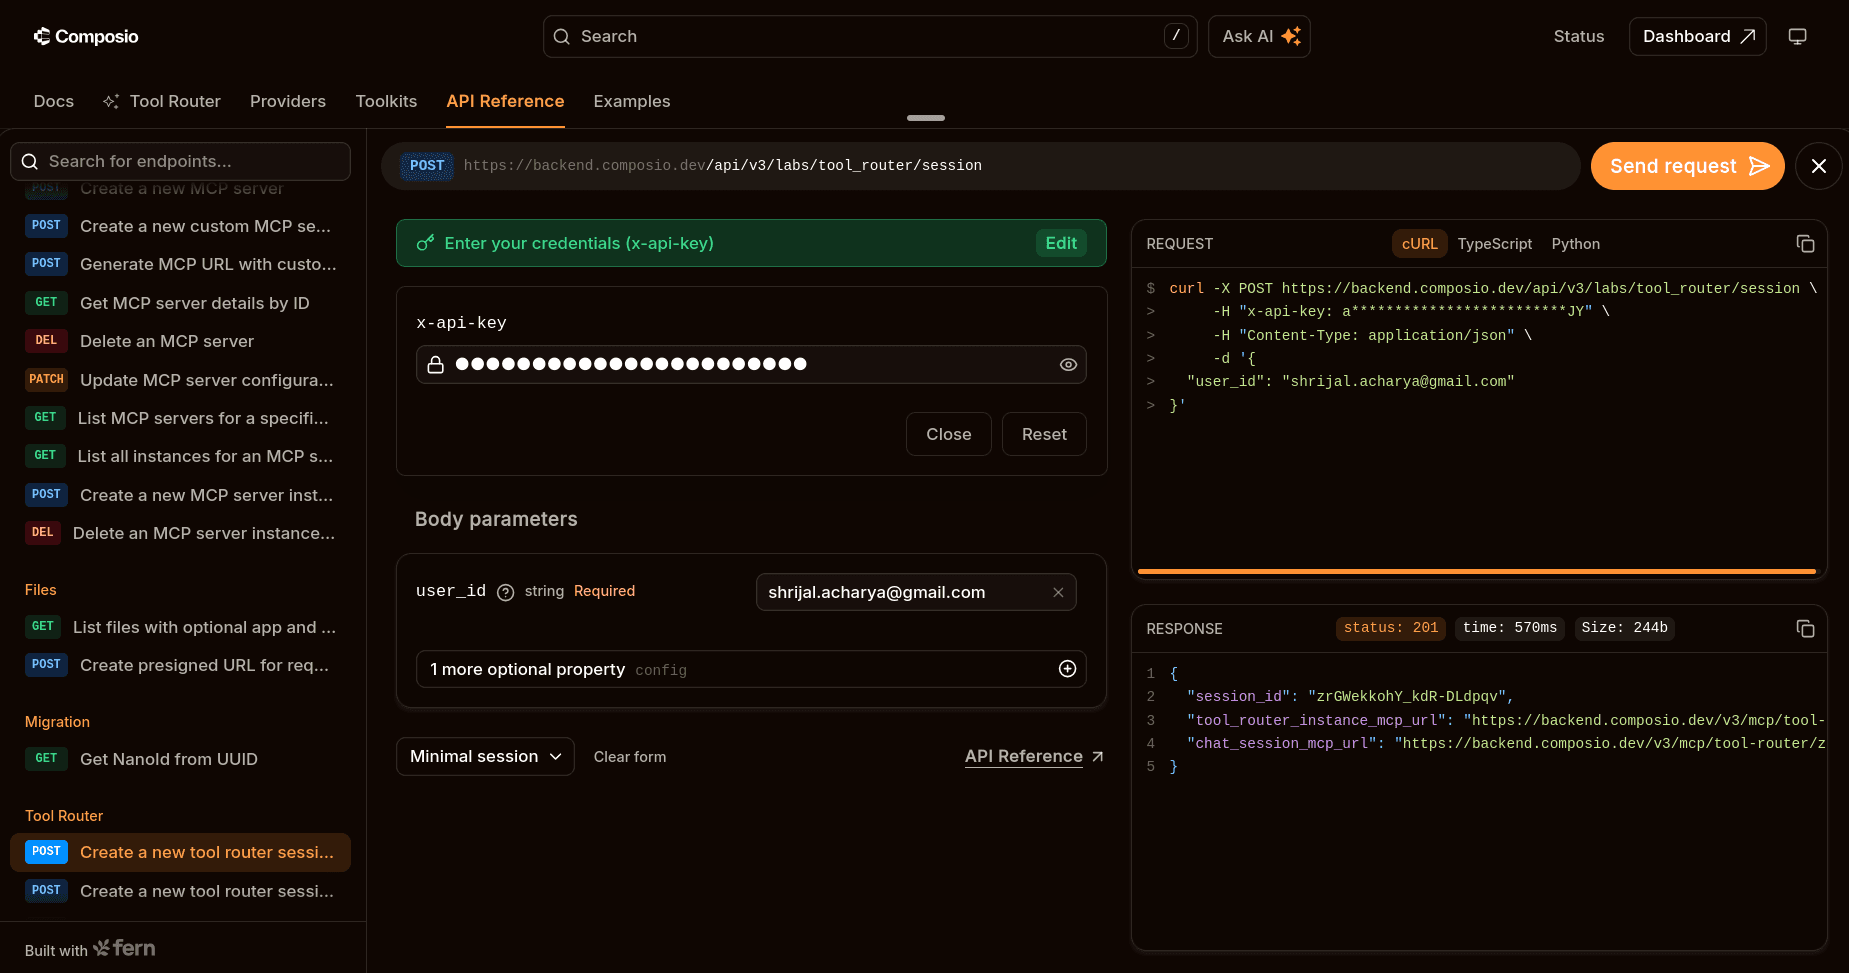
💡 But is this the only way? No, this is just a quick way I use to get the URL back without any coding. You can get it using Python/TS code as well.
Now, you're almost there. All you need to do is add a new MCP server with this URL.
In Ollama, click on your profile icon at the top, under Admin Panel, click on the Settings tab, and under External Tools, click on the "+" button to add external servers.
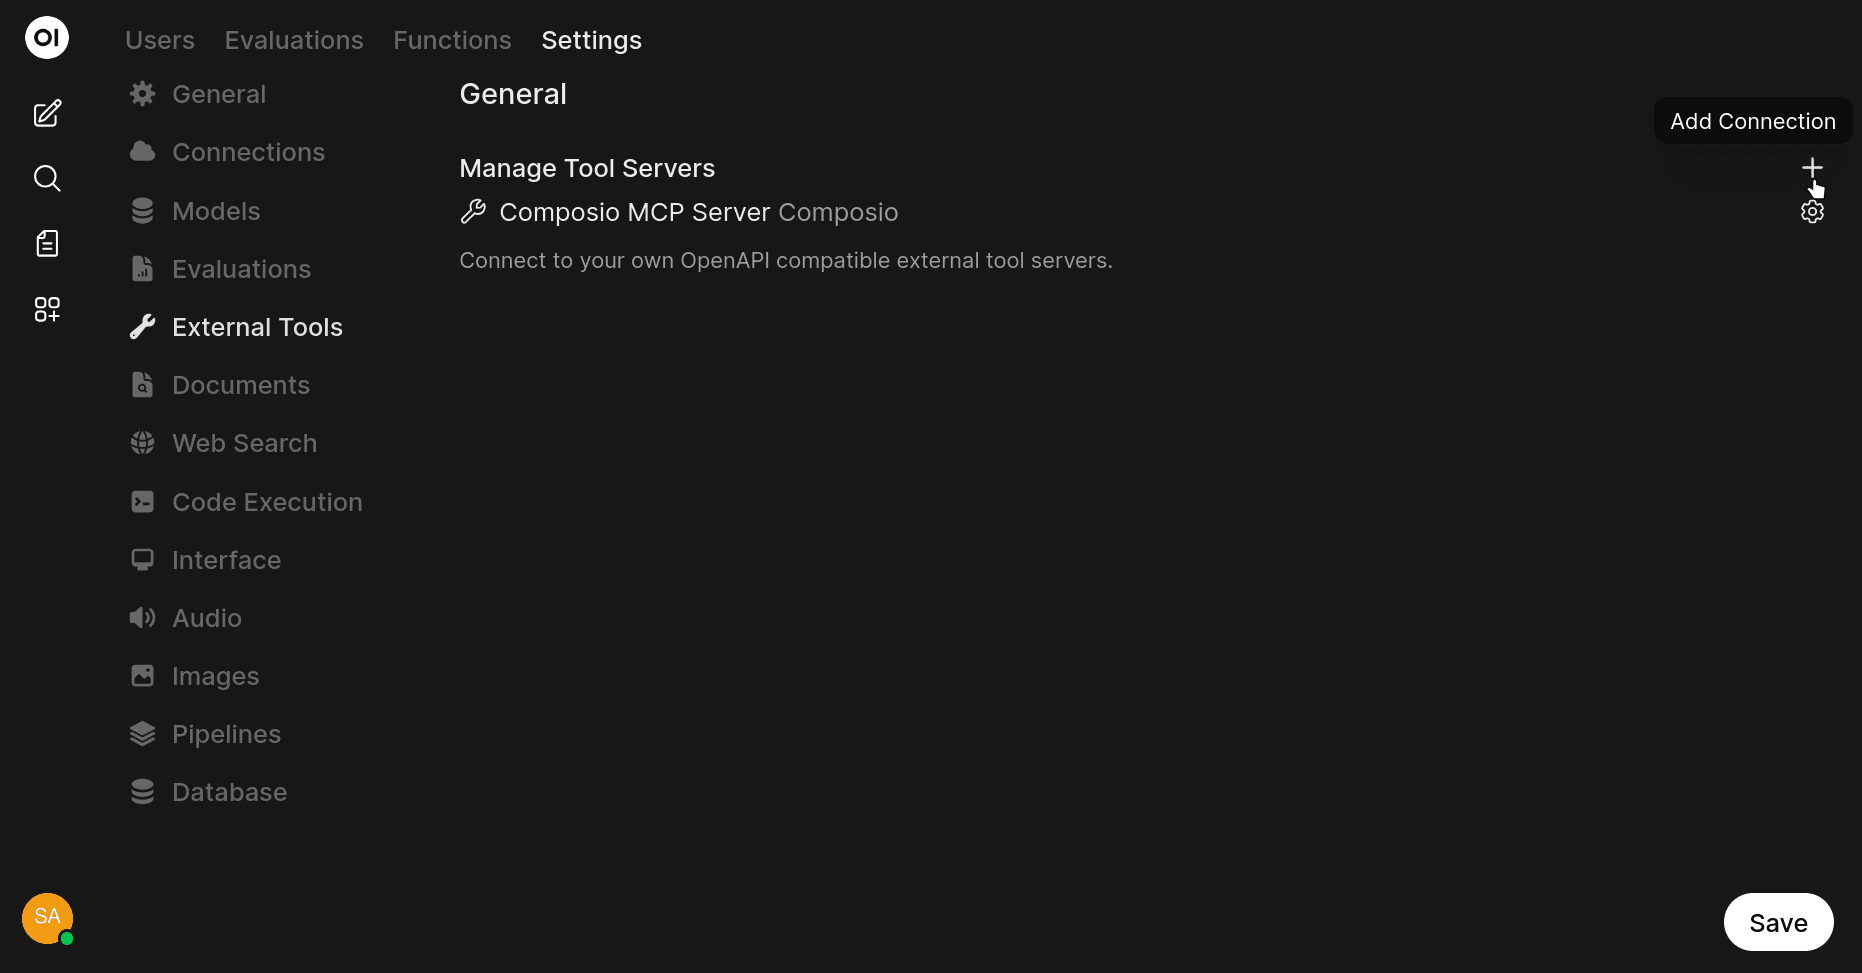
In the dialog box, make sure that you switch to MCP Streamable HTTP from OpenAPI, and fill in the URL and give it a nice name and description.
For Authentication, check None; we will handle authentication with the additional header "x-api-key". In the Headers input, add the following JSON:
{
  "x-api-key": "YOUR_COMPOSIO_API_KEY"
}
Once that's done, click on Verify Connection, and if everything went well, you should see "Connection Successful." That's pretty much all you need to do to use local and remote tools with the Ministral 3 3B model using Ollama.

The steps here will be pretty much the same for any other models that support tool calling.
Here's an example of the model returning a response after doing tool calls:
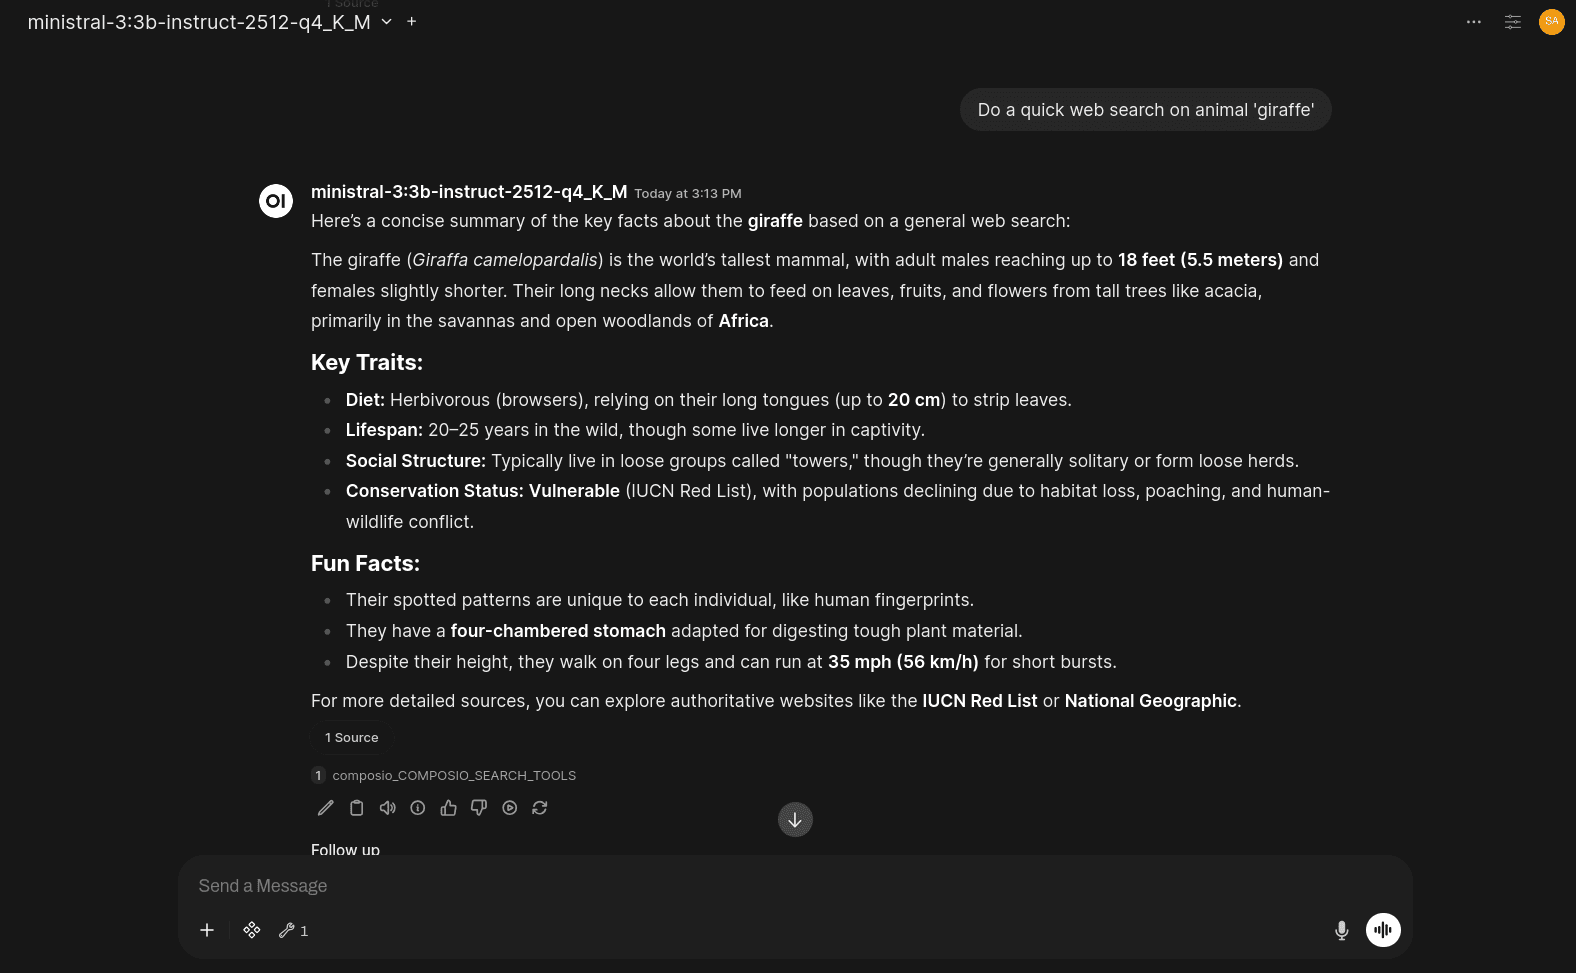
💡 NOTE: The model might take quite some time to answer the question and perform tool calls, and that pretty much depends on your system as well.
If you feel something is not working as expected, you can always view the logs of your Ollama WebUI.
docker logs -f open-webui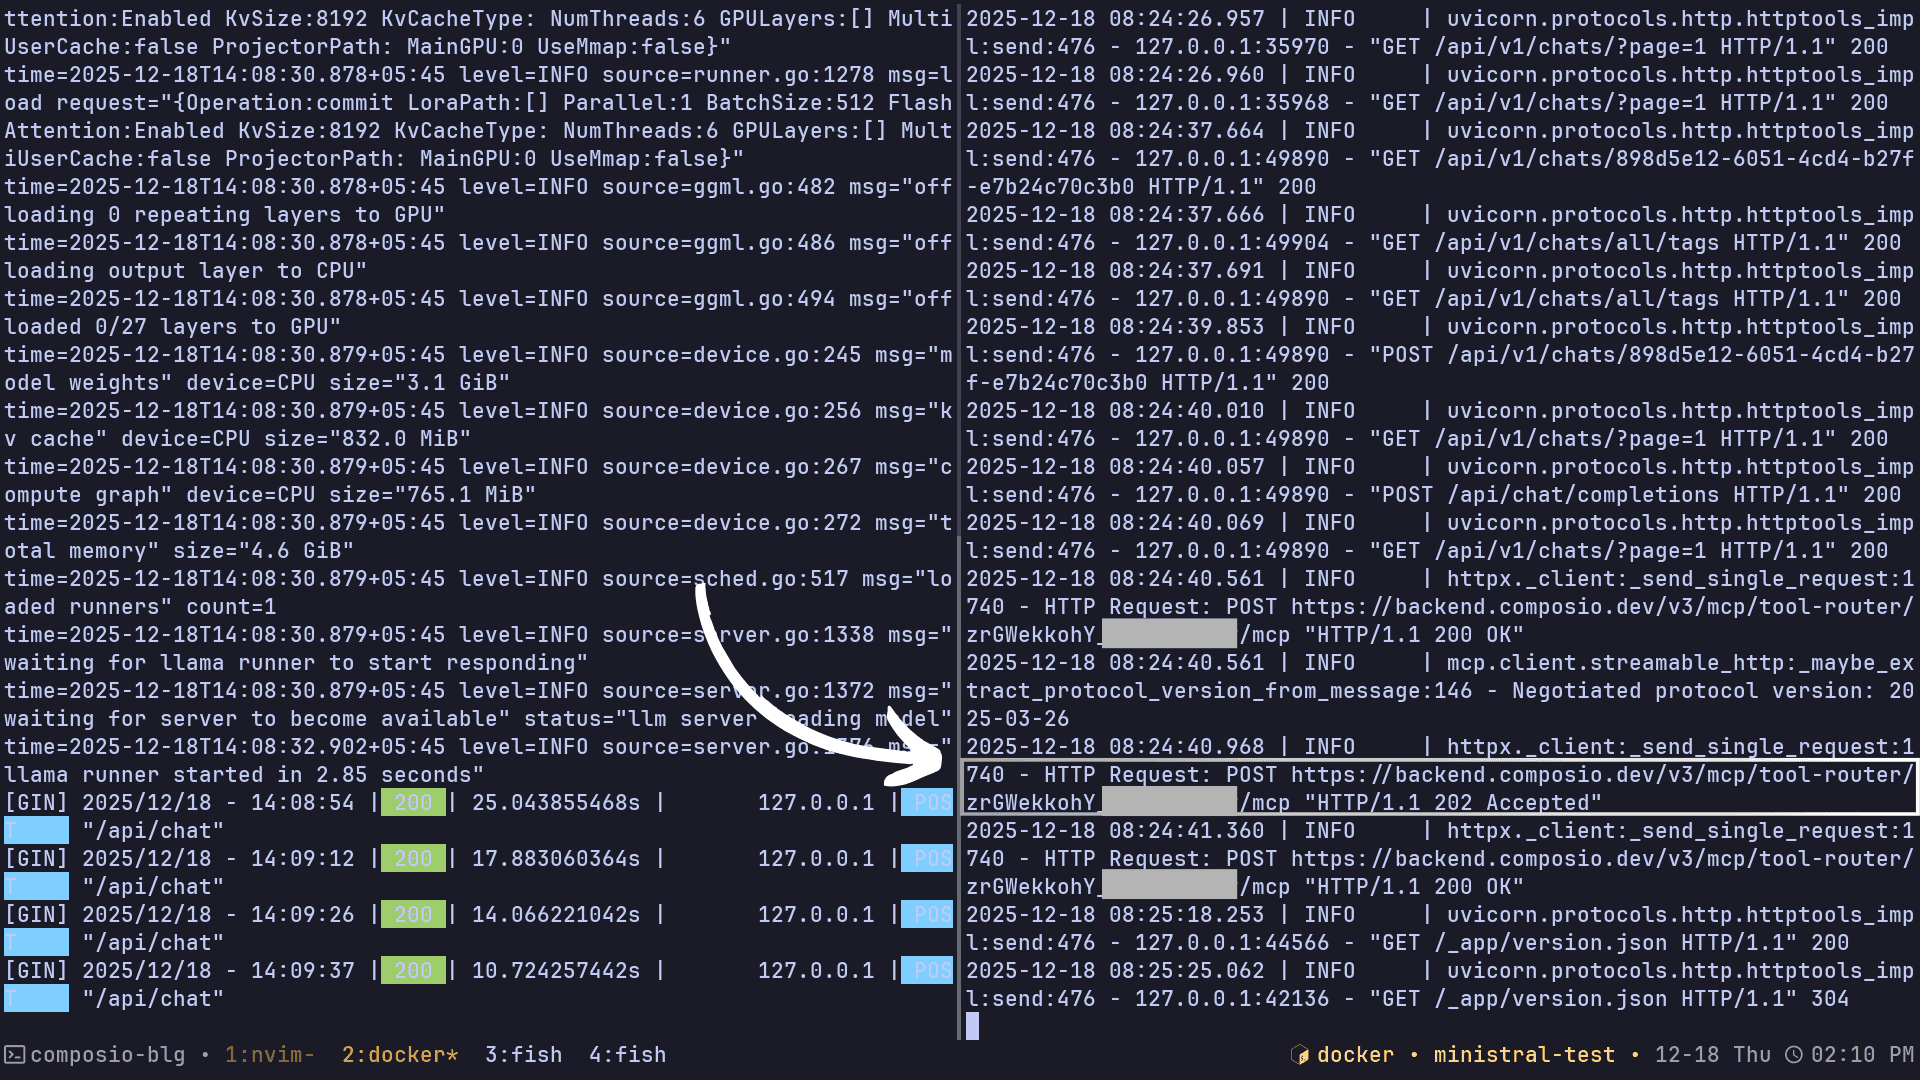
Next Steps
This entire demo was done using Ollama and Ollama WebUI. See if you can get it working with vLLM and Ollama WebUI. The steps will be pretty similar.
Just follow the docs for installing vLLM on your system, and follow the guide to get you going.
Let me know if you can make it work.
Conclusion
That's it. We just ran a lightweight, quantised Ministral 3 3B model in Ollama, wrapped it with Open WebUI, and showed it can perform real tool calling, both with small local Python tools and remote MCP tools via Composio.
You now have a simple local setup that lets the model do more than chat. The best part is that the steps won't change across models, and you can quickly build your own local model that's entirely yours.
Now, try adding more toolkits and models (if your system can handle it) and experiment. You already have a clear understanding of Ministral 3 3B and running models locally with Ollama. Apply it to your actual work, and you'll thank me later.
Well, that's all for now! I will see you in the next one.
Frequently Asked Questions
What are the minimum system requirements to run Ministral 3 3B locally?
While the exact requirements depend on whether you use the full or quantised model, you'll generally need at least 8GB of RAM and preferably a GPU with 4GB+ of VRAM. If you don't have sufficient VRAM, use the quantised version (q4_K_M), which is much lighter on resources. The model can run on a CPU only, but it will be significantly slower.
Can I use Ministral 3 3B with other tools besides Composio MCP?
Yes! While this guide demonstrates using Composio MCP for remote tools, you can integrate any MCP-compatible server or create your own custom Python tools in Open WebUI. The same setup works with OpenAPI specifications and other tool formats supported by Open WebUI.
Why is the model taking so long to respond when using tool calls?
Response time depends on several factors: your system specs, whether you're using the quantised version, CPU vs GPU inference, and the complexity of the tool being called. Tool calling adds overhead because the model must parse the request, decide which tool to use, execute it, and then formulate a response. Running on CPU or lower-end hardware will significantly increase response times.
Do these steps work with other LLMs besides Ministral 3 3B?
Absolutely! The setup process is nearly identical for any model that supports function calling and is available in Ollama. You can swap out
ministral-3:3bfor models like Llama 3, Mistral, or Qwen, and the same Open WebUI + MCP integration will work. Just make sure the model you choose explicitly supports tool calling.