At DevDay on October 6, 2025, OpenAI launched AgentKit, a toolkit that makes it easier to build AI agents that can use real apps and data. The new Agent Builder lets you connect these agents to external tools via Model Context Protocols (MCPs).
Gmail is a good starting point because it is simple to connect and instantly useful. Your inbox already holds clear tasks, messages to read, replies to send, and updates to follow. That makes it a natural place to see how an agent can take action rather than answer questions.
We are going to connect Gmail to Agent Builder and see what happens when your agent learns to handle email.
Let’s goooo!
What is Agent Builder?
Agent Builder is part of OpenAI’s new AgentKit. It gives you a place to build AI agents that can actually get work done. Everything happens in a single environment, from planning your agent’s steps to testing its performance.
The interface feels familiar if you have used any workflow or automation tool before. You can drag and connect nodes to design how your agent thinks and acts. Each node represents an action, a decision, or a connection to a tool. You see the full logic without digging through code.
Here is why developers and beginners like it:
You can connect external apps with a few clicks.
You can add logic and conditions visually instead of writing long scripts.
You can test your agent’s actions in real time and see results instantly.
You can set limits and control what your agent can do.
Agent Builder removes much of the setup work and lets you focus on what your agent should actually accomplish. It is simple to start with and powerful enough to take it further as your ideas grow.
What is Rube MCP?
Rube MCP is a connector that links OpenAI’s Agent Builder with the apps you use every day. It acts as a single bridge for your agent to access 100s of tools like Gmail, Slack, or Notion.
It follows the same Model Context Protocol standard as Agent Builder, which means everything fits together smoothly. You don’t have to manage multiple APIs or complex authentication. Rube handles that in the background.
Once connected, your agent can use real data, send messages, and complete actions in other apps, all from one place.
Prerequisites
Before you connect Gmail to Agent Builder, make sure the following is ready.
You need access to the OpenAI Agent Builder. Log in with an account that can create or edit agents.
You need a Google account with Gmail enabled. This is the account your agent will connect to when sending or reading emails.
You will also need the Rube MCP set up as a connector. It acts as the link between Gmail and Agent Builder. Once it’s active, Gmail will appear as an available MCP inside the Builder.
That is all you need. With these three pieces in place, you are ready to connect Gmail and see your agent in action.
How to Add Gmail MCP in Agent Builder
To connect Gmail, you’ll use Rube MCP as the bridge between OpenAI’s Agent Builder and Gmail. Rube handles the backend setup so your agent can securely talk to Gmail without custom code.
Here’s how to set it up from start to finish.
Step 1: Get Your Rube MCP Endpoint
Before connecting Gmail inside Agent Builder, you first need to set it up in Rube. This gives you the endpoint and token your agent will use to connect.
Follow these steps:
Go to Rube’s website and sign in or create an account.
Open your Dashboard.
From the left menu, select Apps and search for Gmail.
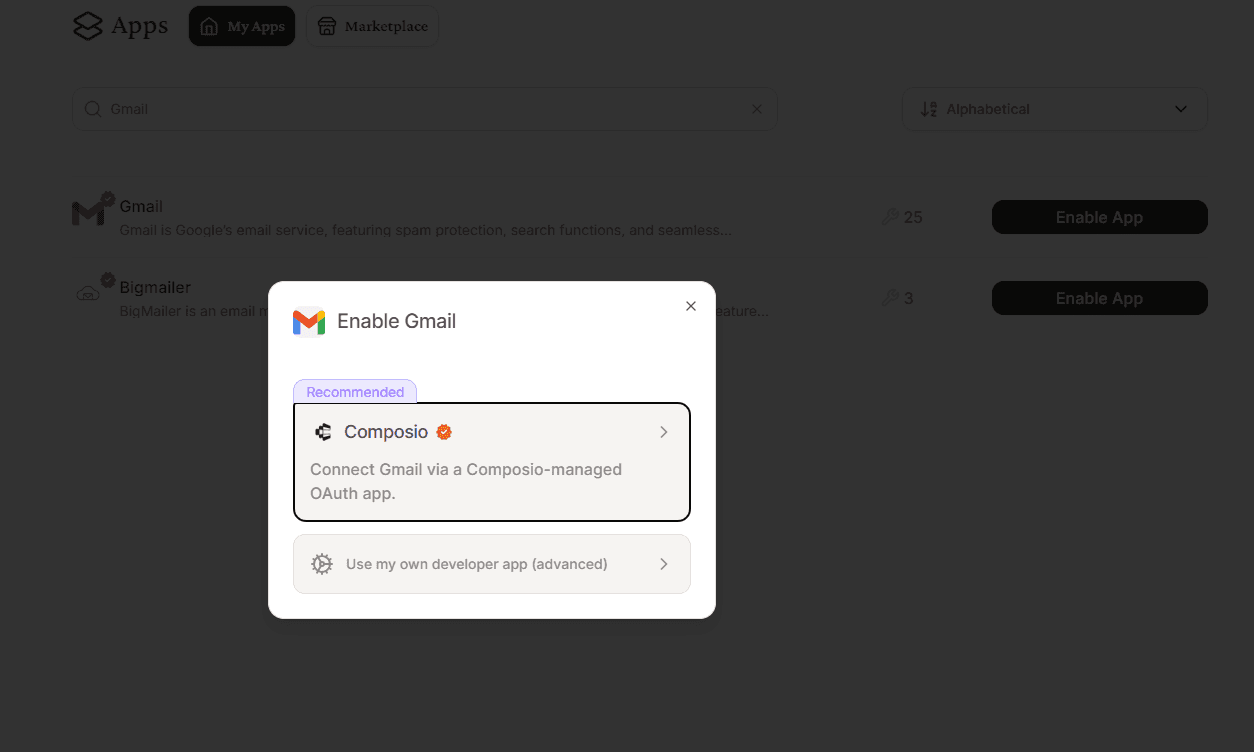
Select the required scopes. All scopes are selected by default, so if you’re fine with full access, leave them as they are.
Complete the authentication process and approve the required permissions.
Once authenticated, you will see a notification confirming that Gmail is connected.
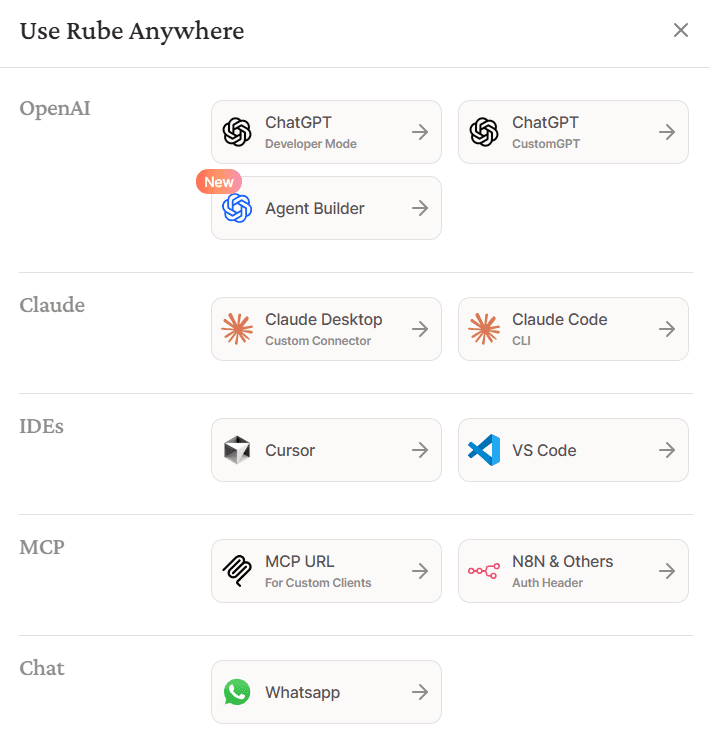
Click the Install button and choose the Agent Builder option.
Scroll down and copy your MCP Endpoint.
Generate a Token as well and save both; you will need them in the next step.
This setup provides the secure connection details that allow OpenAI’s Agent Builder to communicate with Gmail via Rube.
Step 2: Open Agent Builder
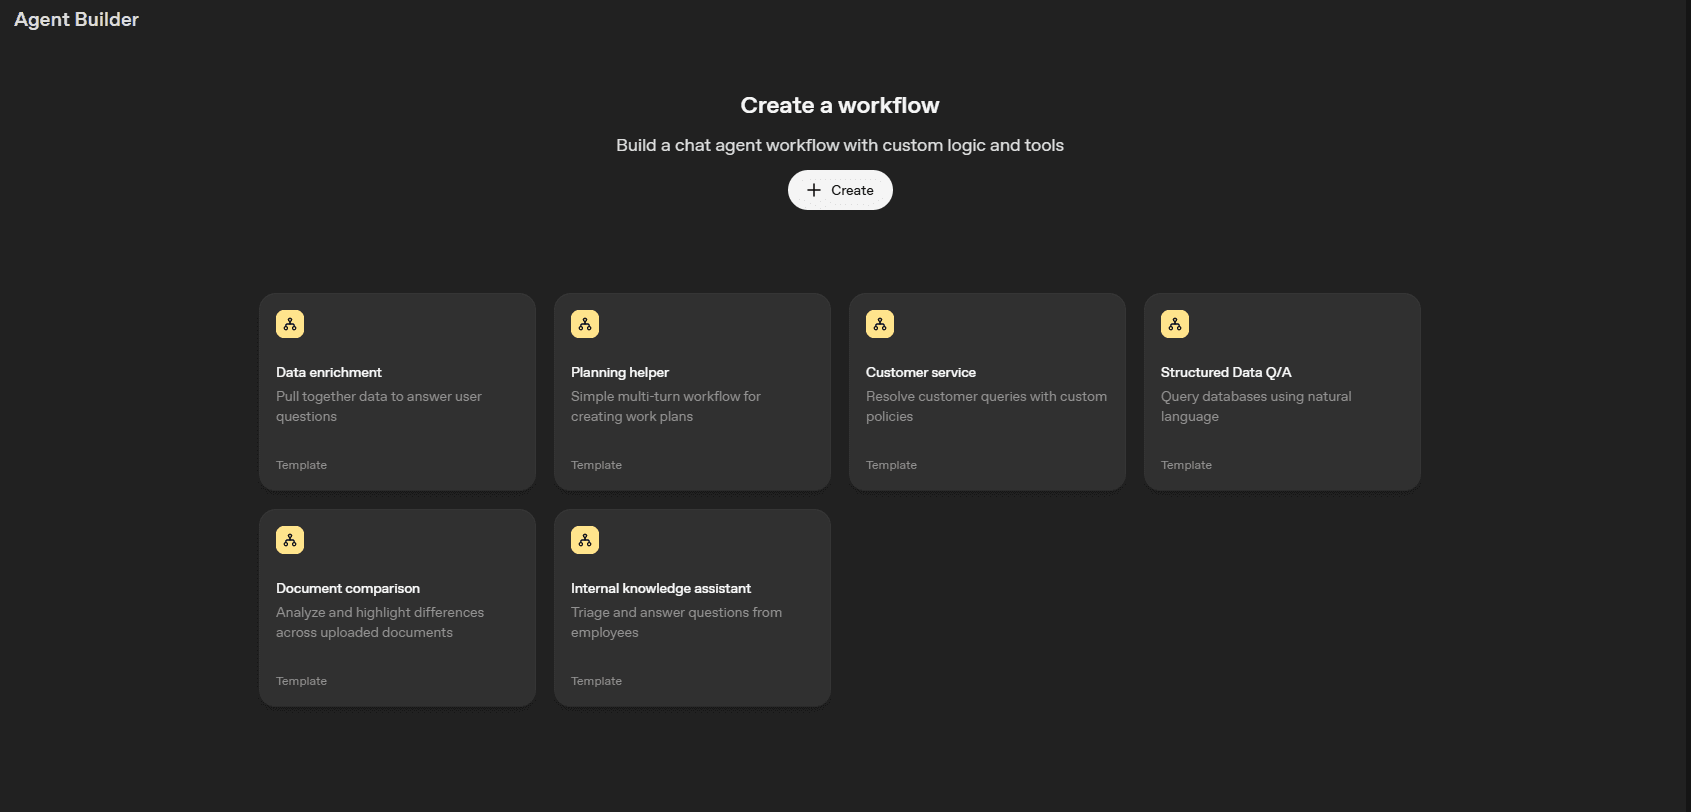
Go to the OpenAI Agent Builder.
Create a new agent or open an existing one.
You’ll land on the main canvas, where you can design your agent’s workflow and connect tools.
Step 3: Add the Rube MCP Server
There are two ways to add an MCP server: you can use the MCP node to do that, or you can go to agent node and open Settings> Tools > MCP server
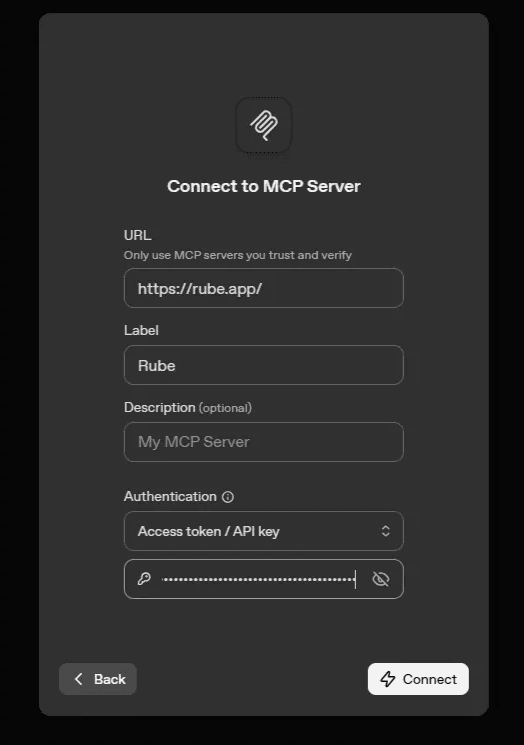
In that box, click the Add button to connect a new app.
Choose the + Server option.
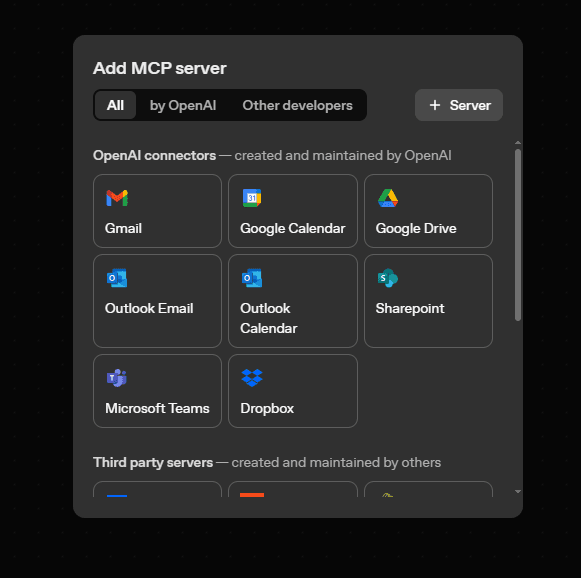
Paste the endpoint you copied from Rube in the previous step.
Add a label, for example
Rube.Enter the Token you generated in Rube.
Click Connect.
You will see a MCP is now connected with the agent successfully under tools.

Build a Smart Gmail Workflow in Agent Builder
This workflow checks your Gmail inbox for unread emails using Rube MCP, and if any are found, it sends you a short summary email.
If there are no unread messages, the workflow simply ends.
It’s perfect for staying on top of your inbox without constantly checking Gmail yourself.
Step 1: Set Up the Main Flow
Open your agent in Agent Builder.
On the main canvas, you should already see the Start Node.
Add three more nodes:
Guardrails Node
Agent Node (for Gmail actions)
End Node
Your layout should look like this:
Start → Guardrails → Gmail Agent → EndThis simple layout ensures that:
The Guardrails node checks your Gmail connection first.
The Gmail Agent node only runs if everything is fine.
The End Node closes the workflow cleanly.
Step 2: Configure the Start Node
This node begins your workflow.
It simply signals where the workflow begins when you click Run (or if you later connect this agent to an external trigger, such as a webhook or another system).
Step 3: Add the Guardrails Node
Add a Guardrails Node and connect it after the Start Node.
In the Guardrails settings, enable the “Jailbreak” option.
This makes sure your workflow stays secure by blocking any malicious or injected instructions that could try to override your agent’s rules or access Gmail in unsafe ways.
Enabling Jailbreak keeps your agent’s behaviour controlled and prevents prompt manipulation before continuing to the next step.
Connect Pass → Gmail Agent
Connect Fail → End
✅ Why this matters:
It prevents workflow errors when your Gmail connection token expires or if Rube MCP becomes unreachable.
Step 4: Add the Gmail Agent Node
Add a new Agent Node and name it Gmail Agent (Unread Email Notifier).
Connect it from Guardrails → Pass.
Now, connect your Gmail MCP:
In the left sidebar, click Tools → MCP.
Click Add → choose + Server.
Paste your Rube MCP Endpoint and Token (from your Rube dashboard).
Click Connect.
Once connected, Gmail will appear as an available MCP.
Now that Gmail is active, go to the Prompt Tab and enter this prompt:
Use the connected Gmail MCP to fetch all unread emails from the inbox.

If there are any unread emails:
- Show each sender’s name and email.
- Include the subject line.
- Count how many unread messages exist.
- Summarize each email briefly (one or two lines per email).
- Send me an email using Gmail MCP with:
  - Subject: "Unread Emails Summary"
  - Body: Include the total number of unread messages and their summaries.

If there are no unread emails:
- Do nothing and end the workflow.
✅ What this does:
The agent first checks your inbox for unread messages.
If unread messages exist, it summarizes them and emails the summary back to you automatically.
If there are none, it ends quietly.
Step 5: Add the End Node
Add an End Node to your canvas.
Connect:
Guardrails (Fail) → End
This ensures your workflow always terminates gracefully, whether it runs successfully or fails a safety check.
Step 6: Review the Full Layout
Here’s your completed workflow structure:
Start
   ↓
Guardrails (Check Gmail Connection)
   ├── Pass → Gmail Agent (Unread Email Notifier)
   └── Fail → End
Step 7: Test the Workflow
Click Preview in the top-right corner.
Select Run to execute the workflow.
Observe the output:
If Gmail MCP is connected, the Guardrails node passes.
The agent fetches unread emails.
You receive an email summary if there are new, unread messages.
If it doesn’t run correctly:
Double-check that the Rube MCP endpoint and token are correct.
Make sure Gmail permissions were granted when connecting through Rube.
Retry with a manual trigger.
✅ Output
When unread emails exist, you’ll get an email like this:
If there are no unread emails, the workflow ends without sending anything.
🧠 Optional Enhancement
You can make the workflow smarter by adding a Condition Node after the Gmail Agent:
If output contains "urgent" → send a Slack notification.
Else → End.
This way, your agent can automatically alert you when something important hits your inbox.
Real-World Use Cases
Once Gmail is connected through Rube MCP, your agent can do more than check messages. It can handle repetitive work, organize your inbox, and even help with communication tasks. Here are a few ways to put it to use.
1. Daily Inbox Summary
This workflow checks your inbox every morning and pulls unread emails from the past 24 hours. The agent then summarizes them into a short digest and sends it to your Gmail or Slack.
It’s a simple setup that saves you from scanning through dozens of emails before you even start your day. Instead, you get a clear summary of what actually matters.
2. Turning Emails into Tasks
By linking Gmail with a task manager like Notion, ClickUp, or Asana through Rube MCP, your agent can convert email content into tasks. It scans new emails for phrases like “Please finish this by Monday” or “Can you update this report?” and creates a task automatically.
This keeps your inbox cleaner and ensures that every request becomes something actionable in your workflow.
3. Meeting Prep Assistant
Your agent can read upcoming meeting invites and gather context from related email threads. A few minutes before the meeting, it sends you a short summary with the topic, participants, and key discussion points.
It’s a small automation that helps you stay organized and prepared without digging through old threads.
4. Multi-App Workflows
Rube MCP also lets your agent combine Gmail with other apps. You can create workflows that send email updates to Slack, save attachments to Google Drive, or update project notes in Notion.
This is where things get powerful. Once Gmail is connected, it becomes part of a larger network of tools your agent can use.
Final Verdict
Knowing how each node works is useful, but what really matters is how they connect. The power of Agent Builder comes from understanding how data moves between nodes and how to shape that flow to match your goal.
Once you get that part right, building smart, reliable agents becomes much easier. You’ll know which nodes to use, how to pass data cleanly, and how to turn a simple setup into something that runs well every day.
Agent Builder makes this process smooth for both beginners and developers. It lets you build and test complete workflows without spending time on setup. And with Rube MCP, adding tools like Gmail feels fast and straightforward.
If you’re curious, open Agent Builder, link Rube MCP, and build your first workflow. You’ll pick things up faster than you expect.
Frequently Asked Questions (FAQs)
1. Do I need to know how to code to use Agent Builder?
No! That’s one of the best parts of Agent Builder. You can design logic visually using nodes, just drag, connect, and adjust prompts. No coding is required unless you want to extend functionality or create custom connectors later.
2. Is Rube MCP safe to use with my Gmail account?
Yes. Rube MCP follows Google’s secure OAuth authentication flow, so your login and permissions stay protected. It only accesses the scopes you approve during setup, and you can revoke access anytime from your Google Account’s security settings.
3. Can I connect other apps besides Gmail?
Absolutely. Rube MCP supports a growing list of apps like Slack, Notion, Google Drive, ClickUp, and more. Once your Gmail workflow is running, you can easily expand it, for example, forwarding summaries to Slack or saving attachments to Drive.
4. Can I keep using Rube MCP as I build more complex agents?
Yes. Rube MCP is designed to scale with you. You can start small, like connecting Gmail for simple summaries, and later expand into multi-app workflows without changing your setup. The same Rube connection can handle multiple agents and tools, so you can reuse your integrations instead of rebuilding them each time.