Building AI agents that can interact with GitHub repositories, create issues, review pull requests, and manage workflows is now straightforward with MCP (Model Context Protocol) integration in OpenAI's Agent Builder.
This guide walks you through connecting GitHub MCP to Agent Builder, so your agents can automate GitHub operations without manual API integrations.
What is Agent Builder?
Agent Builder is OpenAI's tool for creating custom AI agents that can interact with external systems and perform actions beyond conversation. With Agent Builder, you can define tools, set up integrations, and deploy agents that automate workflows. Check out this blog post on how to work with Agent Builder.
The key limitation? Setting up integrations typically requires custom code and API management.
That's where MCP comes in.
What is Rube?
Rube is a universal MCP server implementation built on top of Composio’s tool infra. Instead of writing custom OAuth flows or managing API keys for every service, Rube provides a unified MCP interface for over 500 apps like GitHub, Bitbucket, Jira, etc, that seamlessly works with OpenAI's Agent Builder out of the box.
App authentication, token refresh, and API calls are all handled automatically.
Why use Rube?
Your LLM’s context window is sacred; polluting it with useless tools that you’ll never need is heresy. We solved this with Rube MCP, which has only seven tools. Given a task, it loads only the relevant tools into the LLM’s context.
For example, “sending an email on Gmail and updating on Slack “ task will only load relevant actions like drafting an email, sending an email, sending a Slack message, replying to a Slack message in a thread, etc.
This drastically reduces the LLM bloat.
Pre-requisites
Head to the https://platform.openai.com/agent-builder and
Log in with your OpenAI Credentials. If you don’t have one, create it and ensure that you add your billing details
Verify your organisation in the account settings to run the agents in preview mode.
Hosted MCP servers to let the agent access data in third-party services.
Next in the Agent Builder Tab, you will see 3 Tabs and a familiar interface:
Workflows → Published Workflows. By default, a My Flow might be given.
Drafts → All unfinished / not published flows can be found here.
Templates → Predefined templates that work out of the box. Good for starters.
However, we will opt for a blank flow for maximum flexibility.

Agent Builder Platform For reference
Agent Builder comes with default MCP servers from OpenAI (Gmail, Drive, Outlook), but the real power is in adding custom servers. We'll use Rube MCP, which connects to 500+ apps, including GitHub. This lets you combine multiple apps to accomplish complex AI workflows.
How to Add GitHub MCP to Agent Builder
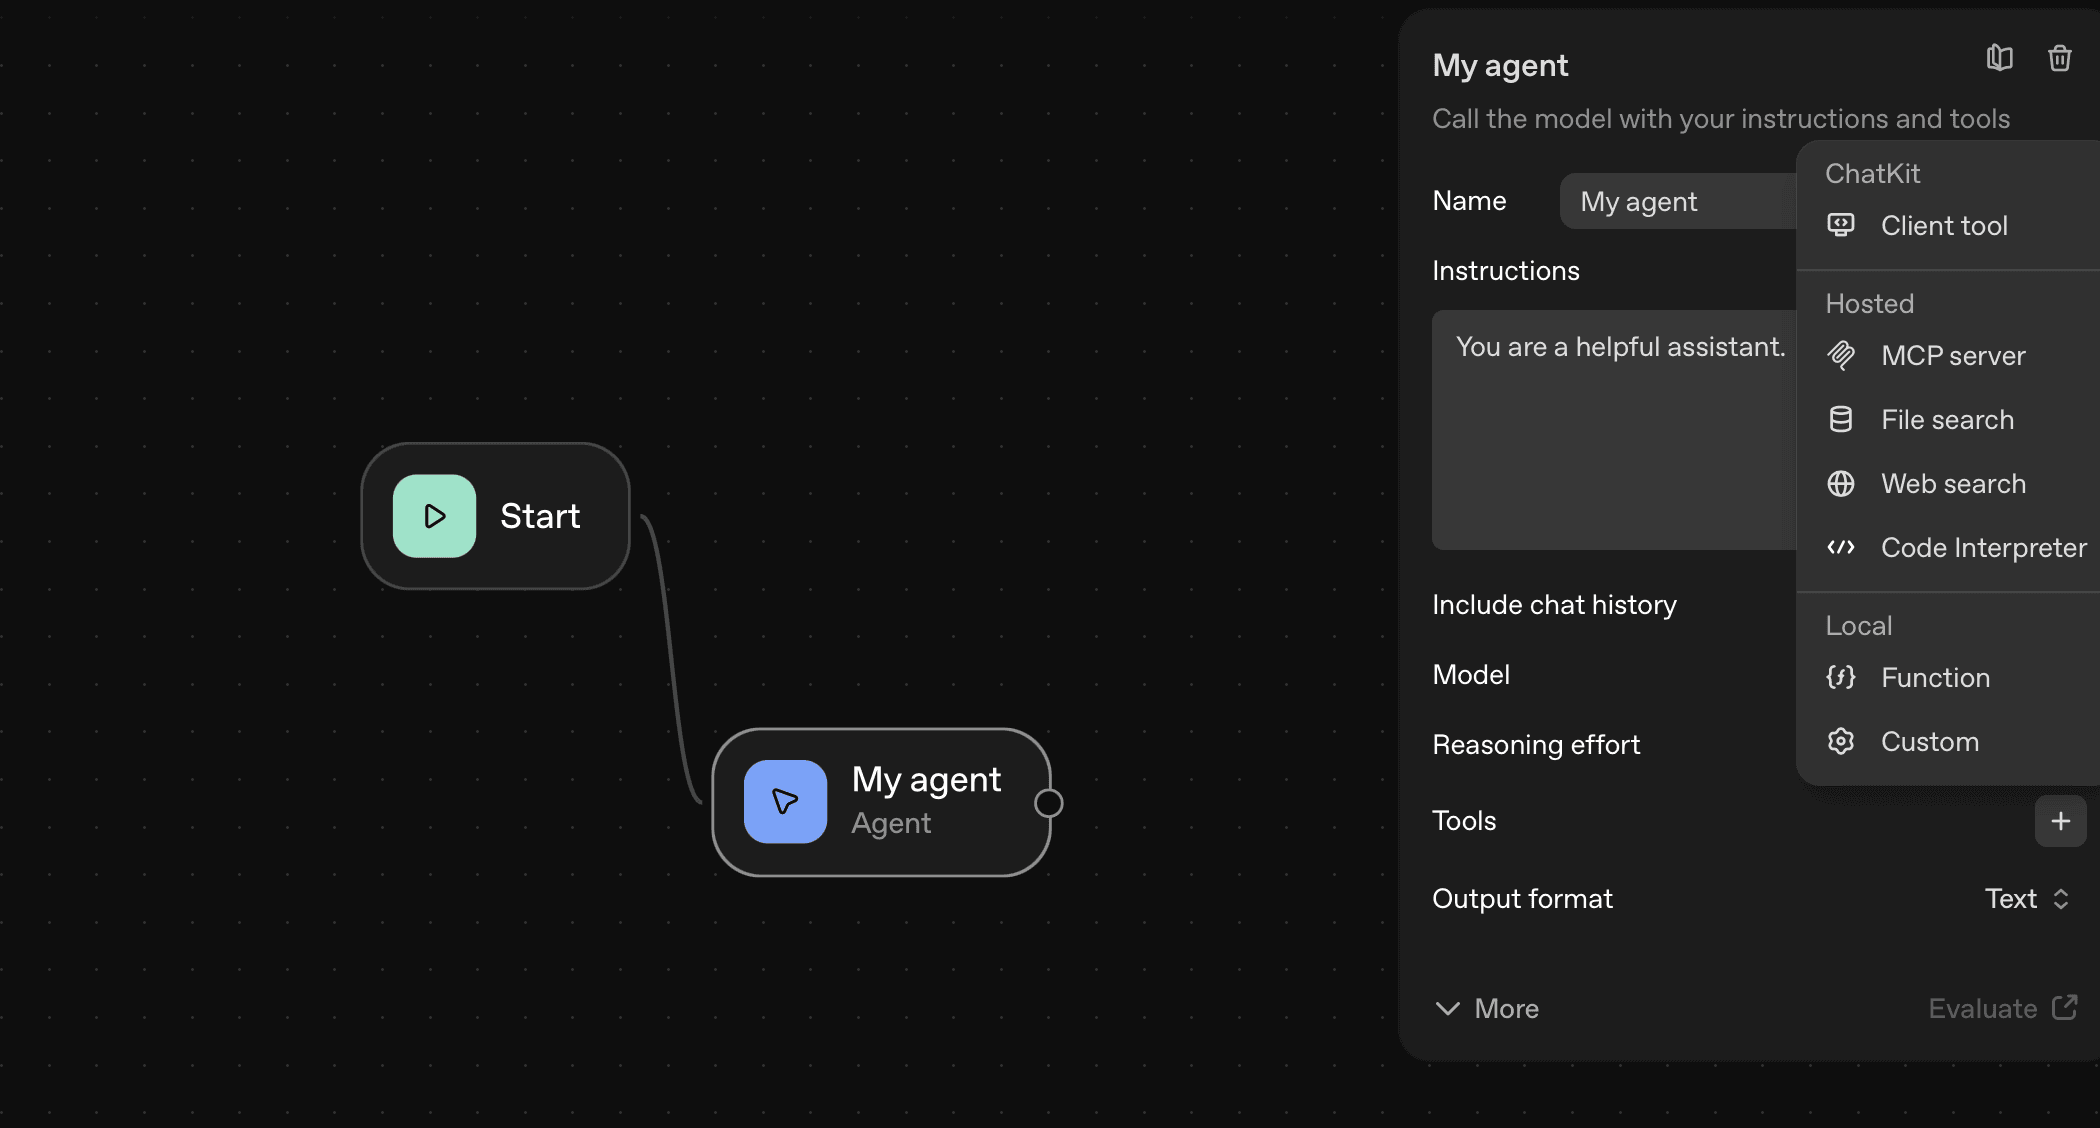
Step 1: Click on your agent
In Agent Builder, click on the Agent node
Then, click on the MCP server
Click + Server
Step 2: Enter Server Details
URL:
https://rube.app/mcpName:
rube_mcpAuthentication: API Key
Step 3: Get Your API Key
Go to rube.app
Click Install Rube
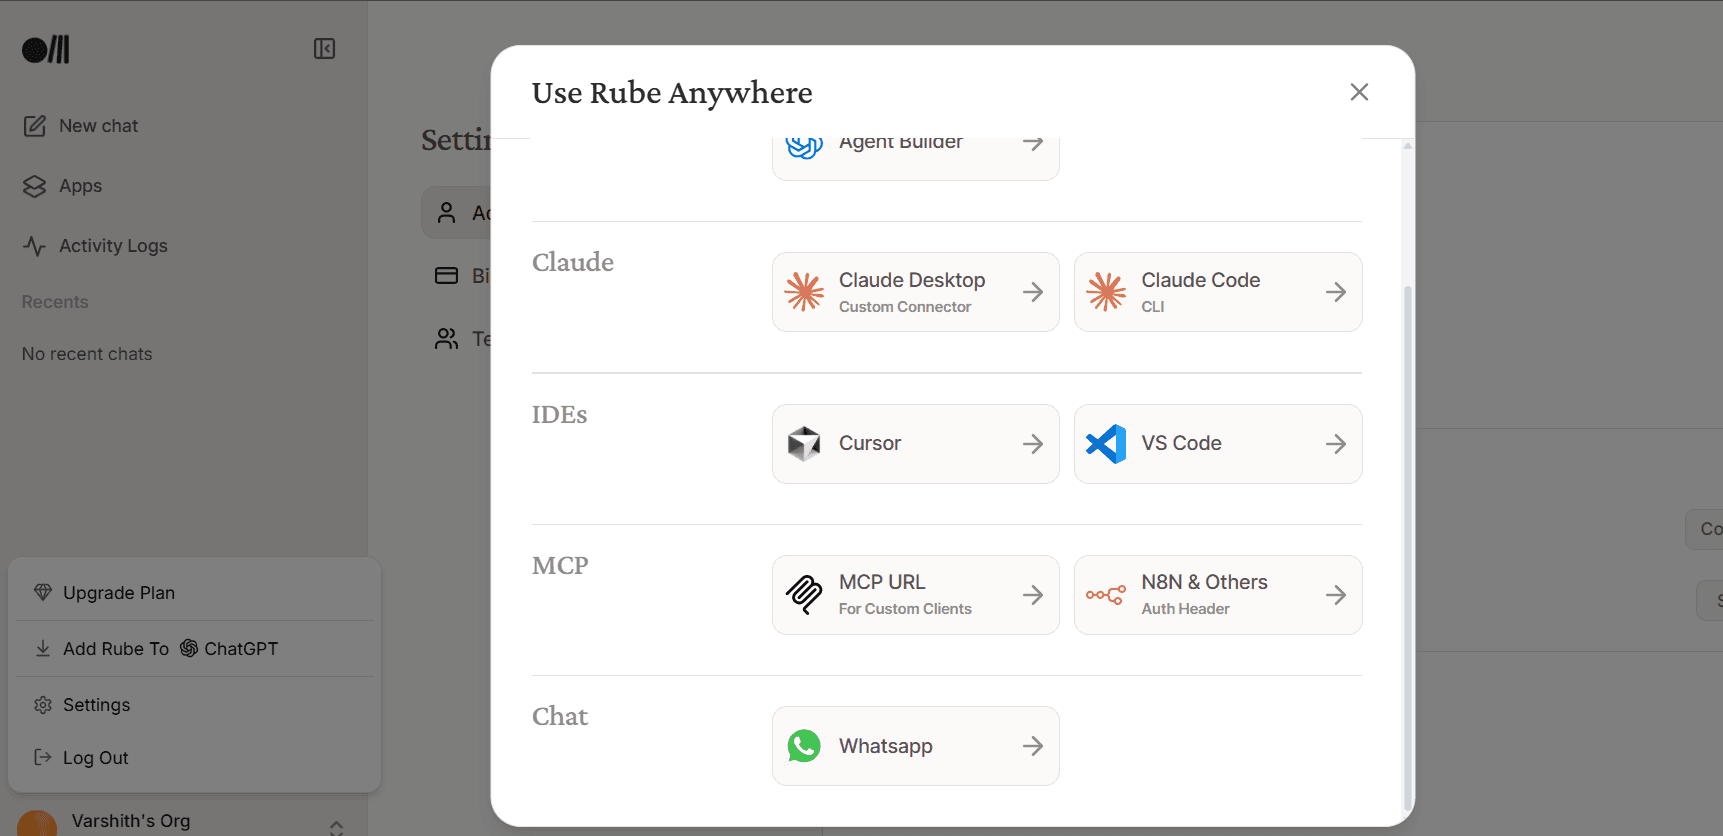
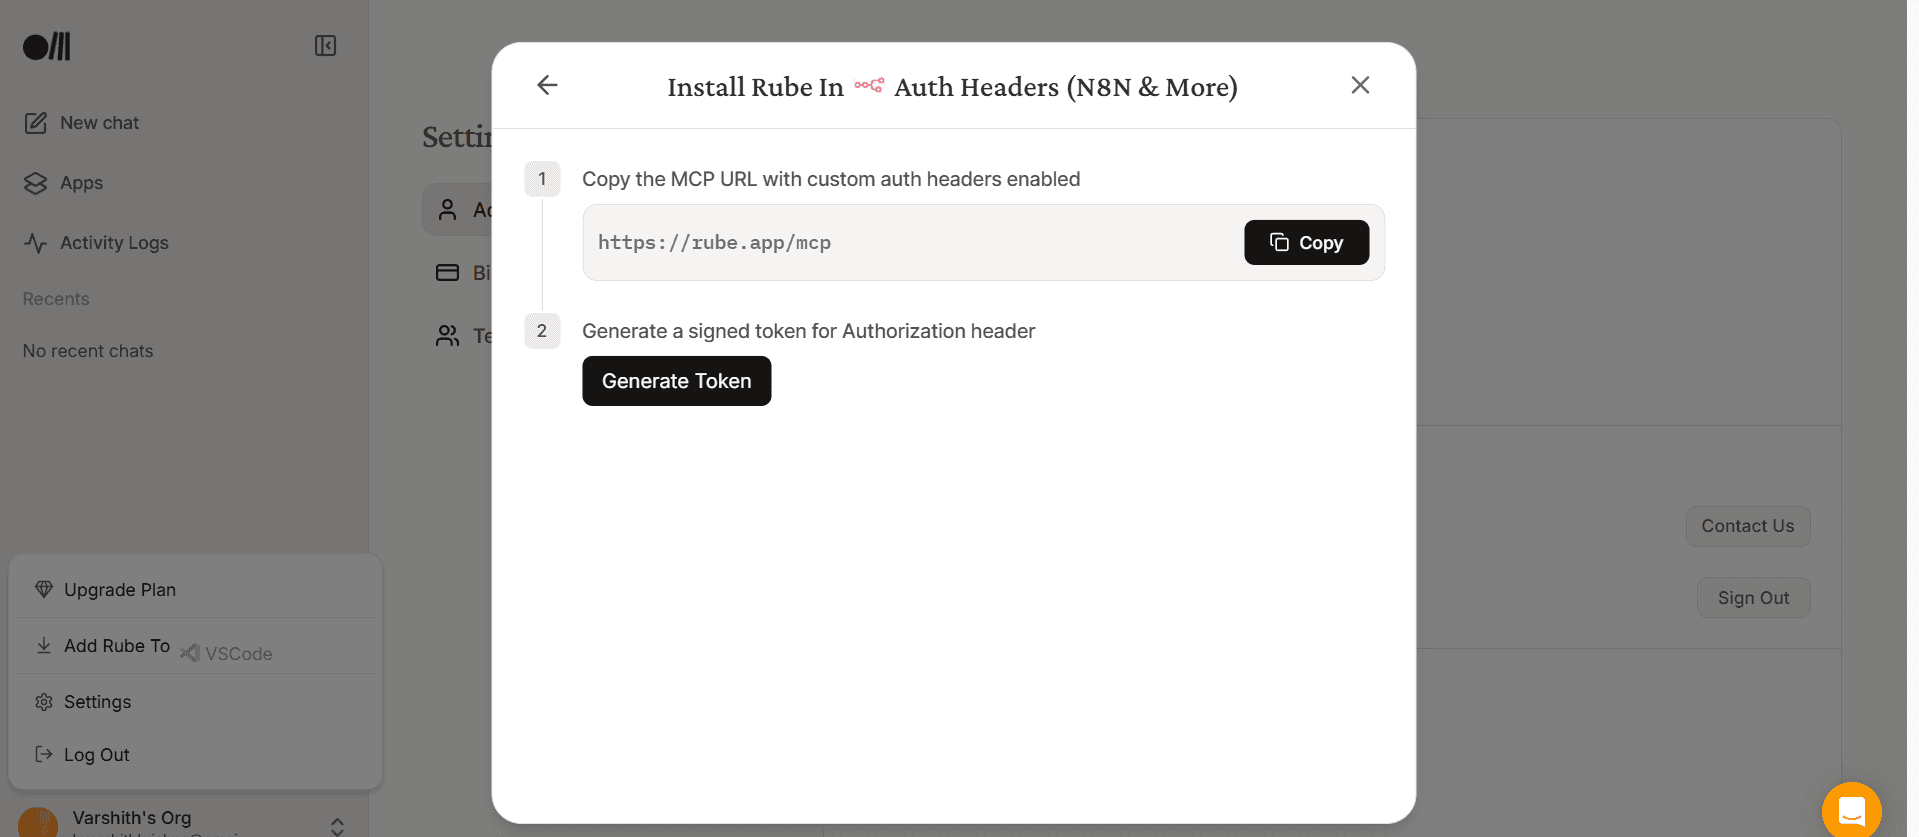
Open N8N & Others tab
Click Generate Token
Copy the token
Step 4: Connect
Paste the token in the API Key/Auth token field
Click Add
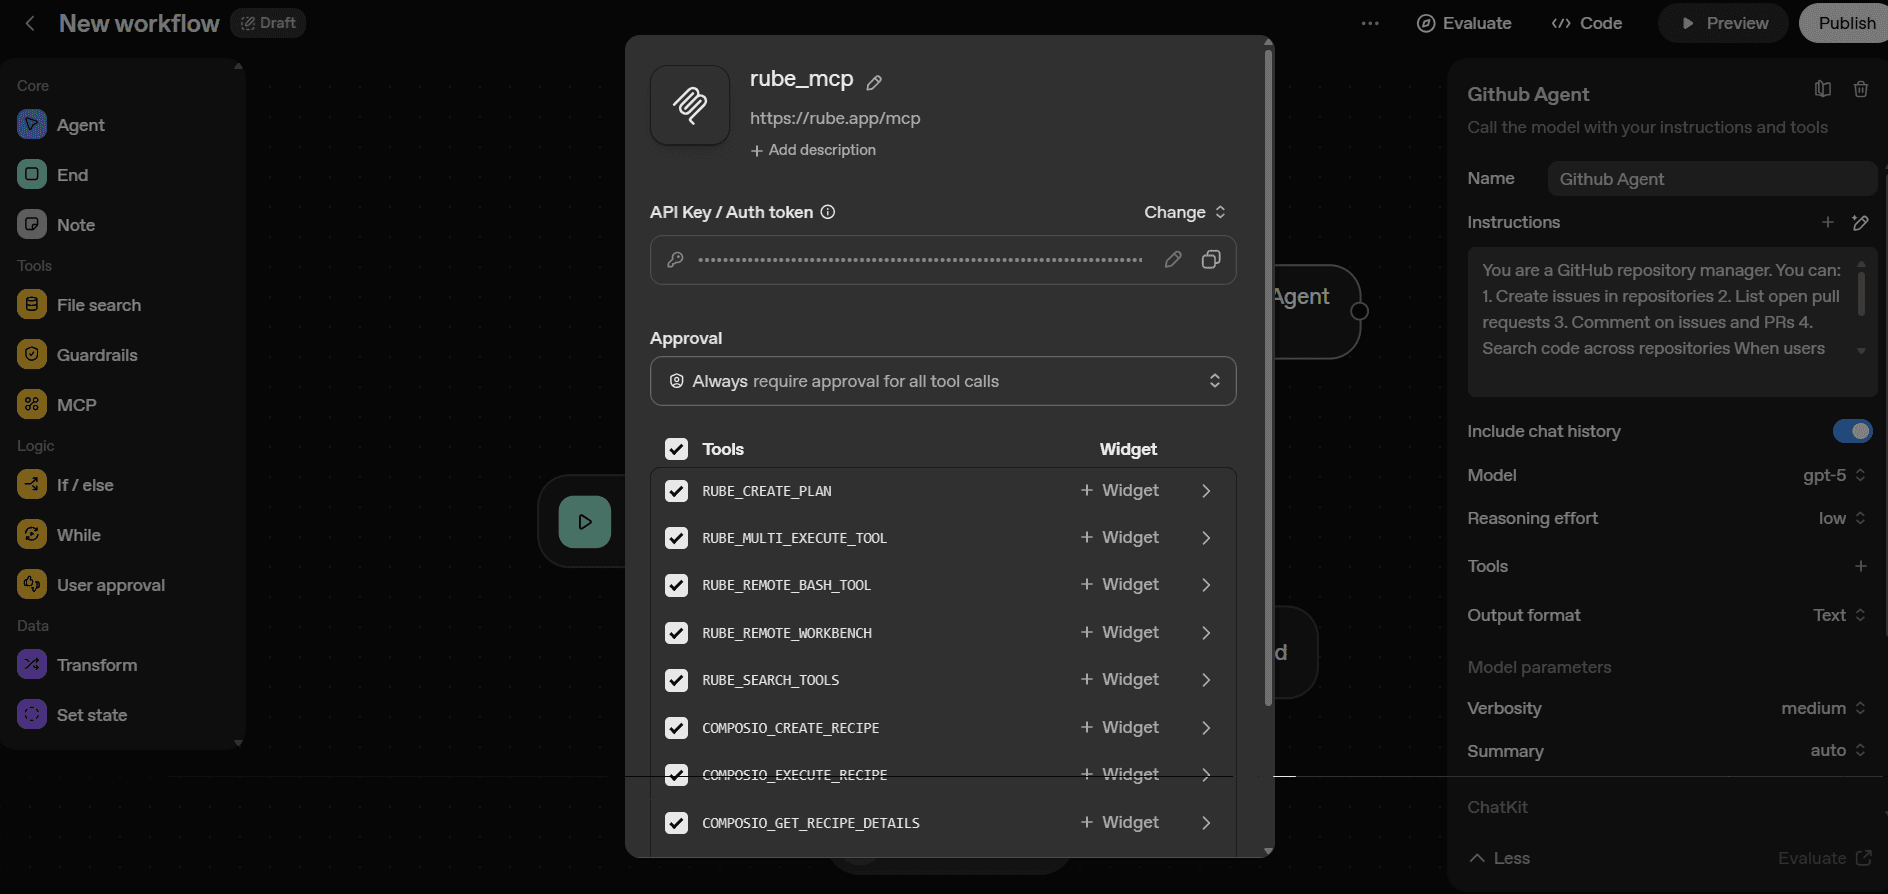
Done! Your agent can now access GitHub through Rube MCP.
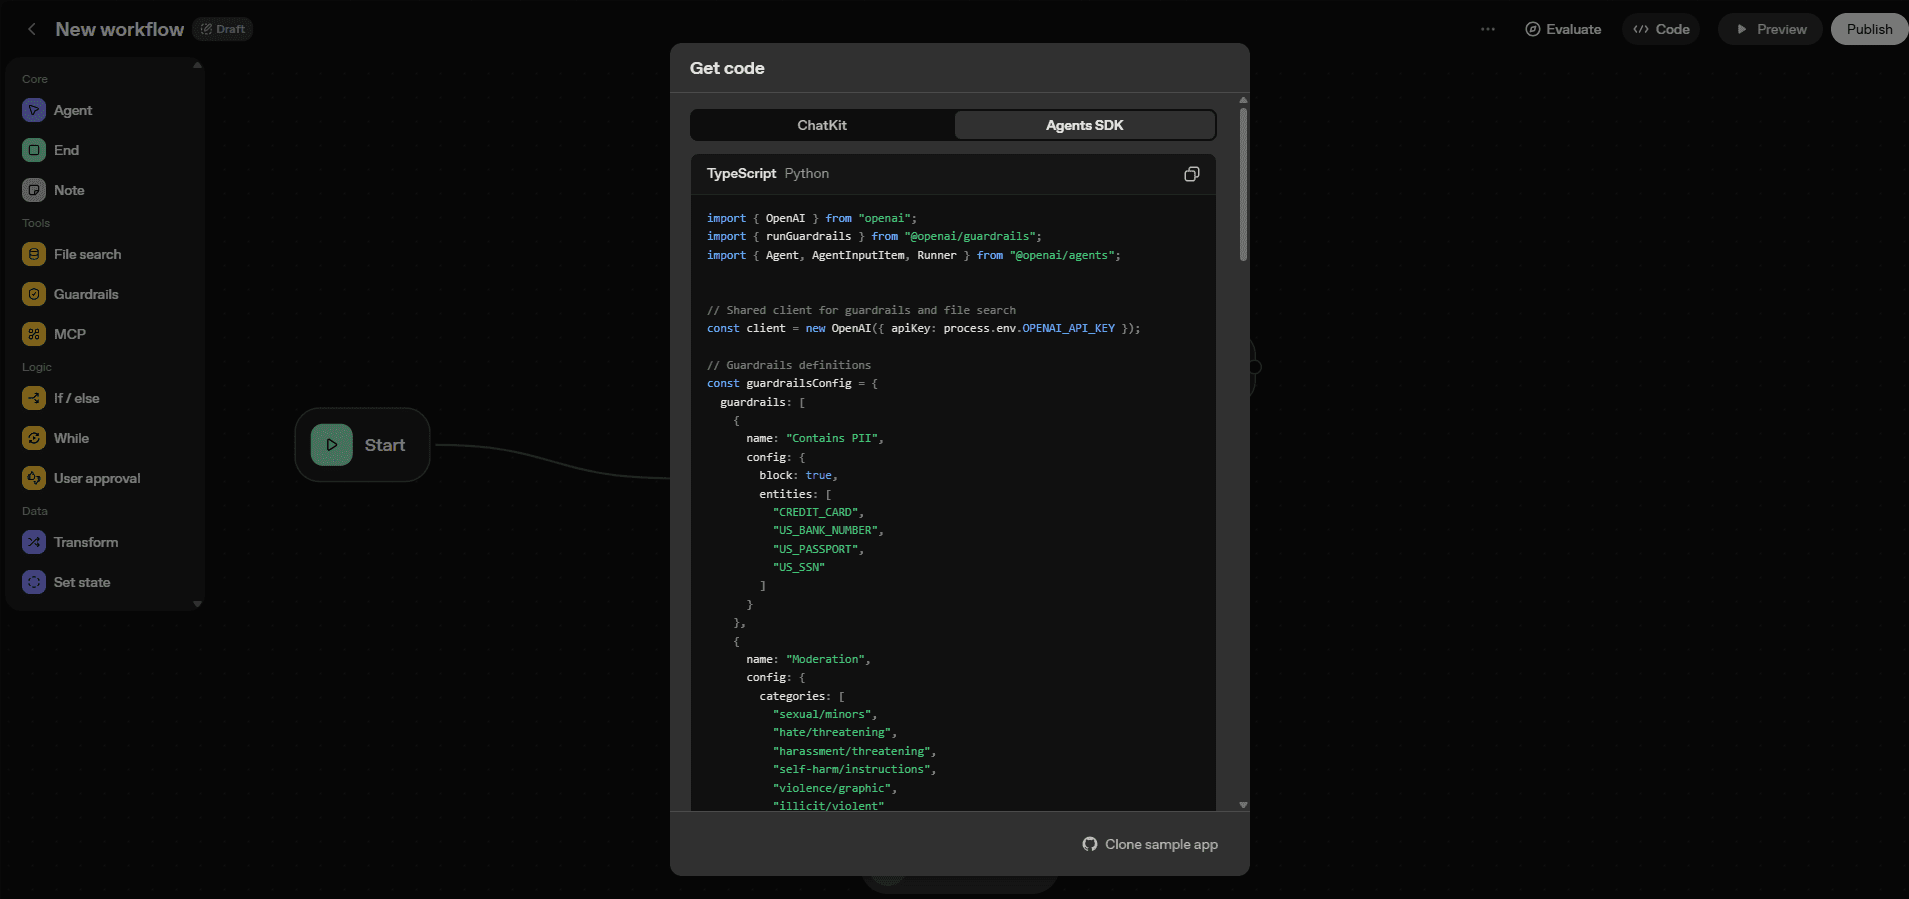
In case you want to get the code, just hitCode
Agent’s SDK → Python / TypeScript and Copy. For Reference.
A Minimal Example: Basic CRUD Operations
Here's a simple example of an agent that can perform basic GitHub operations:
Agent Prompt Configuration
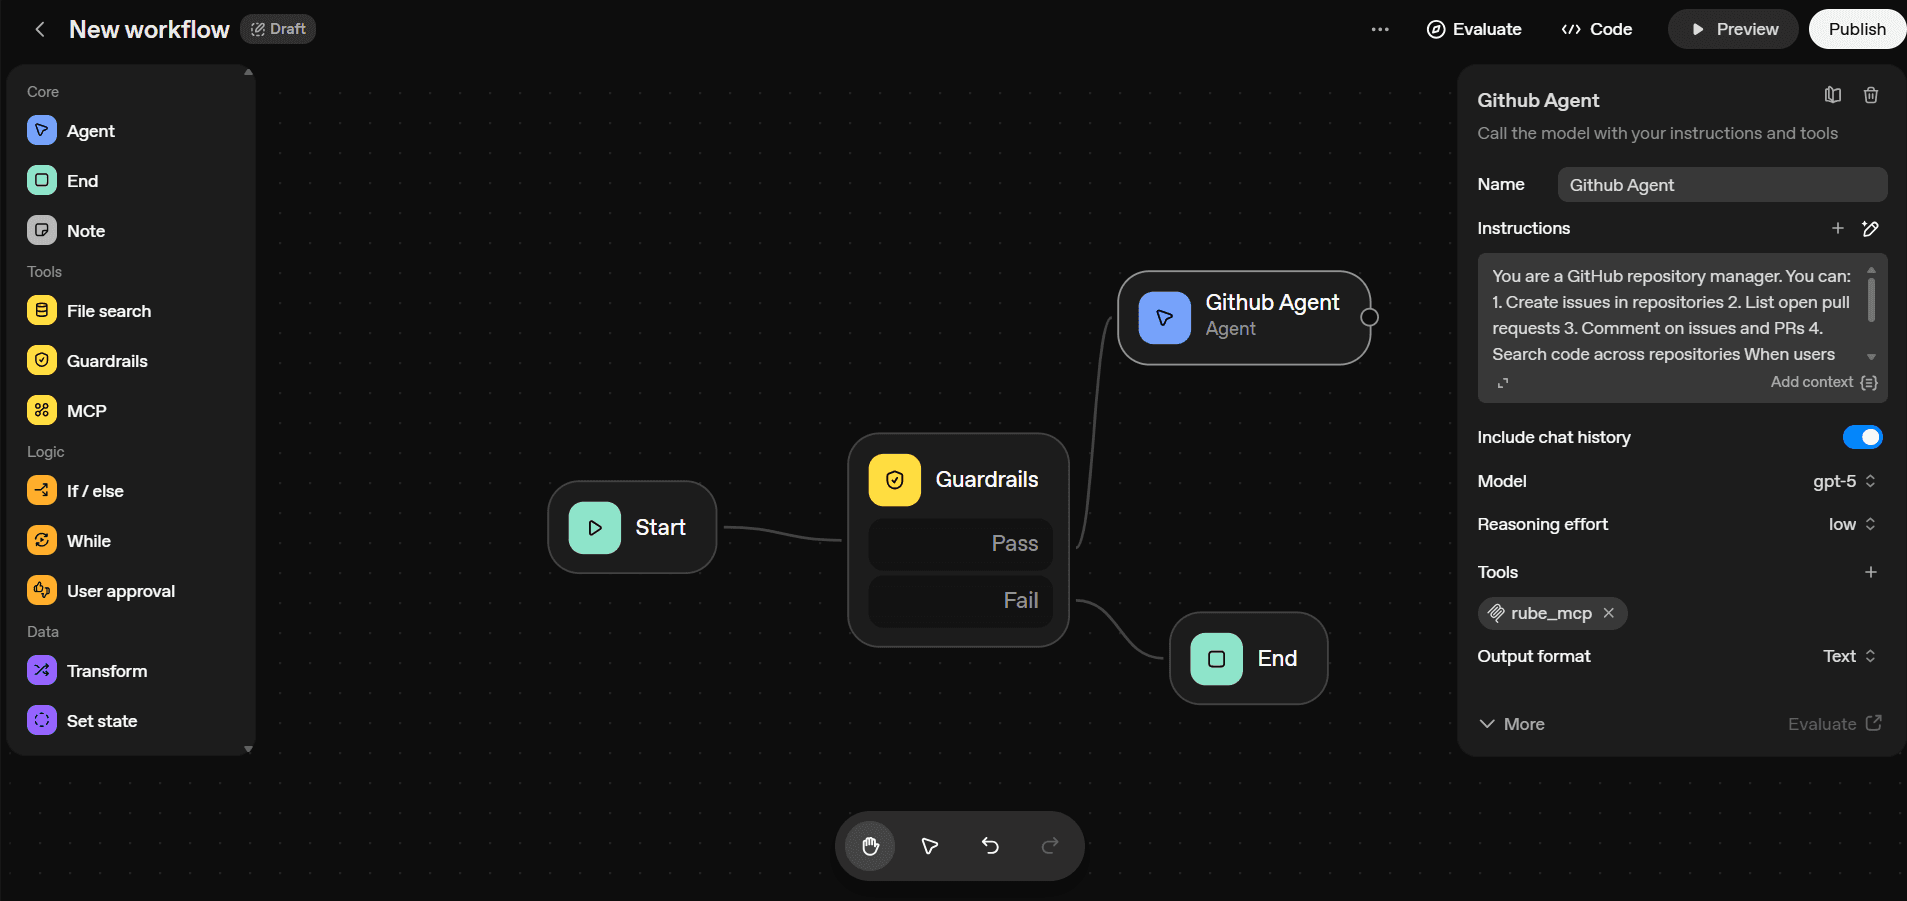
You are a GitHub repository manager. You can:
1. Create issues in repositories
2. List open pull requests
3. Comment on issues and PRs
4. Search code across repositories
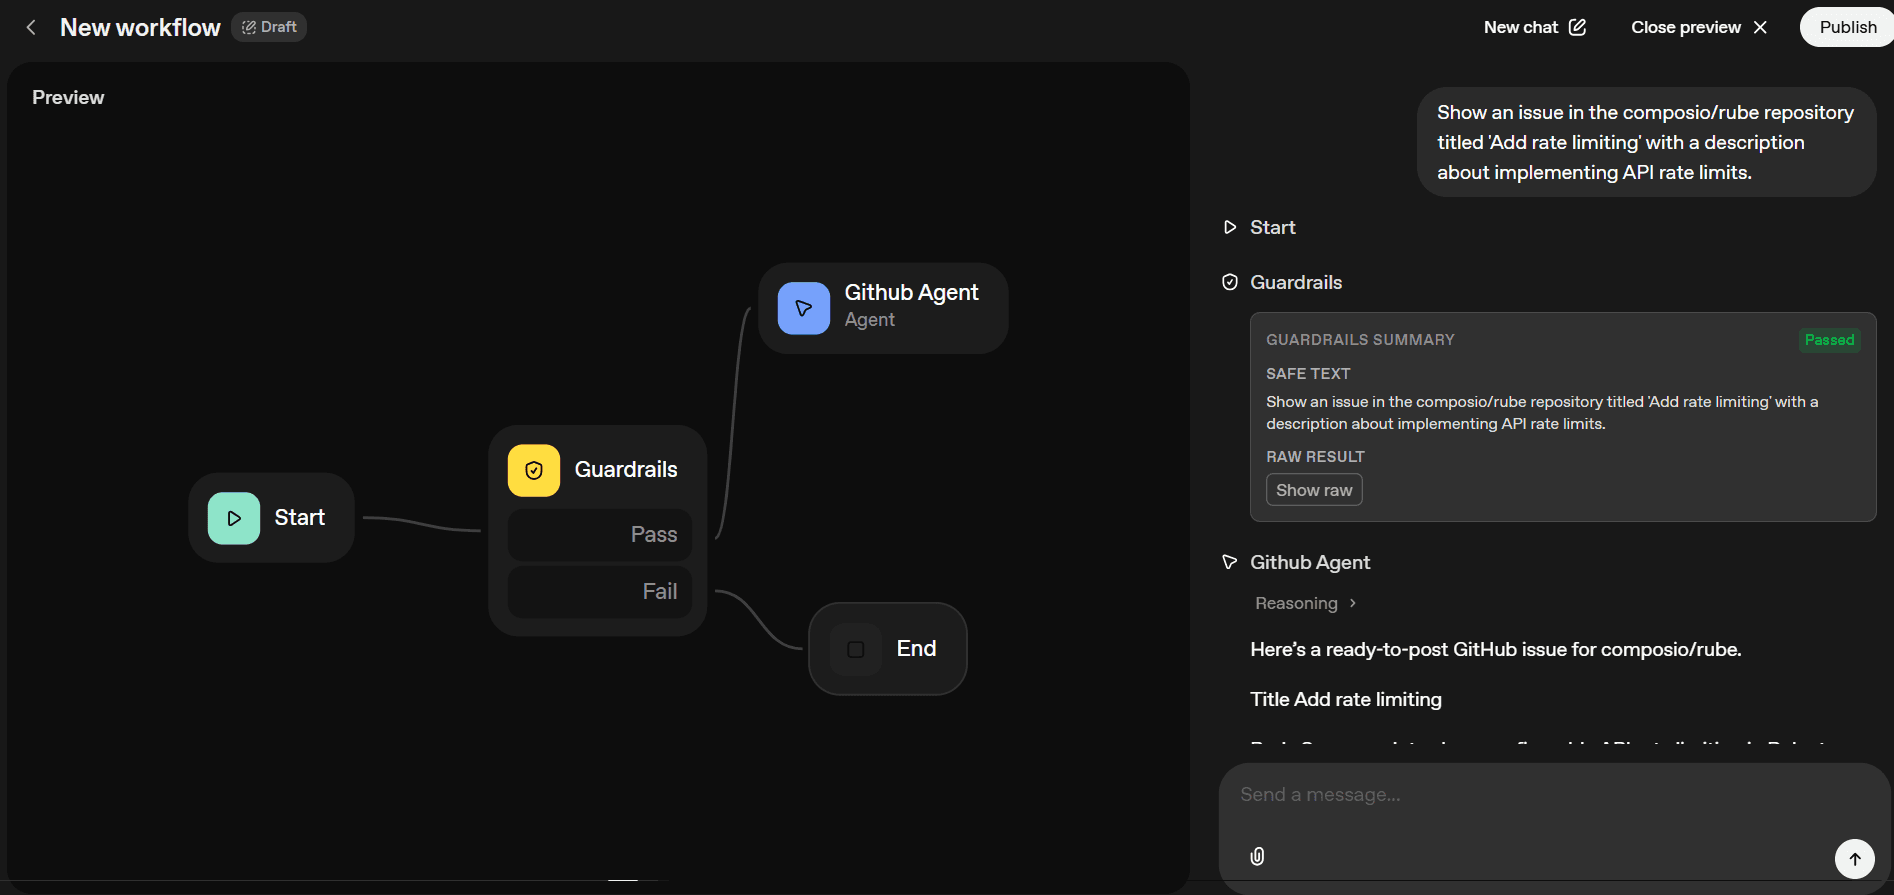
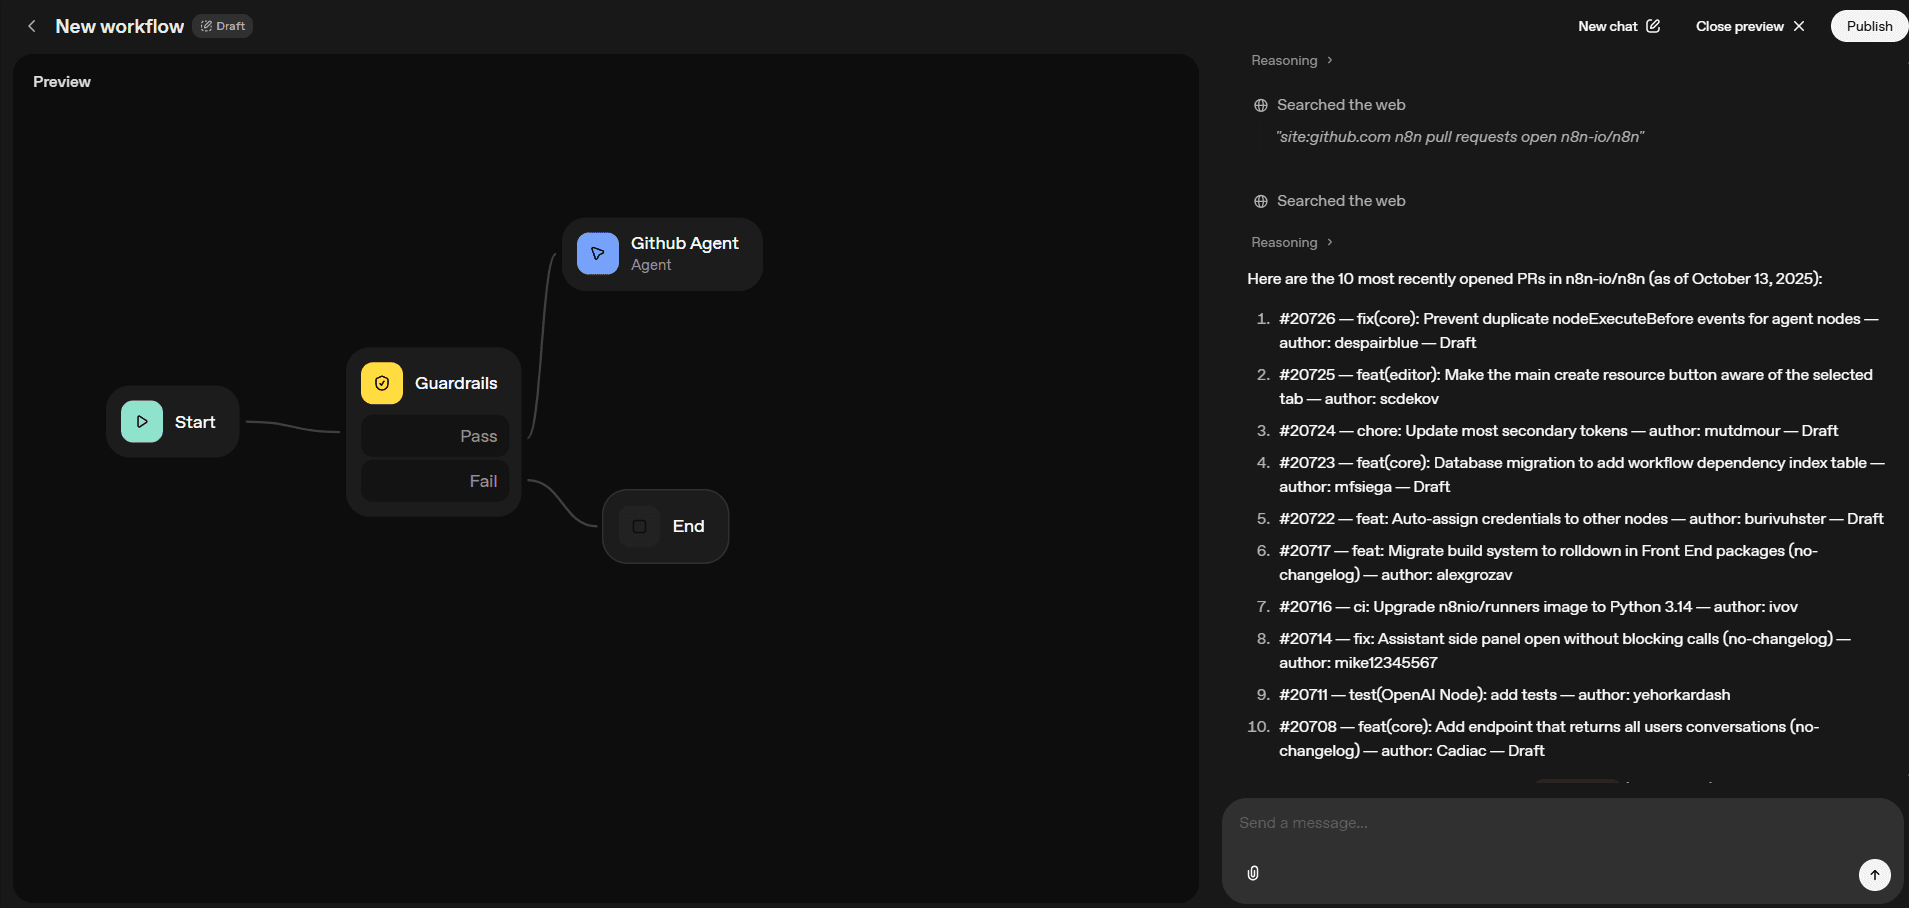
When users ask you to perform GitHub actions, use the available tools to complete the request.Example Interactions

Conclusion
Integrating GitHub MCP with Agent Builder transforms your AI agents from conversational assistants into automation powerhouses. With Rube handling authentication and API management, you can focus on building agent logic instead of wrestling with GitHub's API.
This setup works for simple workflows (creating issues, commenting on PRs) and complex automation (managing release pipelines, coordinating team workflows, automated code reviews).
Next steps:
Explore other Composio MCP integrations
Check out the Rube documentation
Join the Composio community for support
Your agents can now manage GitHub like a team member—no manual API calls required.
Frequently Asked Questions
What is Agent Builder?
Ans. It is a drag-and-drop visual agent builder by OpenAI, which lets anyone create AI agents using nodes.
What is Rube?
Rube is a universal MCP server that can connect your AI assistants and agents to over 500 apps like HubSpot, GitHub, Jira, Figma and more.
What can you build using GitHub MCP in Agent Builder?
You can build agents for code reviews, repository management, write documentation, and much more.
How safe is my data with Rube's GitHub integration?
Rube is built on top of Composio's integration infrastructure, which start-ups and enterprises like Glean, Altera, Context, and more trust. The platform is SOC 2 Type 2 compliant and is on the way to getting GDPR compliance.