




Composio connects AI agents to Slack, helping teams turn conversations into action. With Composio, developers can build agents that read permitted context, respond to mentions, send and manage messages, work with channels and files, and react to Slack events as part of automated workflows.
Access is always limited to the permissions approved during installation, so teams stay in full control of what each agent can see and do.
This guide walks you through creating your own Slack app, generating OAuth credentials, and using them to set up a custom auth config in Composio. Use this option when you need your own branding, specific scopes, or full control over the Slack app. If you just want to get started quickly, use Composio Managed Auth instead.
Part 1: Set up your Slack app
In this section, we’ll go through the process of setting up Slack and creating an OAuth2 application.
NOTE: If you already have a Slack app and access to the Client ID and Client Secret, you can skip this section.
Step 1: Create a Slack App
1. Go to the Slack API Dashboard and click Create New App.
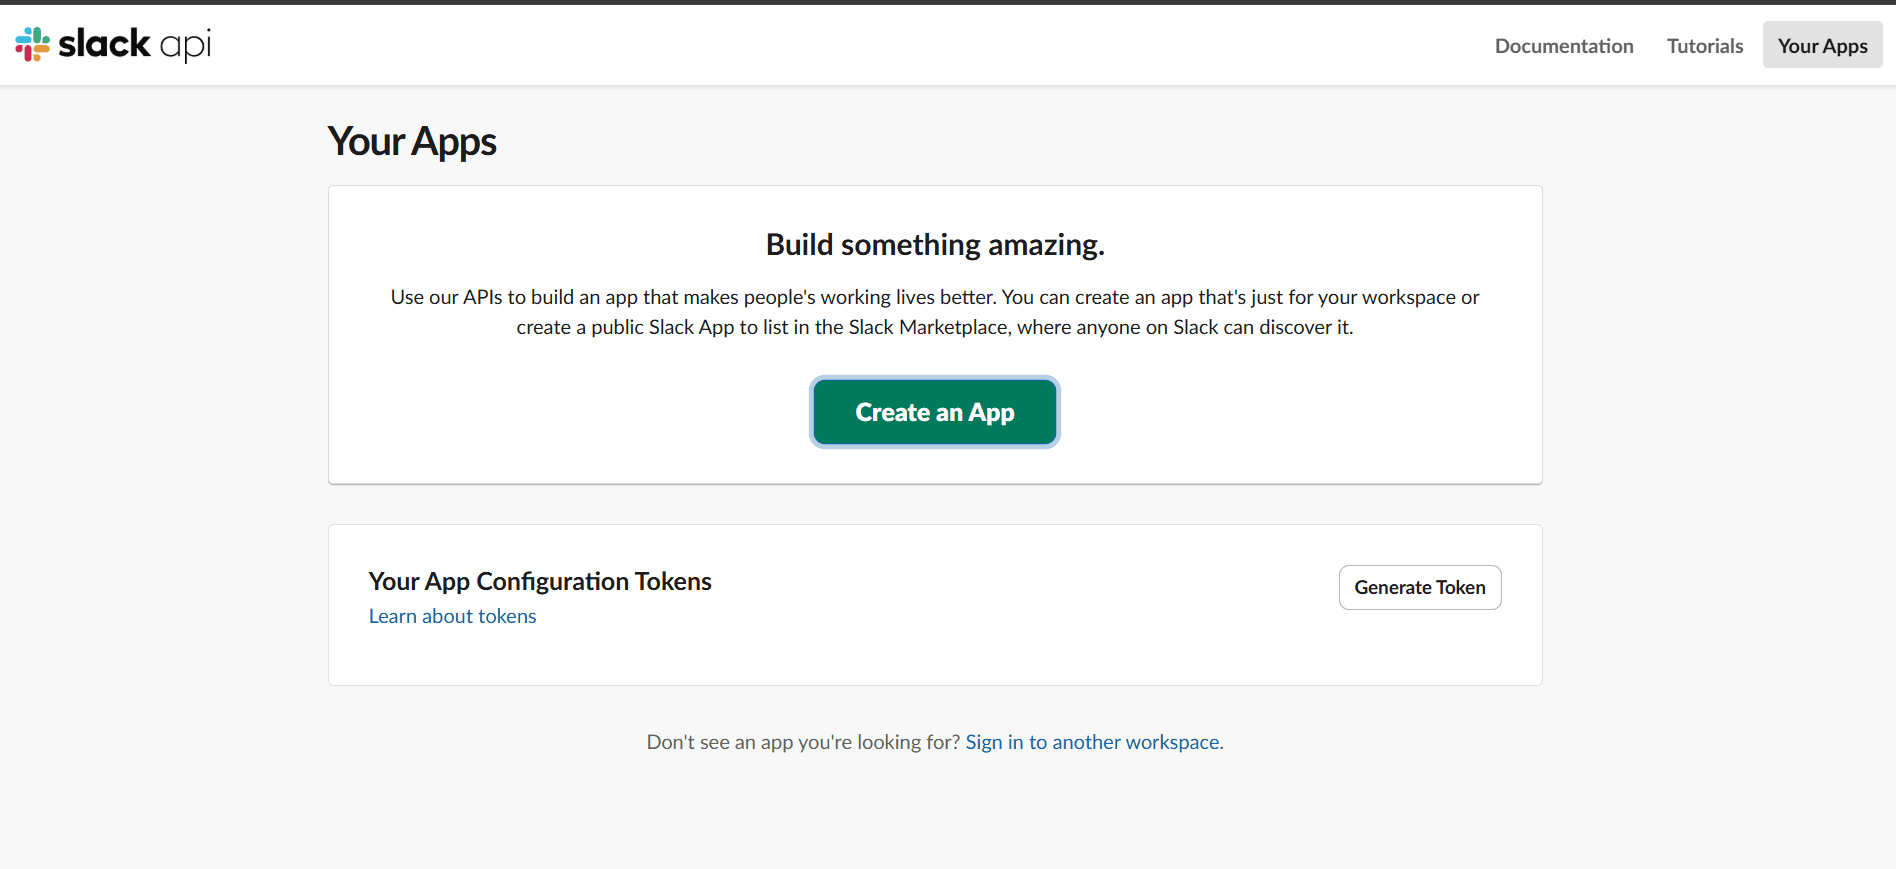
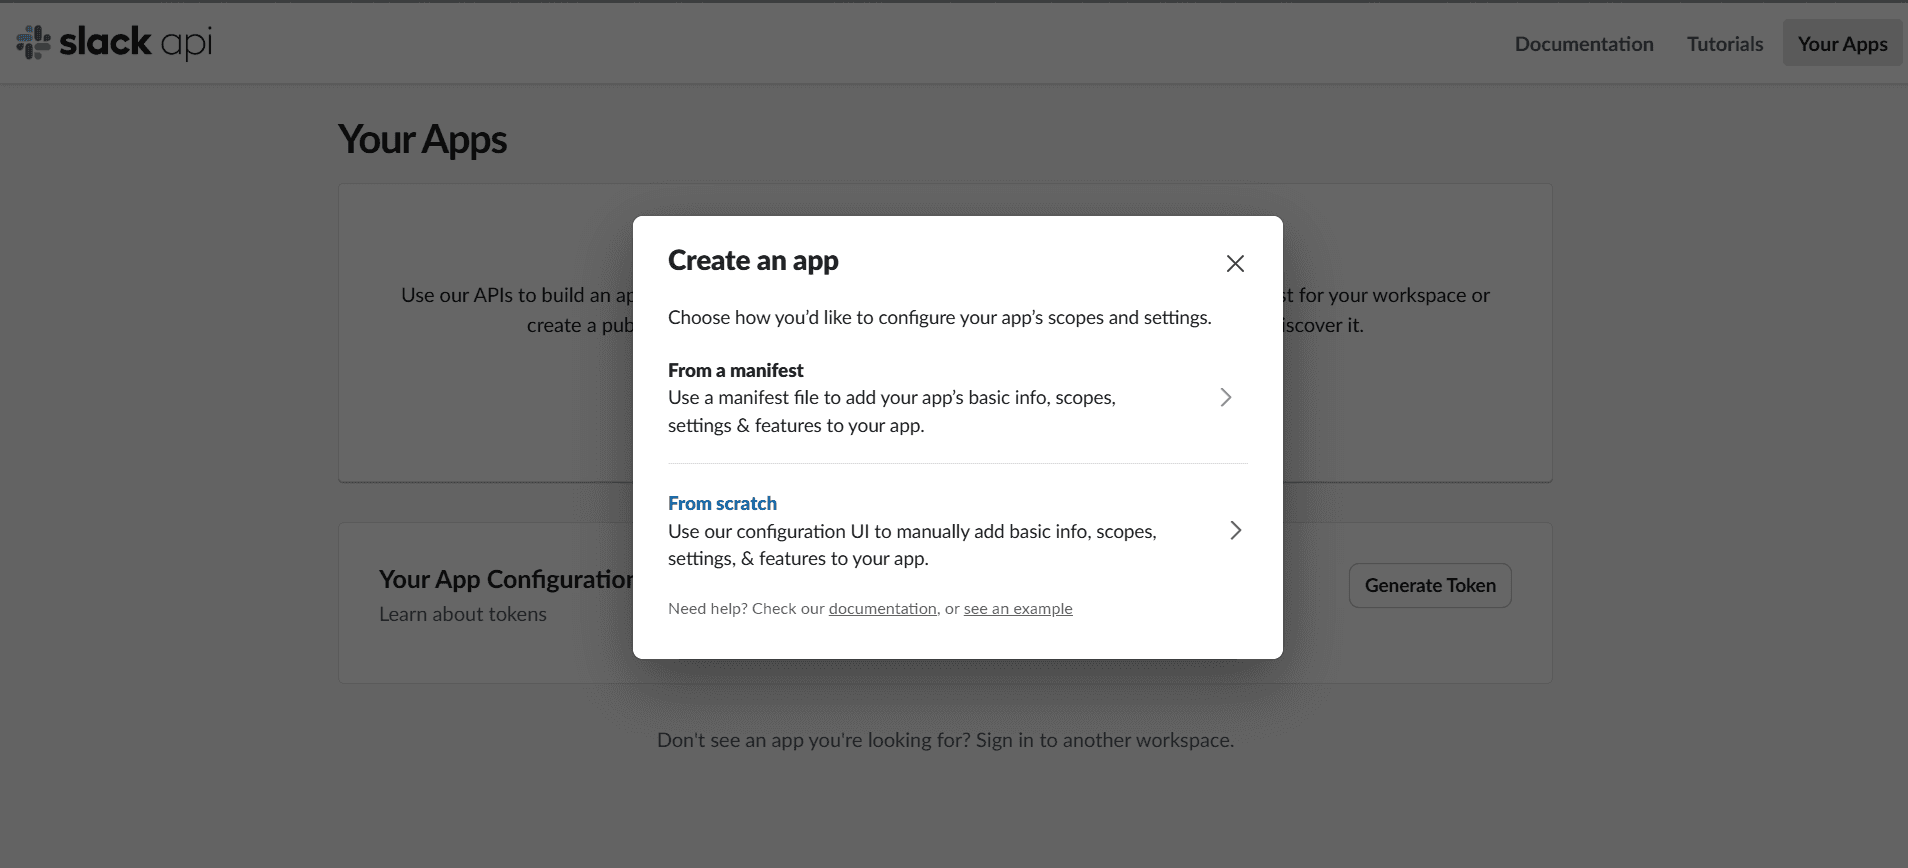
2. Choose from scratch.
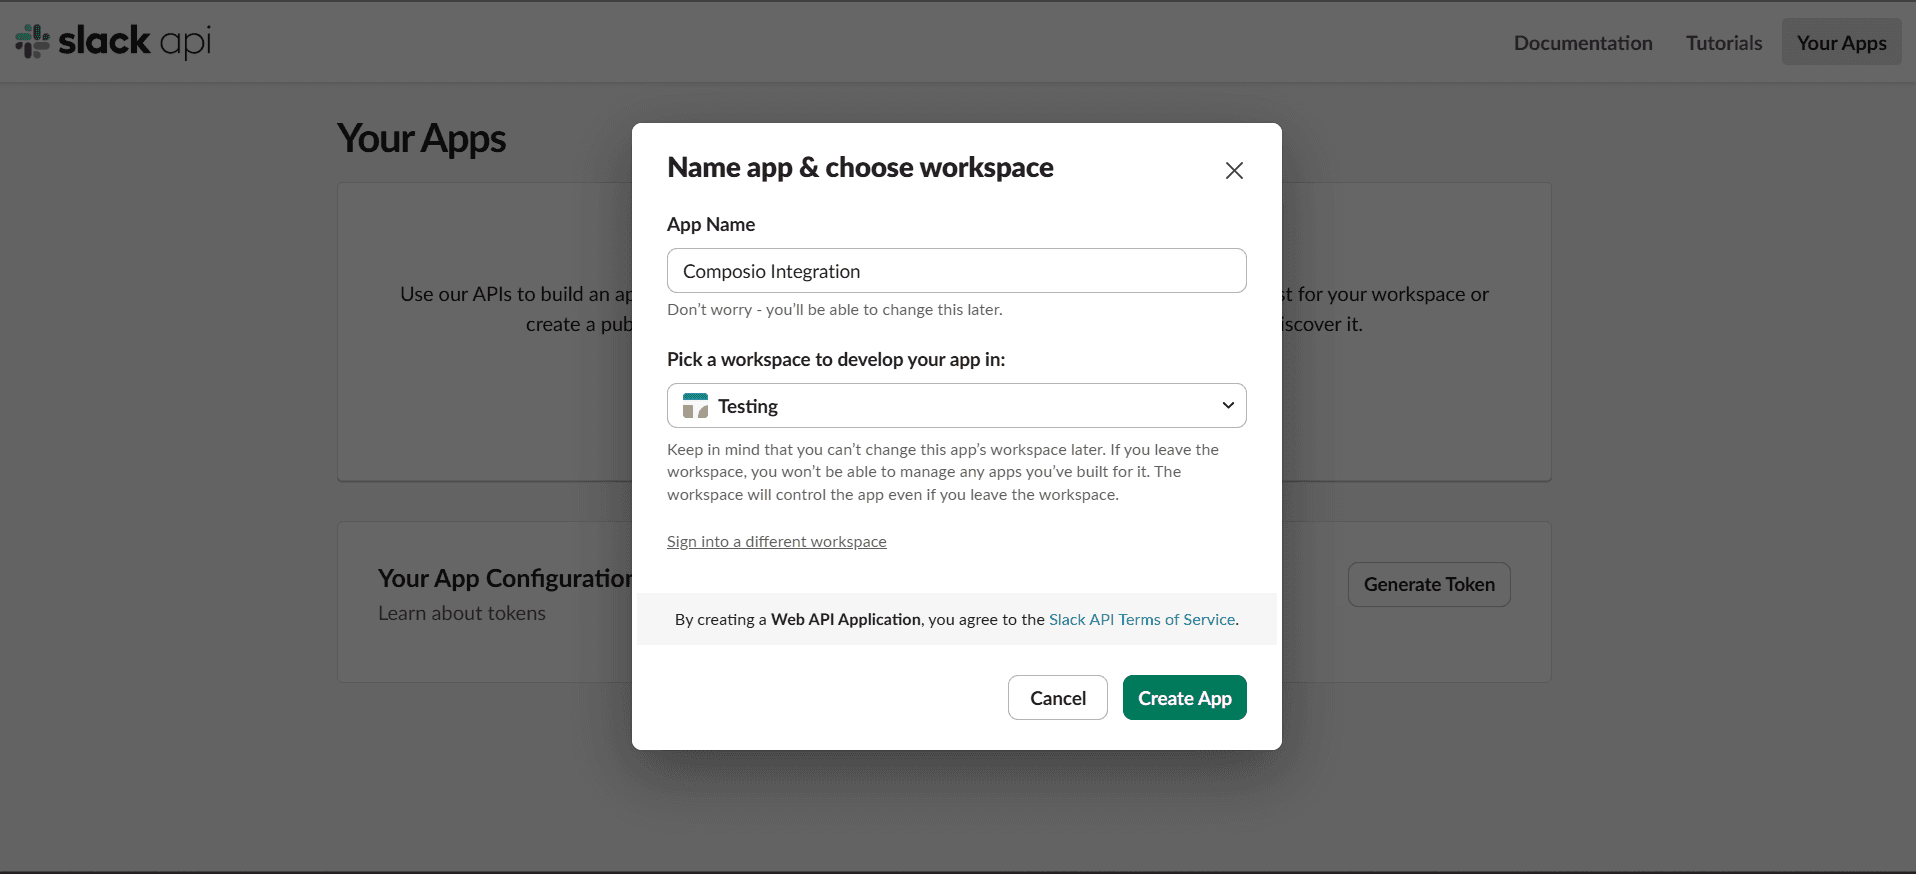
3. Enter your App Name (e.g., Composio Integration) and select your Slack workspace.
4. Click Create App.
Step 2: Configure OAuth & Permissions
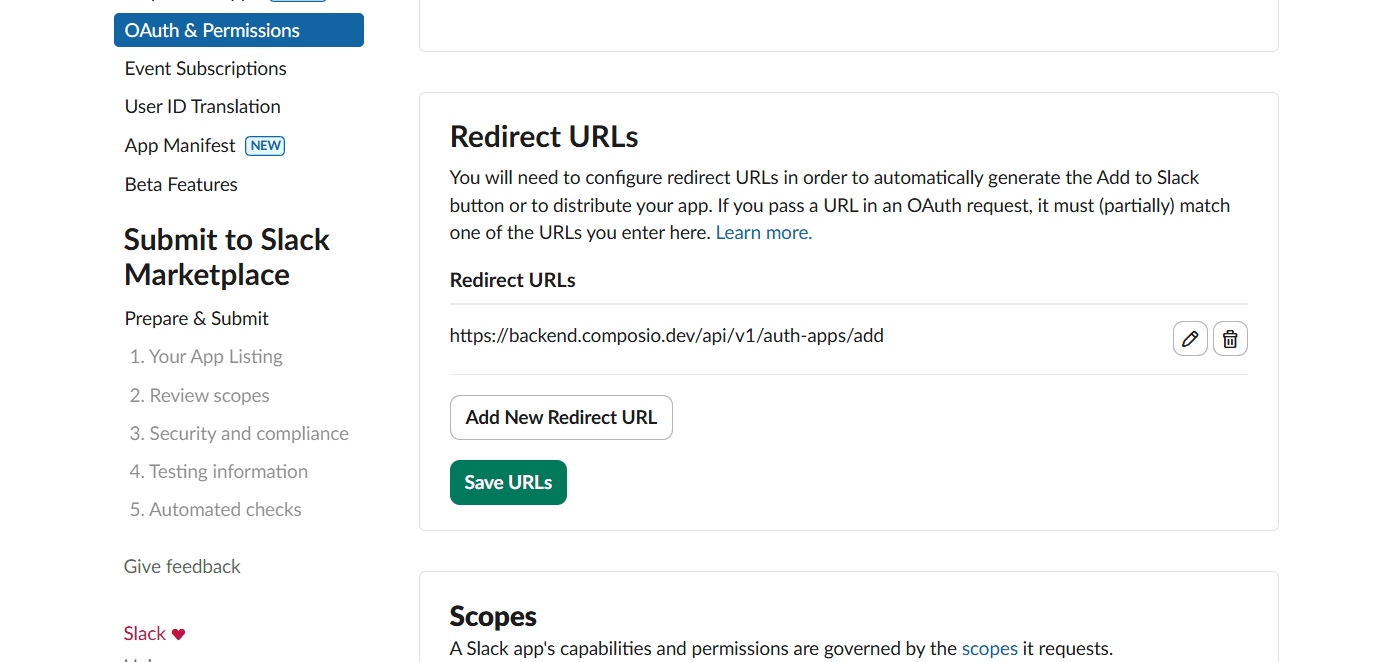
Once the app is created, open the OAuth & Permissions section from the left sidebar.
Scroll down to the Redirect URLs section and click Add New Redirect URL.
Paste the following Composio callback URL:
https://backend.composio.dev/api/v1/auth-apps/addClick Add and then Save URLs.
Step 3: Add OAuth Scopes
Under the same OAuth & Permissions section, scroll to Scopes.
Slack scopes define what your app can do or access on behalf of a user.
You’ll need to select the scopes that match your integration’s functionality. For example:
To read channel messages →
channels:historyTo send messages →
chat:writeTo read user info →
users:read
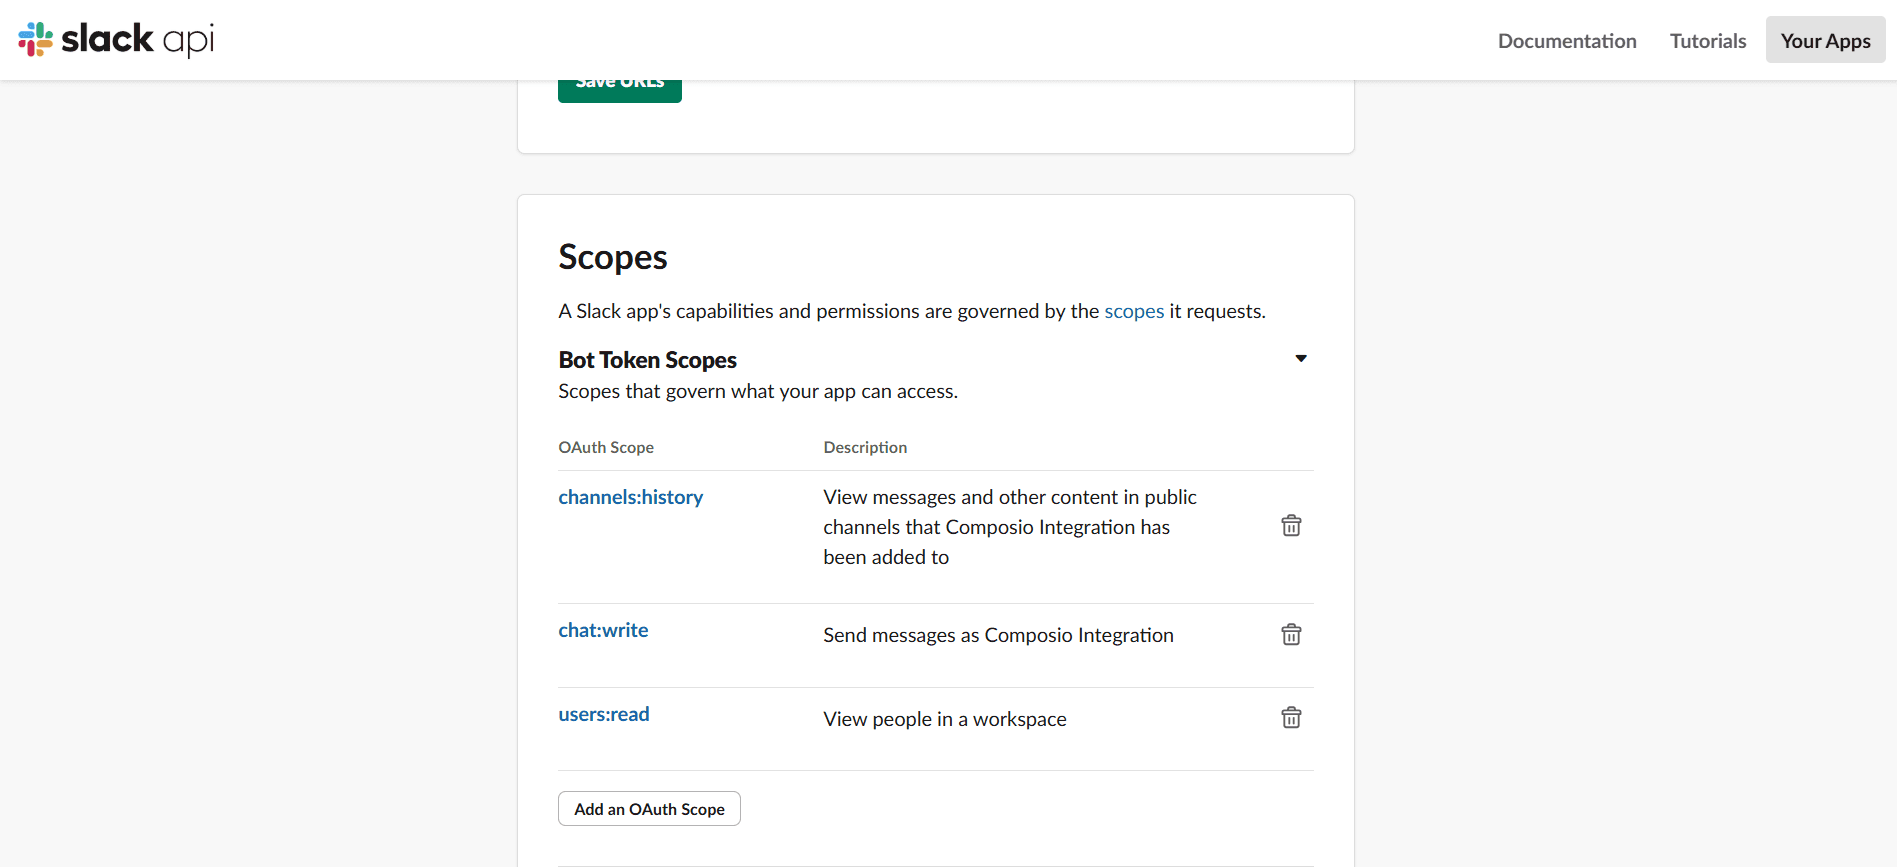
Scopes Supported by Composio
Below are all the scopes that Composio supports for Slack. You can select these based on your integration needs:
calls:read,calls:write,channels:read,channels:history,channels:write,chat:write,chat:write.public,emoji:read,files:read,files:write,groups:read,groups:history,groups:write,im:read,im:write,im:history,mpim:read,mpim:write,mpim:history,pins:read,pins:write,reactions:read,reactions:write,reminders:read,reminders:write,remote_files:read,remote_files:share,search:read,stars:read,stars:write,team:read,usergroups:read,usergroups:write,users:read,users:read.email,users:write,users.profile:read,users.profile:write,bookmarks:read,bookmarks:write,links:read,links:writeThese define what actions your Slack integration can take.
Always include only the ones necessary for your workflow, for example, if your agent only needs to send messages, chat:write alone might be enough.
Note: Slack separates Bot Token Scopes (for app-level access) and User Token Scopes (for user-level actions). Composio typically uses Bot Token Scopes.
Step 4: Get Your OAuth Credentials
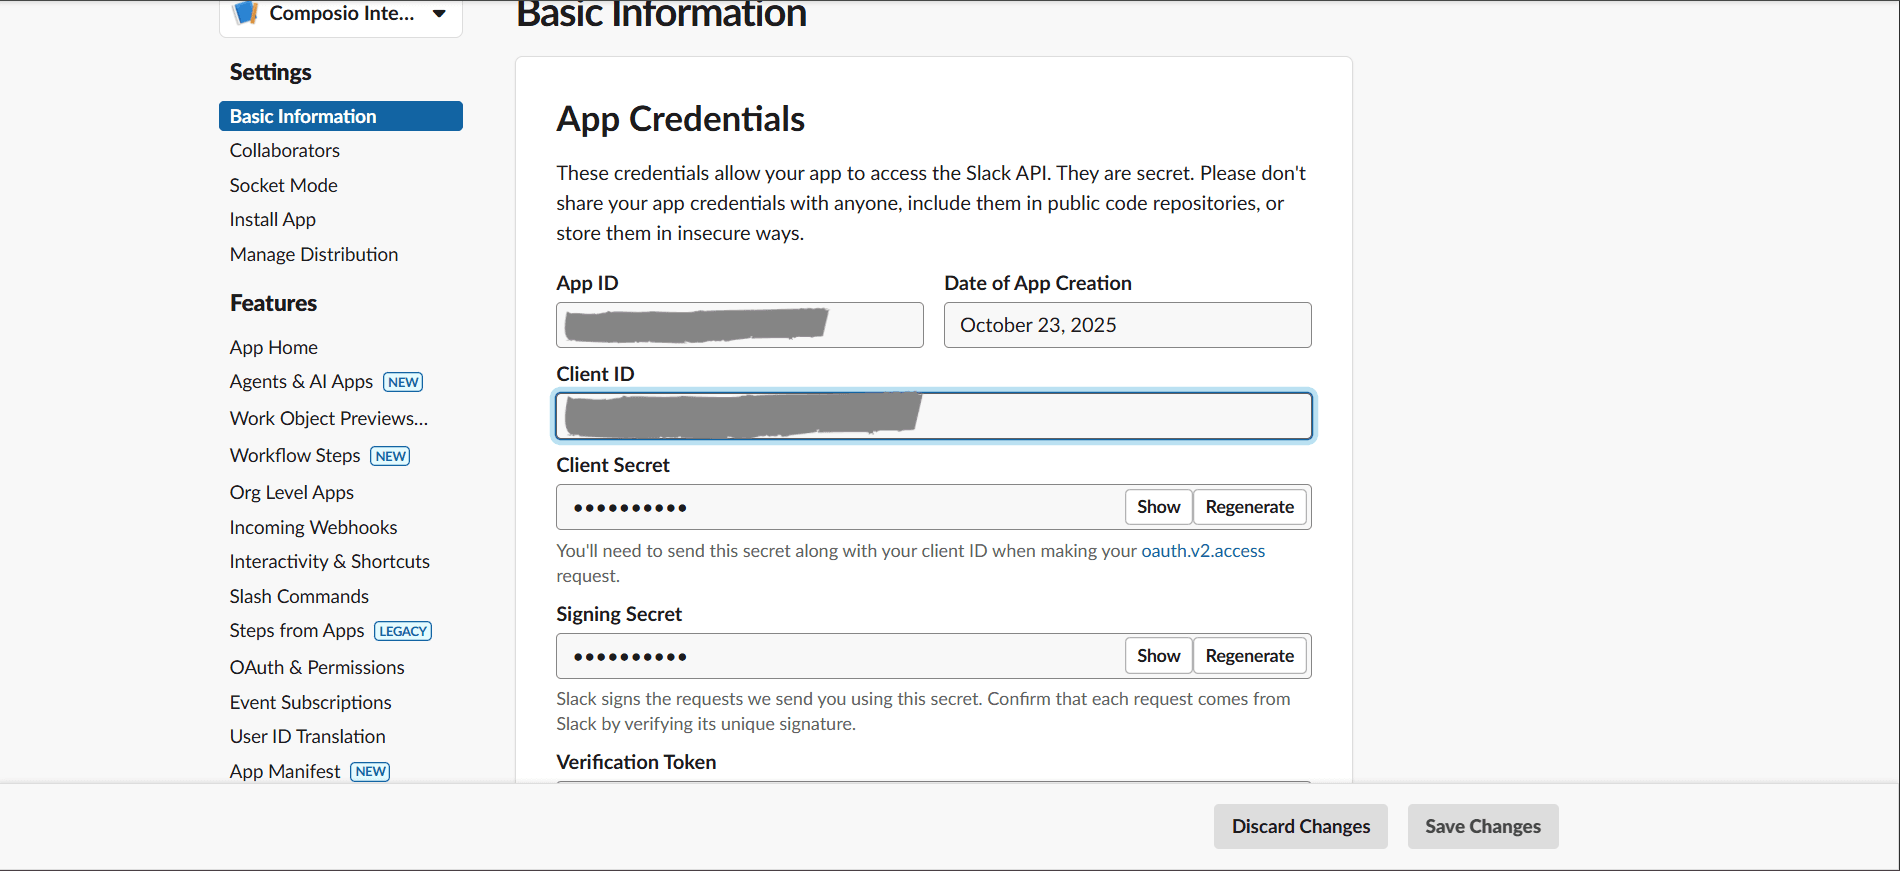
Once you’ve created your Slack app, you can find your OAuth credentials in the Basic Information section:
In the left sidebar, click Basic Information
Scroll down to the App Credentials section
You’ll see:
Client ID
Client Secret (click “Show” to reveal it)
Verification Token (click “Show” to reveal it)
Copy the Client ID and Client Secret, as you’ll need them for Composio.
Part 2: Create the auth config in Composio
With your Slack credentials ready, navigate to the Composio Dashboard.
Step 5: Add Slack to Your Project
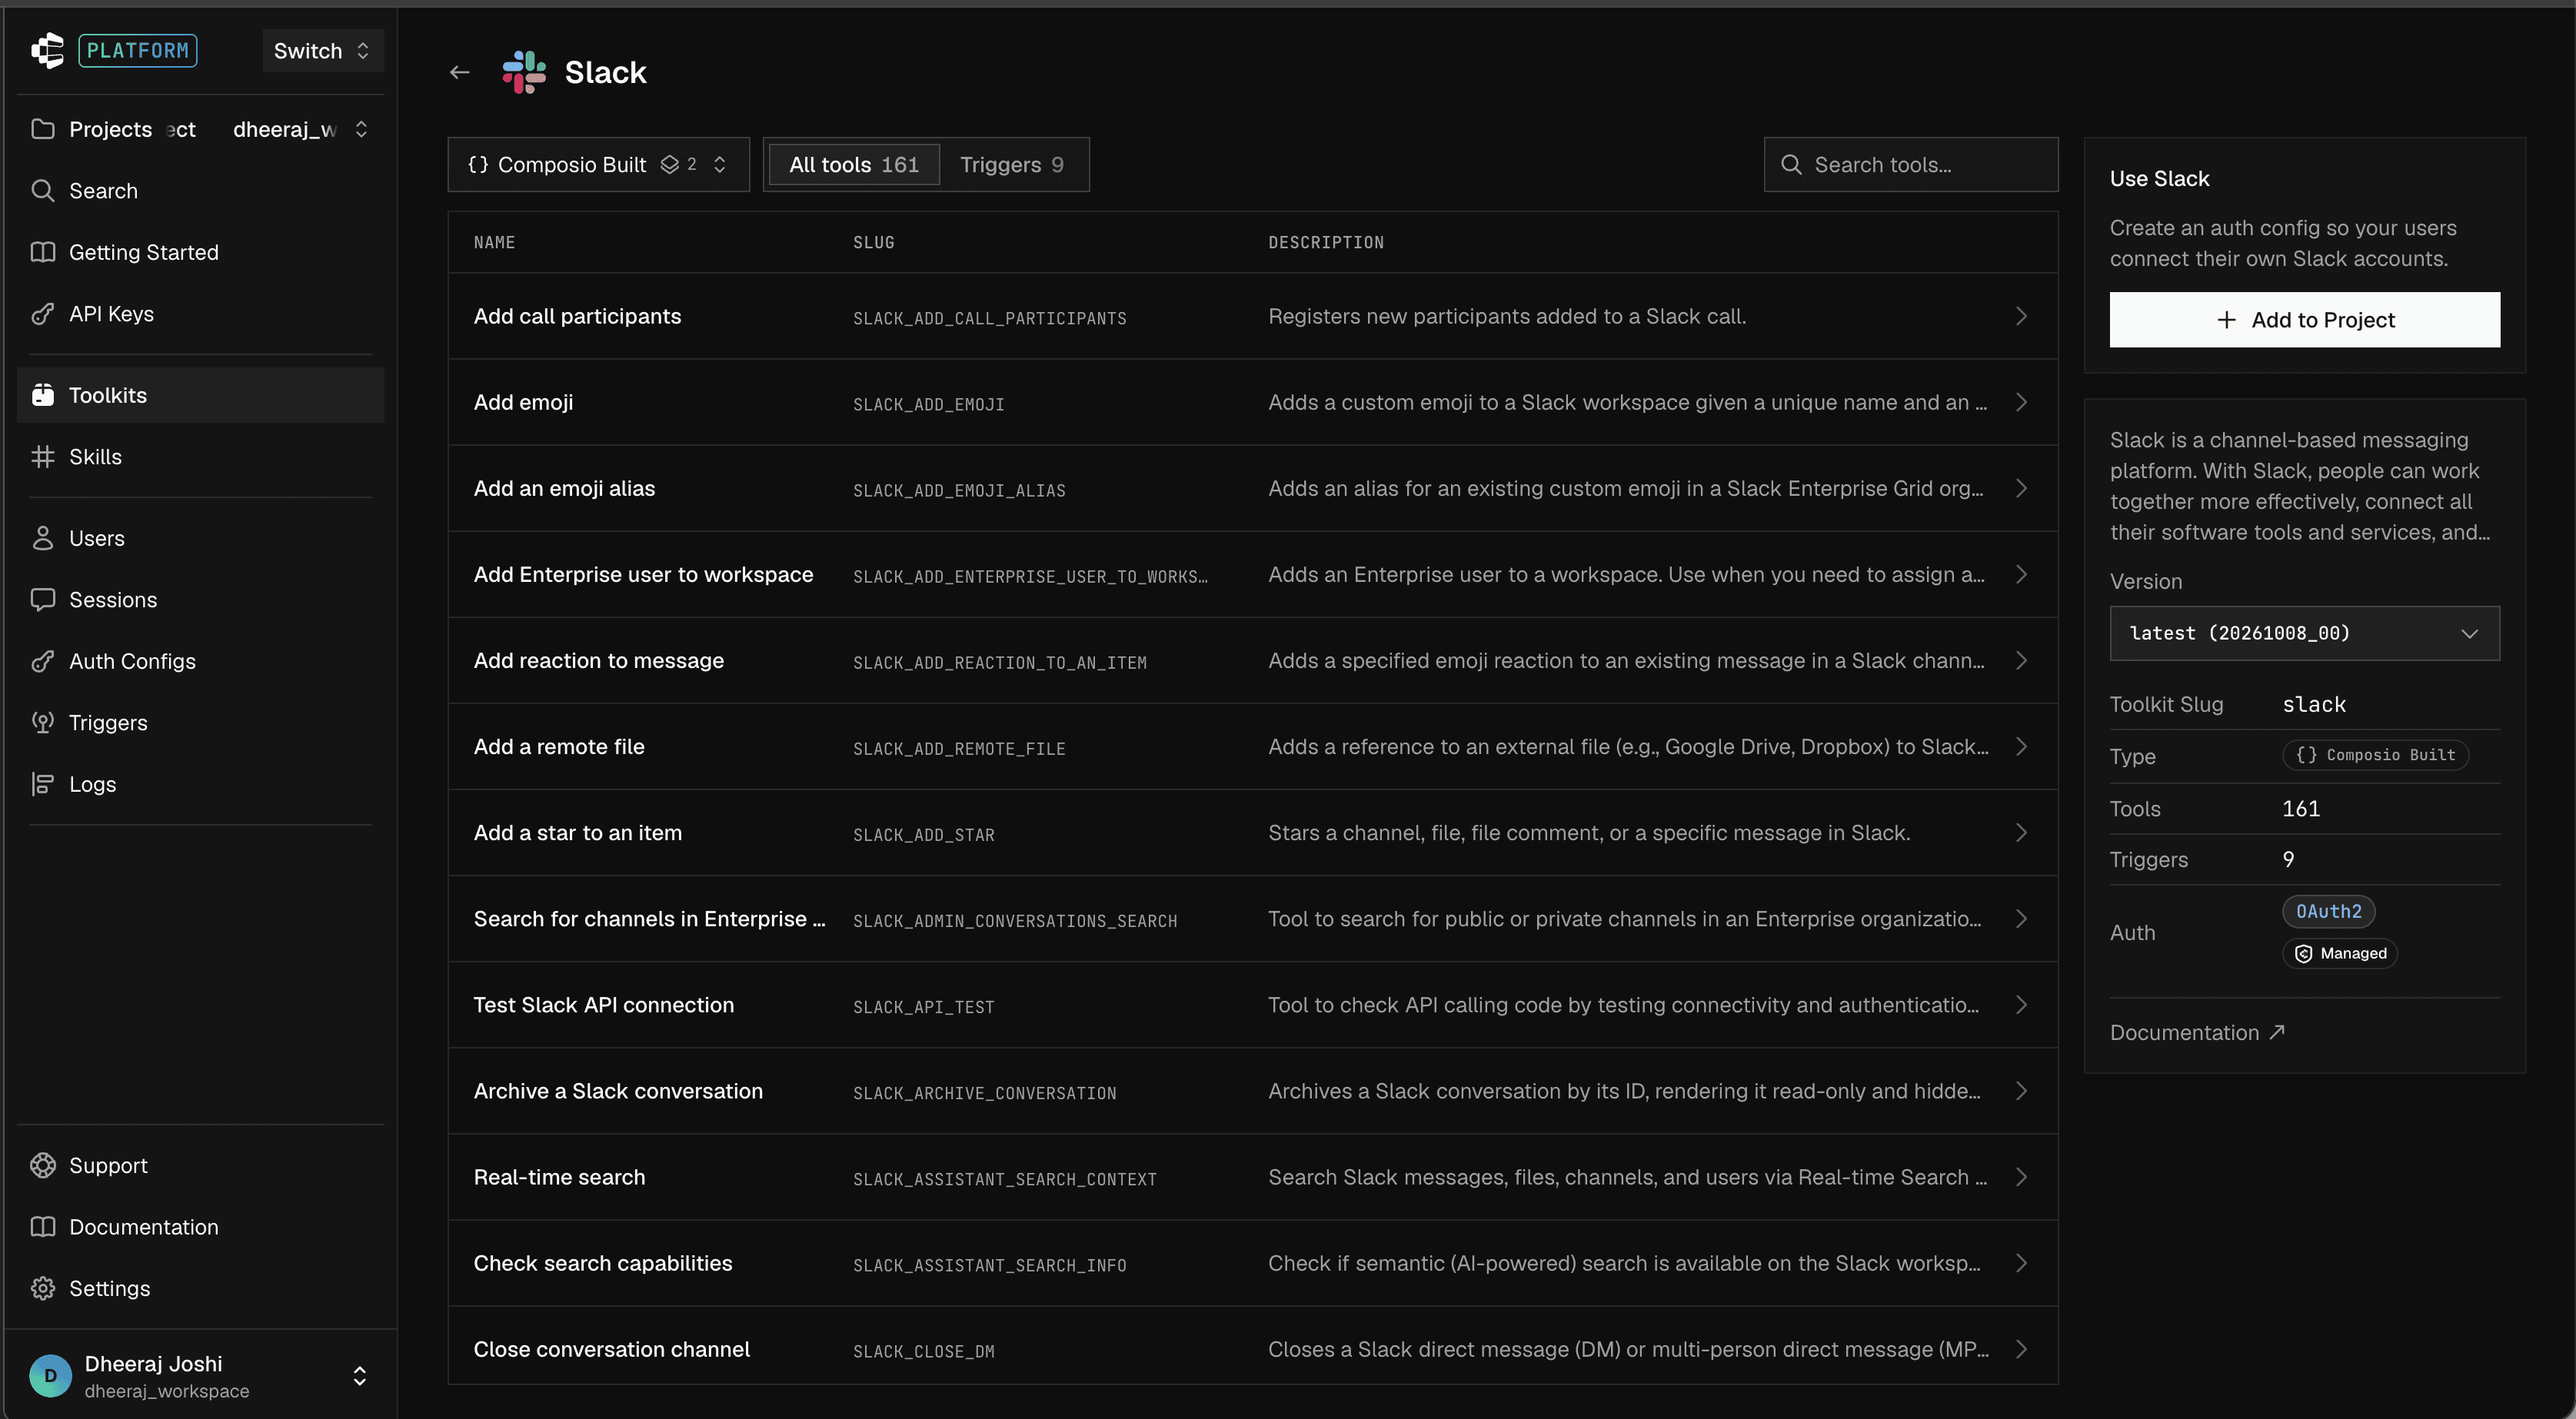
1. Open the Slack toolkit page in the Composio Dashboard and click Add to Project.
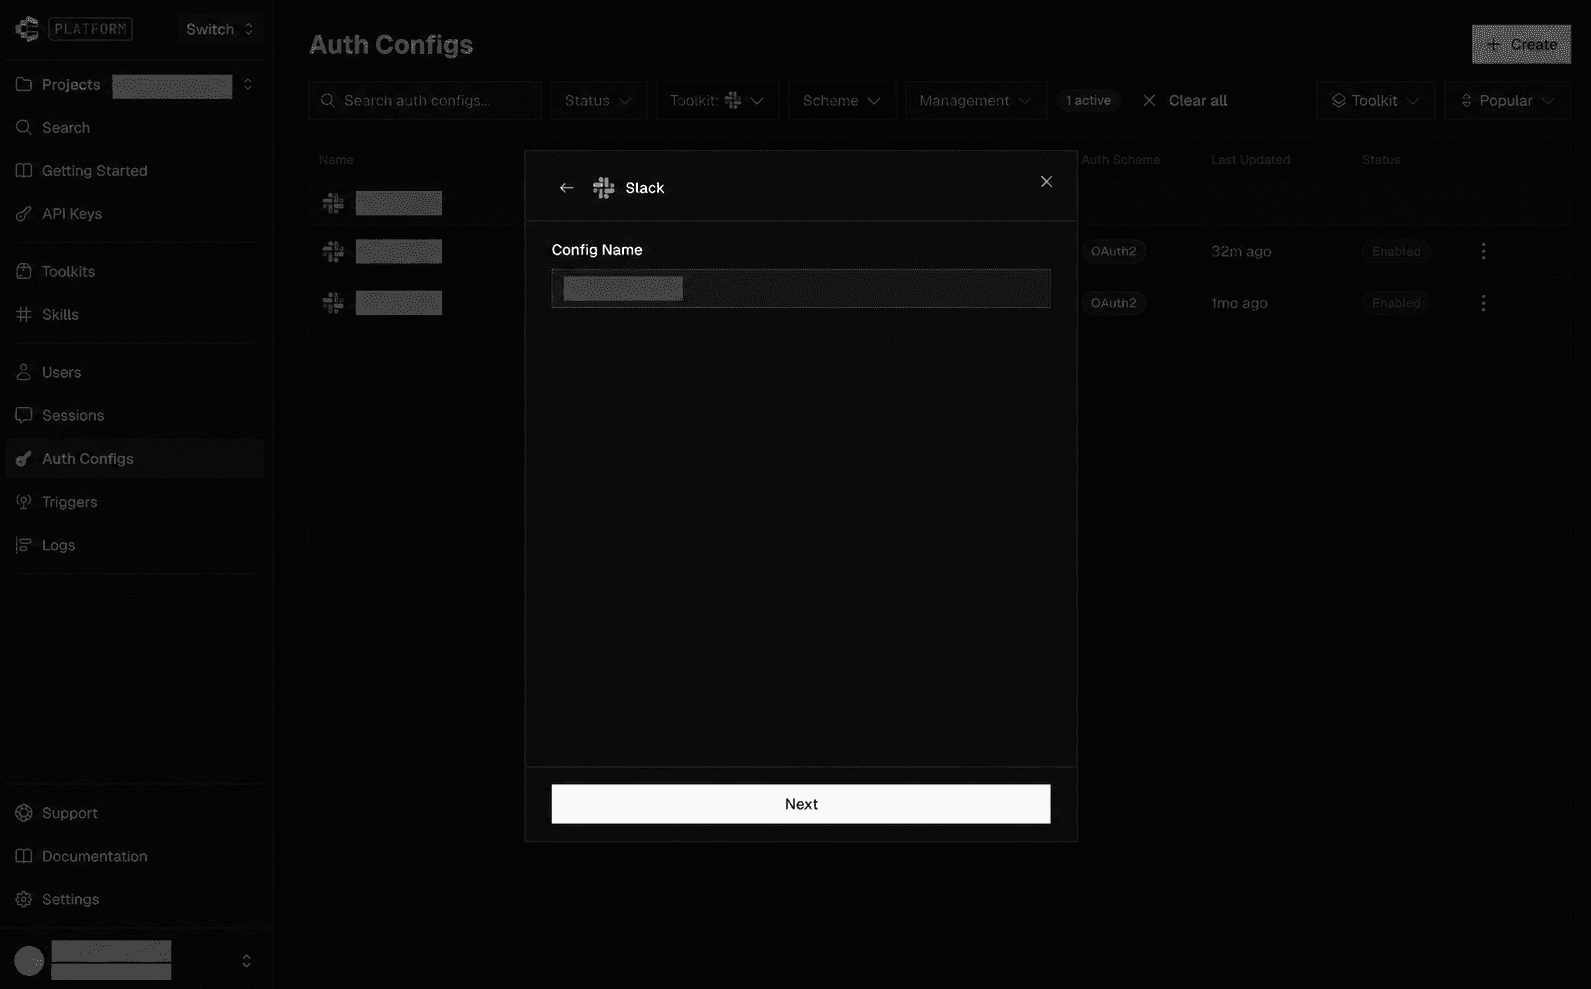
2. Enter a Config Name for your auth config and click Next.
Step 6: Enter Your Own Credentials
1. Under Credentials, select Your Own Credentials, then paste the Client ID and Client Secret from your Slack app.
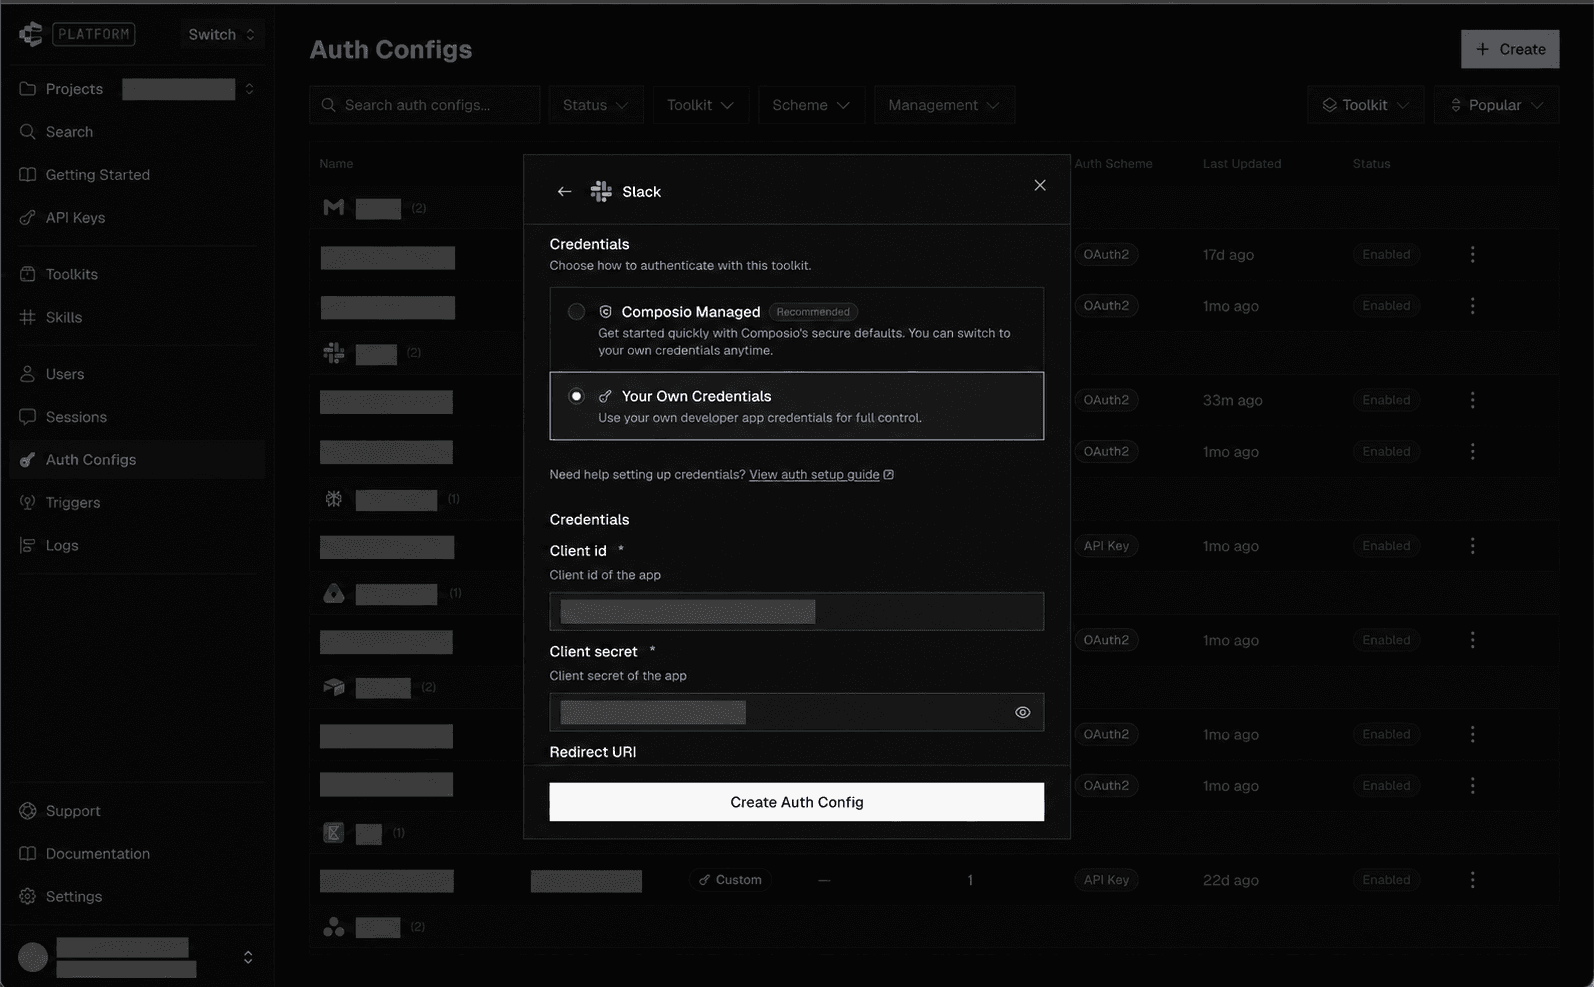
2. Make sure the Redirect URI matches the one added to your Slack app:
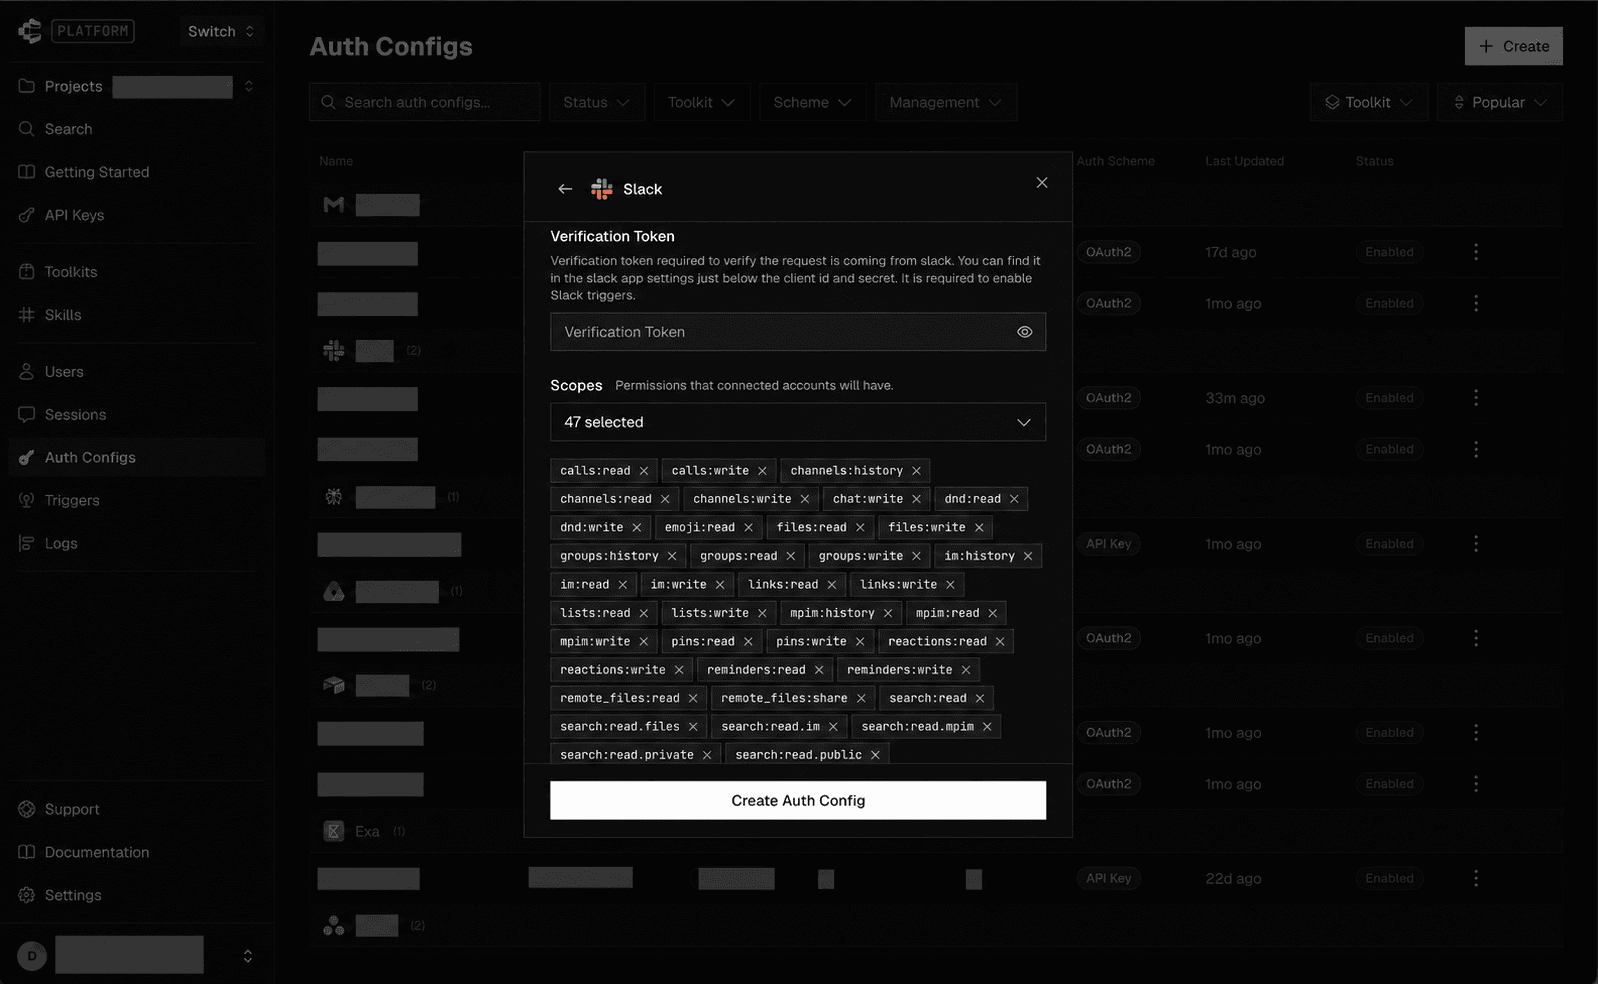
https://backend.composio.dev/api/v1/auth-apps/add3. Enter the Verification Token (required for Slack triggers) and choose the Scopes your connected accounts need, then click Create Auth Config.
Step 7: Connect Your Slack Account
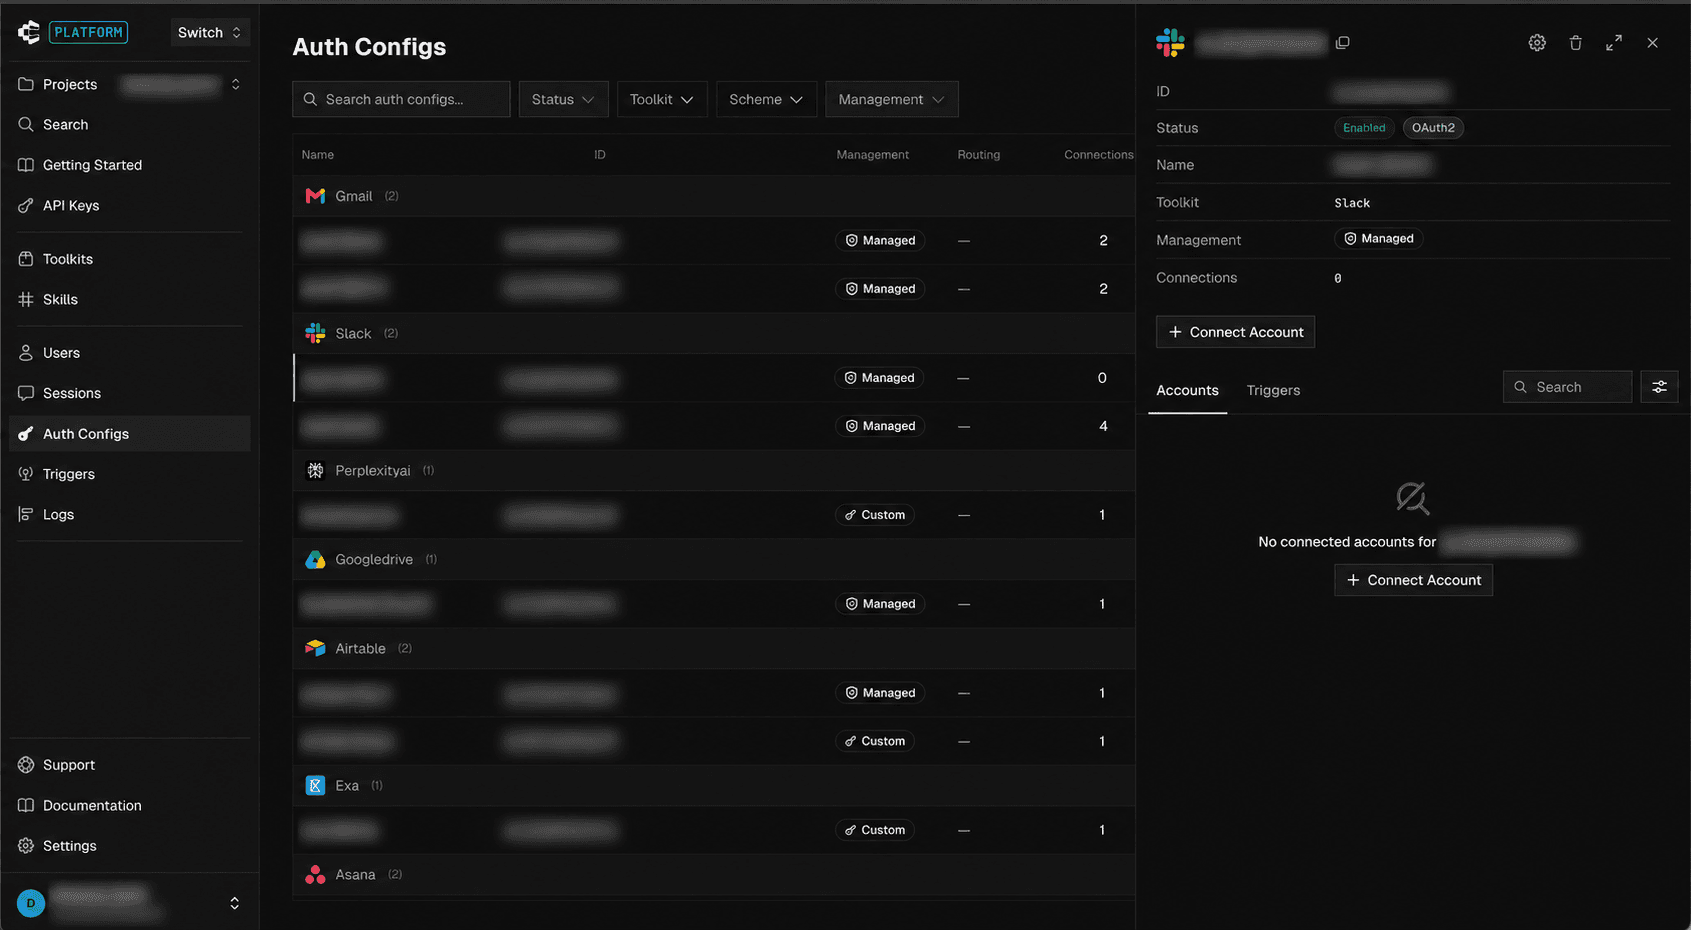
1. Open the new auth config and click Connect Account.
2. On the Slack page, select your workspace, review the permissions, and click Allow.

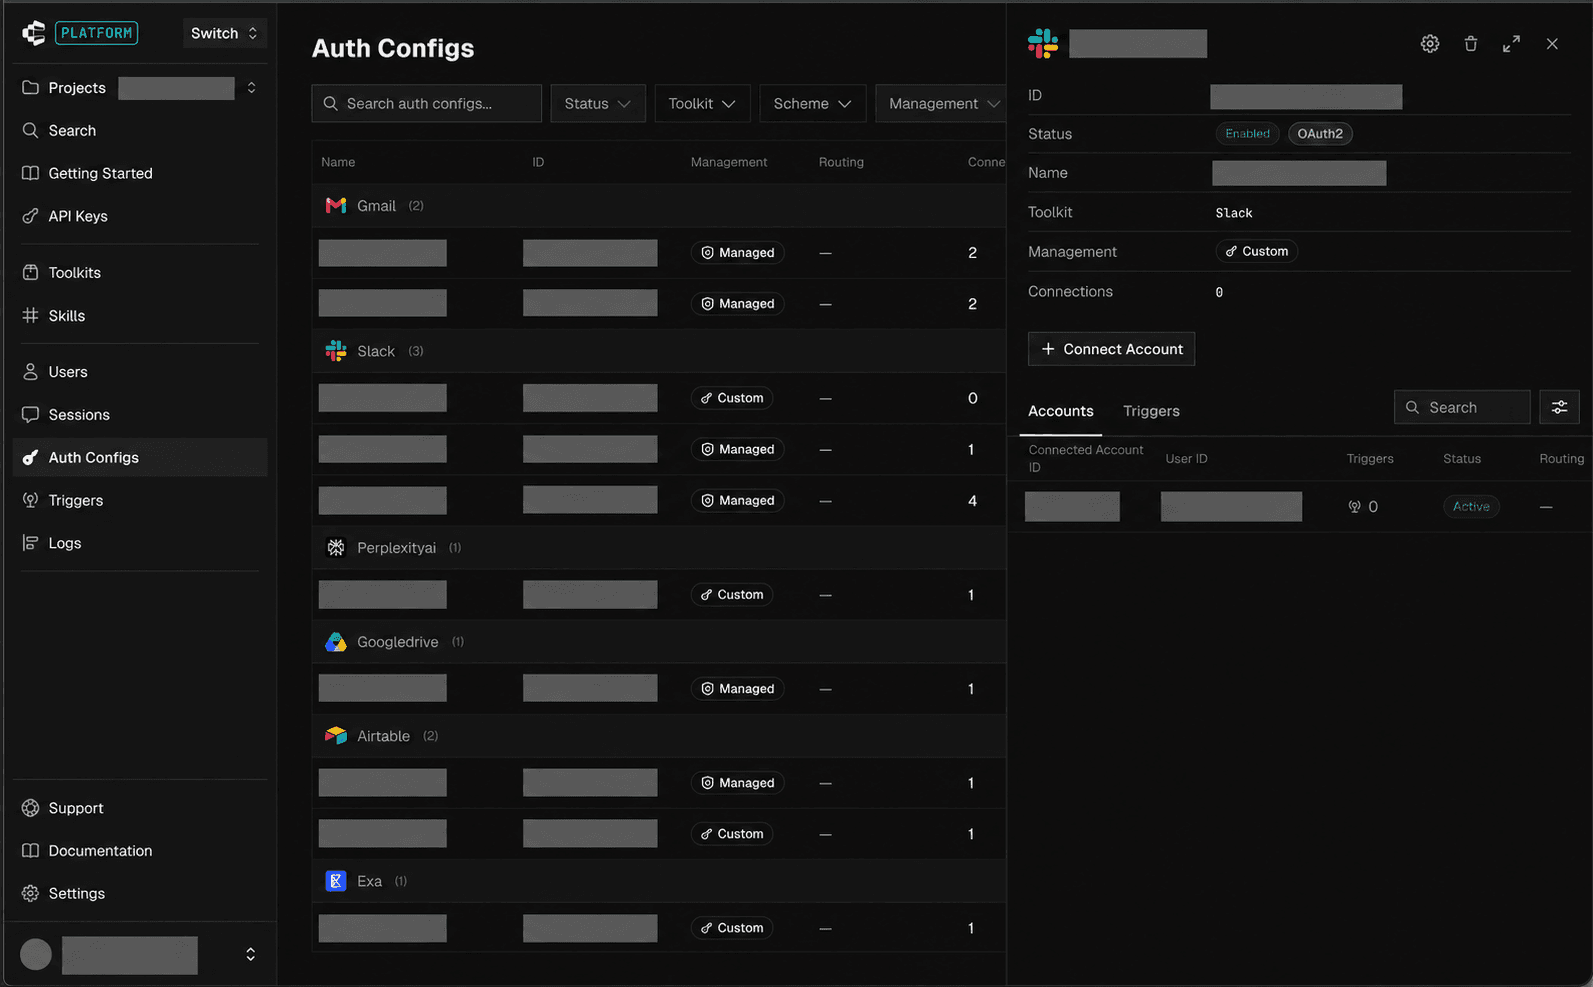
3. Your connected account now appears under Accounts with an Active status.
Base URL for the Slack API
All Slack API calls are made via:
https://slack.com/api/That’s it! Your Slack + Composio OAuth integration is ready.
You can now copy the Auth Config ID (ac_...) and use it inside your code or secret manager.
Revoking Access
You can disconnect Slack at any time:
In Composio: open the auth config under Auth Configs and delete the connected account, or disable the auth config.
In Slack: a workspace admin can remove the app from Settings & administration → Manage apps, which immediately revokes its tokens.
Disclaimer: Composio uses AI and may make mistakes, so please review important outputs and confirm sensitive actions.