Overview
This guide walks you through the complete process of registering a Ramp OAuth app in the Ramp Developer portal and connecting it to Composio using your own credentials. By the end, you will have a registered Ramp OAuth app, a Composio Auth Config backed by those credentials, and a live ACTIVE connected account ready for agents or automations.
What You Will Set Up:
Open your Ramp account settings and navigate to Company → Developer.
Create a new OAuth app and verify your identity.
Add the Composio Redirect URI to the app.
Enable the required Grant Types (Authorization code, Client credentials, Refresh token).
Configure OAuth scopes.
Copy the Client ID and Client Secret.
Create a Ramp Auth Config in Composio with OAUTH2.
Paste credentials, scopes, Base URL, and Authorization URL into Composio.
Connect a user account and approve the Ramp OAuth consent screen.
Verify the connection shows ACTIVE in Composio.
PREREQUISITE
You need an active Ramp account with Owner or Admin access to the Developer section. You also need access to your Composio project. Note whether you are using a Demo account or a Production account - the Base URL and Authorisation URL differ between the two (see Step 9).
1. Click Your Profile Icon to Open Settings
Sign in to your Ramp account. In the top-right corner, click your profile avatar to open the user menu. From the dropdown, click Settings.
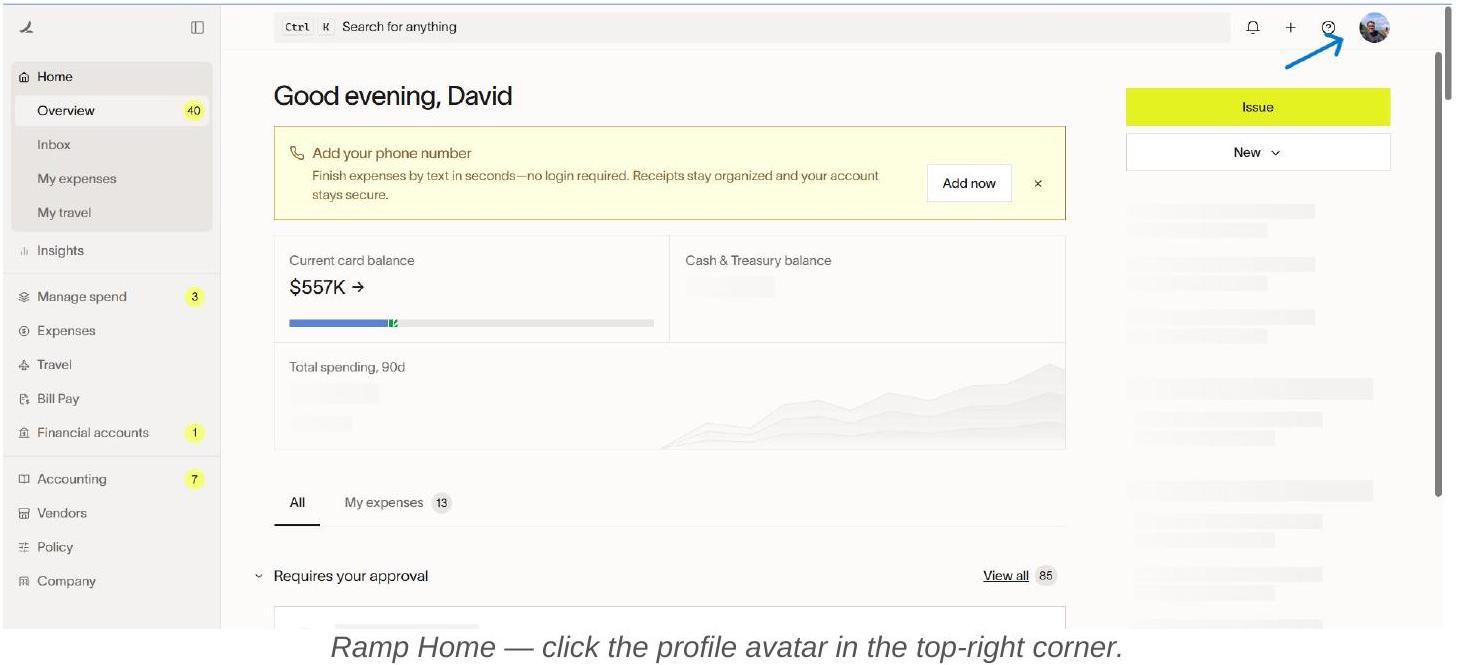
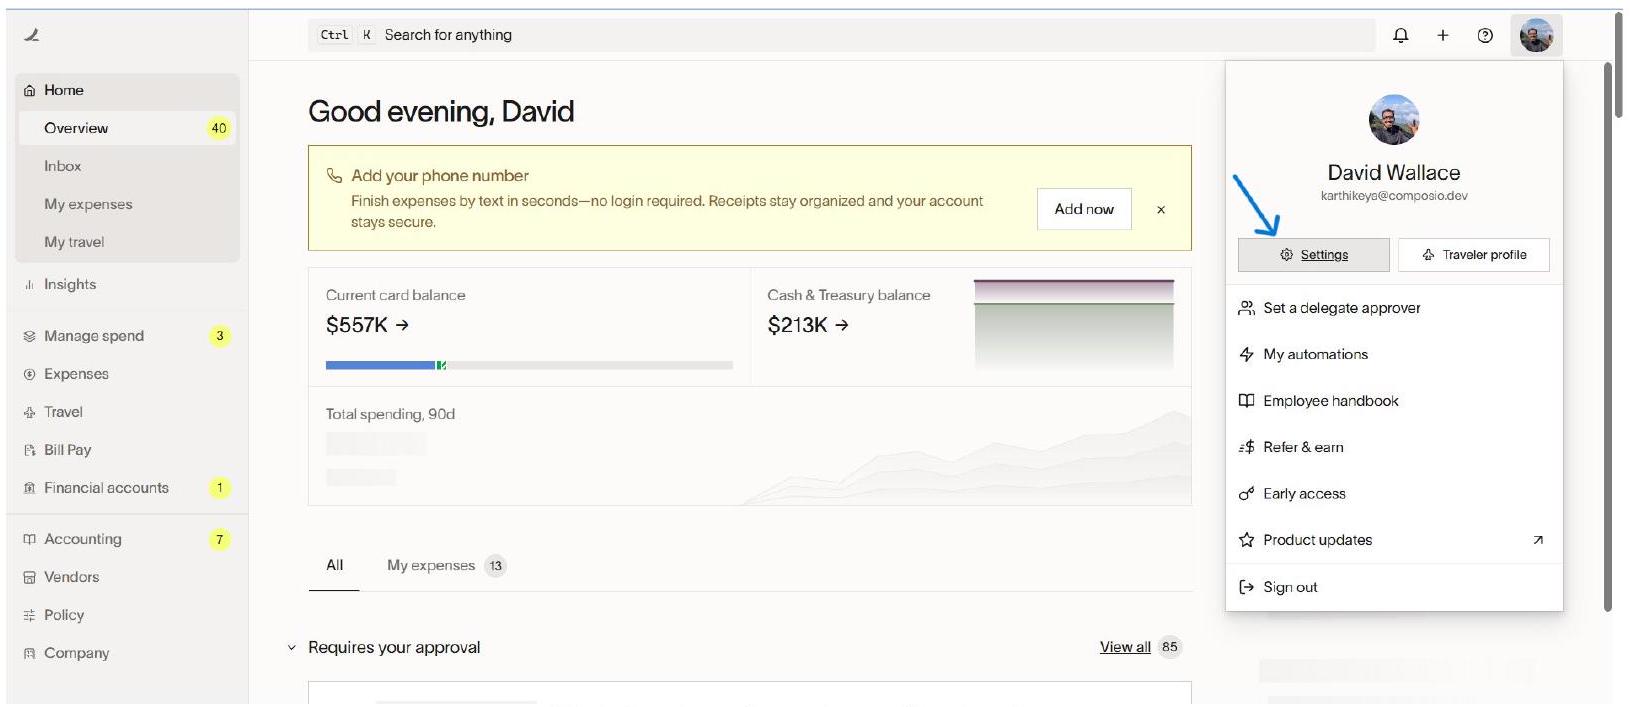
Click Settings from the profile dropdown.
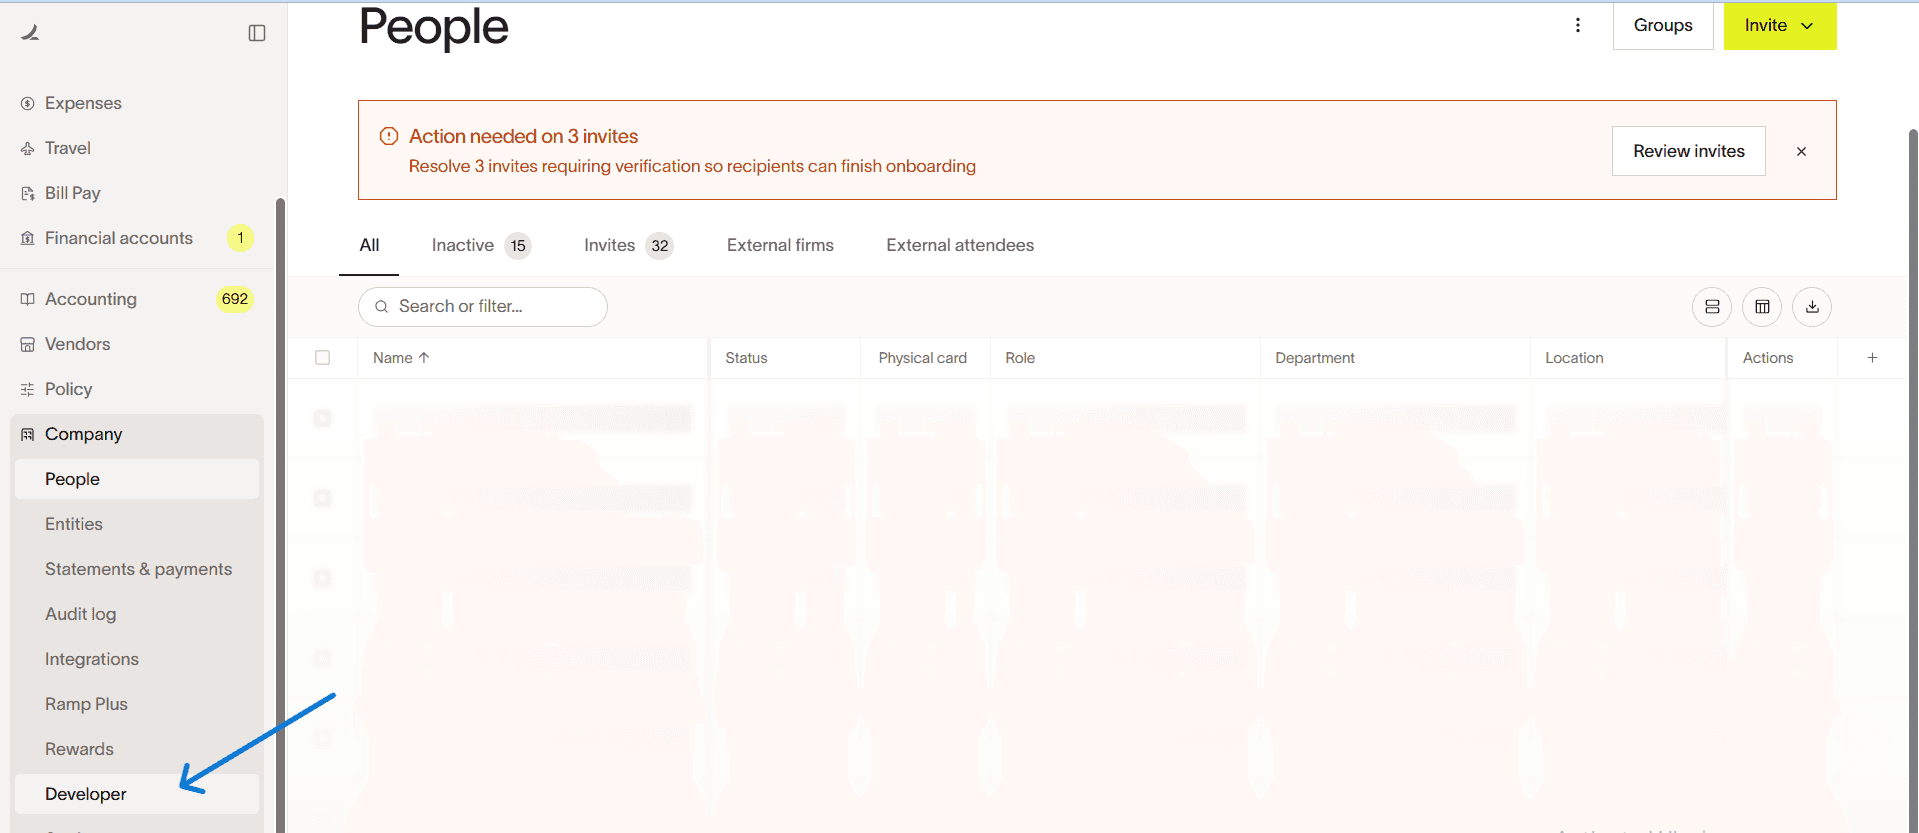
2. Navigate to Company → Developer
Inside Settings, you land on the Personal profile page. In the left sidebar, click Company to expand the section, then click Developer at the bottom of the Company sub-menu.
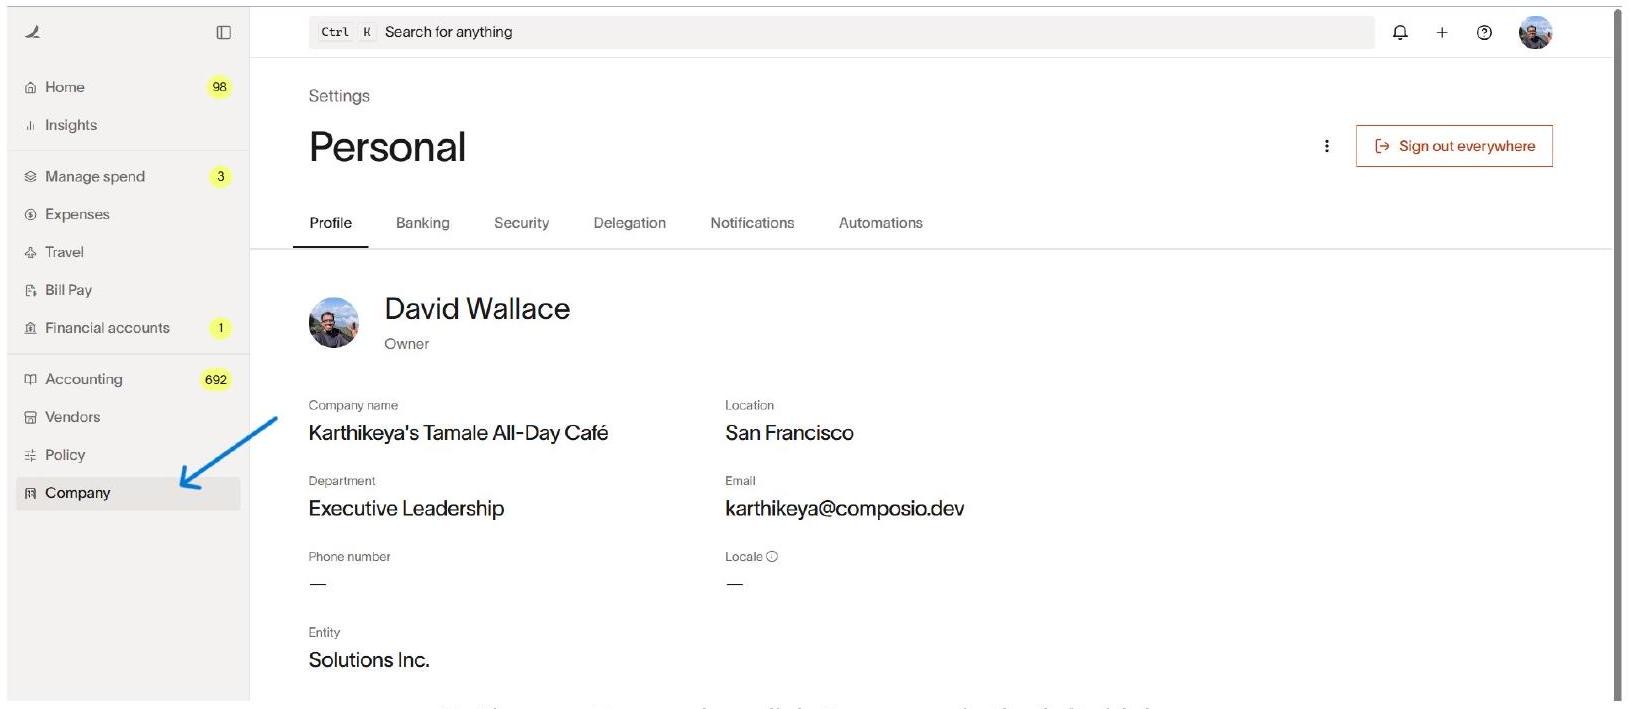
Settings → Personal — click Company in the left sidebar.
3. Create a New App
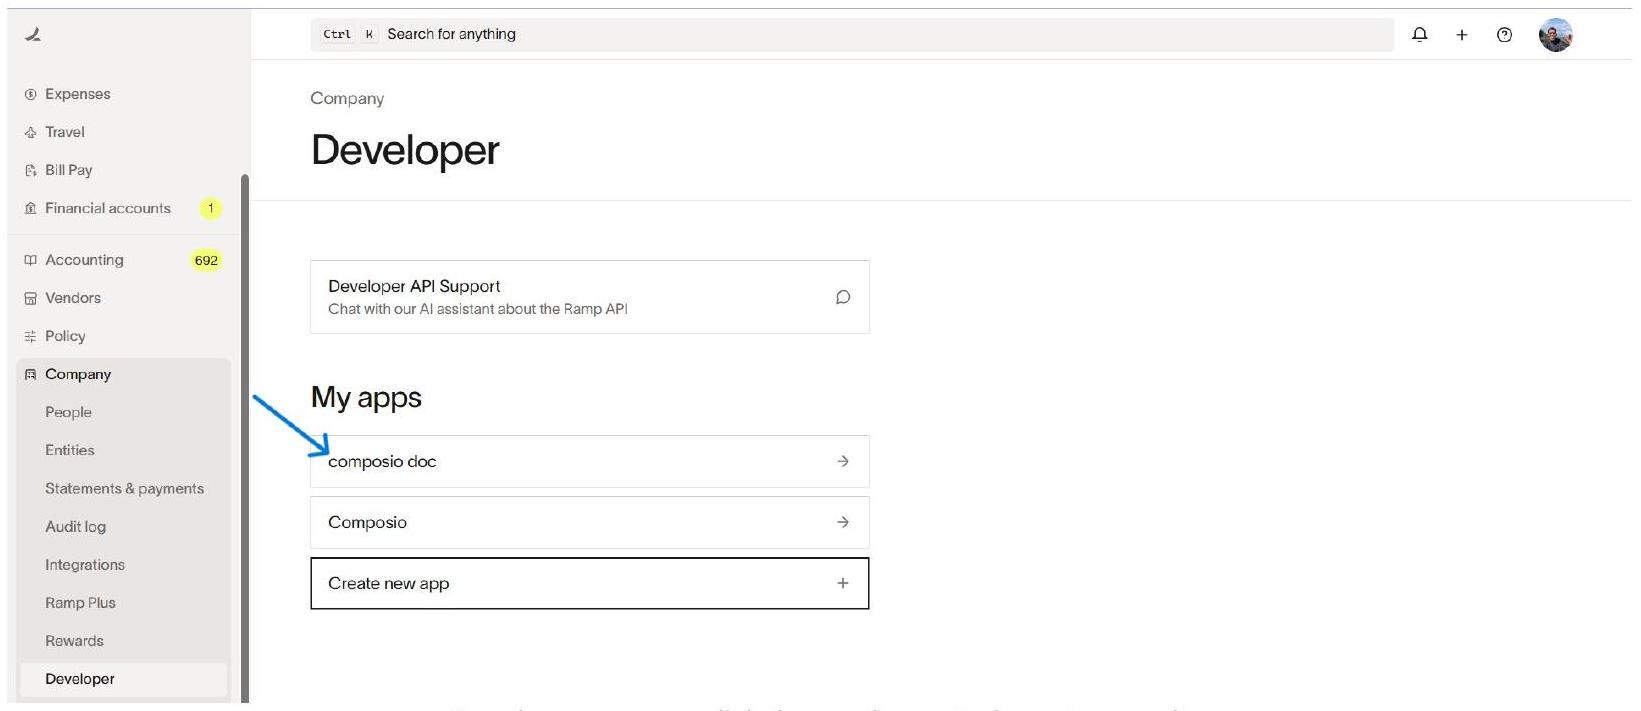
The Developer page shows a list of your existing apps under My apps. Click Create new app.

A modal dialog appears. Enter an App name (e.g., composio doc), check the box to agree to Ramp’s Developer Terms of Service, then click Create app.
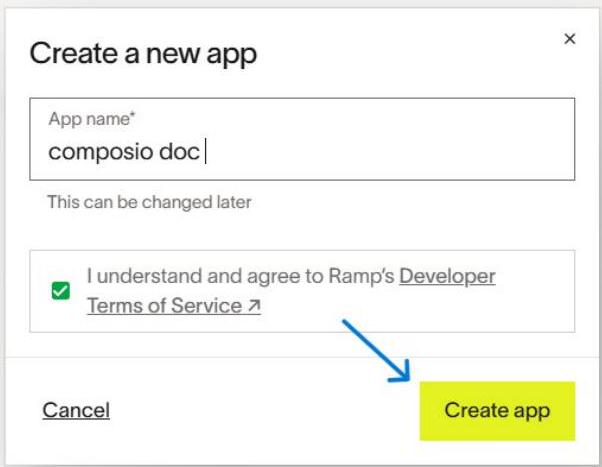
Enter the App name, accept the Terms of Service, and click Create app.
4. Complete Email Verification
Ramp requires email verification before creating a new app. A dialogue will appear asking you to enter a 6-digit code sent to your registered email address. Check your inbox (and spam folder), enter the code, then click Verify.

Email verification dialogue - enter the 6-digit code from your email, then click Verify.
💡 NOTE
The verification code is valid for 5 minutes. If it expires, click Resend to get a new one. If you do not have access to the registered email, contact your Ramp team admin.
5. Open the Newly Created App
After verification, Ramp returns you to the Developer page. Your new app now appears in the My apps list. Click on it to open the app detail page.
Add the Composio Redirect URI
Inside the app detail page, you will see the App information section at the top and a Redirect URIs section below it. Click + Add new URI to open the Add new URI dialogue.
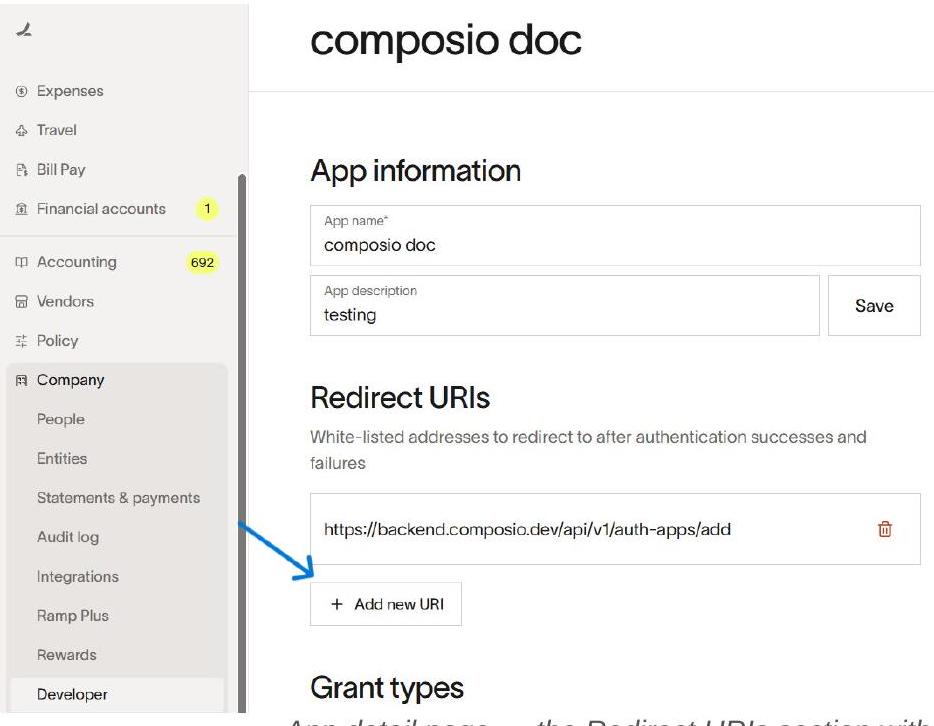
App detail page - the Redirect URIs section with the Composio URI already added.
In the Add new URI dialog, paste the Composio redirect URI and click Add:
https://backend.composio.dev/api/v1/auth-apps/add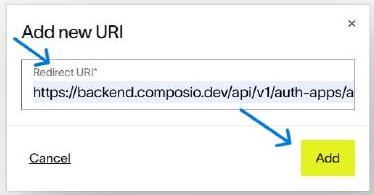
Paste the Composio Redirect URI and click Add
IMPORTANT - Redirect URI
The Redirect URI must match exactly: https://backend.composio.dev/api/v1/auth-apps/add a single character mismatch will cause a redirect_uri_mismatch error, and the OAuth flow will fail.
Enable Grant Types and Copy Credentials
Scroll down on the same app detail page to the Grant types section. Enable all three grant types by toggling them on, then note the Client ID and reveal and copy the Client secret.
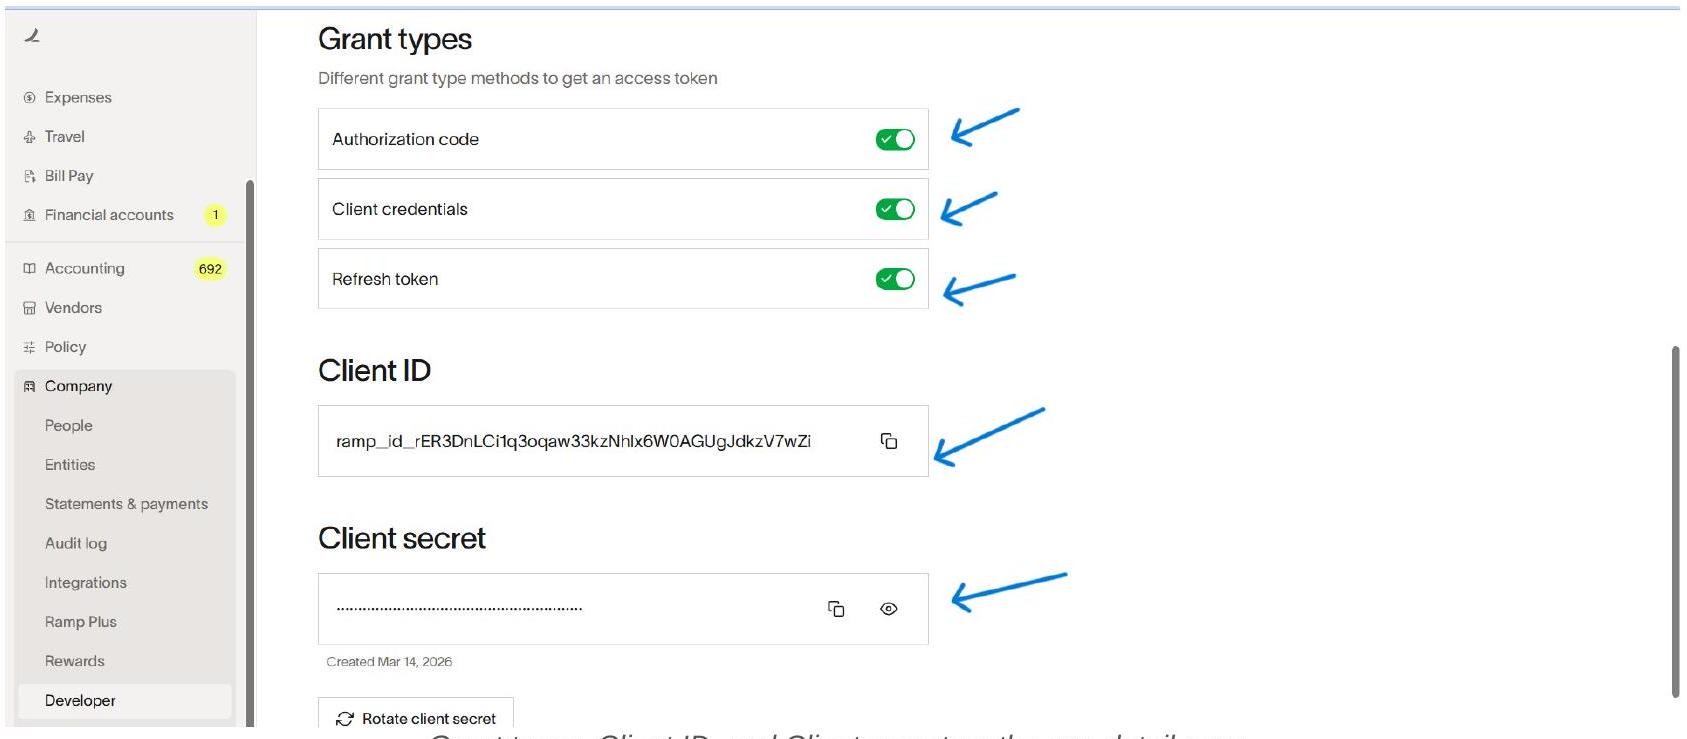
Grant types, Client ID, and Client secret on the app detail page.
WARNING - Save Your Client Secret Now
The Client secret is masked on screen. Use the eye icon to reveal it and copy it immediately to a secure location. If you lose it, click ‘Rotate client secret’ to generate a new one - but you will need to update your Composio Auth Config and reconnect all affected accounts.
Configure OAuth Scopes
Still on the app detail page, scroll down to the Scopes section. Click Configure allowed scopes to open the Set scopes dialogue. Toggle on all scopes that your integration needs, then click Set.
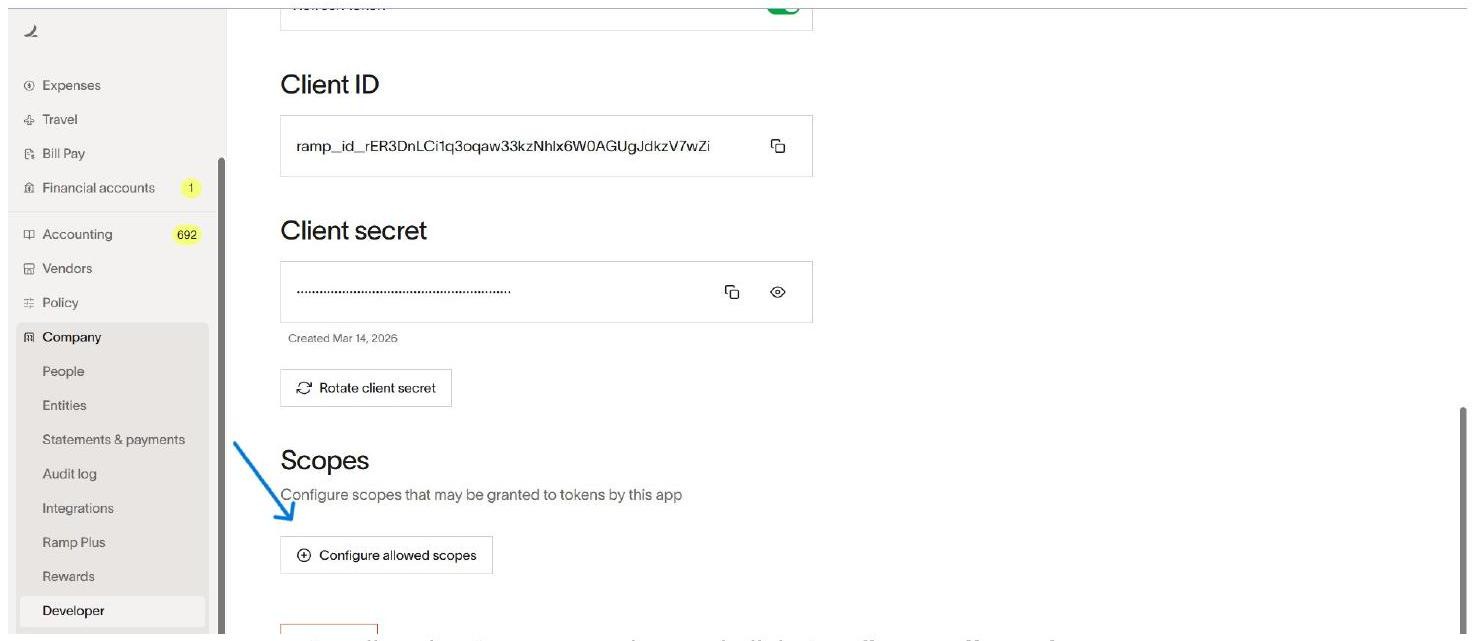
Scroll to the Scopes section and click Configure allowed scopes.
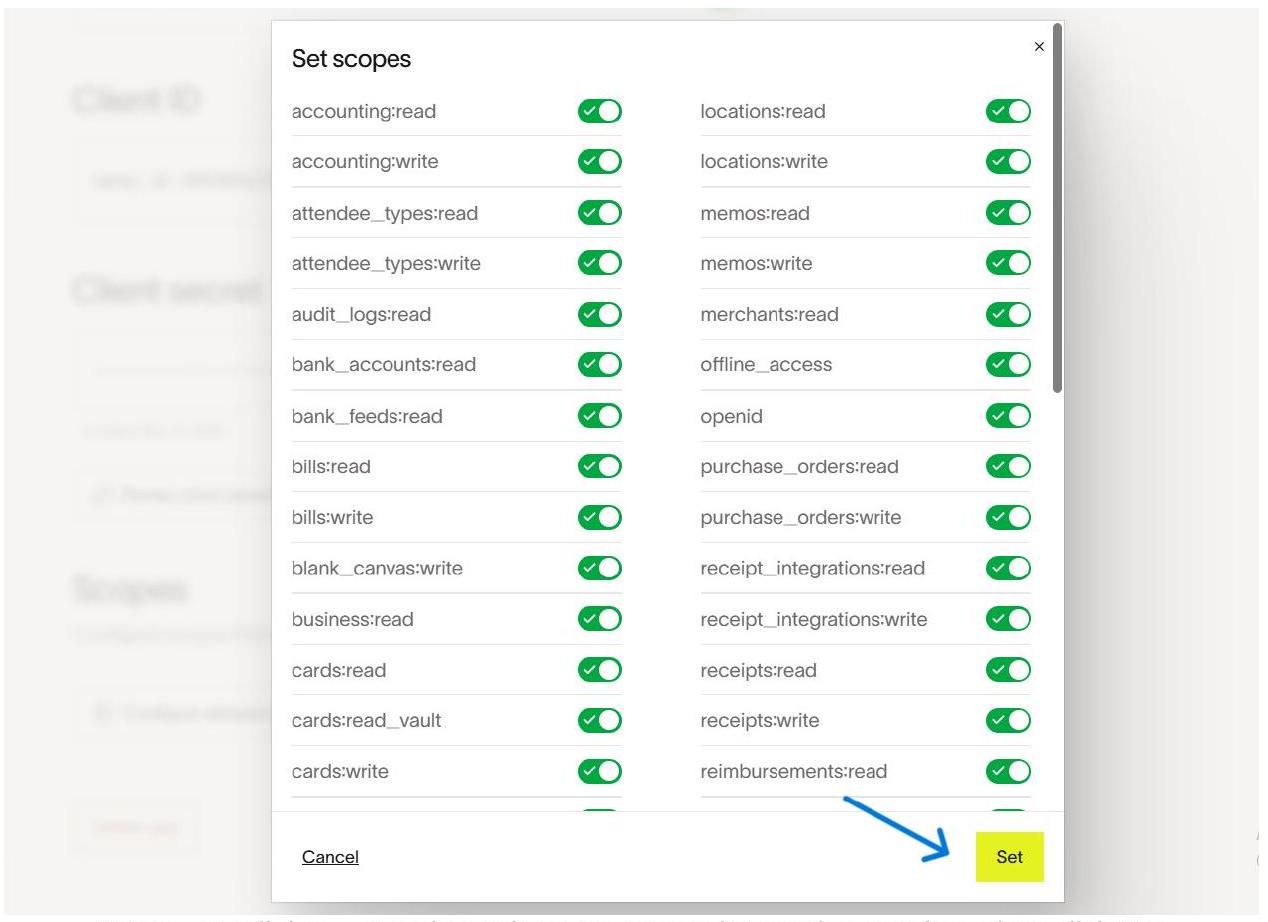
Set scopes dialogue — toggle on the scopes your integration requires, then click Set.
SCOPE SELECTION GUIDANCE
Select only the scopes your use case requires. Common scopes include: accounting:read, bills:read, bills:write, cards:read, cards:write, business:read, users:read, vendors:read, vendors:write, receipts:read, and offline_access. The exact same set of scopes must be added in Composio when you create the Auth Config (Step 10). A mismatch between Ramp and Composio scopes will result in failed or incomplete authorization.
Open Composio and Create a New Auth Config
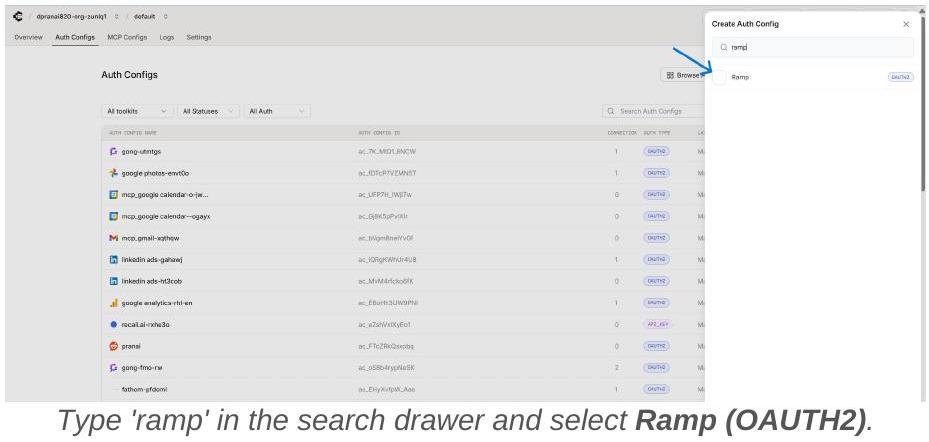
Switch to your Composio dashboard. Navigate to Auth Configs and click + Create Auth Config. In the search drawer that opens, type ramp and select Ramp with the OAUTH2 badge.
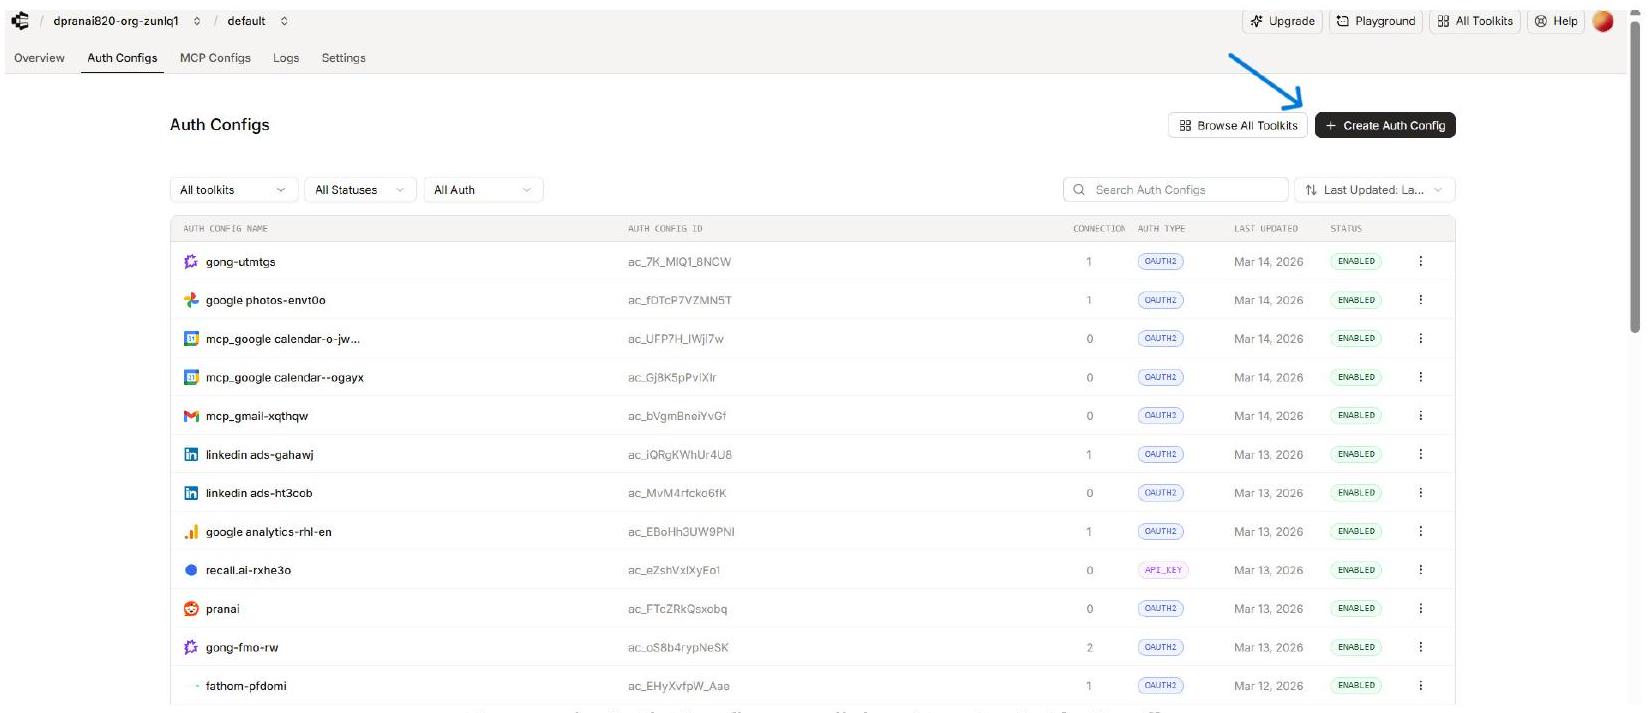
Composio Auth Configs — click + Create Auth Config.
Fill In the Composio Ramp Auth Config Form
The Ramp Auth Config form opens in the right panel. Fill in each field using the credentials you copied from Ramp.
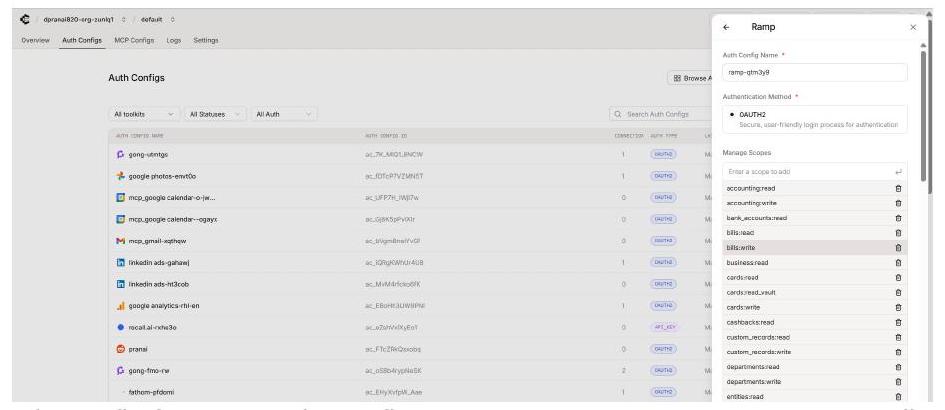
Composio Ramp Auth Config form - Auth Config Name, OAUTH2, Manage Scopes, Client ID, Client Secret.
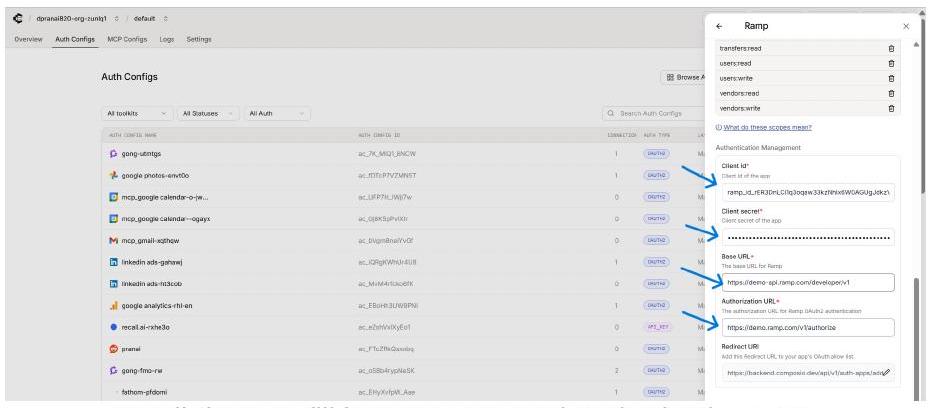
Scroll down to fill in Base URL and Authorization URL.
DEMO vs PRODUCTION URLS
If you registered your OAuth app on a Ramp Demo account, use the demo URLs shown above. For a live production Ramp account, use the production URLs. Using the wrong URLs will cause token exchange failures. Check your browser address bar when logged into Ramp - demo accounts show demo.ramp.com or demo-api.ramp.com while production shows app.ramp.com.
Connect a User Account - Enter External User ID
After saving the Auth Config, open it in Composio and click Connect Account. A modal dialog appears asking for an External User ID. Enter a stable, unique identifier for the user from your own system, then click Connect Account.
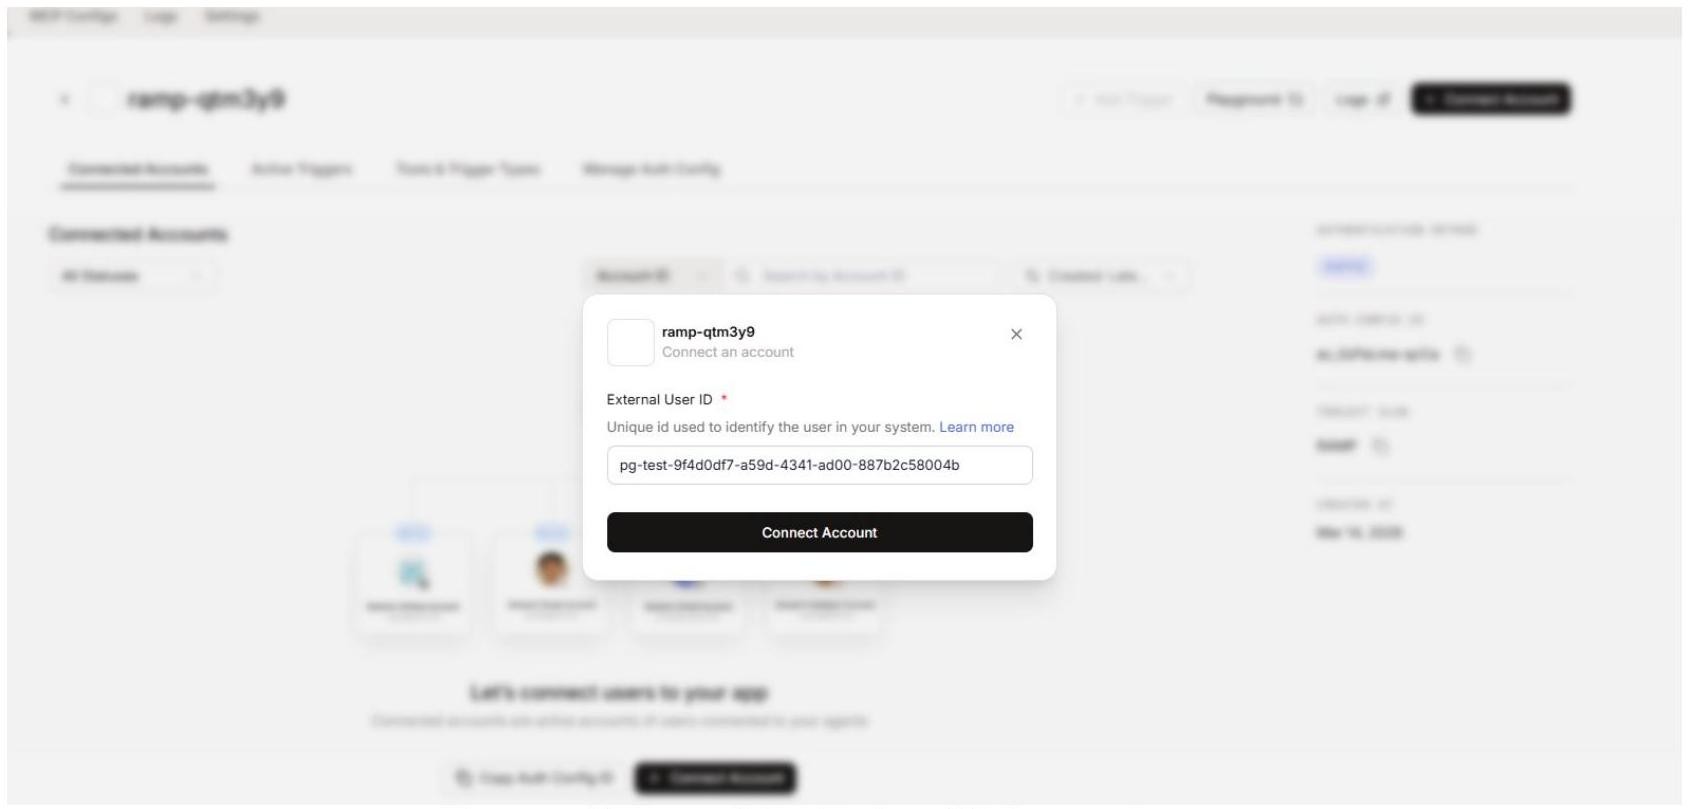
Enter a stable External User ID, then click Connect Account.
EXTERNAL USER ID
Use a consistent, stable ID such as a UUID from your own user database. Composio uses this to associate the Ramp connection with the correct end user when your agents or apps make tool calls. Do not use temporary or session-based IDs.
Approve the Ramp OAuth Consent Screen
After clicking Connect Account, the Ramp OAuth consent screen opens in the browser. It shows the company name, the requesting entity, and a full list of the permissions being requested. Review them, then click Allow to grant access.
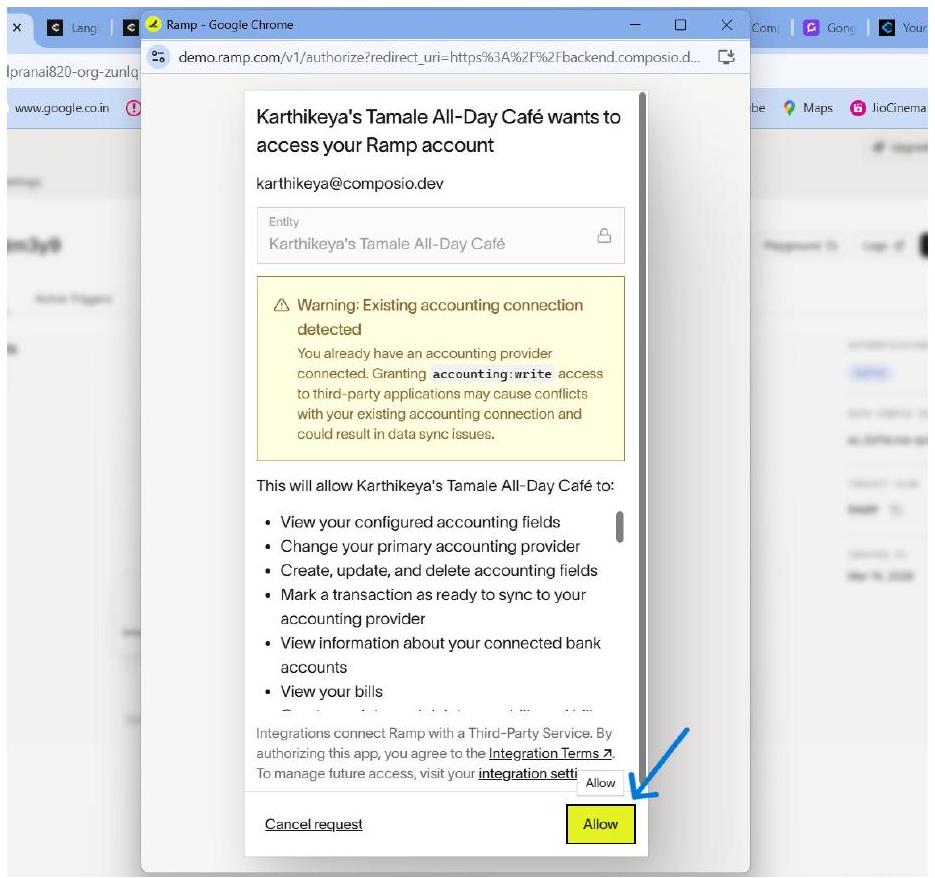
Ramp OAuth consent screen - review the requested permissions and click Allow.
💡 NOTE - accounting:write Warning
If your scopes include accounting:write, Ramp will show a warning that you already have an accounting provider connected and that granting this scope may cause conflicts. If you do not need write access to accounting data, remove this scope from both the Ramp app (Step 8) and the Composio Auth Config (Step 10) before connecting.
Verify the Active Connection in Composio
After the OAuth flow completes, Composio returns you to the Auth Config detail page. The Connected Accounts tab now shows your connection with status ACTIVE.
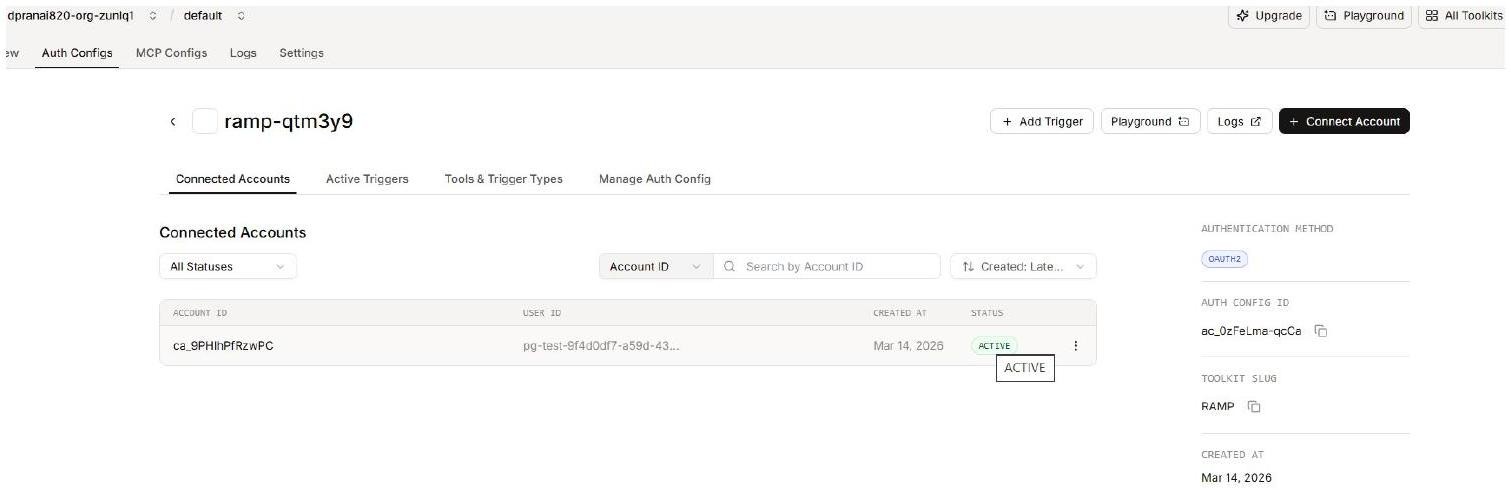
Composio Connected Accounts tab showing an ACTIVE Ramp connection.
Confirm the following before using the connection:
The Account ID appears in the Connected Accounts list with a status of ACTIVE.
The authentication method on the right panel shows OAUTH2.
Toolkit Slug shows RAMP.
Note the Auth Config ID (e.g., ac_OzFeLma-qcCa) for use in SDK calls or API requests.
Troubleshooting & Common Issues
Redirect URI mismatch
Confirm the Redirect URI in Ramp’s app page exactly matches https://backend.composio.dev/api/v1/auth-apps/add — no trailing slash or extra characters.
Wrong Base URL or Authorization URL
The most common error. Demo accounts must use demo-api.ramp.com / demo.ramp.com. Production accounts must use api.ramp.com / app.ramp.com. Check your Ramp browser URL to confirm which environment you are on.
The developer section is not visible
The Developer section requires Owner or Admin access. Ask your Ramp workspace owner to grant you the required role.
Lost Client Secret
Click ‘Rotate client secret’ on the Ramp app detail page to generate a new secret. Update the Client Secret in your Composio Auth Config and reconnect affected accounts.
Scopes mismatch
The scopes in your Ramp app (Step 8) must exactly match those in the Composio Auth Config (Step 10). Mismatched scopes cause authorization failures or missing API permissions.
Connection goes inactive
Ensure the refresh token grant type is enabled in the Ramp app (Step 7). Open the Auth Config in Composio, click Connect Account again, and re-authorise.
Email verification code expired
The code is valid for only 5 minutes. Click Resend in the verification dialogue to get a new code.