


Composio connects AI agents to Google Docs so they can read documents and work with document content.
Use Composio-managed OAuth to connect without registering an app, or follow this guide to use your own Google OAuth credentials.
A Google account with access to the document. Use its document ID or URL.
Part 1: Set up your Google OAuth app
Step 1: Choose a project and enable the API
1. Open Google Cloud Console and select the project that will own your OAuth app. Create a project if you do not already have one.

2. Open APIs & Services → Library, search for Google Docs API, and select the matching API. Select Enable. If Google shows Manage, the API is already enabled.

Enabling an API is a project setting, separate from Google reviewing your OAuth app. If you cannot enable it, ask your Google Cloud project administrator for the required access. API enablement permissions.
Google's Google Docs setup documentation covers the API prerequisites.
Step 2: Configure branding and audience
1. Open Google Auth Platform → Branding. If Google shows Get started, enter your app name, user-support email, audience, and developer-contact details. Review the displayed policy before agreeing and saving.

2. In Audience, choose Internal only for eligible users in your Workspace organization. Use External for consumer accounts or users outside that organization.
3. If the external app is in Testing, add the Google accounts that will test it under Test users.

Step 3: Choose permissions for your workflow
1. Open Data Access → Add or remove scopes.
2. Choose the scopes your workflow needs. If a scope is missing, paste its full URL under Manually add scopes and select Add to table.
Permission reference. To read a document by ID, the example uses https://www.googleapis.com/auth/documents.readonly. documents.readonly supports reading documents. Editing needs a write scope. Searching for documents through Drive can require enabling the Drive API and choosing Drive permissions. This is a workflow example, not a required permission set for every toolkit action. Permission reference.

3. Select Update, then Save.
Step 4: Create a web OAuth client
1. Open Clients → Create client. Select Web application and give the client a name.

2. Under Authorized redirect URIs, add the exact callback shown in Composio:
https://backend.composio.dev/api/v1/auth-apps/add
3. Create the client. Copy its Client ID and securely save its Client secret for Composio. Keep downloaded credential files private.

Part 2: Connect Google Docs in Composio
Step 1: Create an auth config
1. In the Composio dashboard, open Auth Configs and select Create.

2. Search for Google Docs and select the toolkit.

3. Enter a Config Name and select Next.

Step 2: Enter credentials and select scopes
1. Select OAuth 2.0 and Your Own Credentials. Enter the Google Client ID in Client id and its secret in Client secret.
2. Keep Redirect URI unchanged. It must match the callback registered on the Google web client.
3. Choose the scopes your integration needs. Match them to your app's Google configuration. Select Create Auth Config.
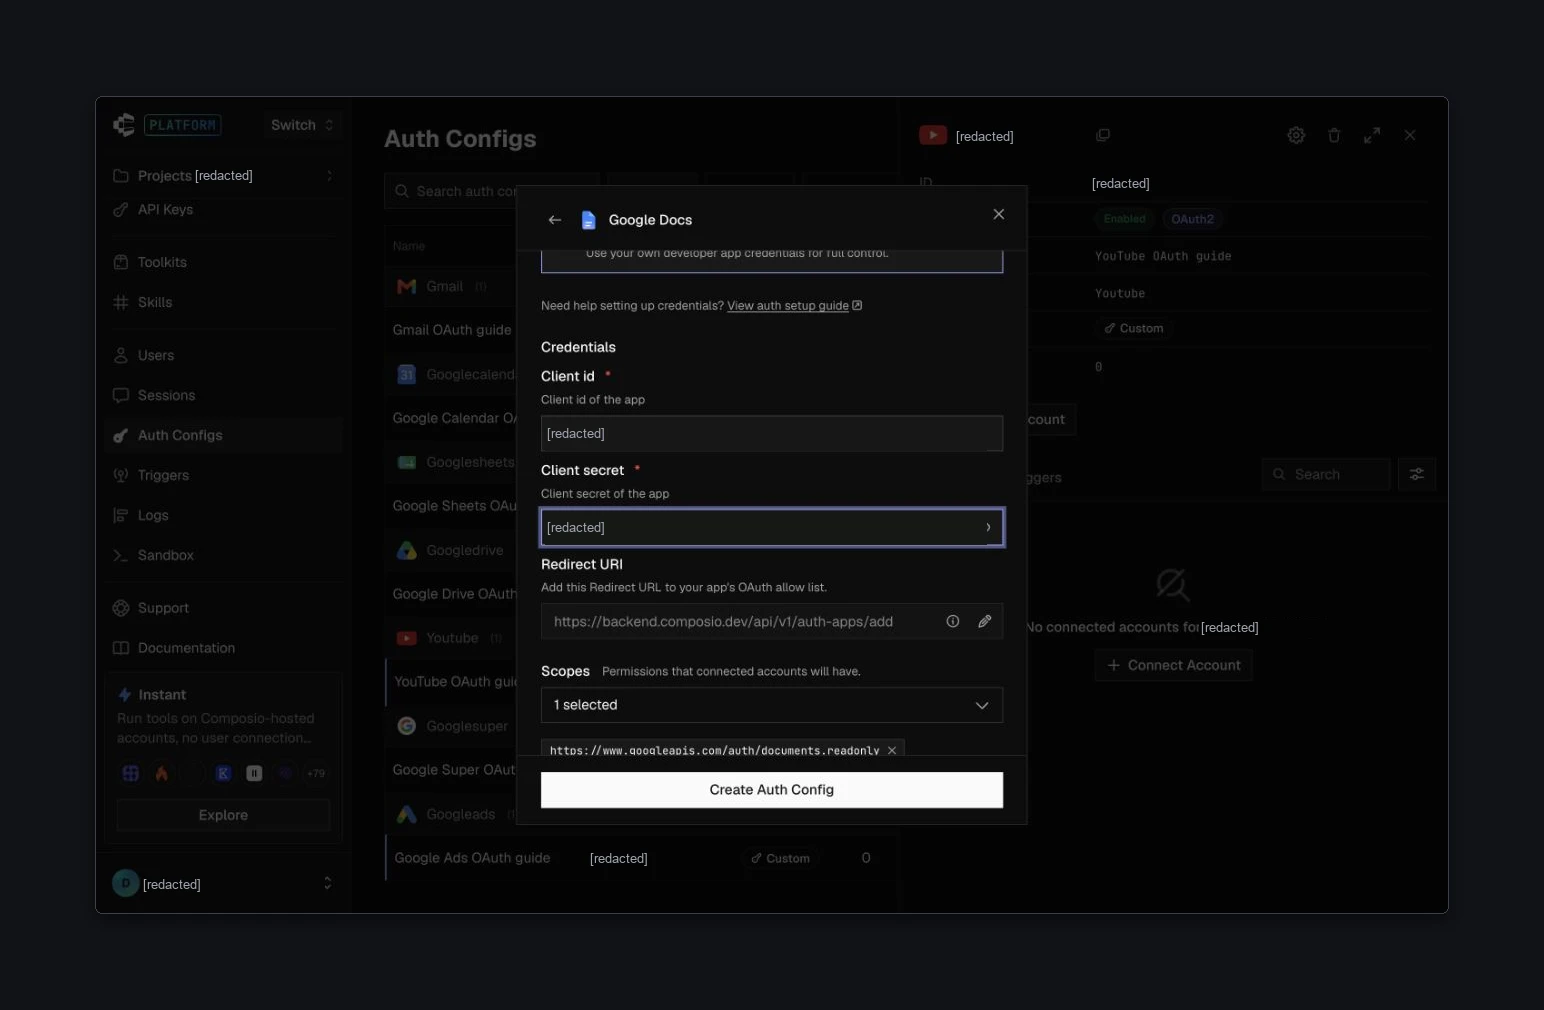
Step 3: Connect your Google account
1. Open the auth config and select Connect Account.
2. Choose the Google account you want to connect. Review the app name and requested permissions, then continue only if they are appropriate.
A testing app can show an unverified-app notice. Check that the app and developer are yours before continuing.


Google may skip a permission screen if you already approved that access. If access is blocked, check the app's audience, test-user list, requested scopes, or your Workspace administrator's access policy.
Step 4: Confirm the connection is Active
1. Wait for Composio's successful-connection confirmation. Return to the auth config and open Accounts.
2. Confirm that the connected account shows Active. The auth config's separate Enabled label does not confirm a connected account.

Before using the app in production
Public production apps that request sensitive or restricted scopes generally need Google OAuth verification, unless an exception applies. Check your scopes in Data Access and the requirements in Google Auth Platform → Verification Center. Testing and eligible internal apps can qualify for exceptions. Verification requirements.
For external apps in Testing, Google generally expires data-scope authorizations after seven days. Moving to production does not itself complete verification.
Troubleshooting
If Google shows Something went wrong, return to your Composio auth config and select Connect Account to start a fresh sign-in.
