Overview
This guide walks you through the complete process of registering a Gong OAuth integration and connecting it to Composio using your own developer credentials. By the end, you will have a registered Gong OAuth app, a Composio Auth Config backed by those credentials, and a live ACTIVE connected account ready for agents or automations.
What You Will Set Up:
Navigate to the Gong Admin Centre and open the API section.
Switch to the Integrations tab and click Create Integration.
Fill in the integration form (name, description, logo, redirect URI, scopes).
Copy the Client ID and Client Secret from the Integrations list.
Create a Gong Auth Config in Composio with OAUTH2.
Paste credentials and scopes into the Composio form.
Connect a user account by entering the Gong API Base URL.
Approve the OAuth consent screen in Gong.
Verify the connection shows ACTIVE in Composio.
You need an active Gong account with Admin Centre access. project. Have your Gong workspace URL ready (visible in the bro us-35894.app.gong.io) - it appears in the Gong URLs and ident
1. Sign In to Gong and Open the Admin Centre
Sign in to your Gong account. On the left navigation sidebar, click the hamburger / expand icon to open the full menu. At the bottom of the sidebar, click Admin centre.
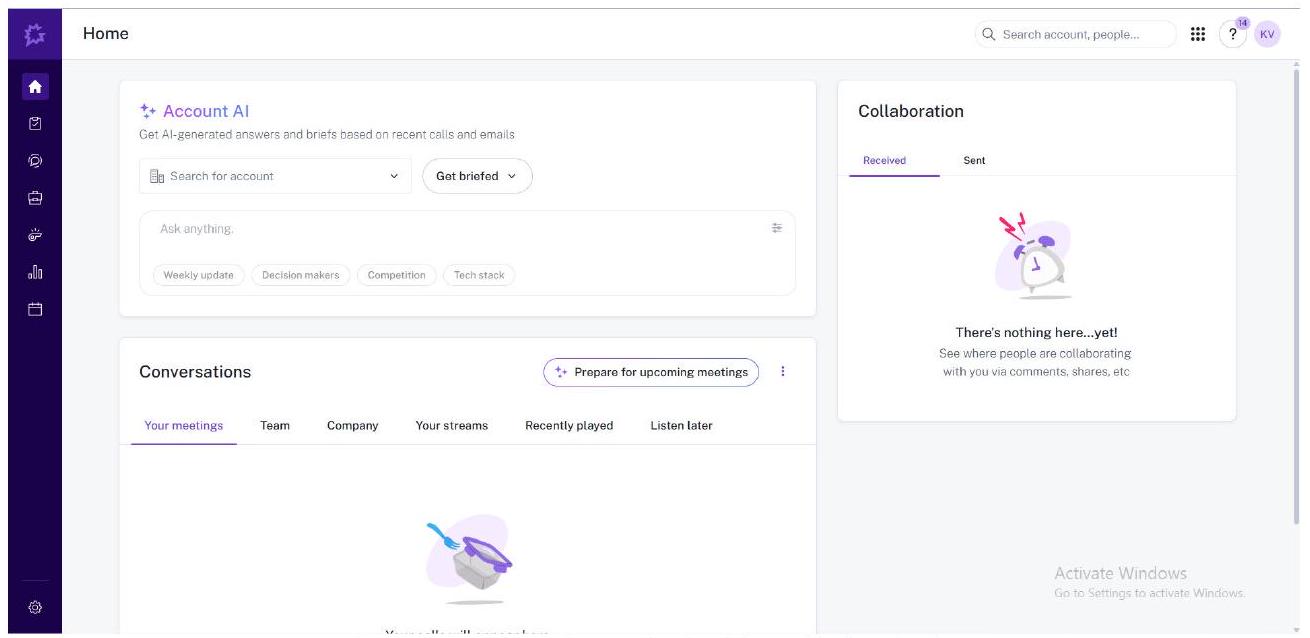
Gong Home - the main dashboard after login.
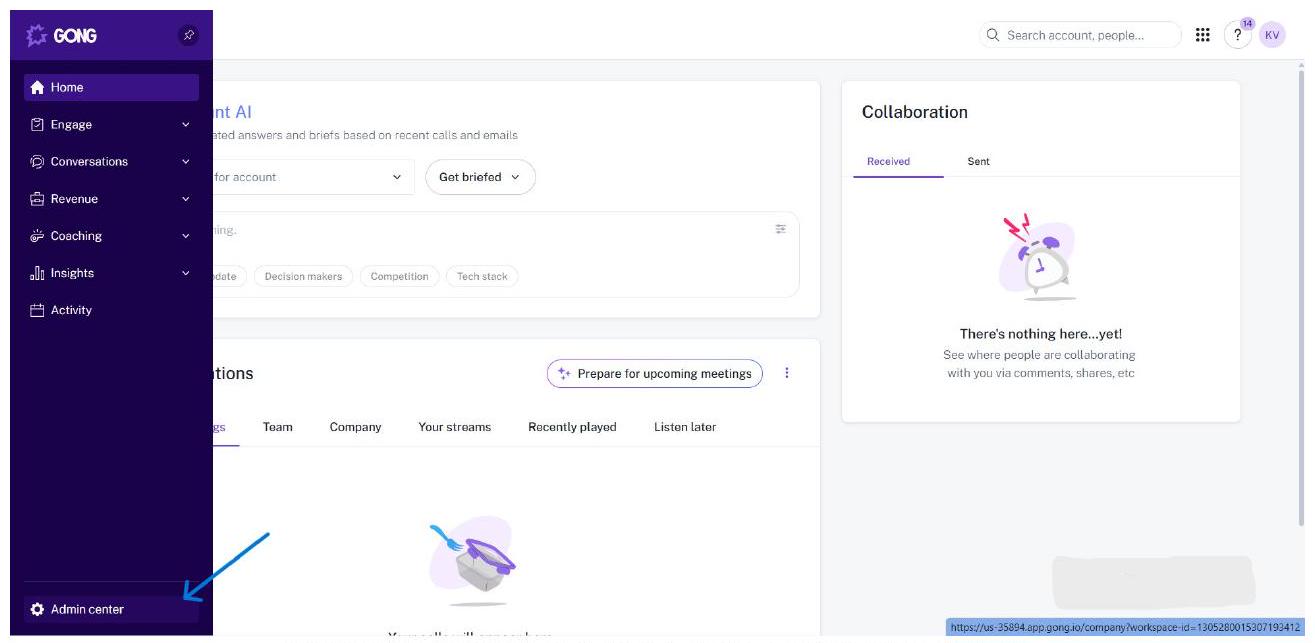
Expand the sidebar and click Admin centre at the bottom.
💡 NOTE
Admin centre is only visible to users with administrator permissions. If you do not see it, ask your Gong workspace admin to grant you the required access.
2. Navigate to the API Section
Inside the Admin centre, you will see the Settings overview with several sections. Scroll down to find the Ecosystem section. Click API.

Admin centre Settings overview - scroll down to Ecosystem.
Q Search account, people…
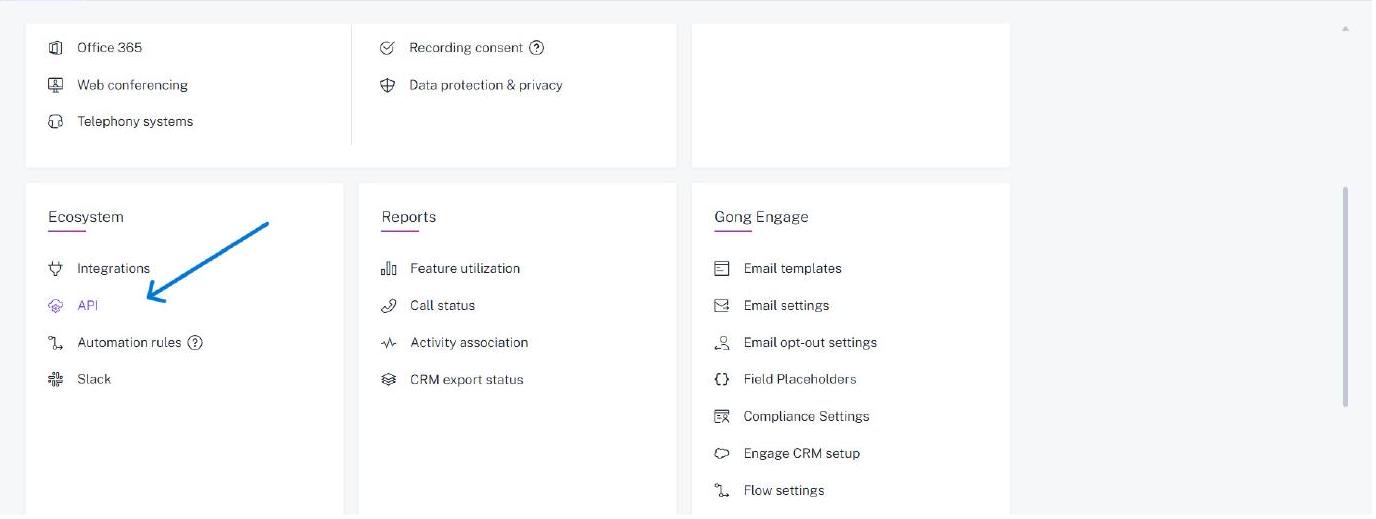
Ecosystem section - click API to open the API management page.
3. Switch to the Integrations Tab
The API page opens on the API KEYS tab by default. Click the INTEGRATIONS tab to switch to the OAuth integrations view. This is where you create and manage OAuth apps.
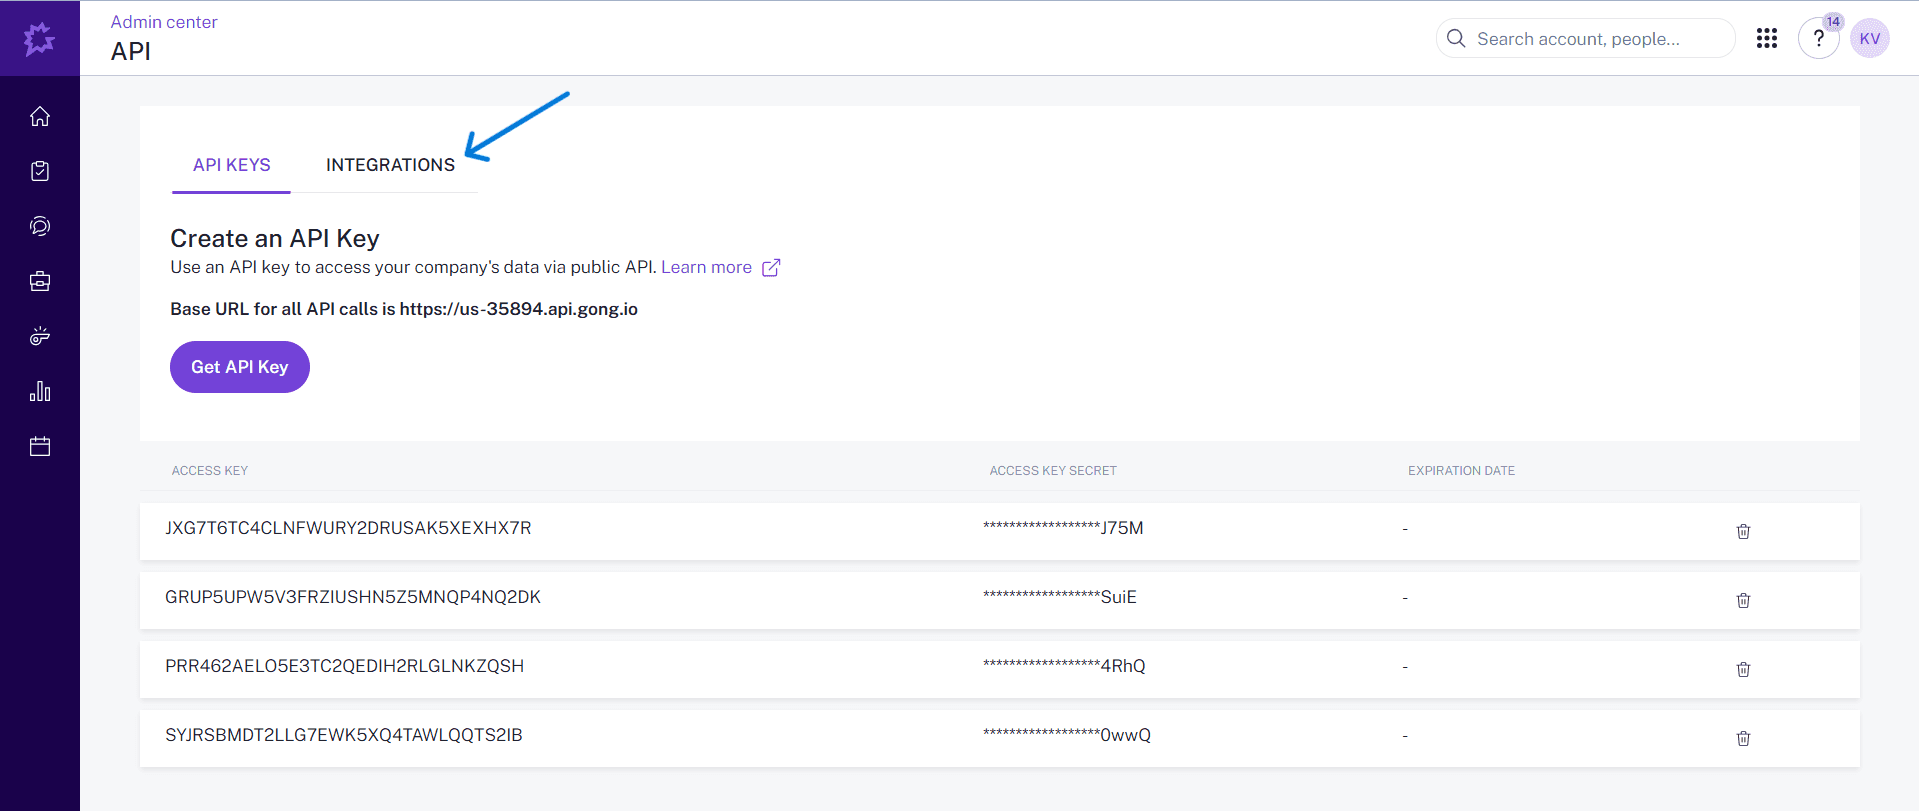
API page - click the INTEGRATIONS tab.
💡 NOTE
The API KEYS tab is for generating simple API access keys. For OAuth 2.0 (required by Composio), you must use the INTEGRATIONS tab.
4. Click Create Integration
On the Integrations tab, you will see any existing OAuth integrations listed below. Click CREATE INTEGRATION to open the integration registration form.
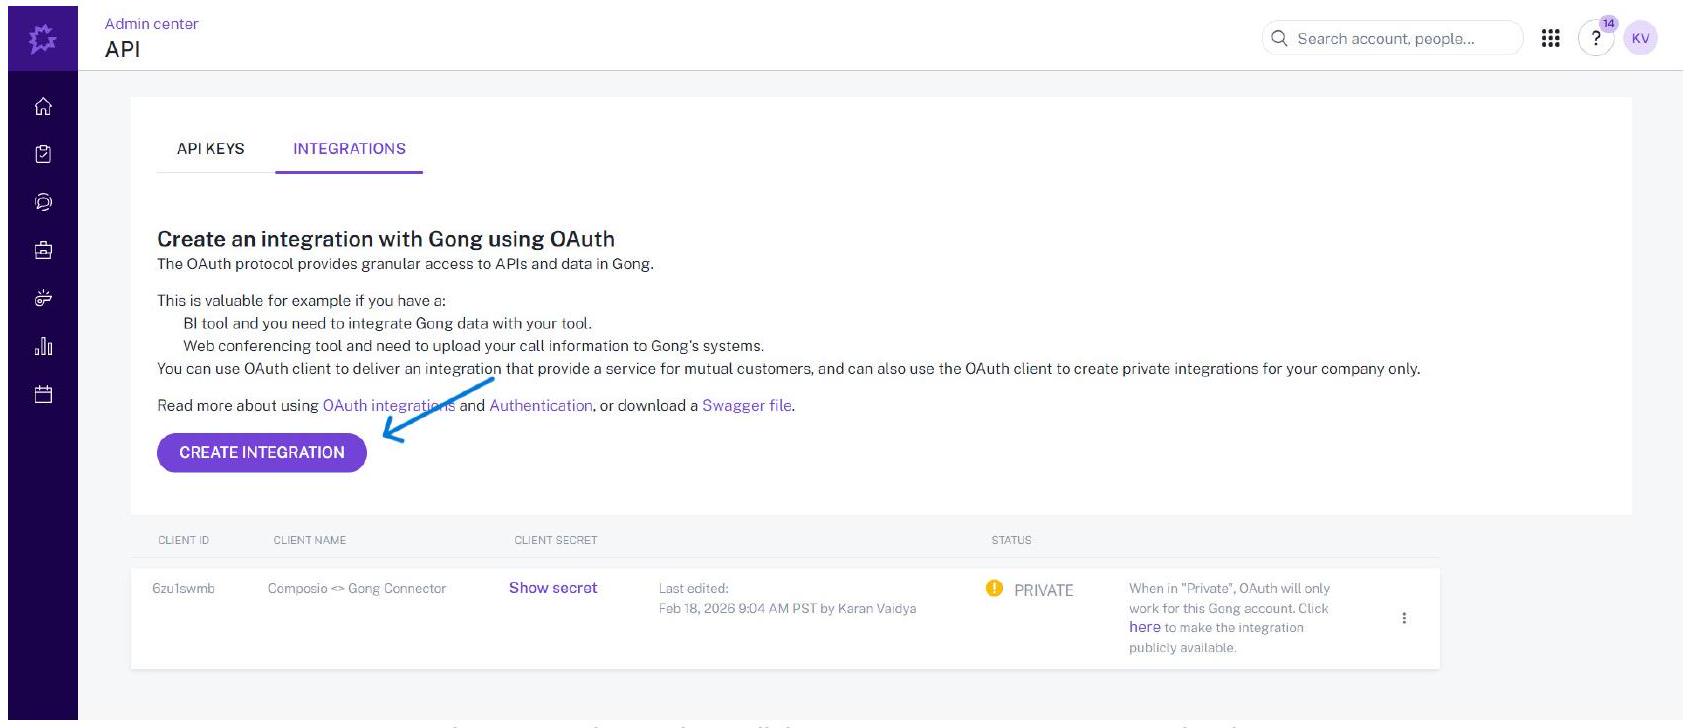
In the Integrations tab, click CREATE INTEGRATION to begin.
5. Fill In the Integration Form - Basic Details
The Create Integration form opens. Fill in the required fields as follows:
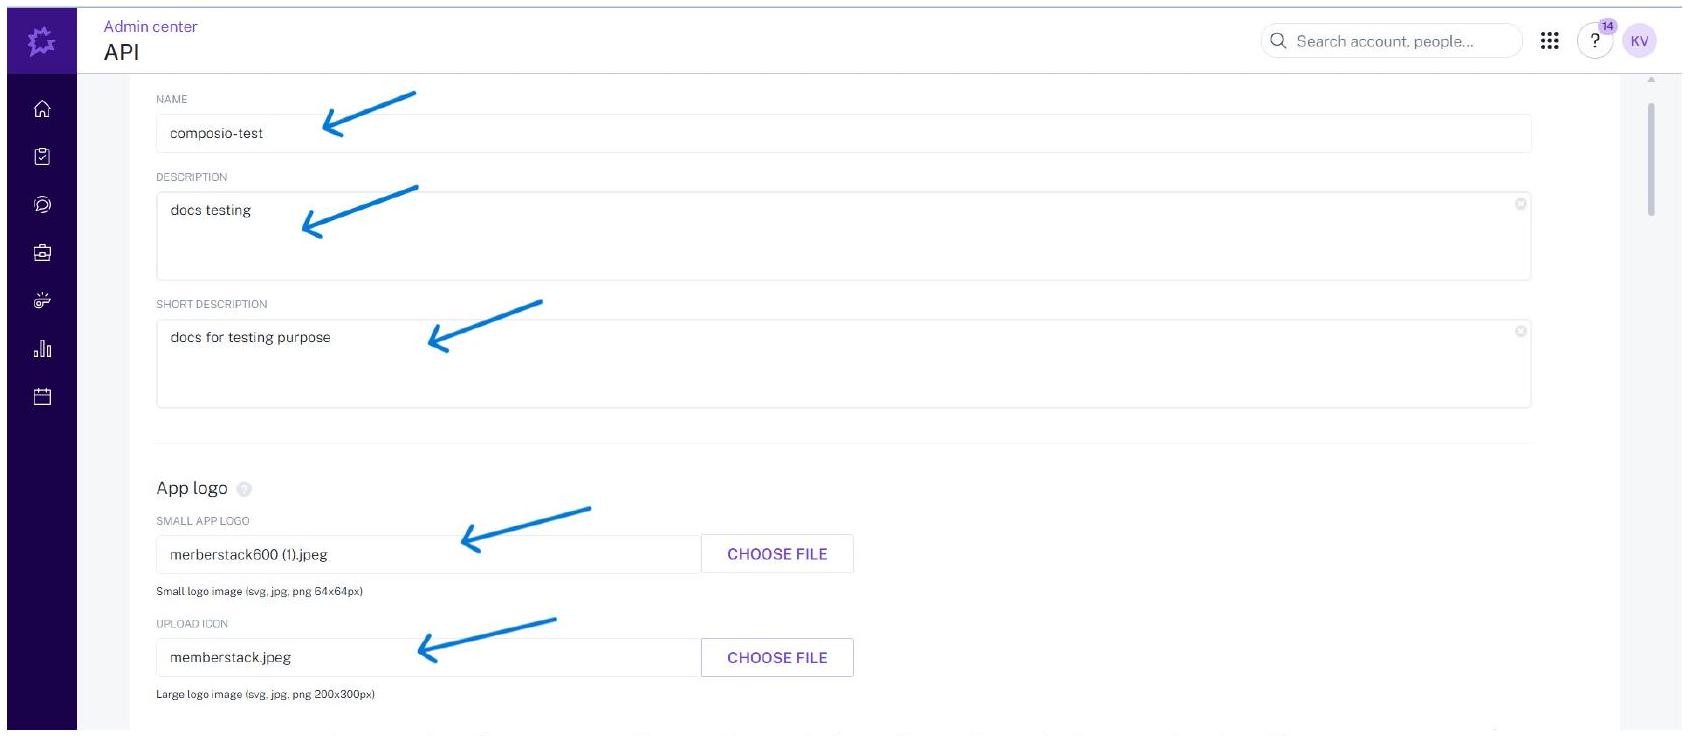
Integration form - set Name, Description, Short Description, and upload logos.
6. Select Scopes for the Integration
Scroll down in the same form to the Required authorisation scopes section. Select all the scopes your integration needs. Gong displays each scope with a description of the API access it grants.
Important: Select only the scopes your use case requires. The exact same set of scopes must also be added in Composio when you create the Auth Config. A mismatch will cause missing permissions or auth failures.
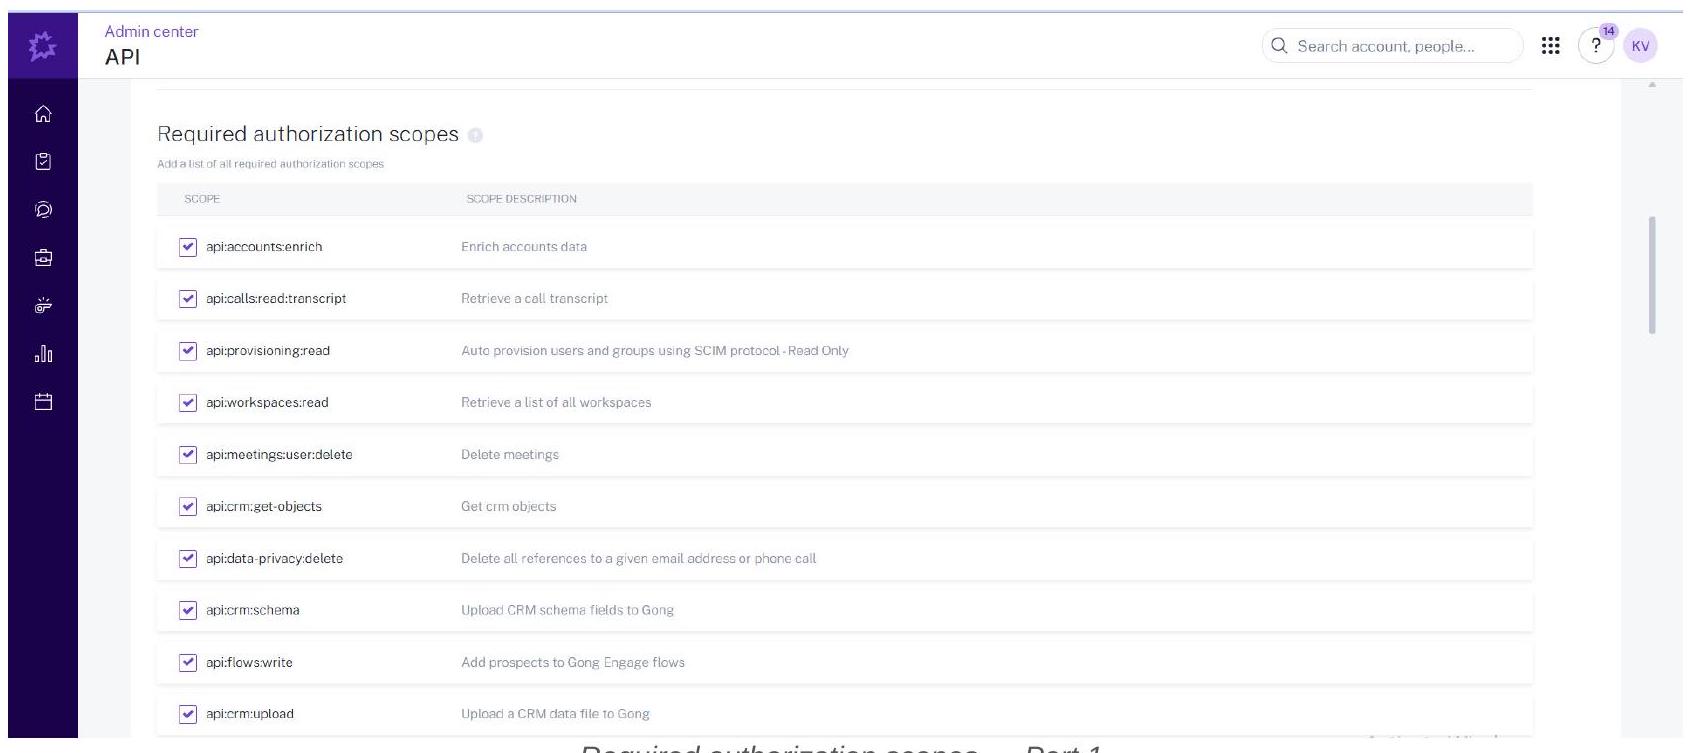
Required authorisation scopes - Part 1.
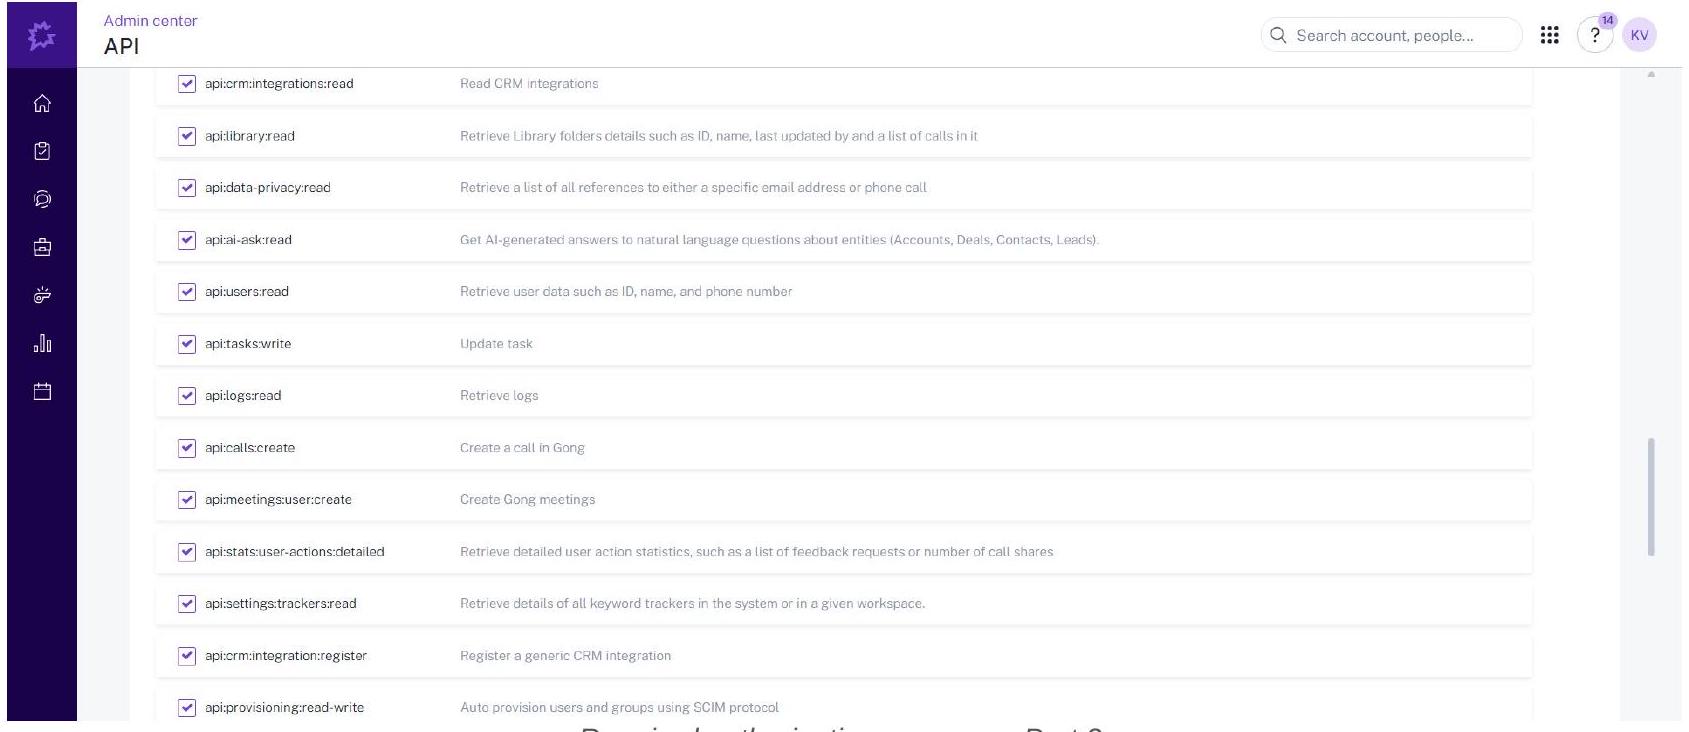
Required authorisation scopes - Part 2.
SCOPE SELECTION GUIDANCE
Gong offers a wide range of scopes covering calls, meetings, CRM, users, flows, and more. Select only what your integration actually needs - users will see the full list on the consent screen. Common scopes for a Composio integration include: api:calls:read:transcript, api:users:read, api:meetings:user:create, api:workspaces:read, and api:calls:create. Whatever scopes you select here must be added identically in the Composio Auth Config (Step 9).
7. Fill In the Redirect URI and Other Fields
Continue scrolling down in the same form. Fill in the remaining required fields:
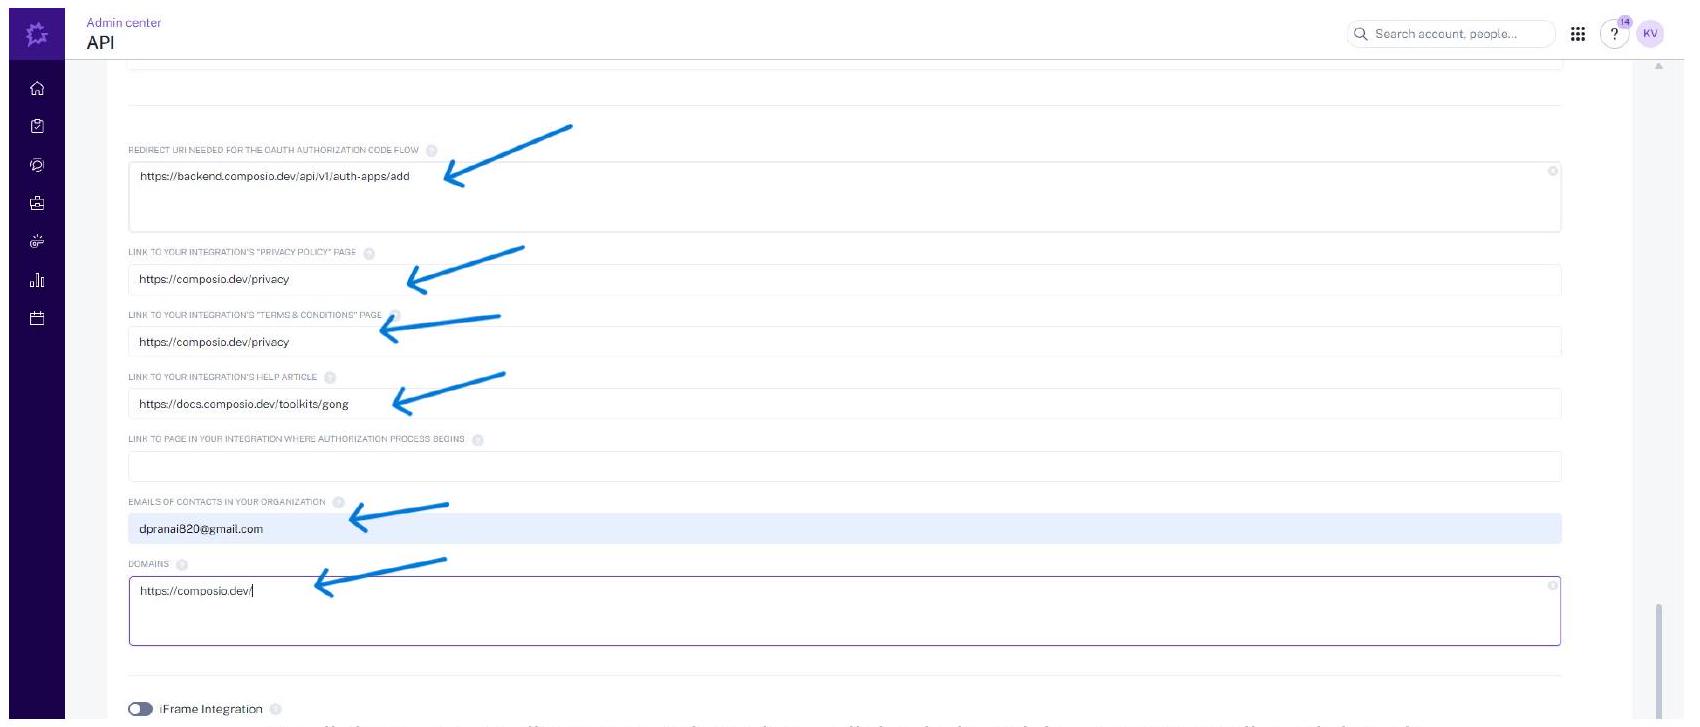
Scroll down: set Redirect URI, privacy/terms links, help article, contact email, and domain.
IMPORTANT - Redirect URI
The Redirect URI must match exactly what Composio sends during the OAuth flow. Copy it precisely:
Do not add a trailing slash or any extra characters.
https://backend.composio.dev/api/v1/auth-apps/add8. Save the Integration and Copy Credentials
After filling in all fields, click SAVE at the bottom right of the form. Gong will create the integration and return you to the Integrations list.
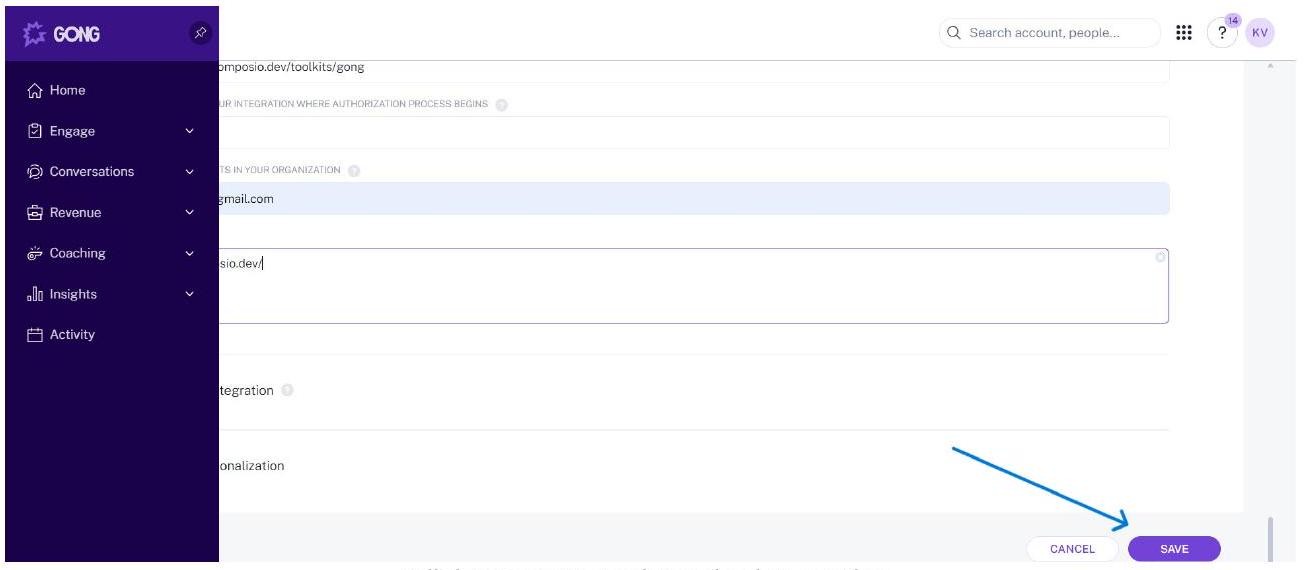
Click SAVE to register the integration.
Back on the Integrations list, locate your newly created integration. The Client ID is shown directly in the table. To get the Client Secret, click Show secret in the CLIENT SECRET column, then click Copy from the popover.
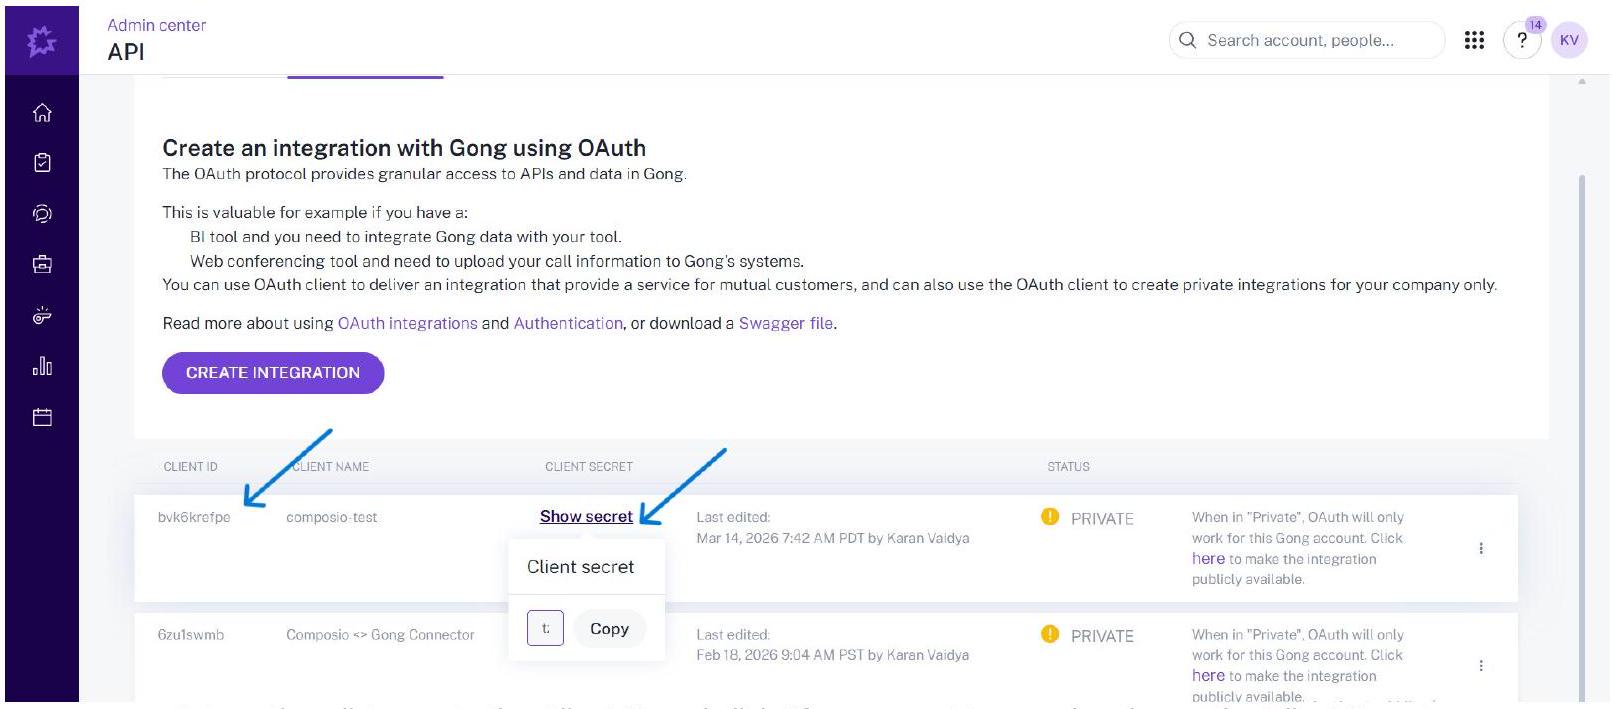
Integrations list - note the Client ID and click Show secret to reveal and copy the Client Secret.
WARNING - Save Your Client Secret Now
The Client Secret is only fully visible immediately after you click Show secret. Copy it to a secure location before navigating away. If you lose it, you will need to regenerate it in Gong and update your Composio Auth Config.
9. Open Composio and Create a New Auth Config
Switch to your Composio dashboard. Navigate to Auth Configs and click + Create Auth Config. In the search drawer that opens, type gong and select Gong with the OAUTH2 badge.
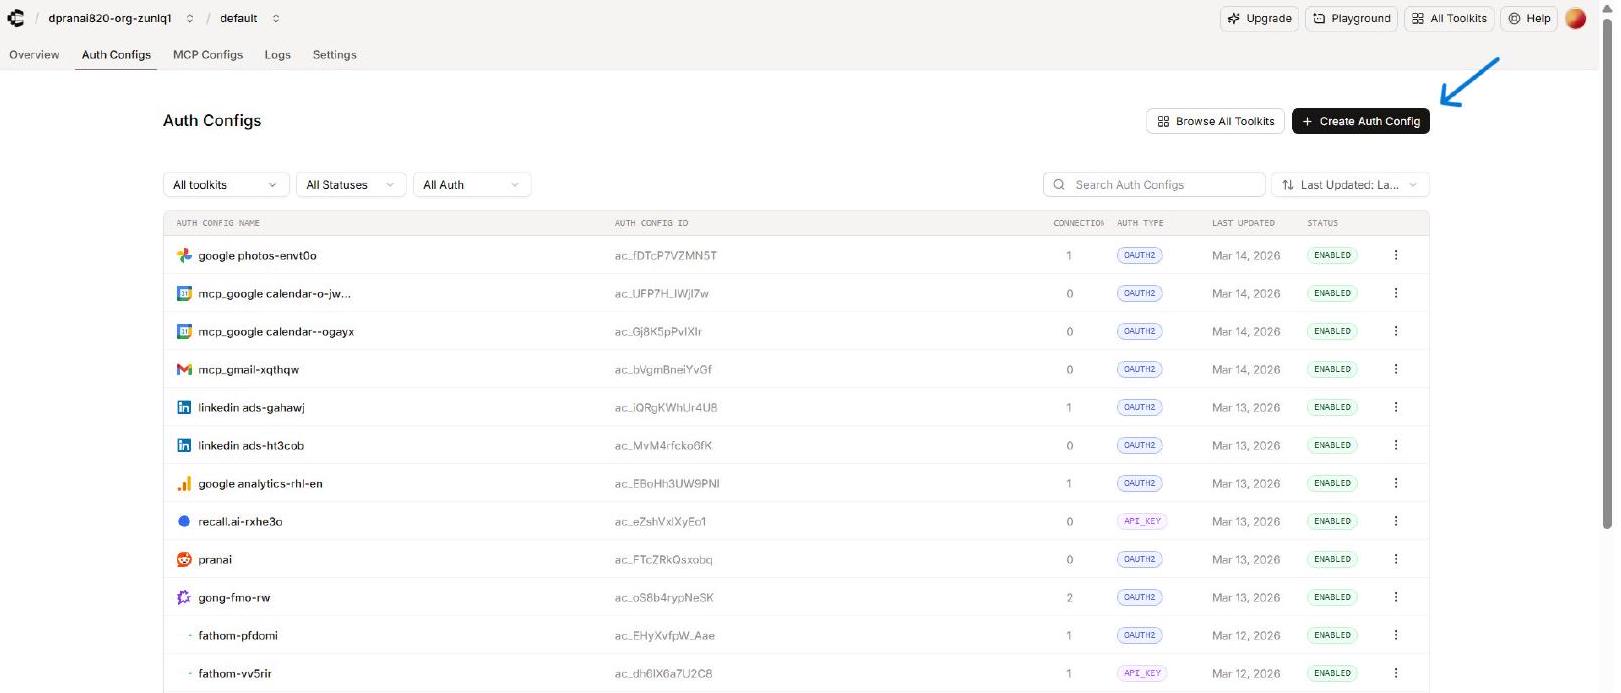
In the Composio Auth Configs page, click + Create Auth Config.
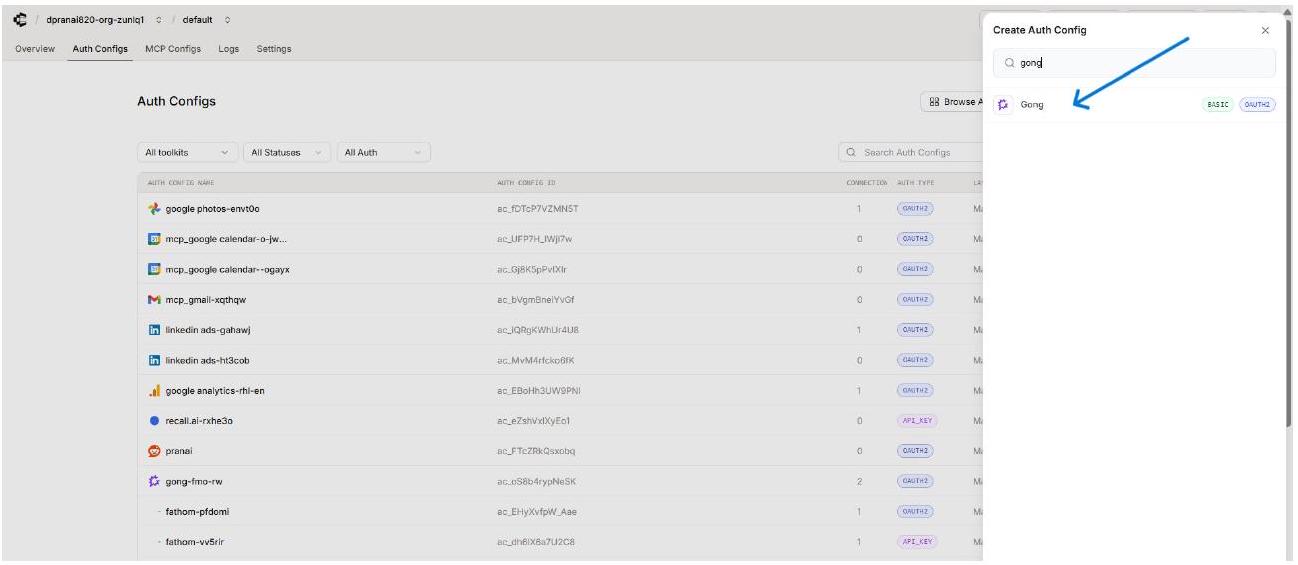
Type ‘gong’ in the search drawer and select Gong (OAUTH2).
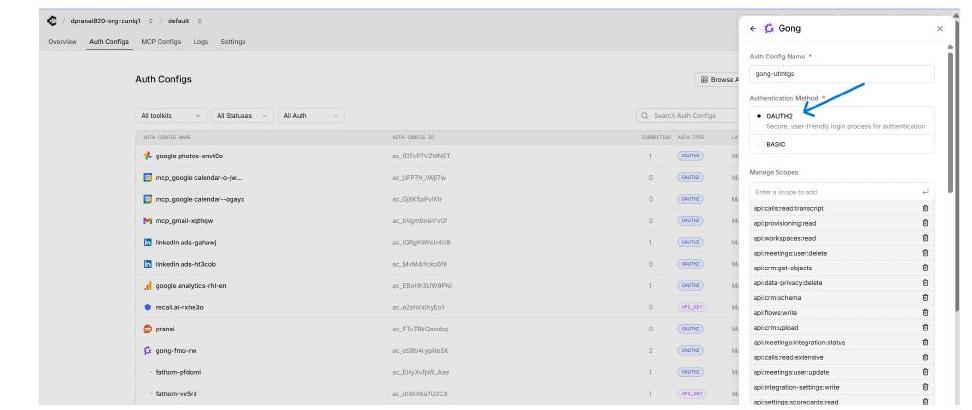
10. Fill In the Composio Gong Auth Config Form
The Gong Auth Config form opens in the right panel. Fill in each field using the credentials you copied from Gong.
The Composio Gong Auth Config form - paste your Gong credentials here.
💡 NOTE - Scopes Must Match
The scopes you add in the Composio Auth Config must be identical to the scopes you selected in the Gong integration (Step 6). Composio will request exactly these scopes during the OAuth flow. If they differ from what is registered in Gong, the authorization will fail or return insufficient permissions.
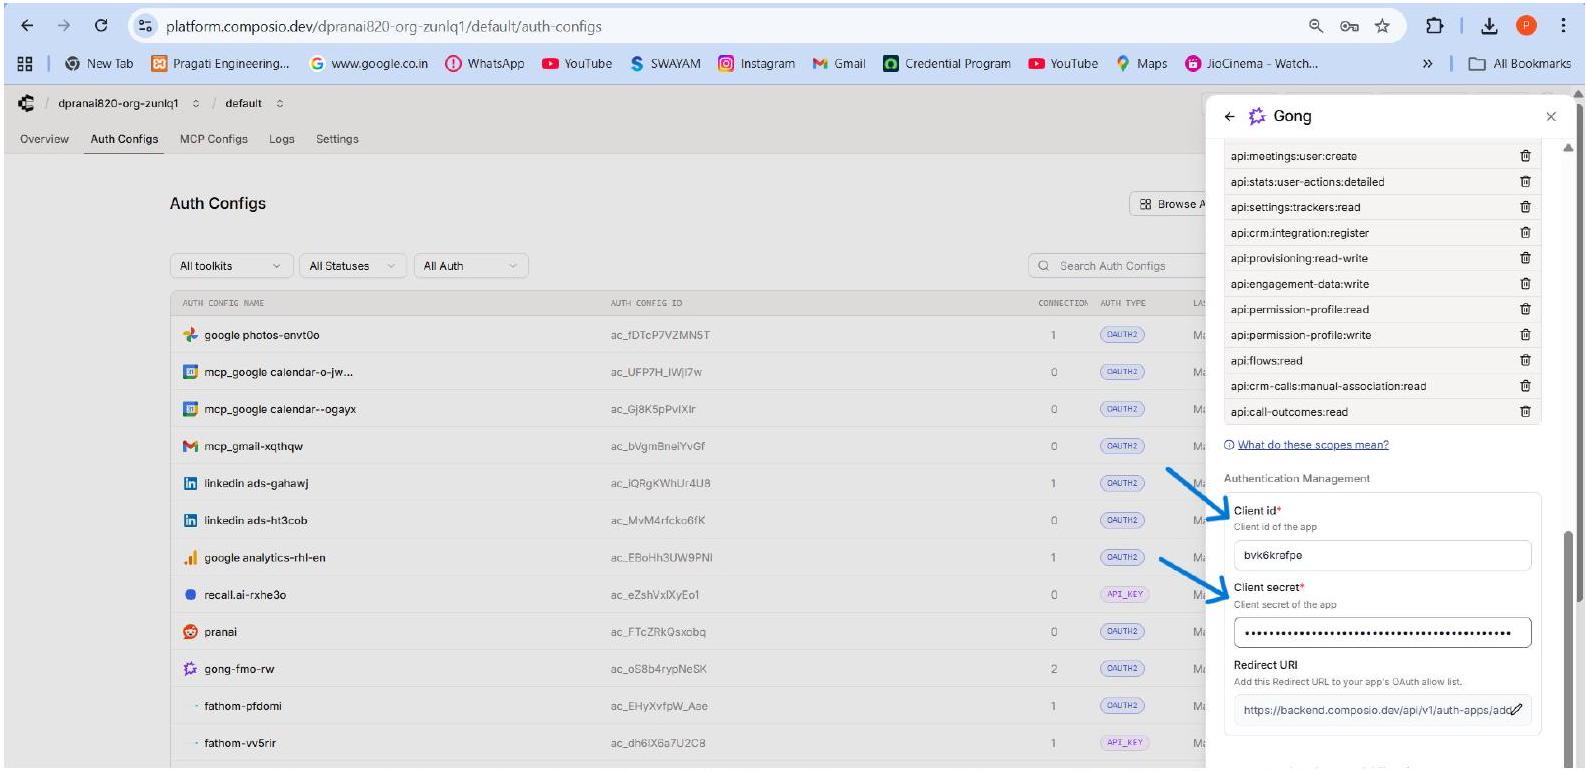
Composio form showing Client ID, Client Secret, and the pre-filled Redirect URI.
11. Connect a User Account - Enter External User ID
After saving the Auth Config, open it in Composio and click Connect Account. A modal dialog appears asking for an External User ID. Enter a stable, unique identifier for the user from your own system, then click Connect Account.
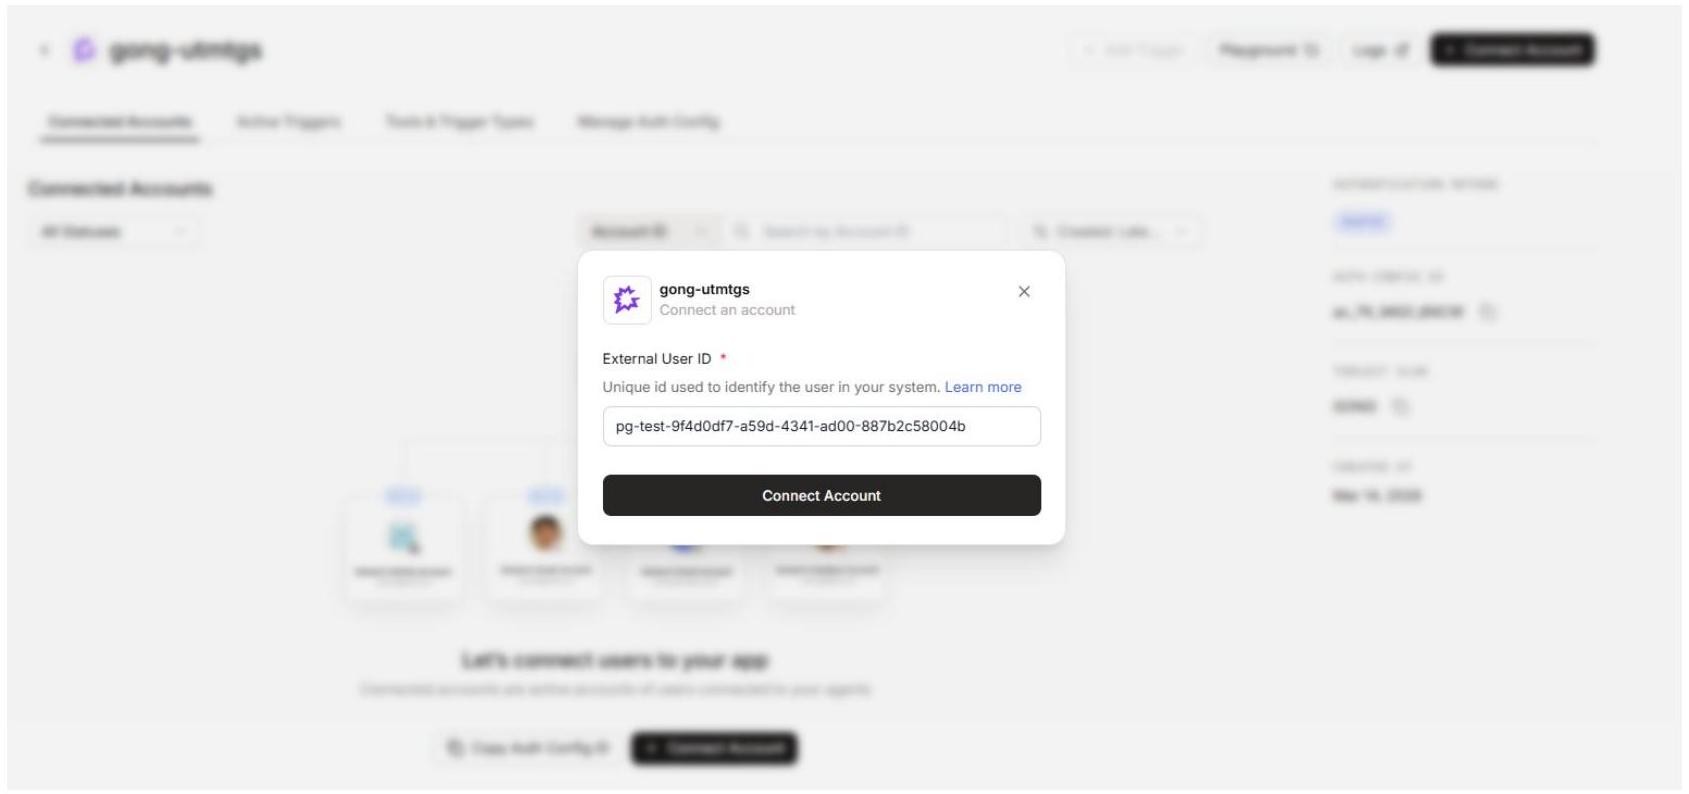
Enter a stable External User ID for the user being connected, then click Connect Account.
EXTERNAL USER ID
Use a consistent, stable ID such as a UUID from your own user database. Composio uses this to associate the Gong connection with the correct end user when your agents or apps make tool calls. Do not use temporary or session-based IDs.
12. Enter the Gong API Base URL in the Composio Connect Screen
A Composio screen opens in the browser, asking for the API Base URL. This is your Gong tenant’s API endpoint. Enter the standard Gong API base URL:

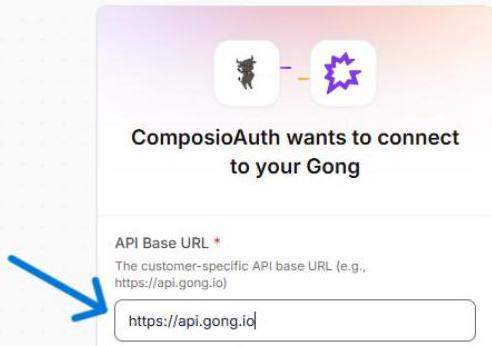
💡 NOTE - API Base URL
For most Gong tenants, the API Base URL is “https://api.gong.io”. Some enterprise tenants may have a custom subdomain. If you are unsure, check your Gong API documentation or ask your Gong admin. The workspace-specific URL visible in the browser (e.g., us-35894.app.gong.io) is for the Gong web app - the API endpoint is separate.
13. Approve the Gong OAuth Consent Screen
After submitting the API Base URL, Gong’s OAuth consent screen opens in the browser. It lists all the permissions (scopes) your integration requests. Review the list, then click ALLOW to grant access.
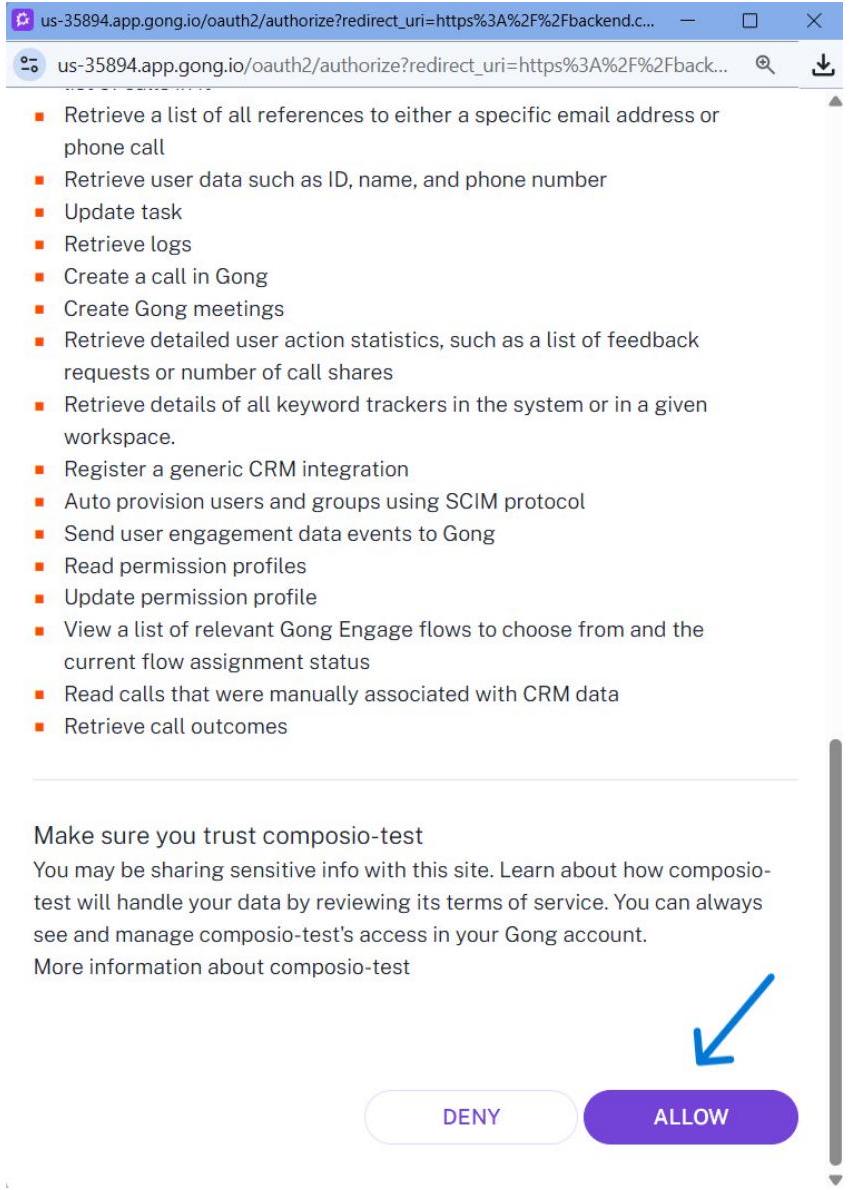
Gong OAuth consent screen - review the requested permissions and click ALLOW.
💡 NOTE - Consent Screen
The permissions listed on this screen correspond exactly to the scopes you selected in Step 6 and added to Composio in Step 10. Clicking ALLOW completes the OAuth authorization and returns you to Composio. Clicking DENY will cancel the connection.
Verify the Active Connection in Composio
After the OAuth flow completes, Composio returns you to the Auth Config detail page. The Connected Accounts tab now shows your connection with status ACTIVE.
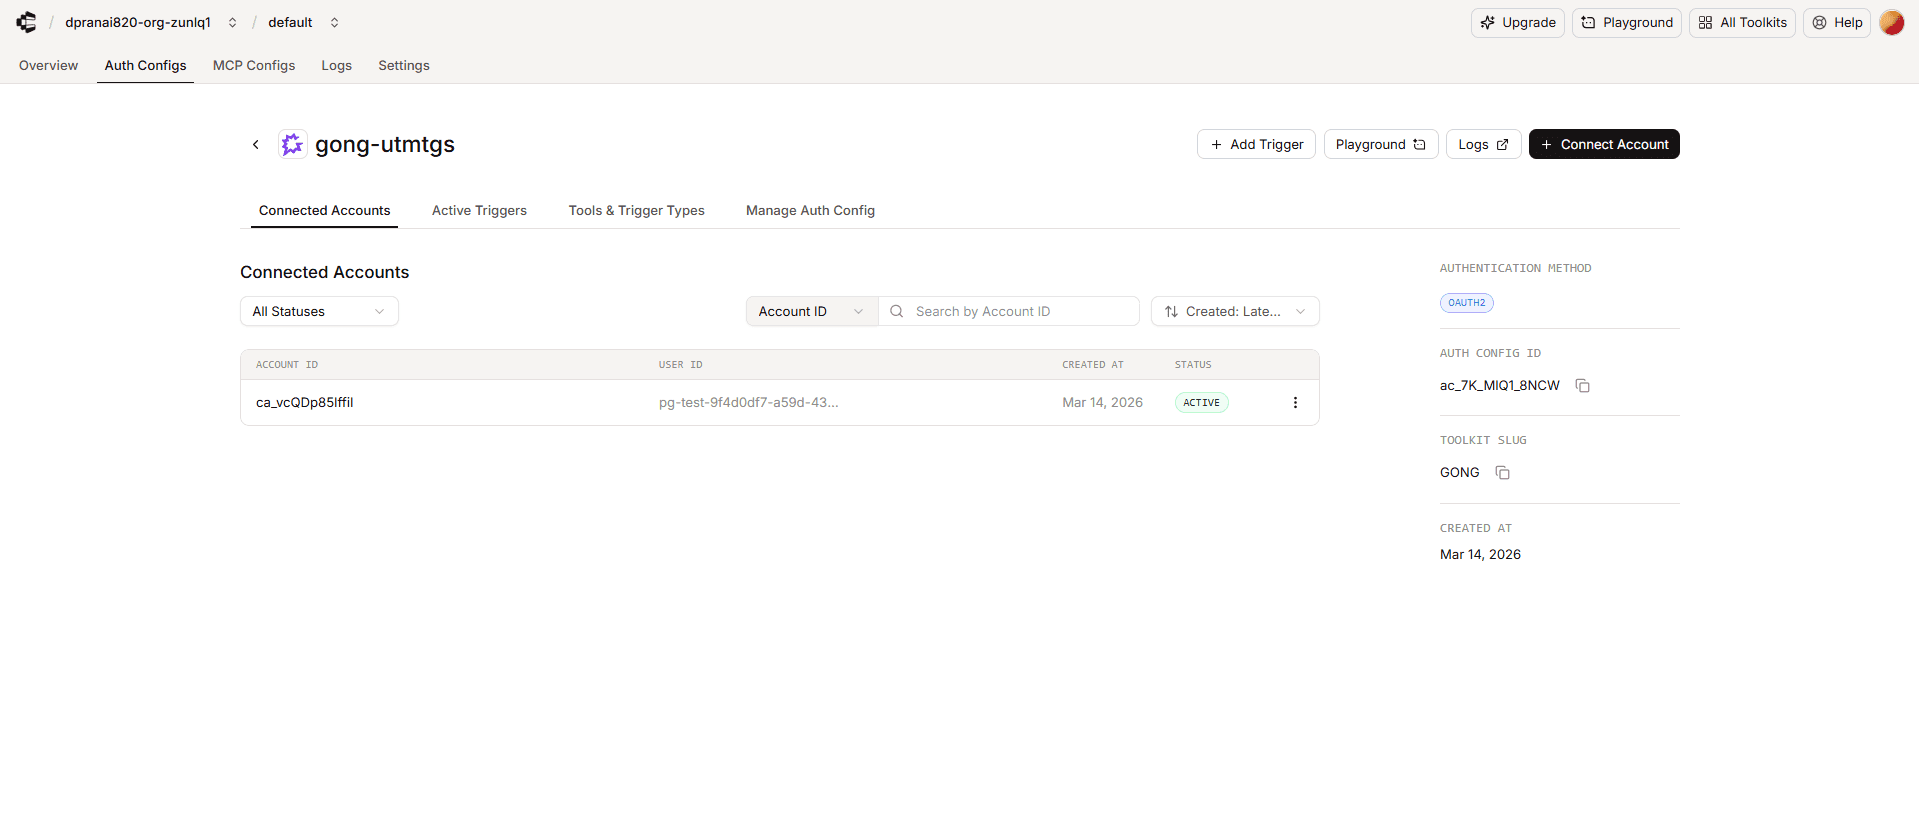
The Composio Connected Accounts tab shows an ACTIVE Gong connection.
Confirm the following before using the connection:
The Account ID appears in the Connected Accounts list with a status of ACTIVE.
The authentication method on the right panel shows OAUTH2.
Toolkit Slug shows GONG.
Note the Auth Config ID (e.g., ac_7K_MIQ1_8NCW) for use in SDK calls or API requests.
Troubleshooting & Common Issues
Redirect URI mismatch
If the OAuth flow fails with a redirect_uri error, open the Gong integration and confirm the Redirect URI exactly matches https://backend.composio.dev/api/v1/auth-apps/add. Even a trailing slash difference will cause failure.
Admin centre not visible
Admin centre requires specific Gong permissions. Ask your Gong workspace administrator to grant you the required admin role.
Lost Client Secret
If you did not save the Client Secret, open the integration in the Gong Integrations list, click the three-dot menu, and regenerate the secret. Update the Client Secret in your Composio Auth Config and reconnect affected user accounts.
Scopes mismatch
If Composio tools cannot access certain Gong data, verify that the scopes in your Gong integration (Step 6) exactly match the scopes in your Composio Auth Config (Step 10). Add any missing scopes to both and reconnect.
Connection goes inactive
Open the Auth Config in Composio, click Connect Account again, and re-enter the Gong API Base URL. Verify the integration is not disabled in the Gong Admin Centre.
Wrong API Base URL
Using an incorrect base URL (e.g., the browser app URL instead of https://api.gong.io) is a common error. Always use https://api.gong.io as the API Base URL unless your Gong admin has confirmed a custom endpoint.