In this guide, I will share the process for creating a GitHub OAuth app for Composio. So, let’s begin.
This walkthrough follows the GitHub and Composio flow shown in your screenshots. By the end, you will have a GitHub OAuth App, a Composio Auth Config that uses your own developer credentials, and a working GitHub account connection ready for agents or automations.
What you will set up
Open GitHub account settings and navigate to Developer settings.
Create a new OAuth App and configure its callback URL for Composio.
Copy the Client ID and generate a Client Secret in GitHub.
Create a GitHub Auth Config in Composio using OAuth2 and your chosen scopes.
Connect a user account and approve the GitHub consent screen.
Before you start
Make sure you have: a GitHub account that can own the OAuth App, access to your Composio project, and a clear idea of which GitHub scopes your integration truly needs.
For production setups, using your own developer credentials is the recommended Composio approach because it gives you full control over branding, scopes, and credential rotation.
Why OAuth App and not GitHub App? GitHub recommends GitHub Apps for many new integrations because they offer fine-grained permissions and short-lived tokens. This guide still uses an OAuth App because the Composio GitHub auth flow in your screenshots is based on OAuth2 client credentials.
Step 1: Open GitHub account settings
Sign in to the GitHub account that should own this OAuth App. On any GitHub page, look to the upper-right corner and click your profile avatar to open the user navigation menu.
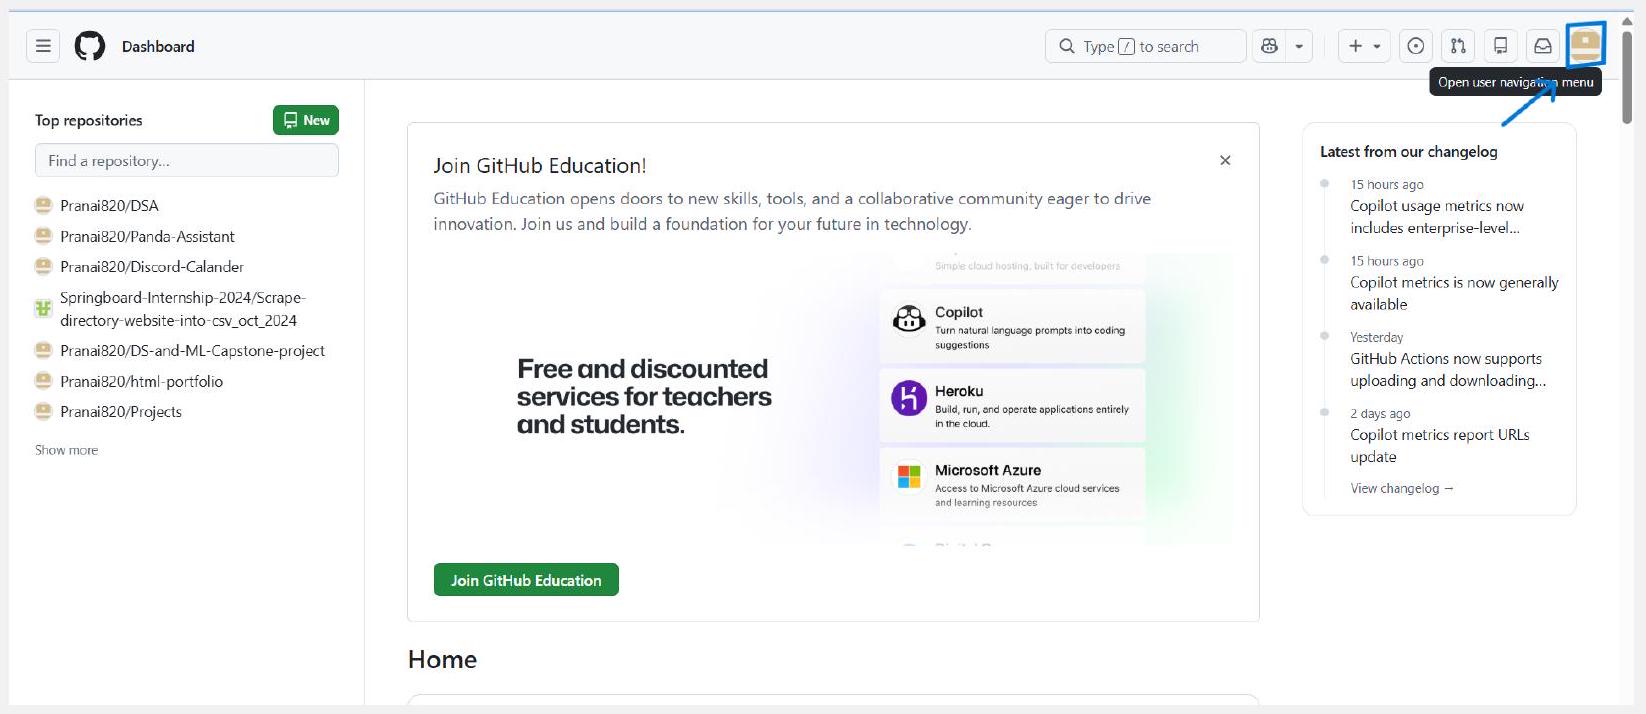
Open the user navigation menu from the top-right corner of GitHub.
From the dropdown, click Settings.
Ownership choice: You can register the app under a personal account or under an organization that allows you to manage apps. If the app should remain with a team instead of one individual, create it under the organization owner that will maintain it.
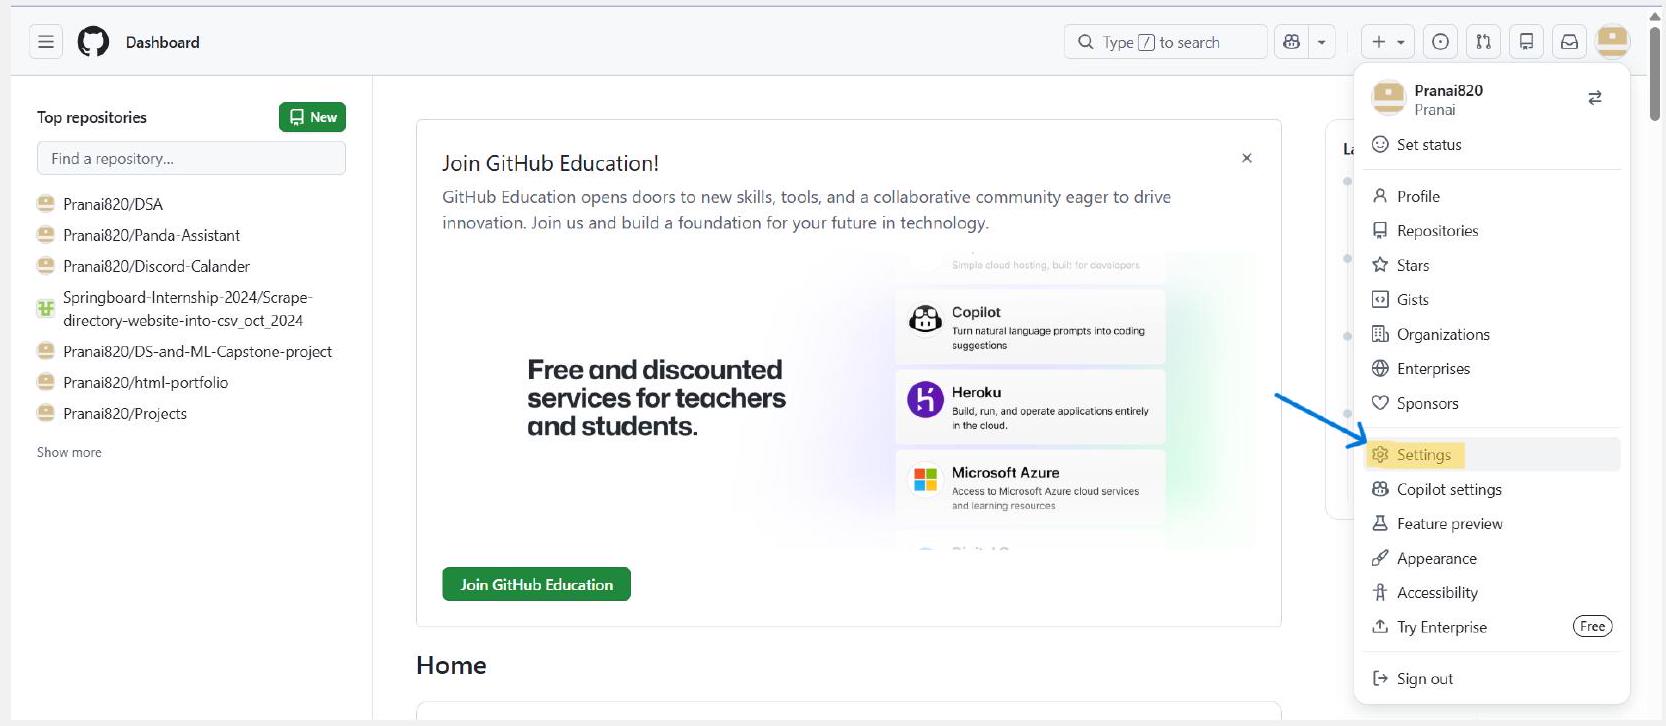
Step 2: Open Developer settings and OAuth Apps
Inside Settings, use the left sidebar. Scroll to the Integrations section and click Developer settings. Then open OAuth Apps and click New OAuth app. If this is the first app for that owner, GitHub may label the button as Register a new application instead.
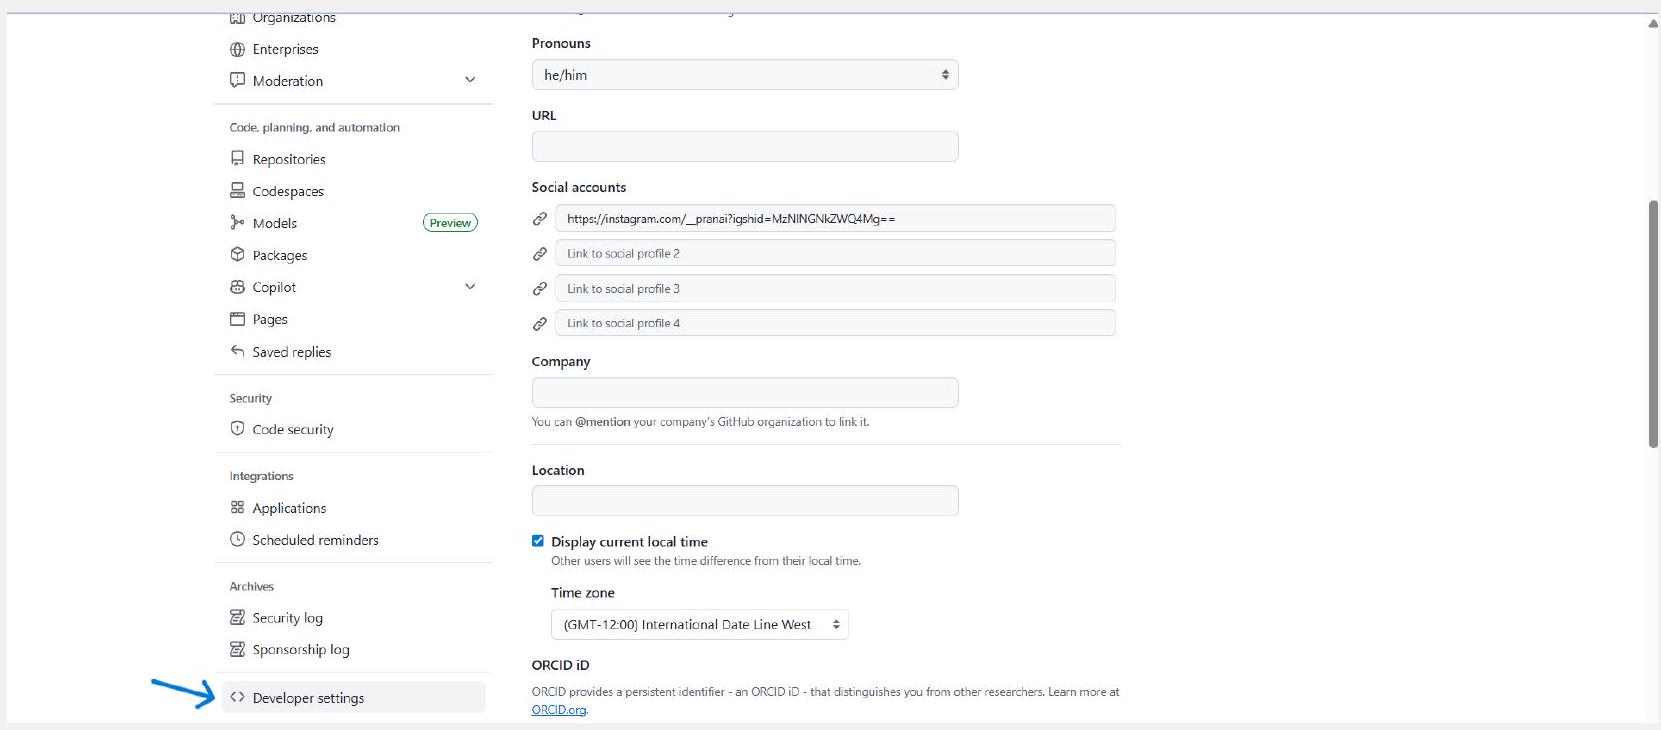
Scroll the settings sidebar and open Developer settings.

View documentation
Choose OAuth Apps, then click New OAuth app.
Context: This Developer settings area also contains GitHub Apps and personal access token settings. Make sure you stay inside OAuth Apps for this Composio setup.
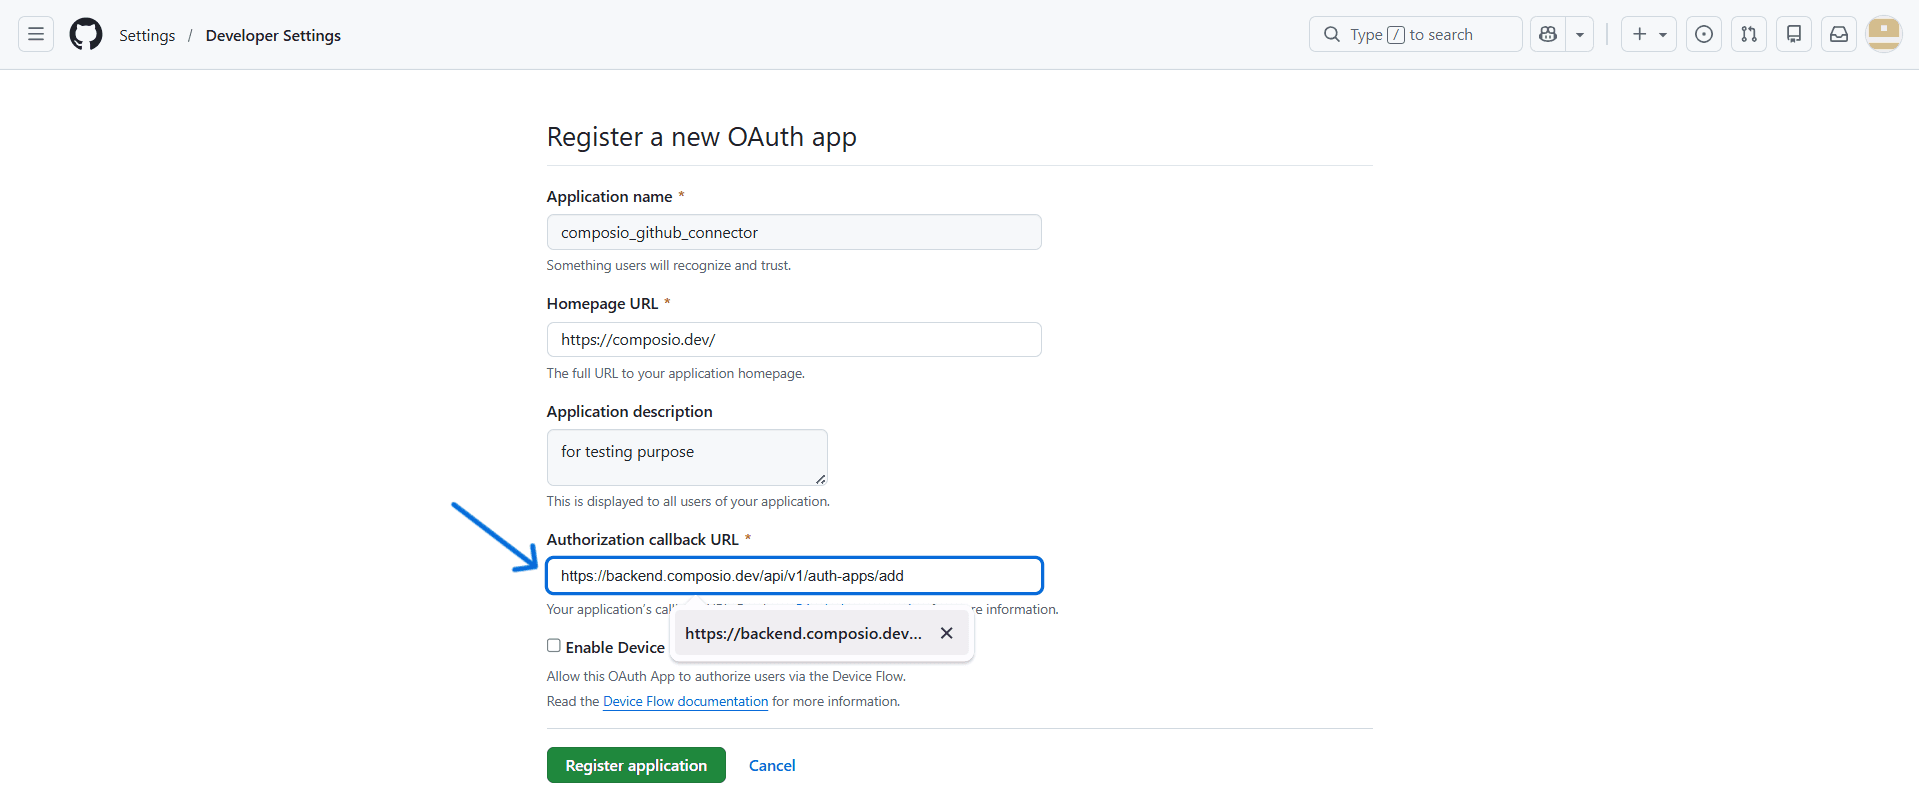
Step 3: Fill the GitHub OAuth App registration form
GitHub now opens the registration page. Complete every field carefully because this metadata is shown to users during authorization and becomes part of your integration’s public identity.
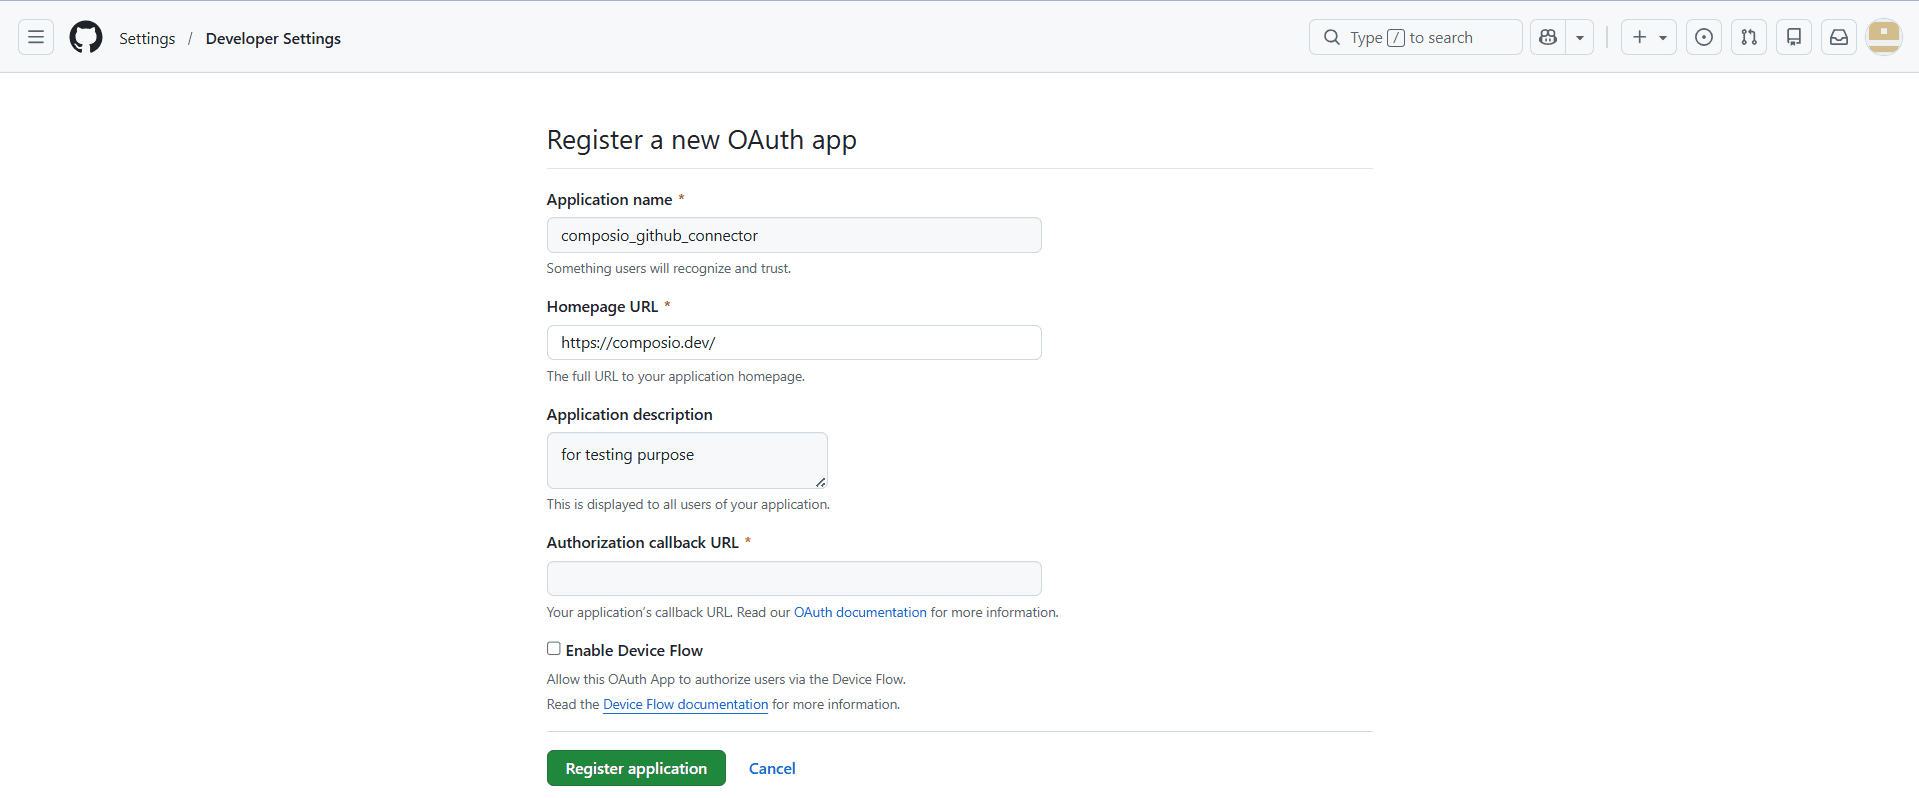
Register a new OAuth app
Application name: Use a clear name users will recognize on the consent screen. In your
example, the name is composio_github_connector.
Homepage URL: Use the public website or landing page for the app or product that owns this
integration. The screenshot uses https://composio.dev/.
Application description: Optional, but strongly recommended. This helps the user
understand why they are authorising access.
Authorisation callback URL: This is the most important field. GitHub will send the OAuth response here after the user approves access.
Public metadata rule: Do not place secrets, internal hostnames, or private-only URLs in the visible app fields. GitHub’s own guidance says OAuth App metadata should contain only information you are comfortable making public.
Step 4: Set the Composio callback URL and review Device Flow
In the next screenshots, the callback URL is filled in, and the Enable Device Flow option is visible. This is the point where GitHub and Composio must agree on the exact redirect destination.
Register a new OAuth app
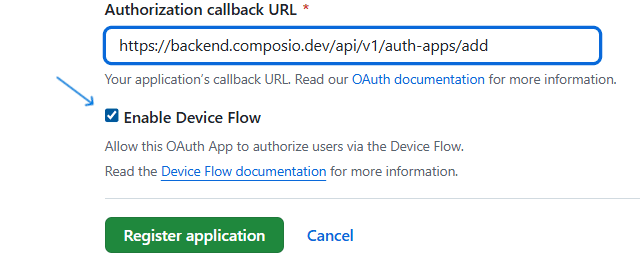
Version detail that matters: The screenshot shows the older Composio callback URL https://backend.composio.dev/api/v1/auth-apps/add. Current Composio documentation now points to https://backend.composio.dev/api/v3/toolkits/auth/callback. Always use the redirect URI that your current Composio Auth Config shows, then paste that same value into GitHub.
The screenshot also enables Device Flow. GitHub supports this, but GitHub’s current best-practice guidance recommends enabling Device Flow only when you truly need headless or constrained-device authorization, such as a CLI or IoT flow. For the standard browser-based Composio connection shown later in this guide, the standard web callback flow is usually sufficient.
Once the fields are correct, click Register application.
Step 5: Register the app and copy the GitHub credentials
After registration, GitHub opens the OAuth App details page. You now need two values from GitHub: the Client ID and a Client Secret. These are the credentials you will paste into Composio.
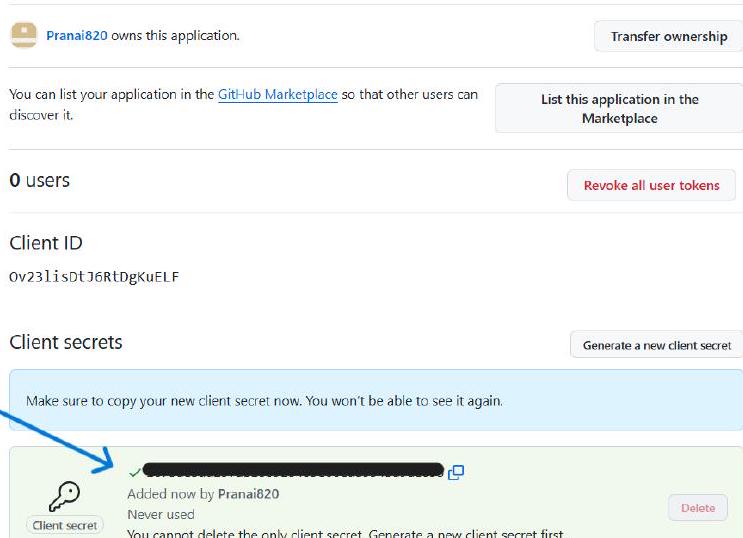
Generate a new Client Secret and copy it immediately.
Security note: GitHub shows the client secret only once. Store it in a secure server-side secret manager or encrypted environment variable. If you lose it, generate a new secret, update Composio, and rotate the old one.
Even if you enabled Device Flow, keep in mind that Composio’s custom OAuth configuration for a standard browser-based connection will generally still be set up with the Client ID and Client Secret from this screen.
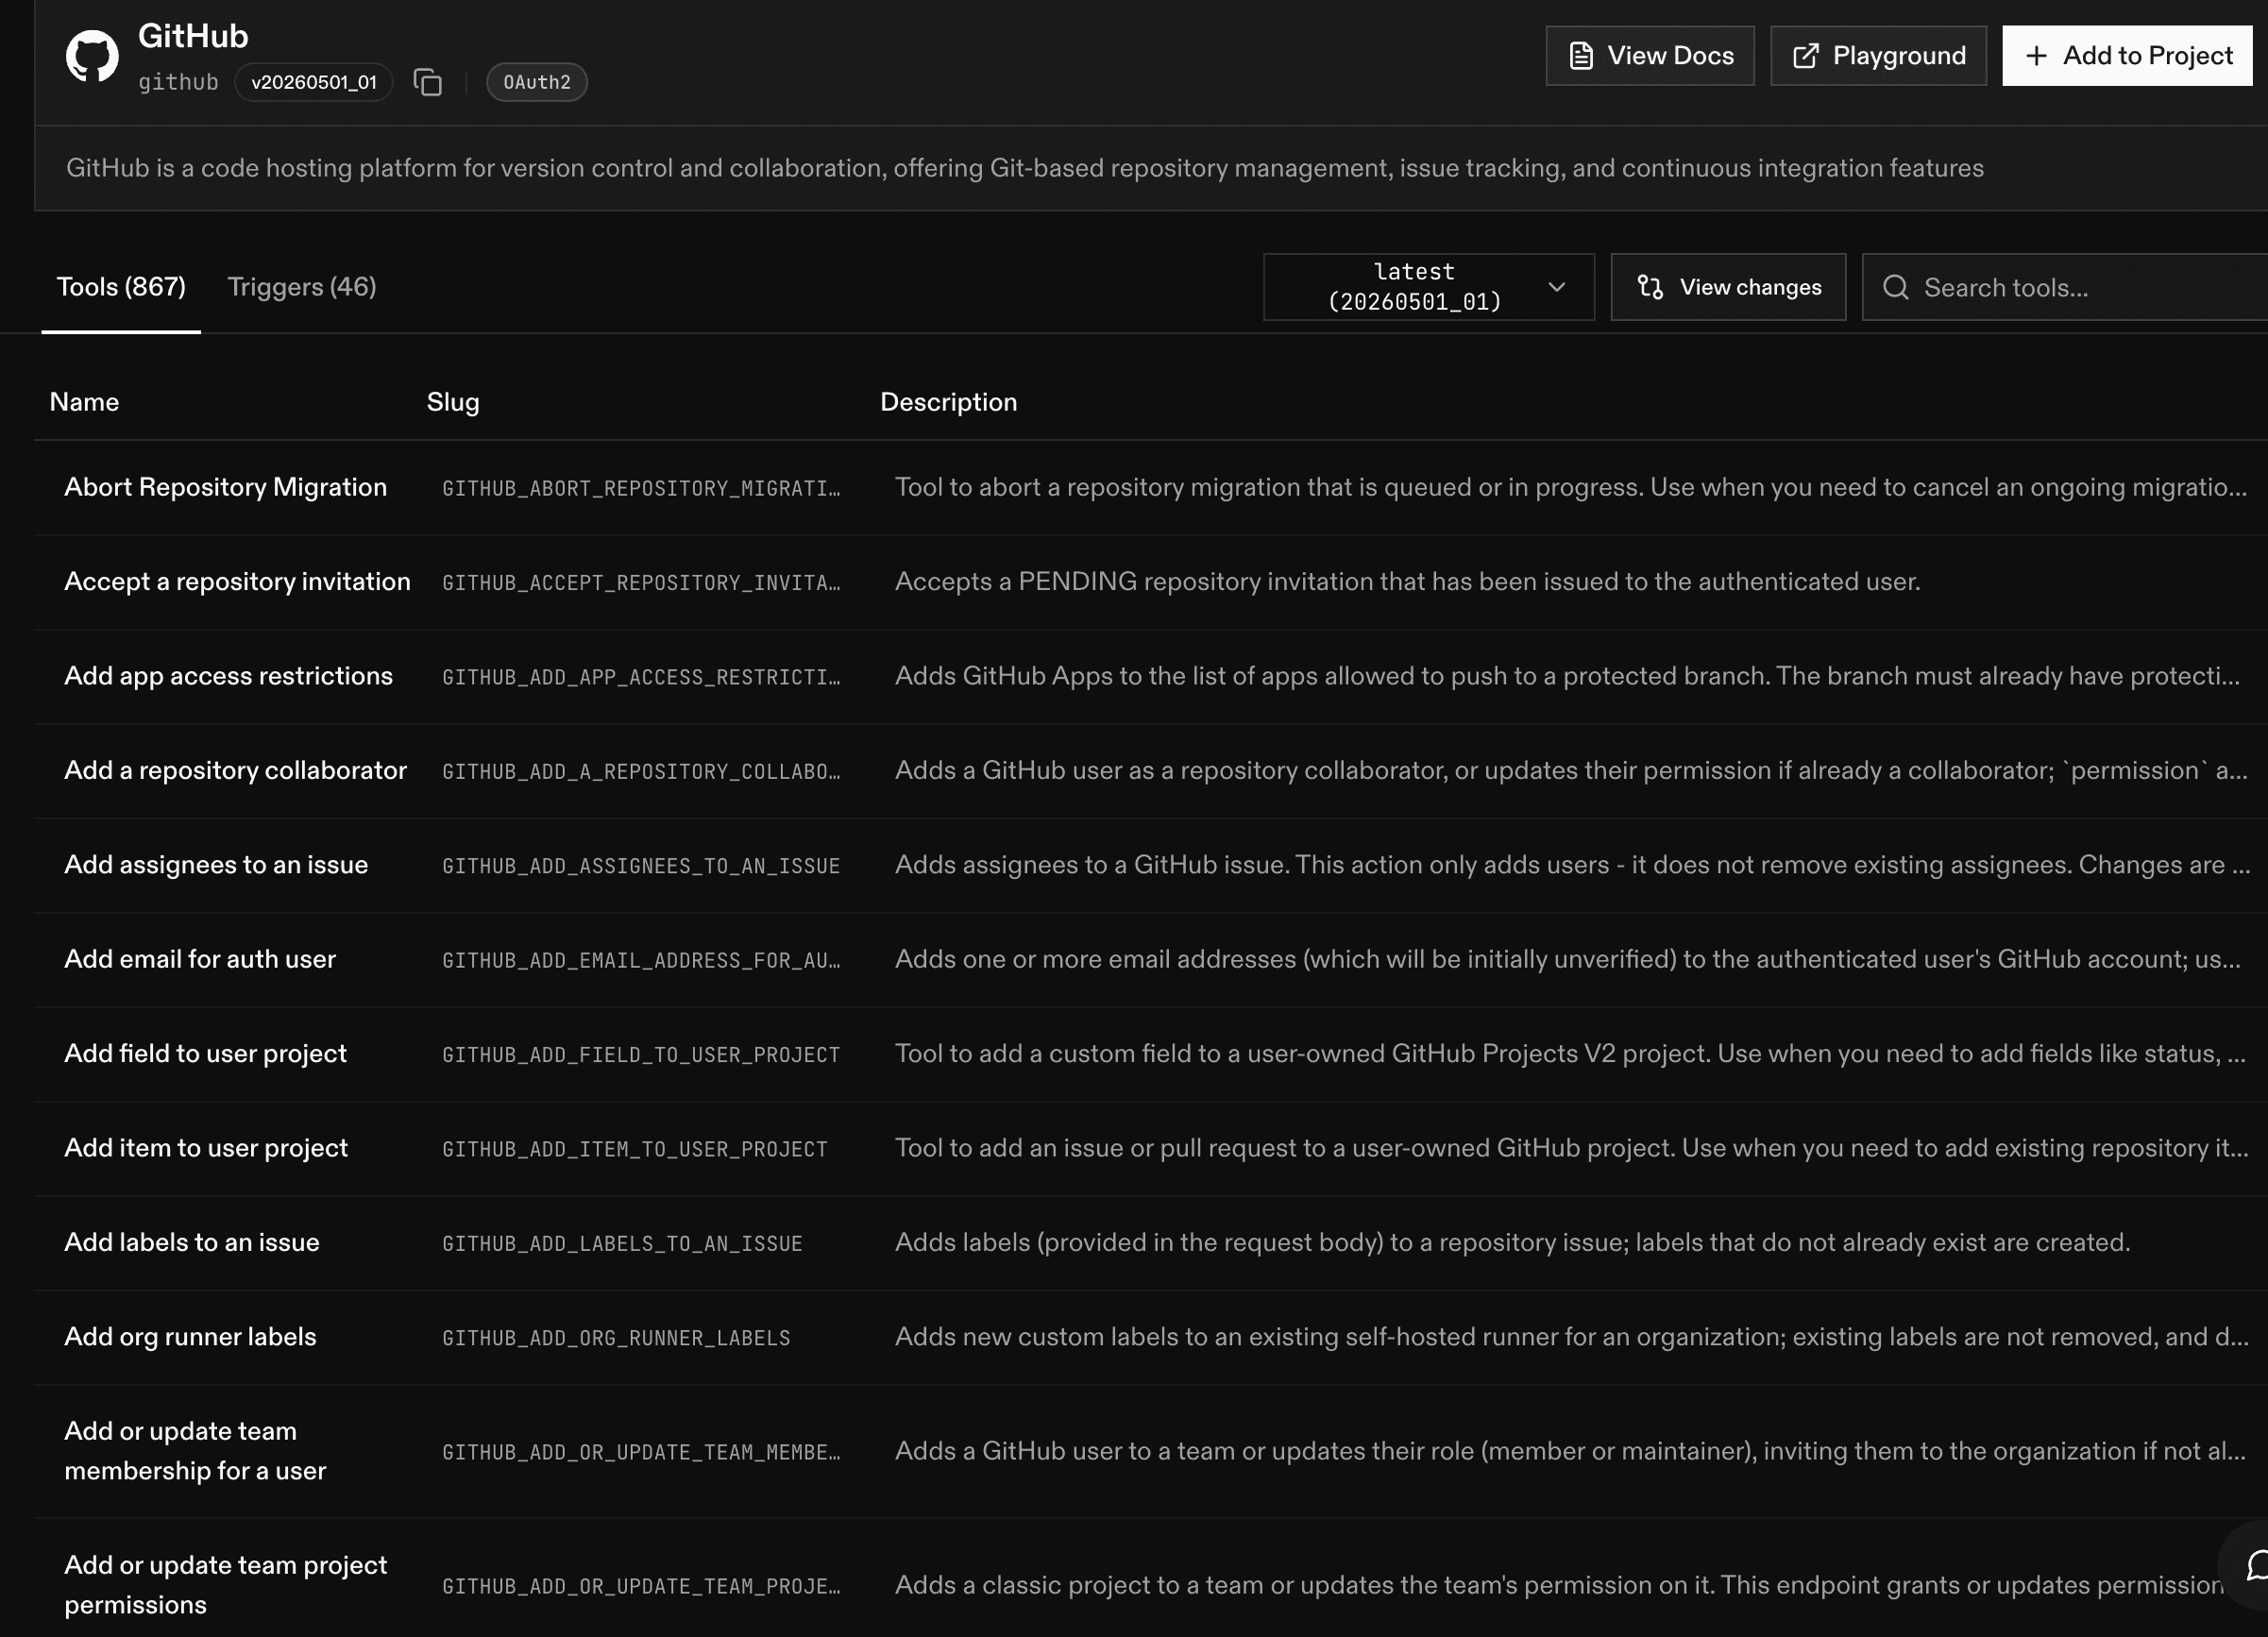
Step 6: Create the GitHub Auth Config in Composio
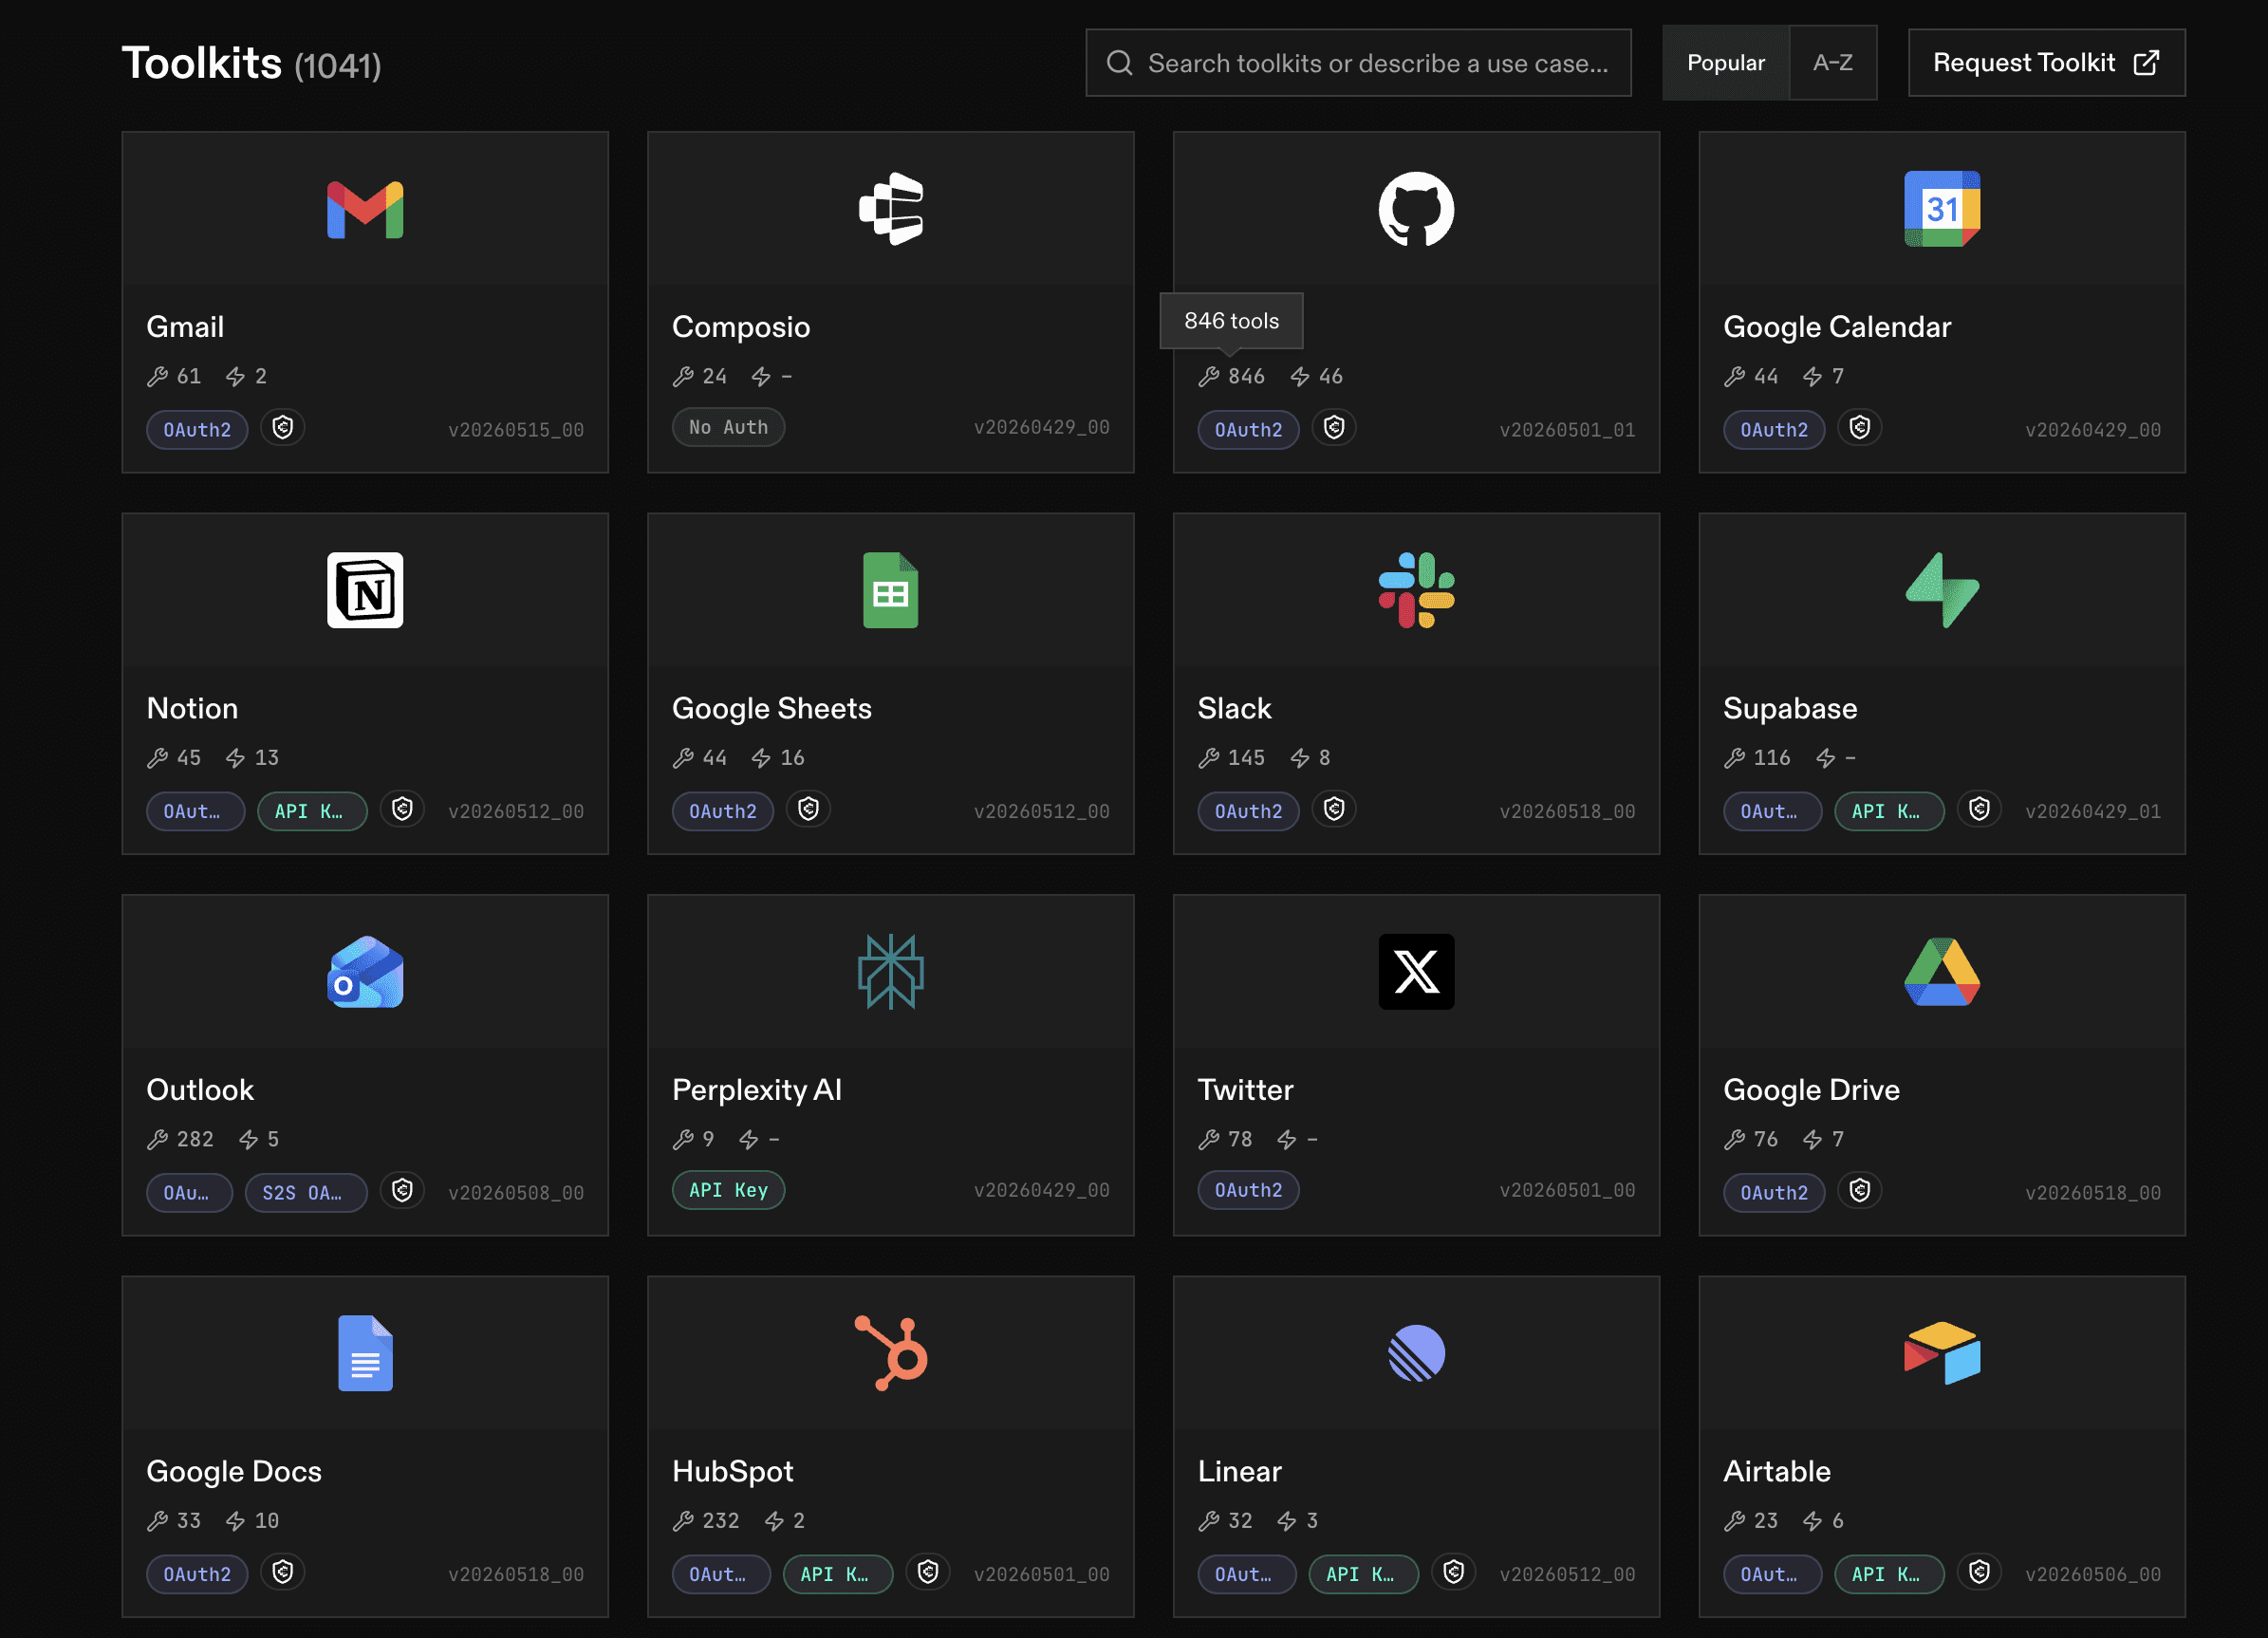
With the GitHub credentials ready, switch to Composio. Open your project, go to Auth Configs, click the create button, search for GitHub, and select the GitHub toolkit.
Select GitHub when creating a new Auth Config in Composio.
An Auth Config is the reusable authentication blueprint for one toolkit. It stores the auth method, scopes, and the app-level credentials that all user connections will rely on.
Composio recommendation: Managed auth can be convenient for development and quick testing, but using your own developer app is the recommended route for production because it gives you control over branding, scopes, and credential lifecycle.
Step 7: Configure OAuth2, scopes, and your own developer credentials
In the GitHub configuration drawer, set a name for the Auth Config, confirm Authentication Method = OAuth2, review the scopes, and turn on Use your own developer credentials.
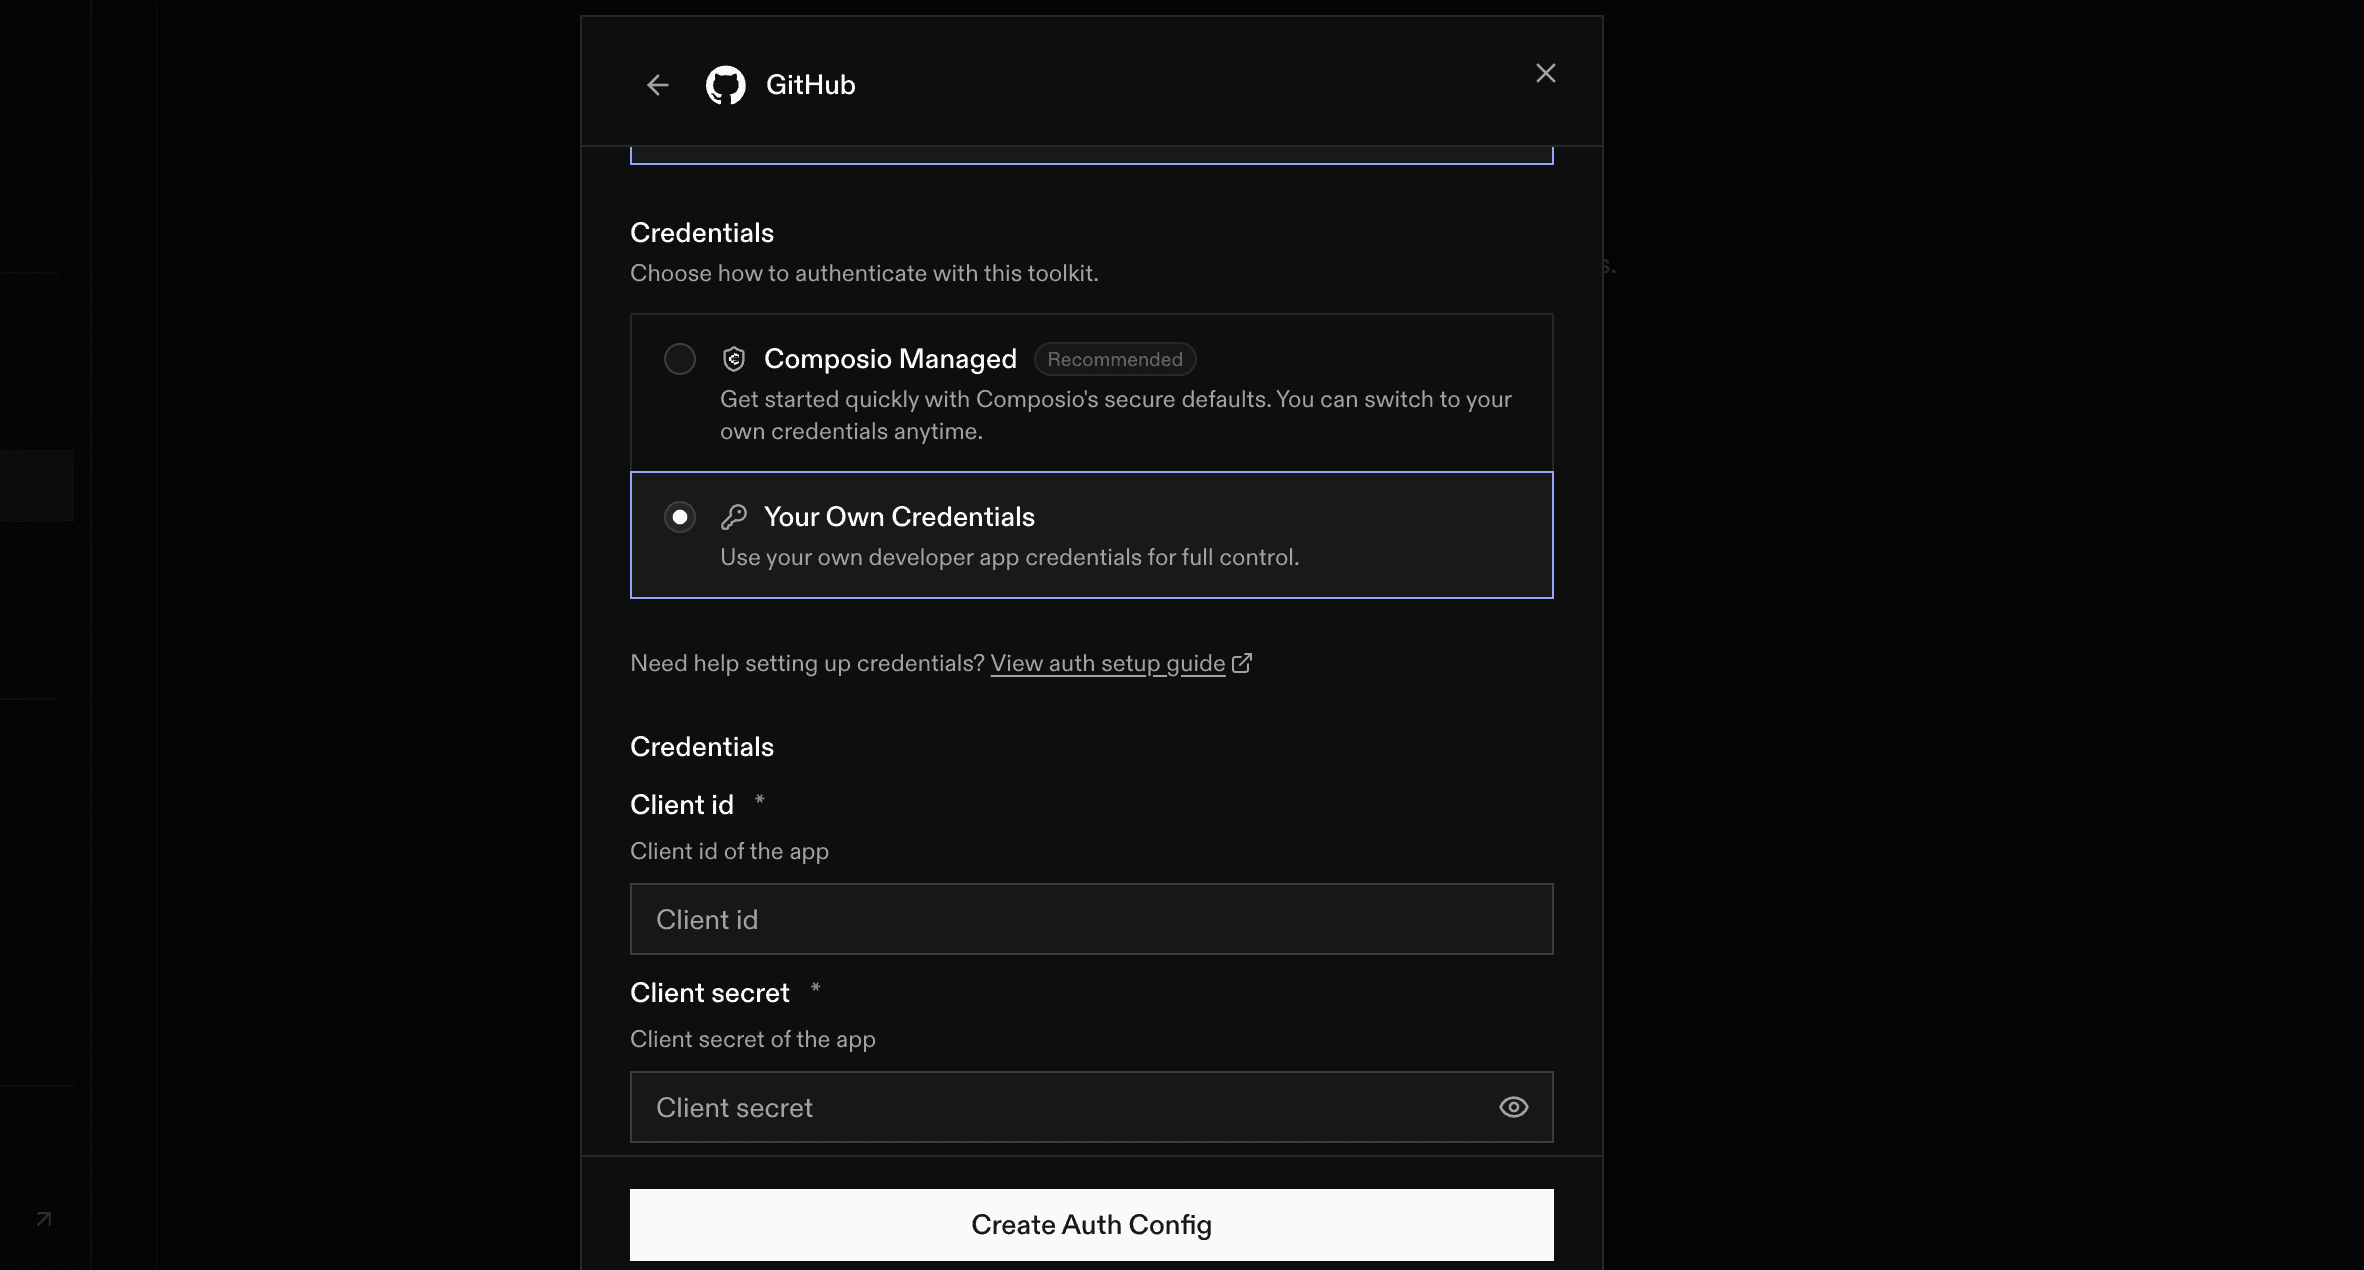
Configure scopes and enable Use your own developer credentials.
Paste the Client ID and Client Secret from GitHub into the corresponding fields. If the drawer shows a redirect URI field, keep it aligned with the same callback URL you registered in GitHub.
Scope summary from the example:
repo - full access to public and private repositories, including broad repository-related operations.
user- read and write access to the user’s profile information.
gist - create and update gists.
notifications - read and manage the user’s notifications and thread subscriptions.
project - read and write access to user and organization projects.
workflow- add and update GitHub Actions workflow files.
codespace - create and manage GitHub Codespaces.
Least privilege: Only request the scopes your Composio tools truly need. If you support multiple permission levels, create separate Auth Configs instead of reusing one broad configuration everywhere.
When everything looks correct, create or save the Auth Config.
Step 8: Connect a user account in Composio
After the Auth Config is created, open it and click Connect Account. Composio will ask for an External User ID.
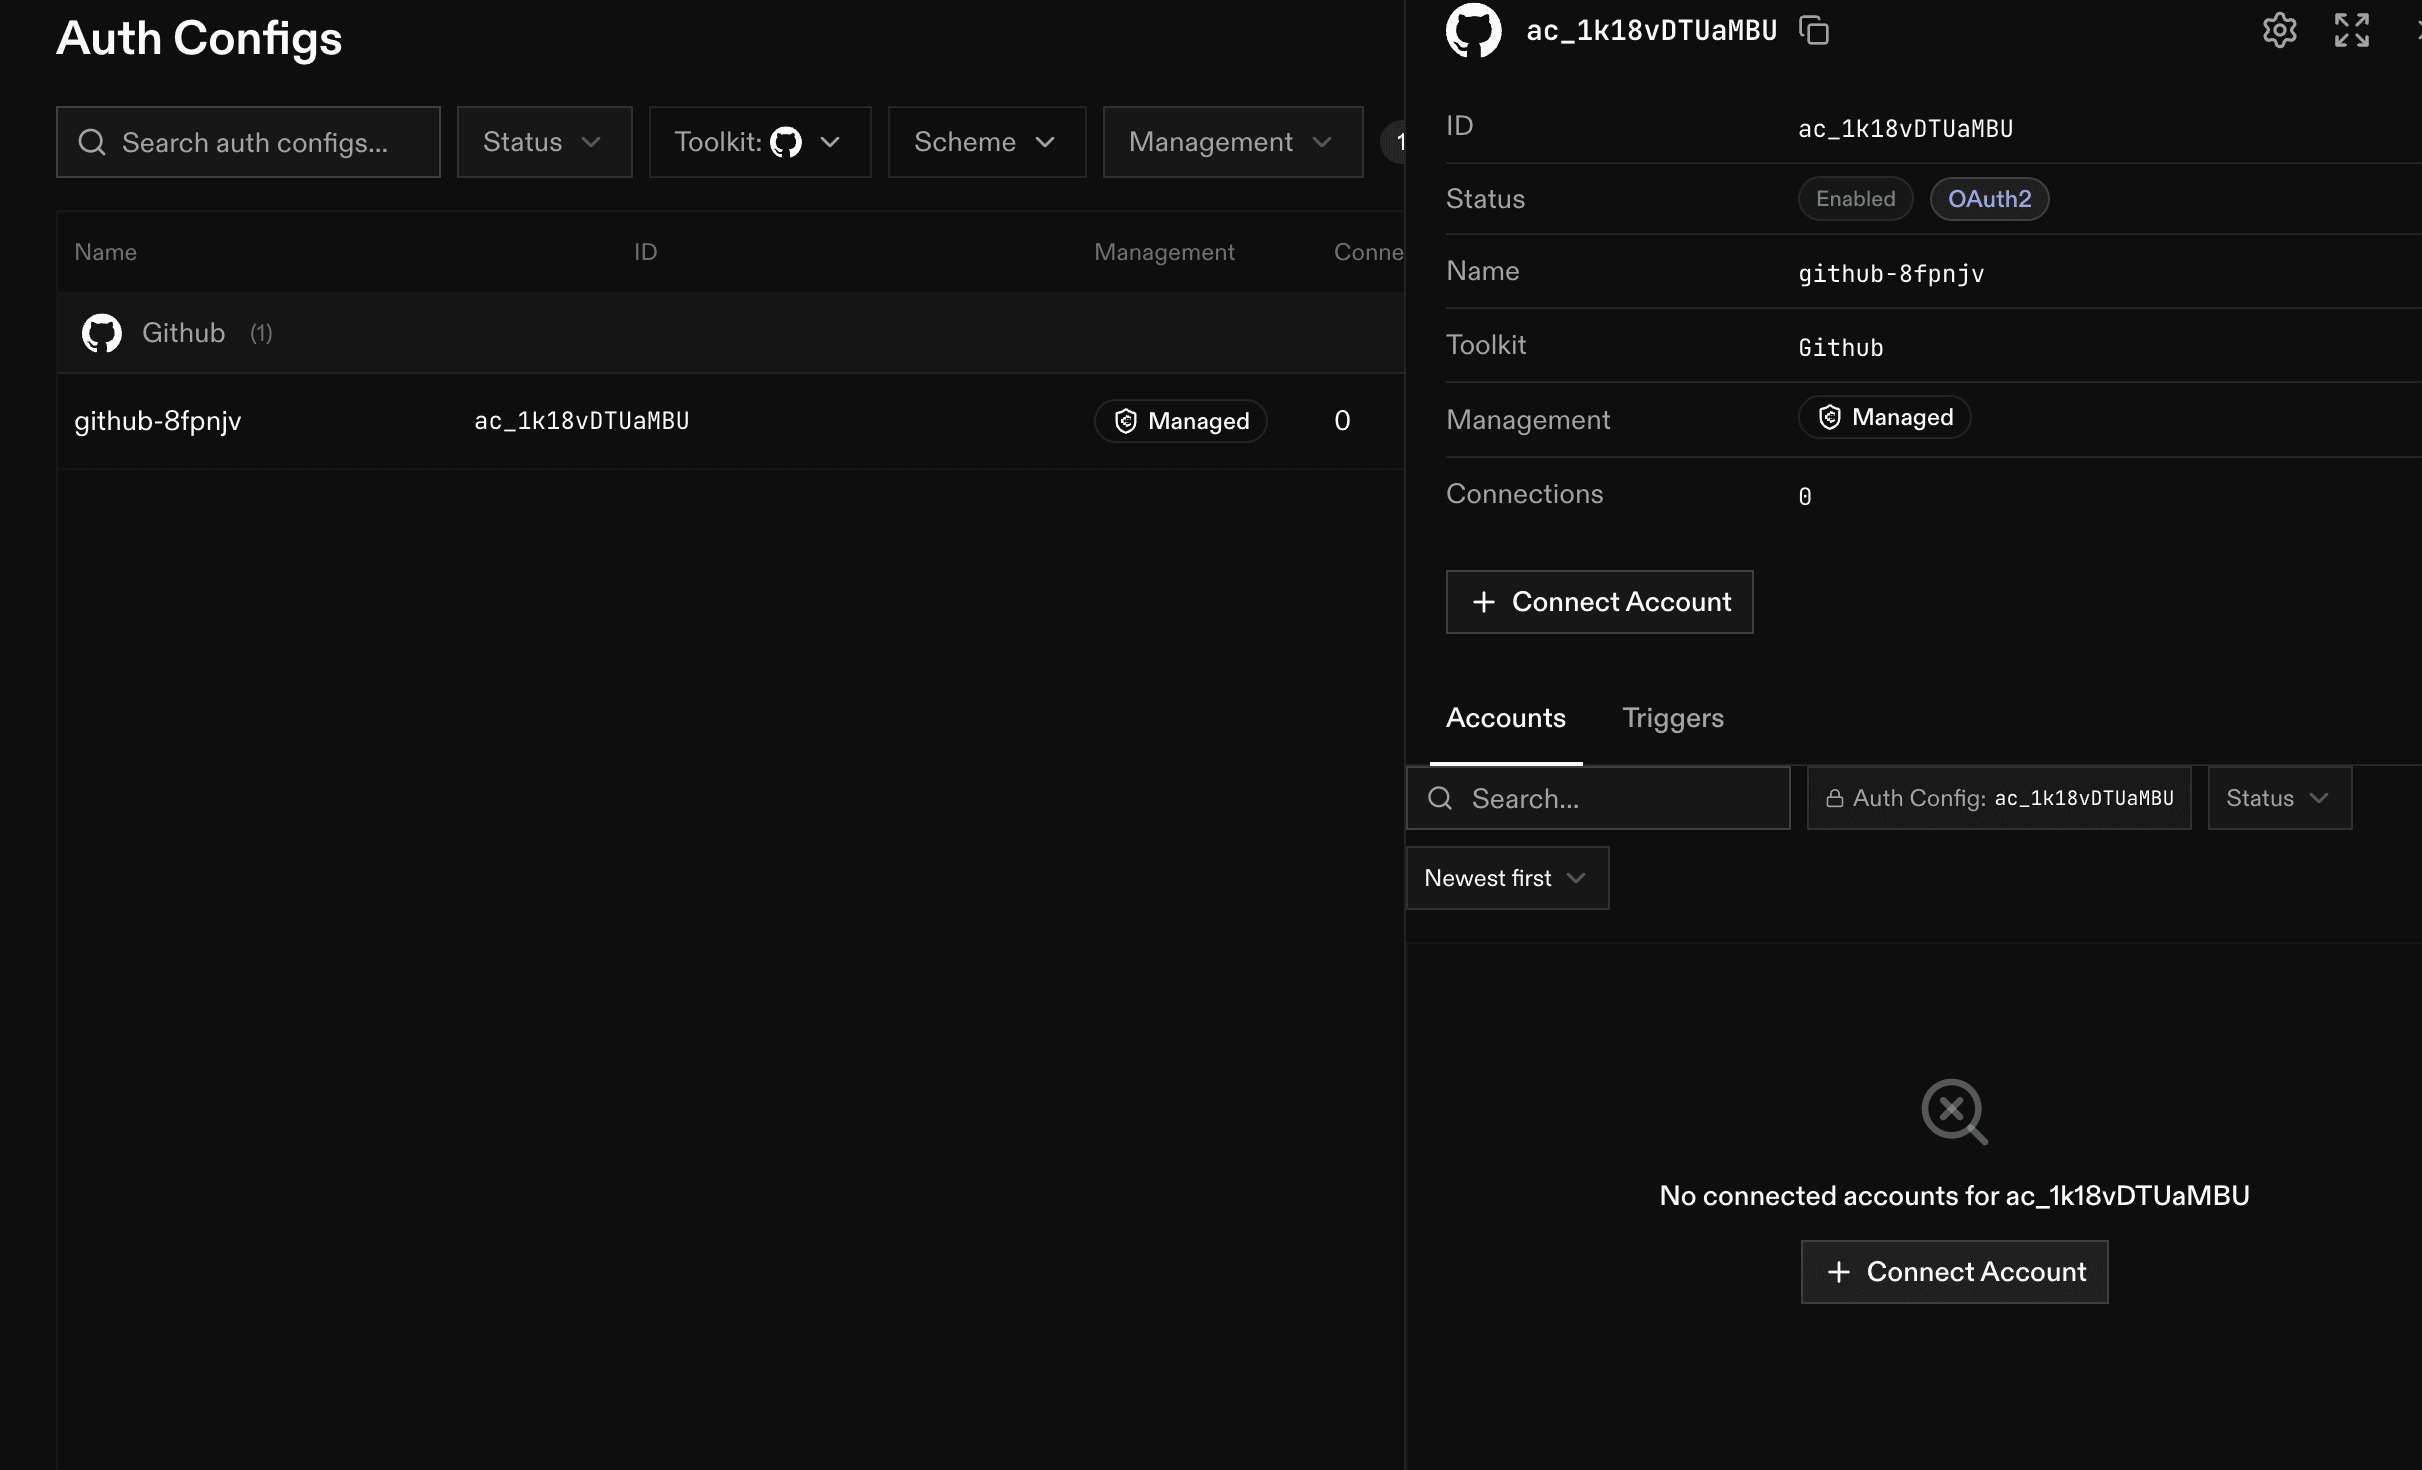
Open the Auth Config and click Connect Account.
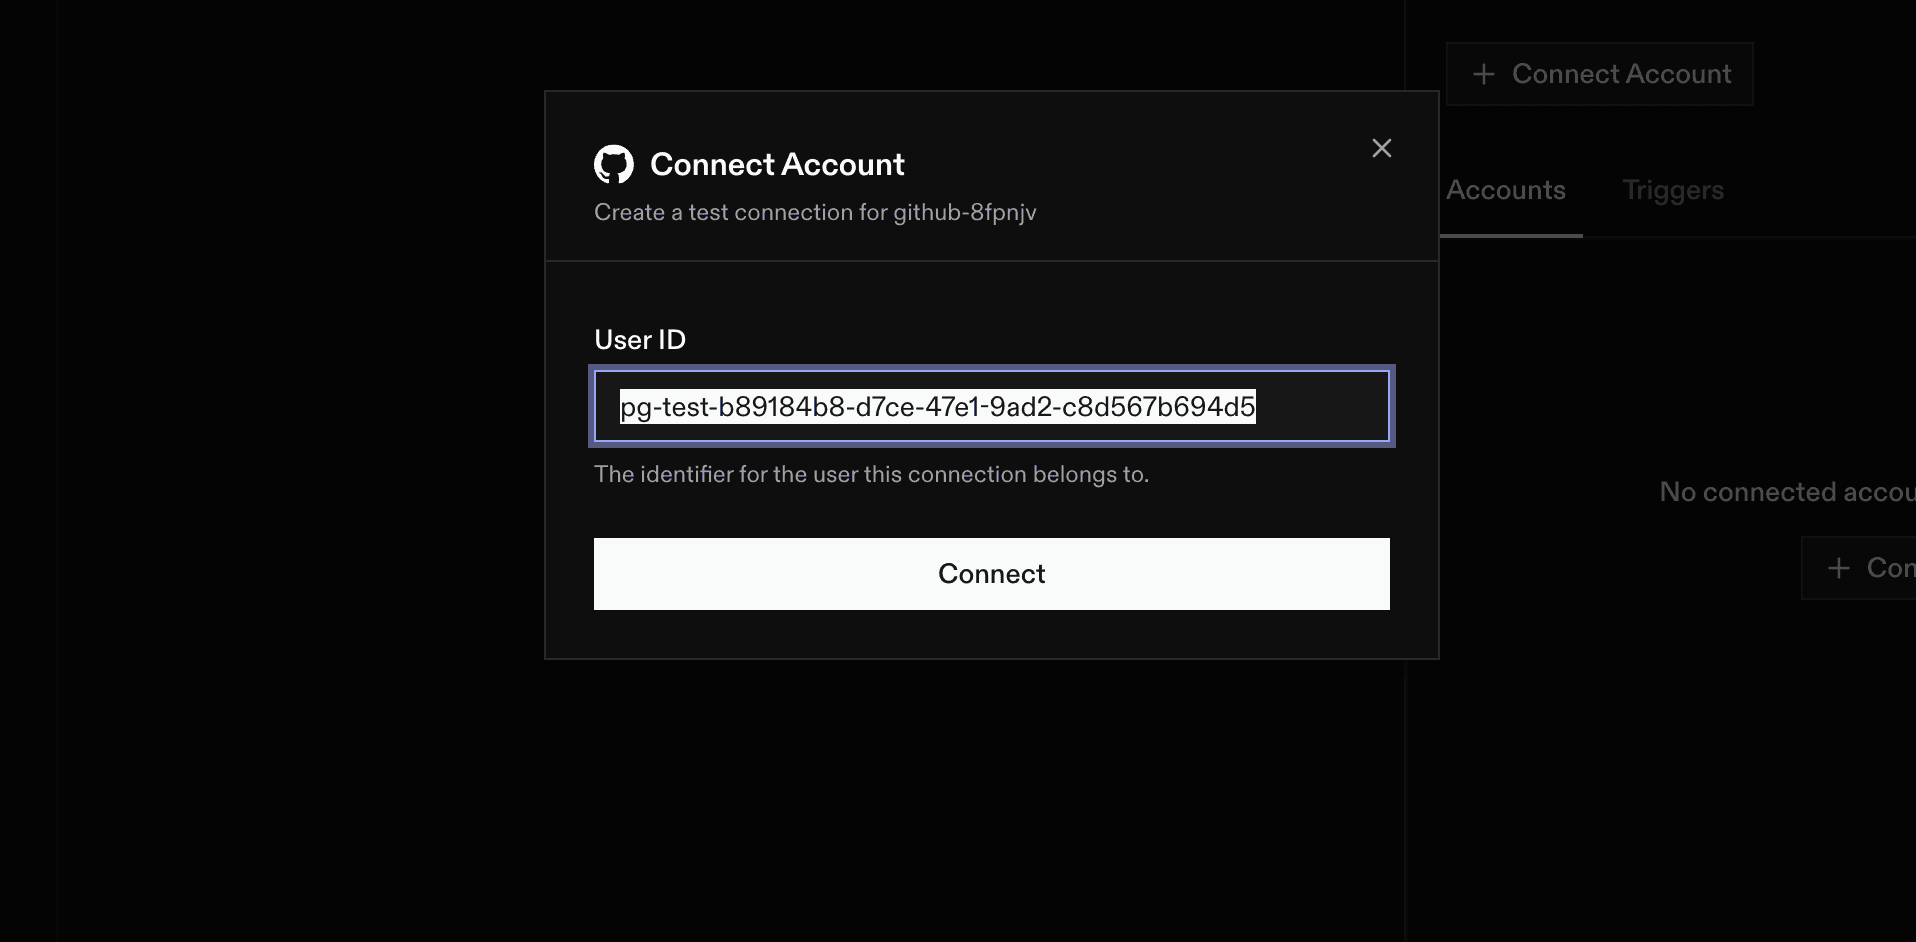
Then continue.
Step 9: Review the GitHub consent screen and authorise
Composio now redirects the user to GitHub’s authorisation screen. GitHub displays the app name, the account that owns the app, and the exact scopes being requested. Review them carefully, then click Authorise to complete the connection.
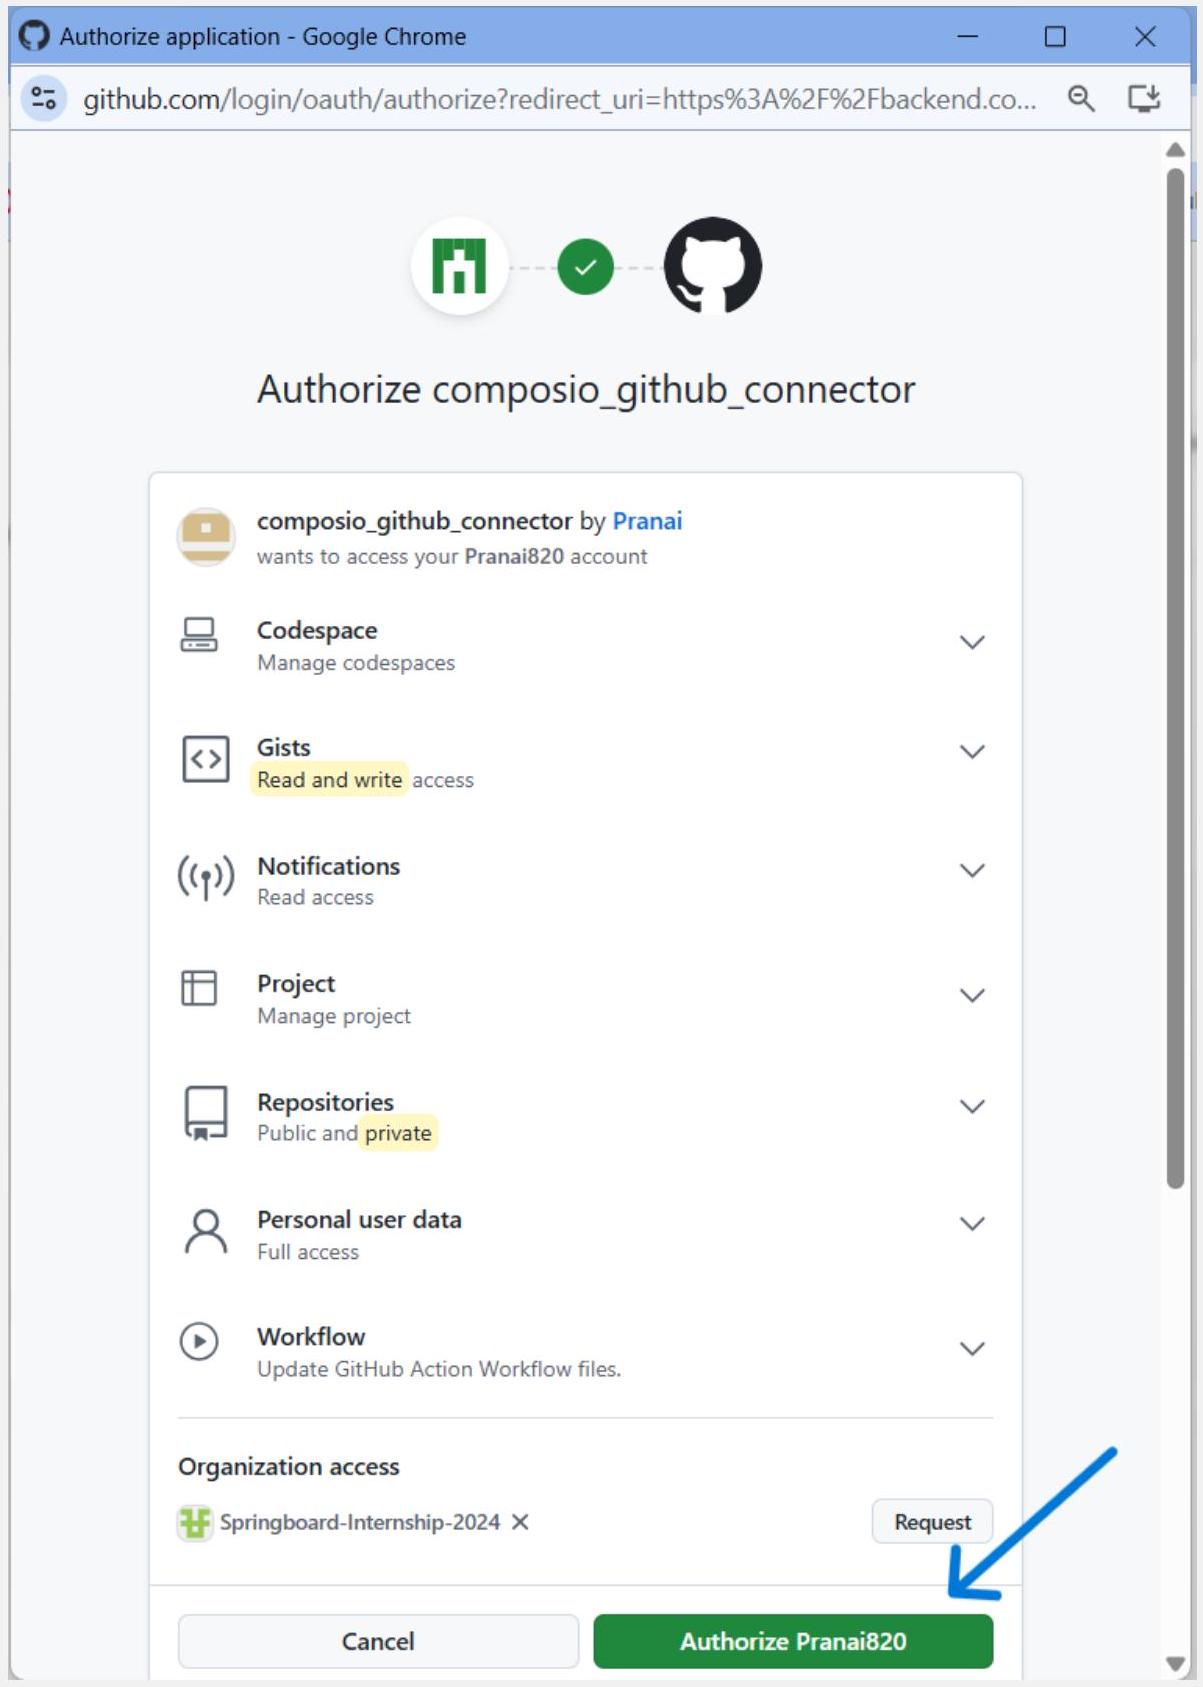
GitHub displays the requested permissions before the user authorises the app.
Organization approval: If the screen shows an organization access section with a Request button, the user may still authorize the app for the personal account, but an organization owner might need to approve access before the app can reach private organization resources.
After approval, the user is redirected back through Composio, and the connected account should appear under the Auth Config’s connected-account list.
After a successful connection, verify these items:
The GitHub connection appears inside Connected Accounts for the Auth Config.
You copied the Auth Config ID if you plan to reference it from Composio Sessions, SDK code, or API calls.
A simple GitHub tool called works with the connected account and the granted scopes.