A complete step-by-step walkthrough for creating a DocuSign Integration Key, configuring OAuth 2.0 authentication, and connecting it to Composio with your own developer credentials.
Overview
This guide walks you through the complete process of creating a DocuSign Integration Key (OAuth 2.0 app) in the DocuSign Developer Console and wiring it into Composio using your own developer credentials. By the end, you will have a registered DocuSign app, a Composio Auth Config backed by that Integration Key, and a live connected account ready for agents or automations.
What You Will Set Up
Navigate to the DocuSign Admin panel and open Apps and Keys.
Create a new Integration Key (OAuth app) named after the app.
Configure the Integration Type as Public integration.
Set up User Application authentication with a Secret Key.
Add the Composio Redirect URI in Additional Settings.
Copy the Integration Key (Client ID) and Secret Key.
Create a DocuSign Auth Config in Composio using OAuth2.
Connect a user account and approve the DocuSign consent screen.
TERMINOLOGY
DocuSign uses the term Integration Key for what other platforms call a Client ID. Throughout this guide, Integration Key and Client ID are used interchangeably - they refer to the same value you will paste into Composio as the Client ID.
PREREQUISITES
Before you start: Make sure you have a DocuSign developer account (free at developers.docusign.com), access to your Composio project, and a browser available to complete the OAuth consent flow. The DocuSign Developer environment uses account-d.docusign.com - this is separate from production (account.docusign.com).
1. Open the DocuSign Home Dashboard
Sign in to your DocuSign account at app.docusign.com. You will land on the Home dashboard showing your agreement activity summary. From here, navigate to the Admin section using the top navigation bar.
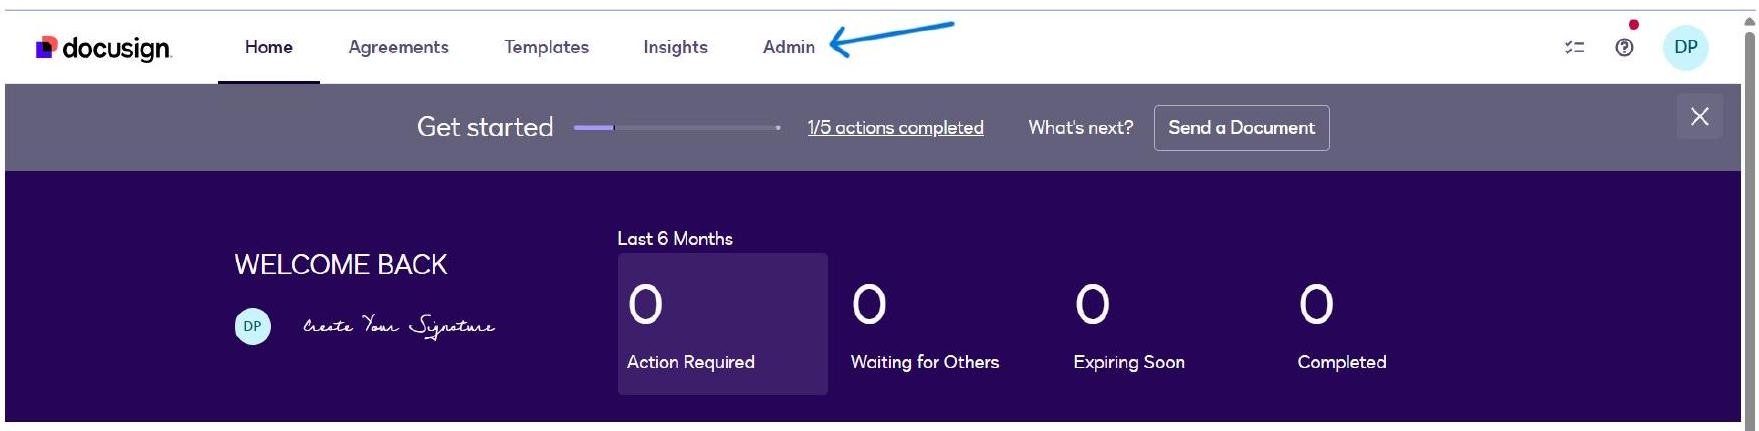
Sign or get signatures
The DocuSign Home dashboard - click Admin in the top navigation bar.
PERMISSION NOTE
The Admin menu item is only visible to users with Administrator privileges on the DocuSign account. If you do not see it, contact your DocuSign account owner to grant you the Admin role before proceeding.
2. Open the DocuSign Admin Panel
Clicking Admin opens the DocuSign Admin panel. The left sidebar shows all account management sections, including Account, Users and Groups, Integrations, Agreement Actions, and Auditing. You can see the account name and Account ID at the top of the sidebar.
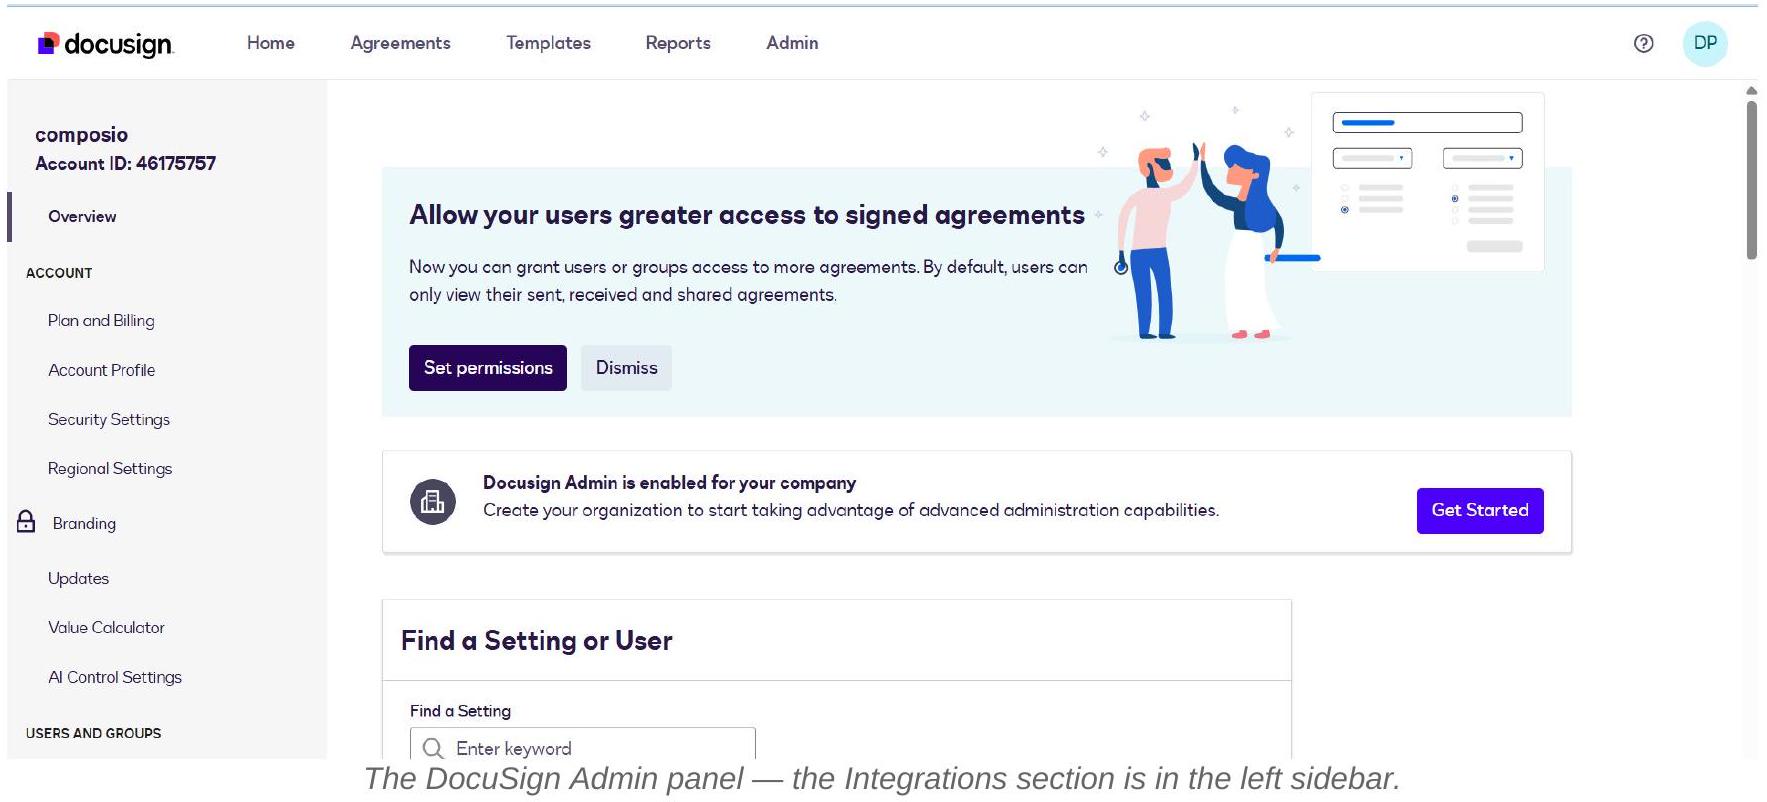
The Admin panel also shows useful prompts, such as setting user permissions and enabling DocuSign Admin for your organisation. For the OAuth app setup, you need the Integrations section in the sidebar.
3. Navigate to Apps and Keys
In the left sidebar, scroll down to the INTEGRATIONS section. You will see App Center, Connect, Apps and Keys, API Usage Center, CORS, and Payments. Click Apps and Keys - this is where DocuSign Integration Keys (OAuth apps) are created and managed.

Scroll the Admin sidebar to INTEGRATIONS and click Apps and Keys.
NOTE
Do not confuse Apps and Keys with the App Center. The App Center lists third-party apps available for your DocuSign account, while Apps and Keys is where you create your own integration credentials for the DocuSign API.
4. View Account Information and Add an Integration Key
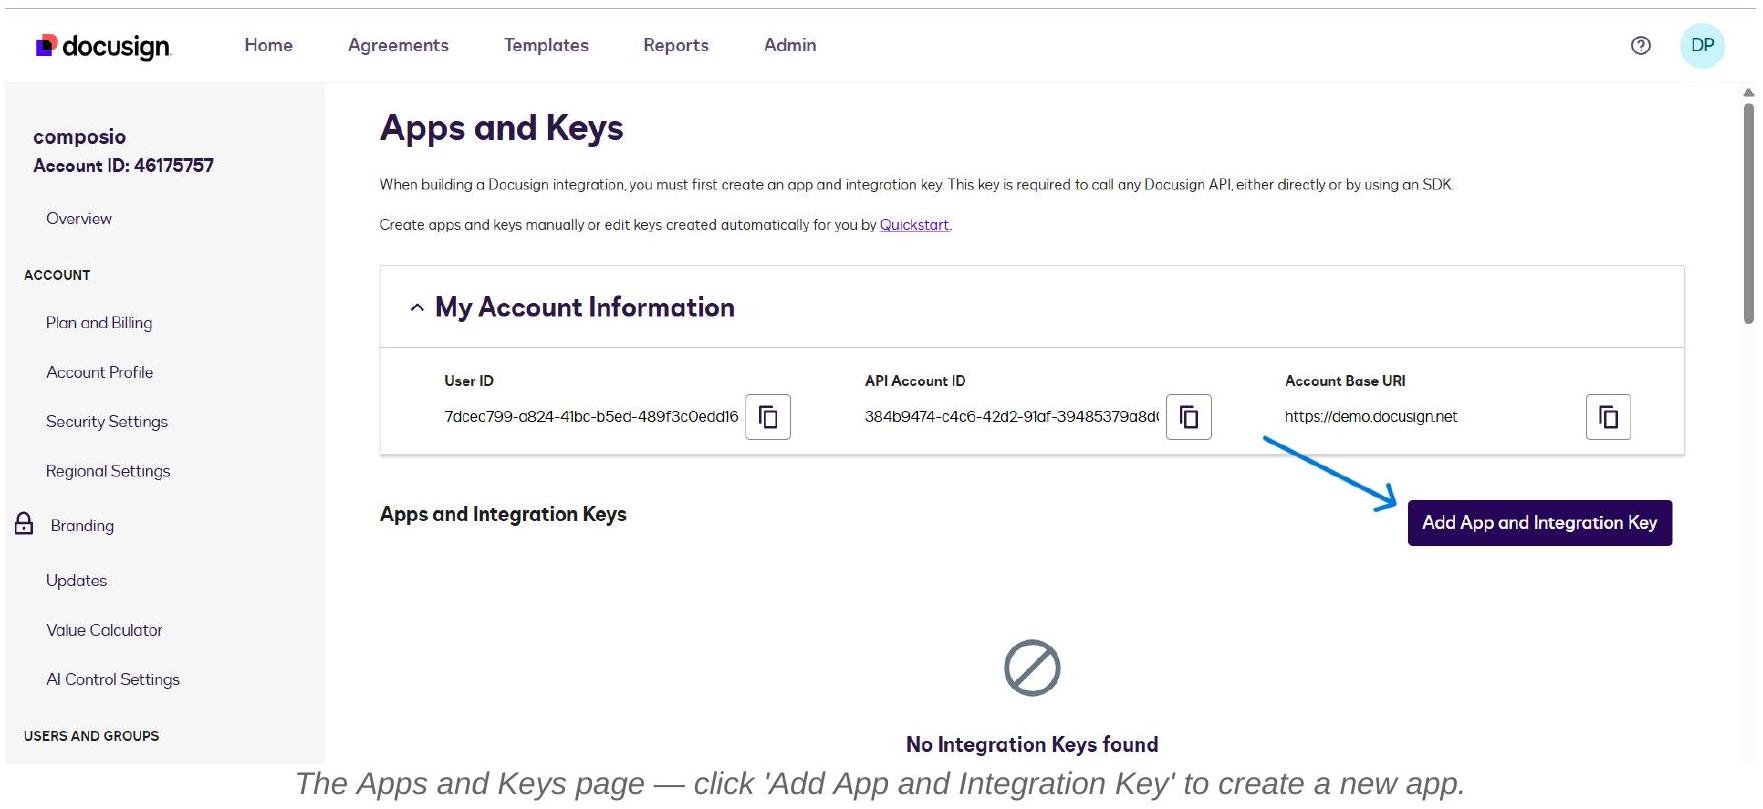
The Apps and Keys page shows your account’s API credentials at the top: User ID, API Account ID, and Account Base URI. These are useful reference values if you need to make direct API calls. Below that, the Apps and Integration Keys section lists all your registered apps. Since this is a fresh setup, it will show ‘No Integration Keys found’. Click Add App and Integration Key to begin.
5. Name Your App and Create It
A modal dialogue appears asking for the App Name. Enter a clear, descriptive name that identifies this as your Composio connector. The example uses composio-docusign-connector. Then click Create App.
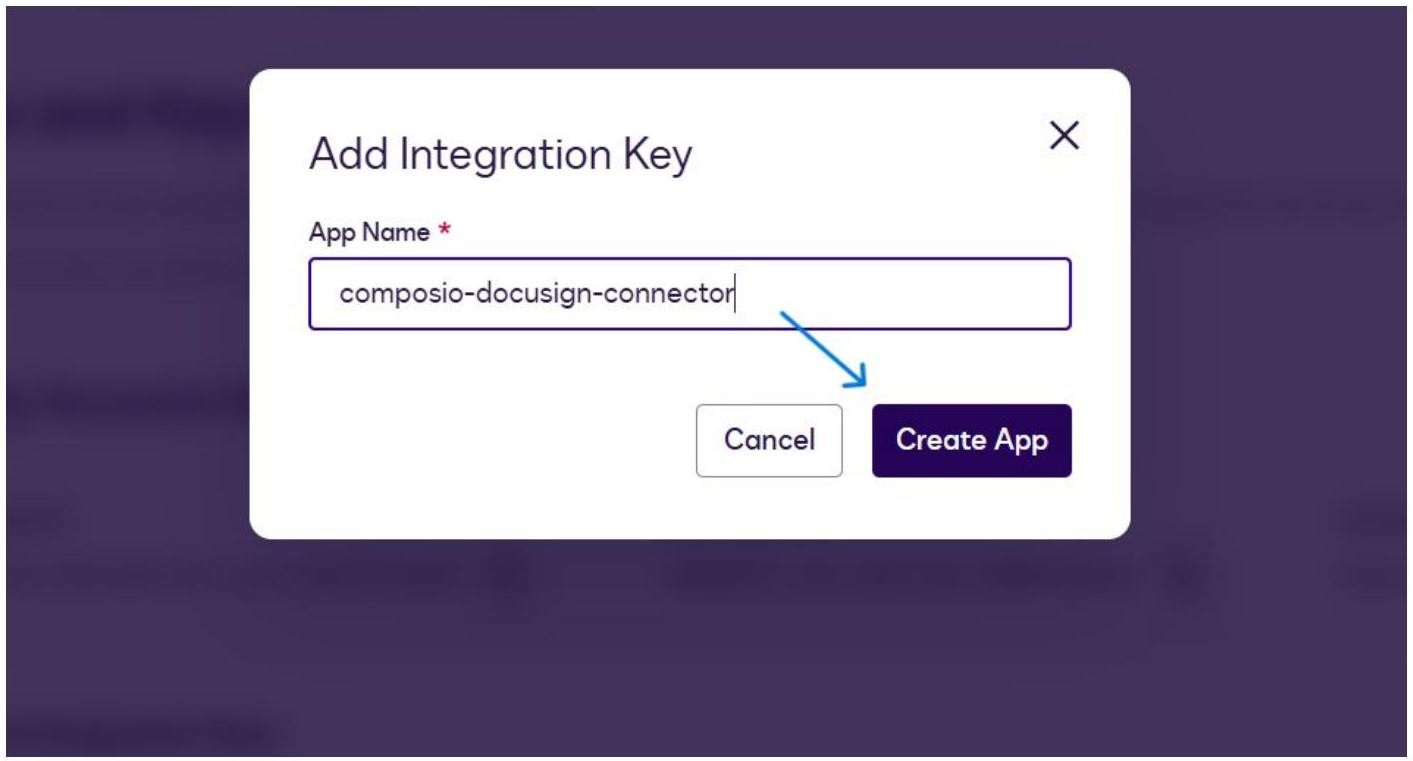
Enter the app name in the Add Integration Key modal and click Create App.
NAMING TIP: Choose a name that clearly identifies the purpose of the integration. This name is shown to users on the OAuth consent screen when they authorize access, so it should be recognizable and professional. You can change it later from the app settings.
6. Copy the Integration Key and Set Integration Type
After creating the app, DocuSign opens the app configuration page. At the top under General Info, you will see the Integration Key - a UUID that acts as your Client ID. Copy this value now and keep it safe; you will need it for Composio.
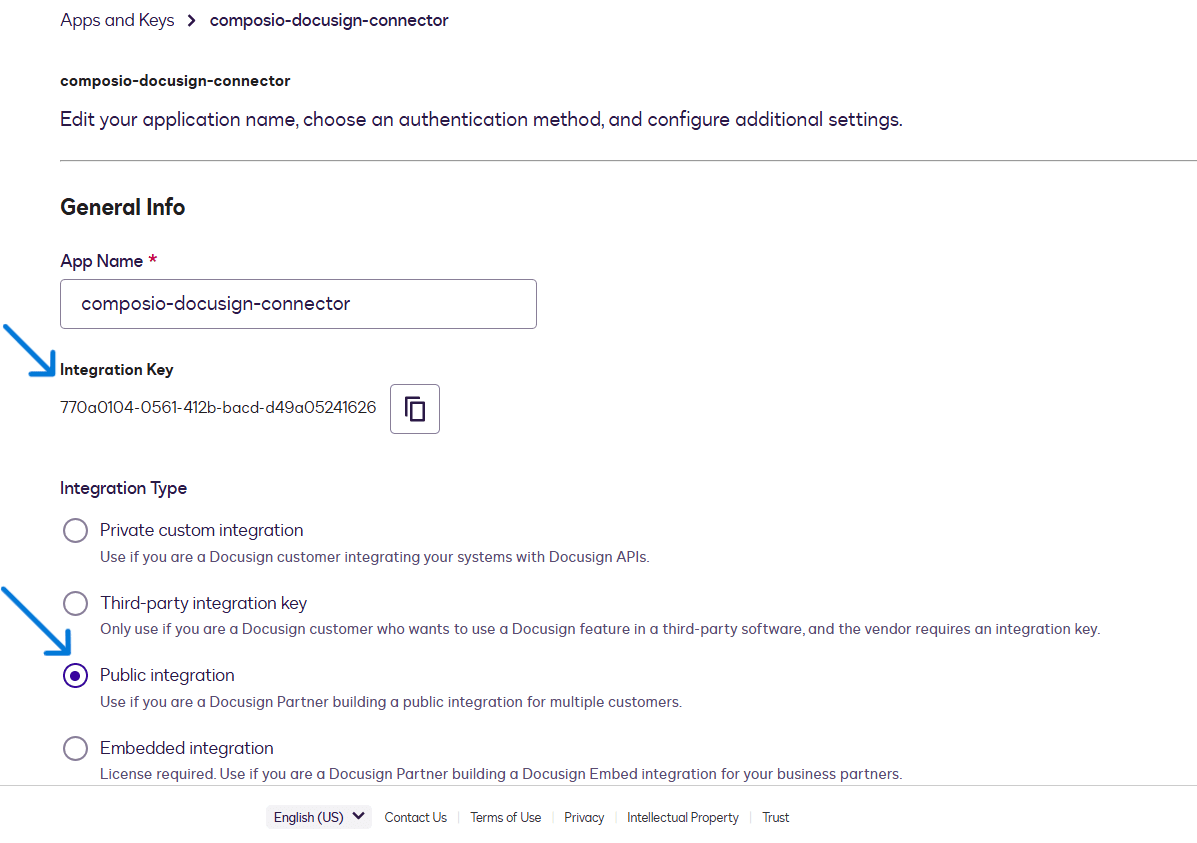
Integration Type
7. Configure Authentication - User Application
Scroll down to the Authentication section. Under User Application, DocuSign asks: Is your application able to securely store a client secret? Select Yes. This tells DocuSign your app is a confidential client that can safely store credentials server-side, which enables the Authorisation Code Grant flow - the standard OAuth 2.0 flow used by Composio.
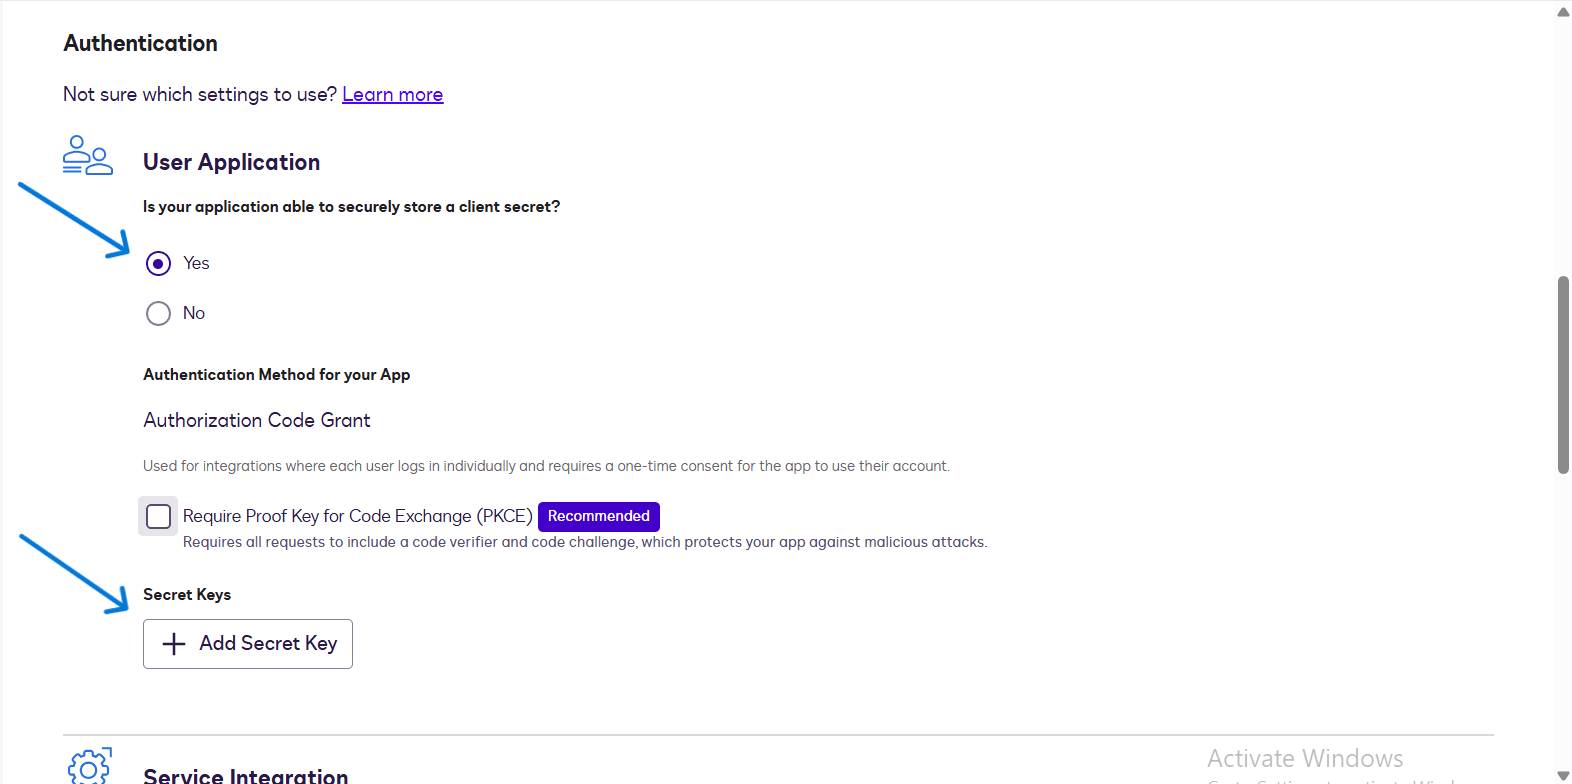
After selecting Yes, DocuSign confirms the Authentication Method for your App is Authorization Code Grant. You will also see an option to enable the Require Proof Key for Code Exchange (PKCE) setting, which DocuSign recommends for additional security. For the standard Composio flow, PKCE can be left unchecked unless your Composio setup explicitly requires it.
AUTH FLOW: Authorization Code Grant is the OAuth 2.0 flow where each user logs in individually and gives one-time consent for the app to use their account. This is the correct flow for Composio’s user-level connection model.
8. Generate and Copy the Secret Key
Under Secret Keys, click + Add Secret Key. DocuSign generates a client secret and displays it immediately. Copy this secret key right away - DocuSign will mask it after you navigate away.
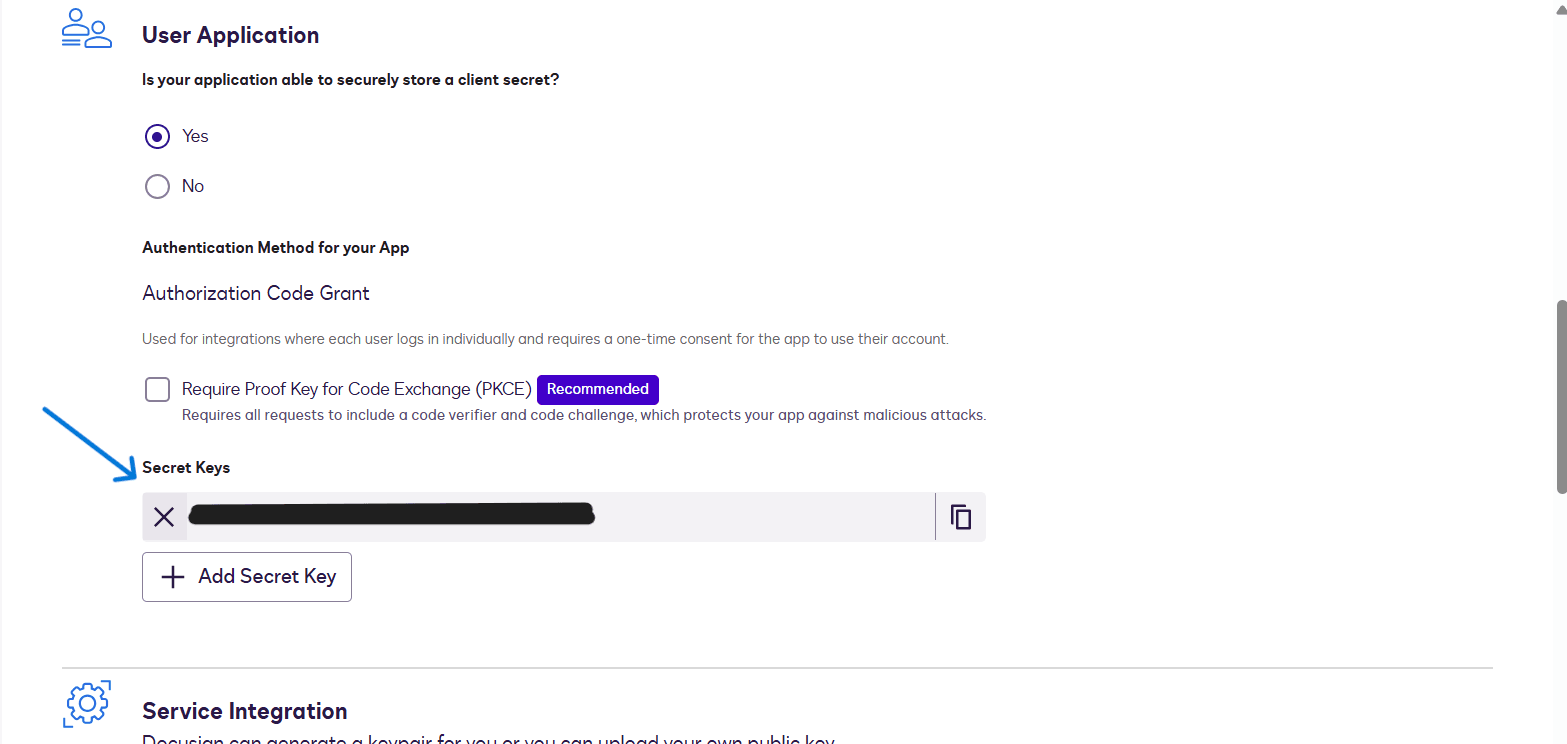
CRITICAL SECURITY NOTE
Security: The Secret Key is shown only once in plain text. After you navigate away from this page, DocuSign masks the secret permanently. Copy it now and store it in a secure location - a password manager, secrets vault, or encrypted environment variable. If you lose it, you must generate a new secret key and update your Composio Auth Config.
9. Add the Composio Redirect URI
Scroll further down to Additional Settings. Under Redirect URIs, click + Add URI and enter the Composio OAuth callback URL. DocuSign will only redirect users to URLs saved here after they authorize the app.
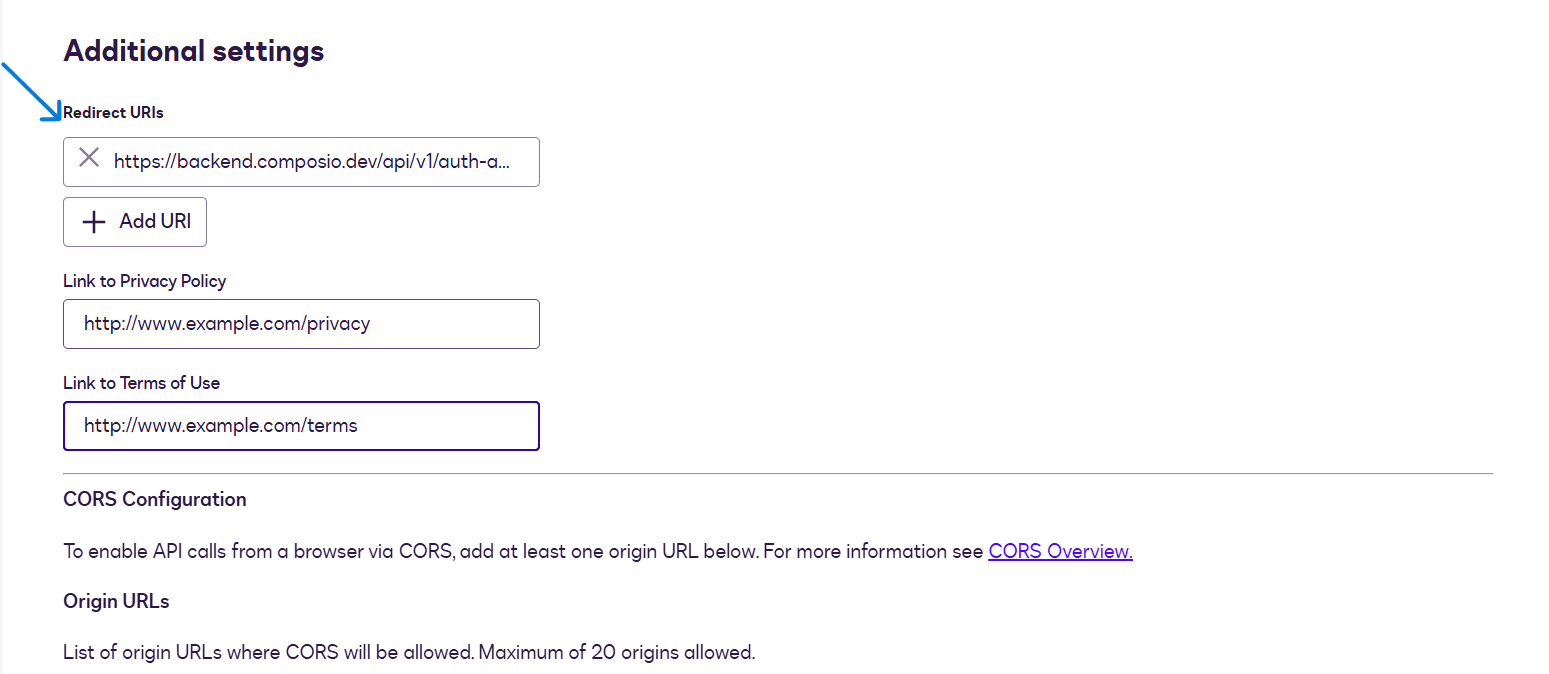
Composio Redirect URI:
https://backend.composio.dev/api/v1/auth-apps/addIMPORTANT - URL VERSION
Always verify the redirect URI displayed in your current Composio Auth Config form - it may differ from older documentation. Copy the exact value from your Composio dashboard and paste it here. The URI in DocuSign must match character-for-character with what Composio sends during the OAuth flow.
You can also optionally add your Privacy Policy and Terms of Use URLs in the corresponding fields; these are shown to users on the consent screen.
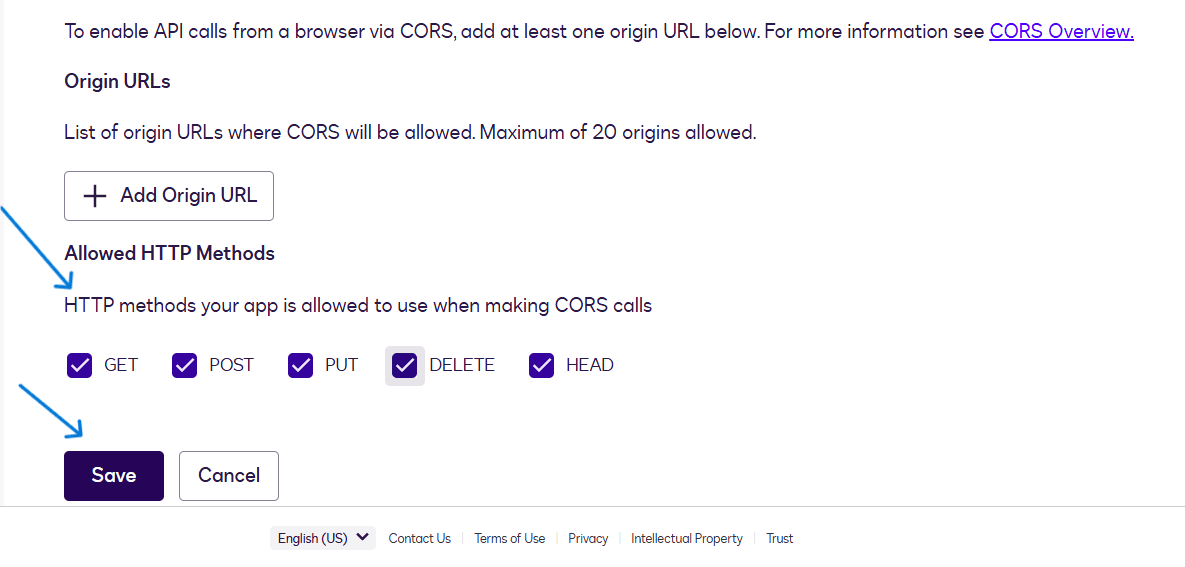
10. Configure CORS and Save the App
Continue scrolling to the CORS Configuration section. CORS settings control which origin URLs are permitted to make API calls from the browser. For a standard Composio server-side integration, you do not need to add origin URLs unless you are building a browser-based frontend. The Allowed HTTP Methods section shows GET, POST, PUT, DELETE, and HEAD - leave these at their defaults. Click Save to finalise the app.
ENVIRONMENT NOTE
After saving, your app will show Environment: Development and Go Live Status: Ready to Submit. For Composio integration with the DocuSign developer/demo environment, the Development environment is sufficient. You only need to promote to production when you are ready to use real DocuSign accounts.
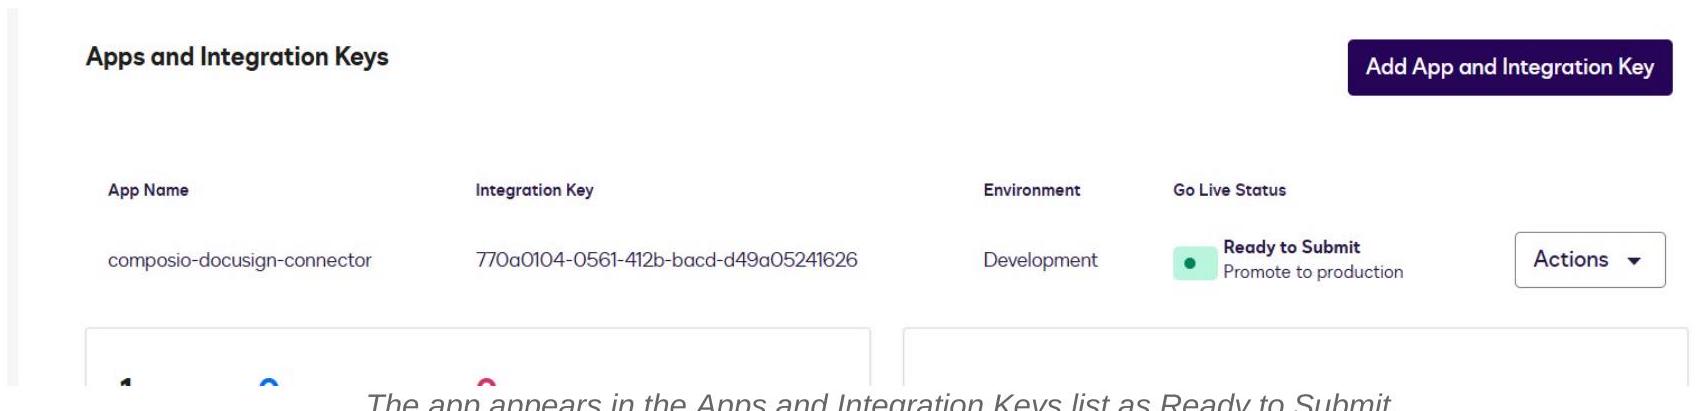
11. Confirm the App is Listed and Ready
After saving, DocuSign returns you to the Apps and Keys page. Your new app composio-docusign-connector now appears in the list with its Integration Key, Environment (Development), and Go Live Status. The status Ready to Submit means the app is fully configured and ready to use.
12. Create the DocuSign Auth Config in Composio
Switch to your Composio dashboard. Navigate to Auth Configs and click + Create Auth Config. In the search drawer, type docusign and select** DocuSign** with the OAUTH2 badge.
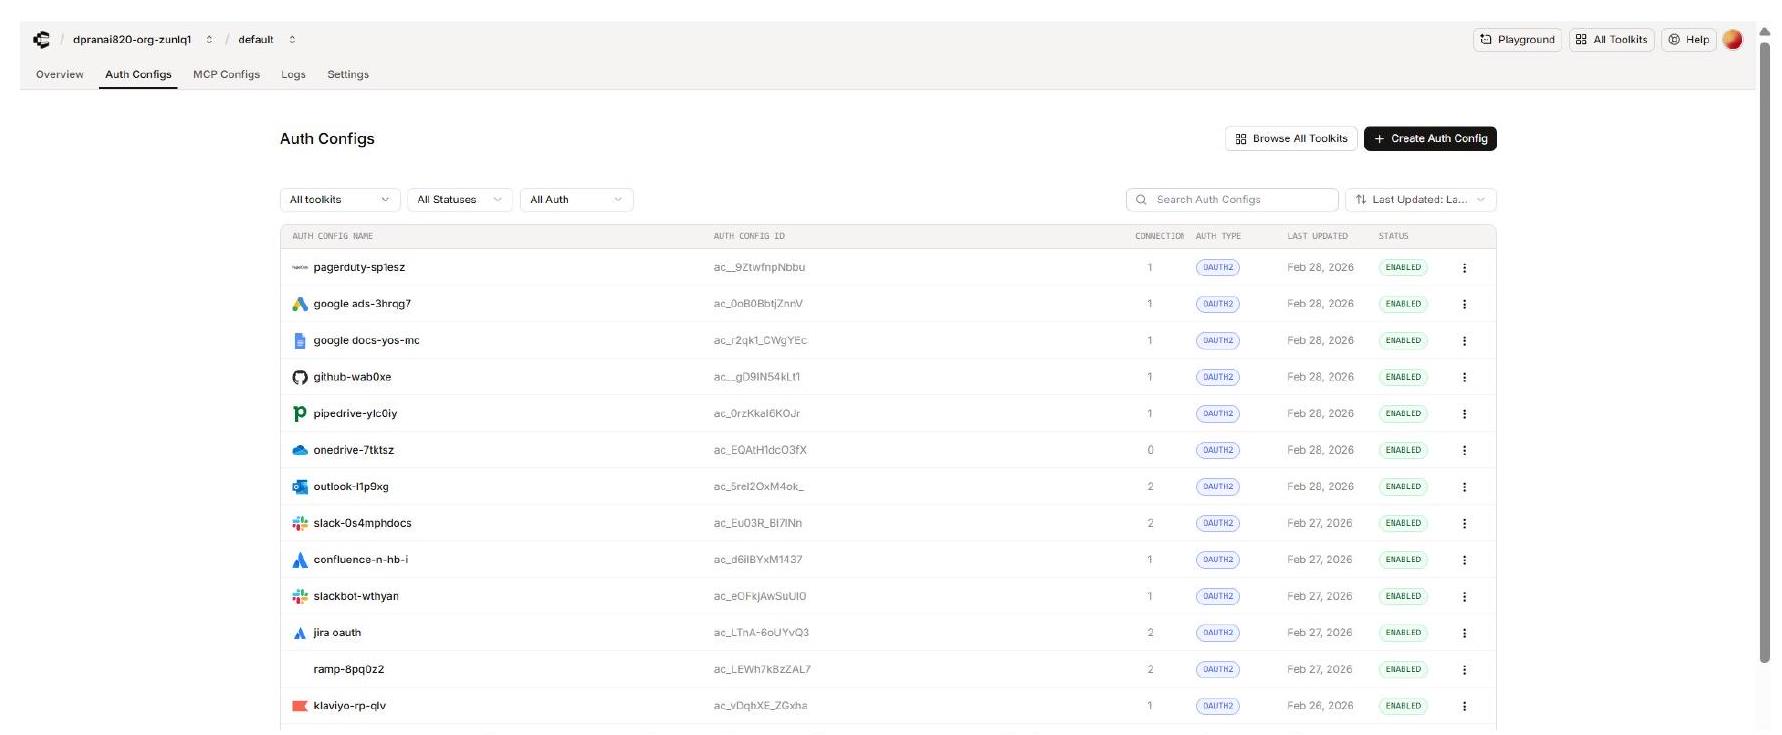
The Composio Auth Configs page - click Create Auth Config.
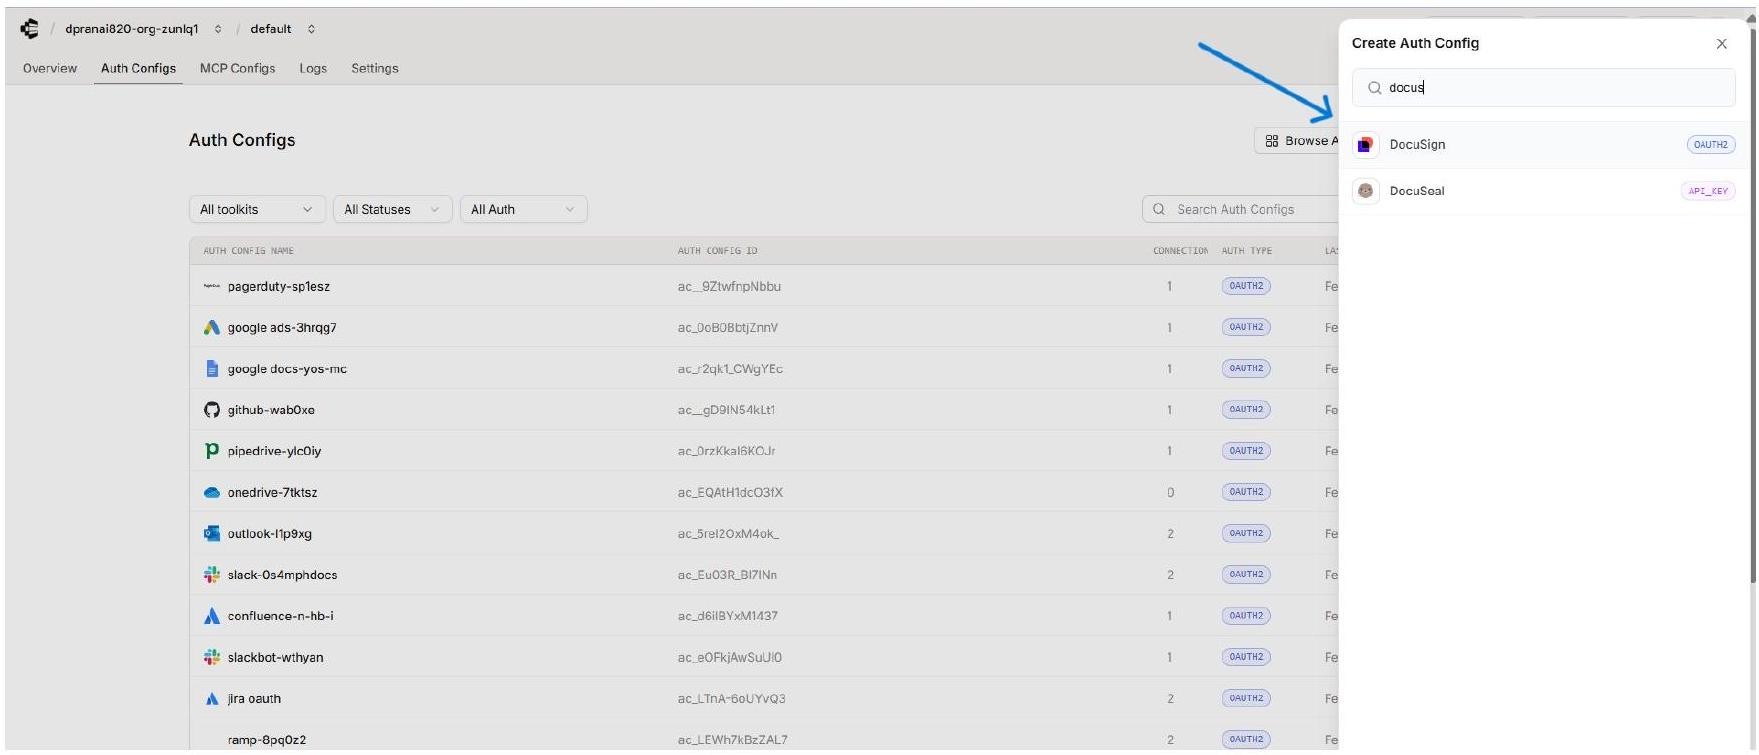
Search for ‘docus’ and select DocuSign (OAUTH2) from the drawer.
13. Fill In the Composio Auth Config Form
The DocuSign Auth Config form opens in a side panel. Fill in each field using the credentials you collected from DocuSign.
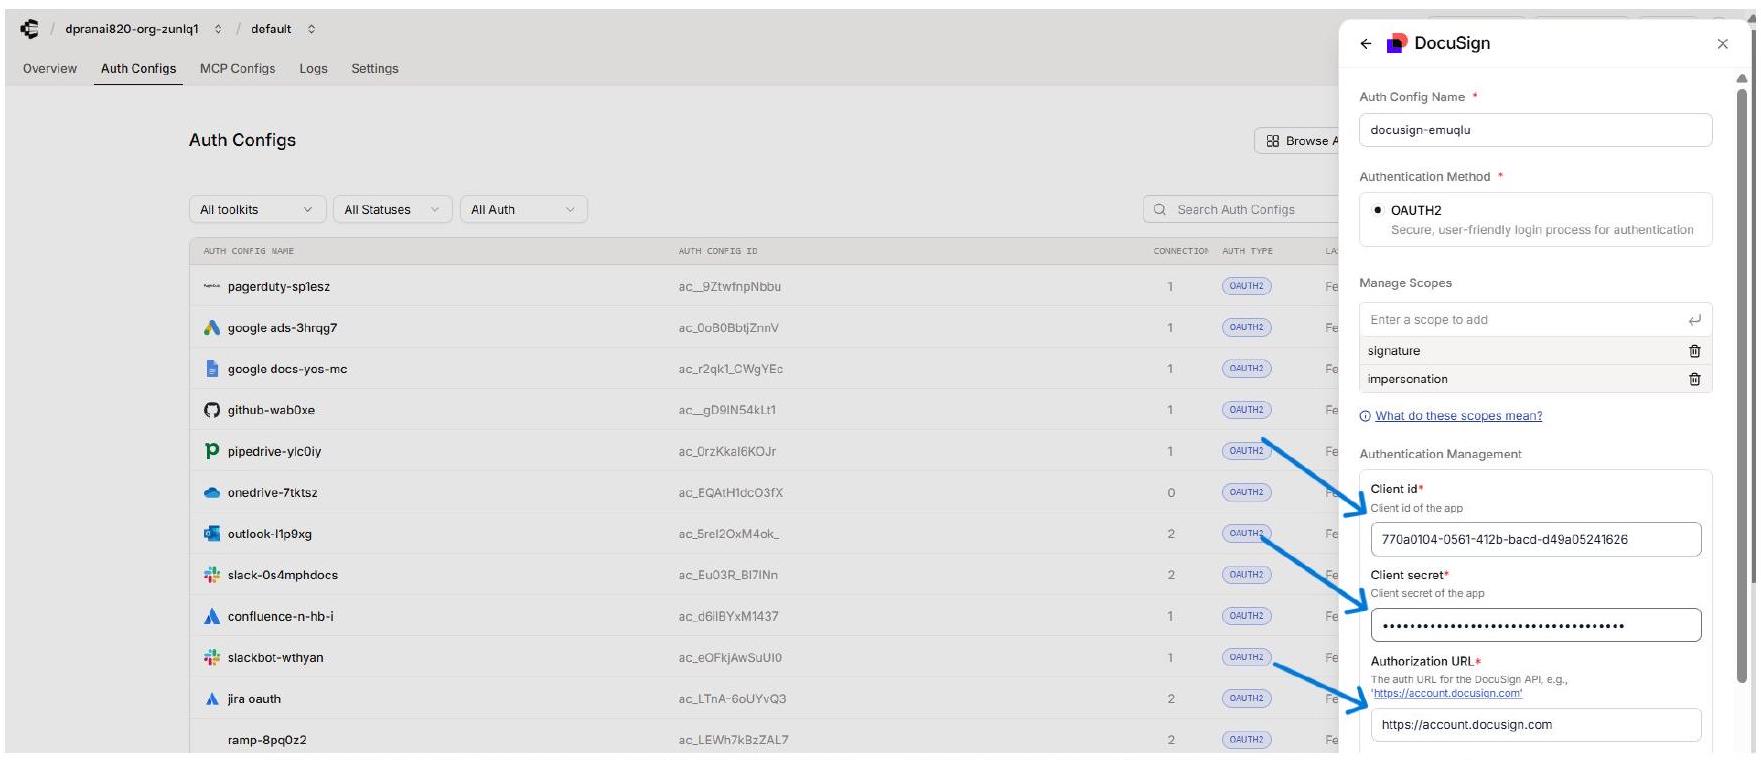
The Composio DocuSign Auth Config form — enter your Integration Key and Secret Key.
14. Set the Correct Authorisation URL
One field unique to the DocuSign Auth Config is the Authorisation URL. DocuSign has separate development and production environments, each with its own OAuth endpoint. You must enter the URL that matches the environment in which your DocuSign app is registered.
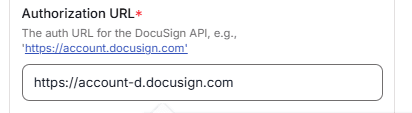
The Authorization URL field - use account-d.docusign.com for the developer environment.
DEV vs PRODUCTION: The screenshots in this guide use account-d.docusign.com (developer environment). When you are ready to go live with real users and real documents, create a separate Composio Auth Config pointing to account.docusign.com with your production Integration Key.
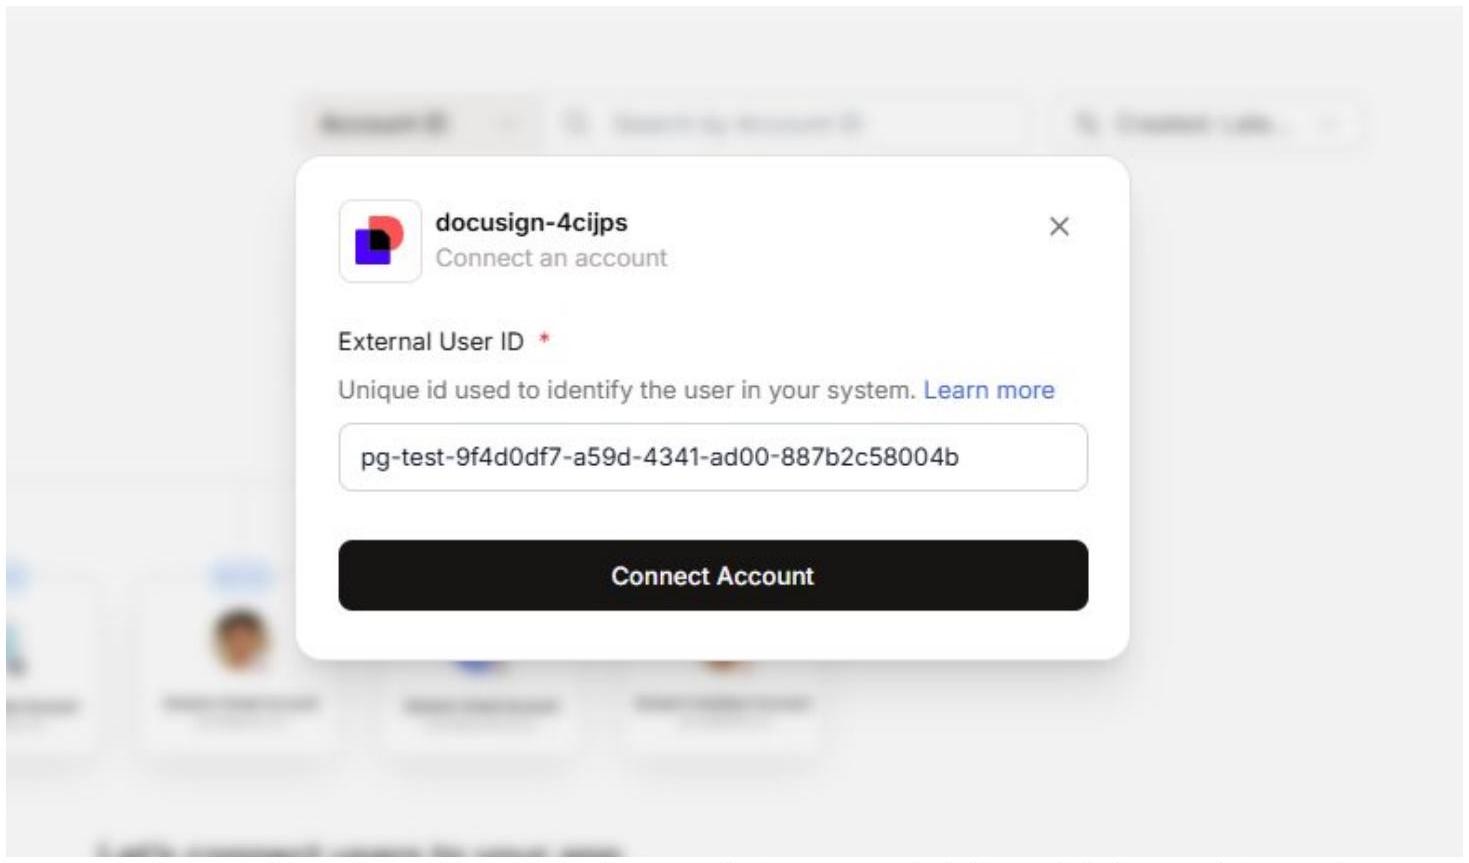
15. Connect a User Account
After saving the Auth Config, open it in Composio and click Connect Account.
16. Review Permissions and Allow Access
Composio redirects the user to DocuSign’s OAuth consent screen. This screen displays your app name (composio-docusign-connector) and the permissions being requested:
This application will be permitted to request access to your account without your presence.
Create and send envelopes. Obtain links for starting signing sessions.
Review the permissions carefully, then click Allow Access to complete the connection.
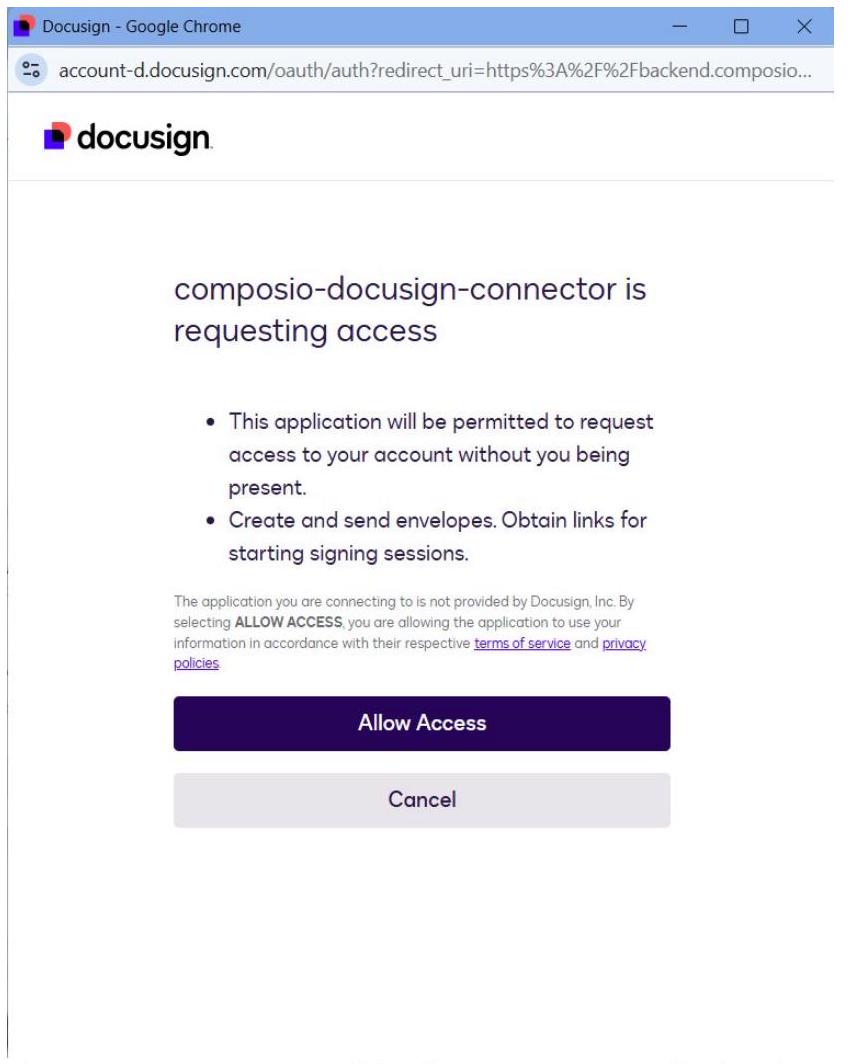
The DocuSign consent screen - click Allow Access to authorize the connection.
CONSENT SCREEN NOTE: The consent screen note states: The application you are connecting to is not provided by Docusign, Inc. This is expected - it means the app is a third-party integration (your Composio connector), not a DocuSign first-party app. This is normal and safe to accept.
17. Verify the Active Connection in Composio
After clicking Allow Access, DocuSign redirects back through the Composio callback URL and the connection is established. In Composio, the Auth Config’s Connected Accounts tab now shows your connection with status ACTIVE.
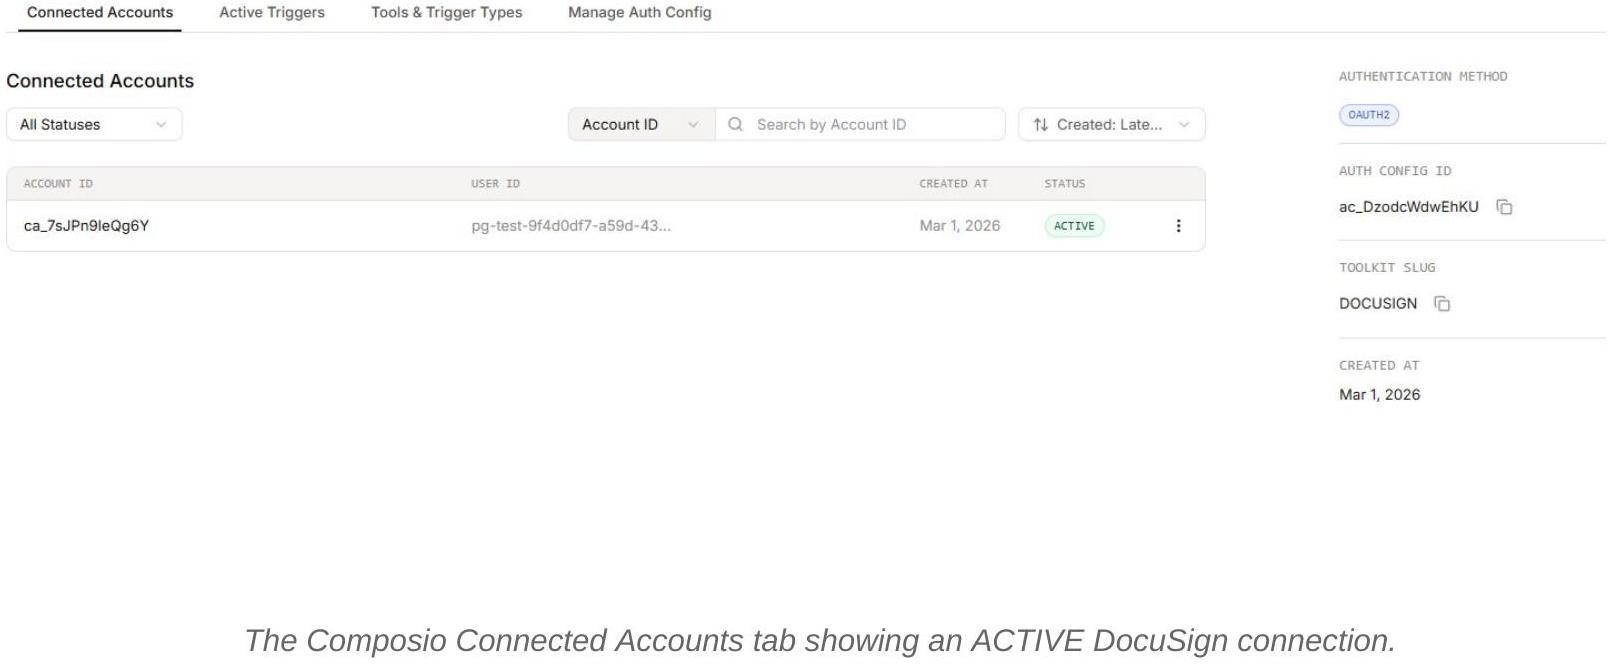
Confirm the following before using the connection:
The Account ID appears in the Connected Accounts list with status ACTIVE.
The Authentication Method on the right panel shows OAUTH2.
The Toolkit Slug shows DOCUSIGN.
Note the Auth Config ID (e.g., ac_DzodcWdwEhKU) for use in SDK code or API calls.
SETUP COMPLETE
Your DocuSign Integration Key is now fully connected to Composio. If you ever rotate credentials, change scopes, or promote to production, update both DocuSign and Composio together and reconnect any affected user accounts.