In this guide, I’ll walk you through the process of customizing the auth config for Zendesk. So, let’s begin.
Setting up Zendesk
In this section, we’ll go through the process of setting up Zendesk and creating an OAuth client.
NOTE: If you already have a Zendesk OAuth client and access to the Client ID and Client Secret, you can skip this section.
Step 1: Create a Zendesk OAuth Client
Log in to your Zendesk Admin Centre.
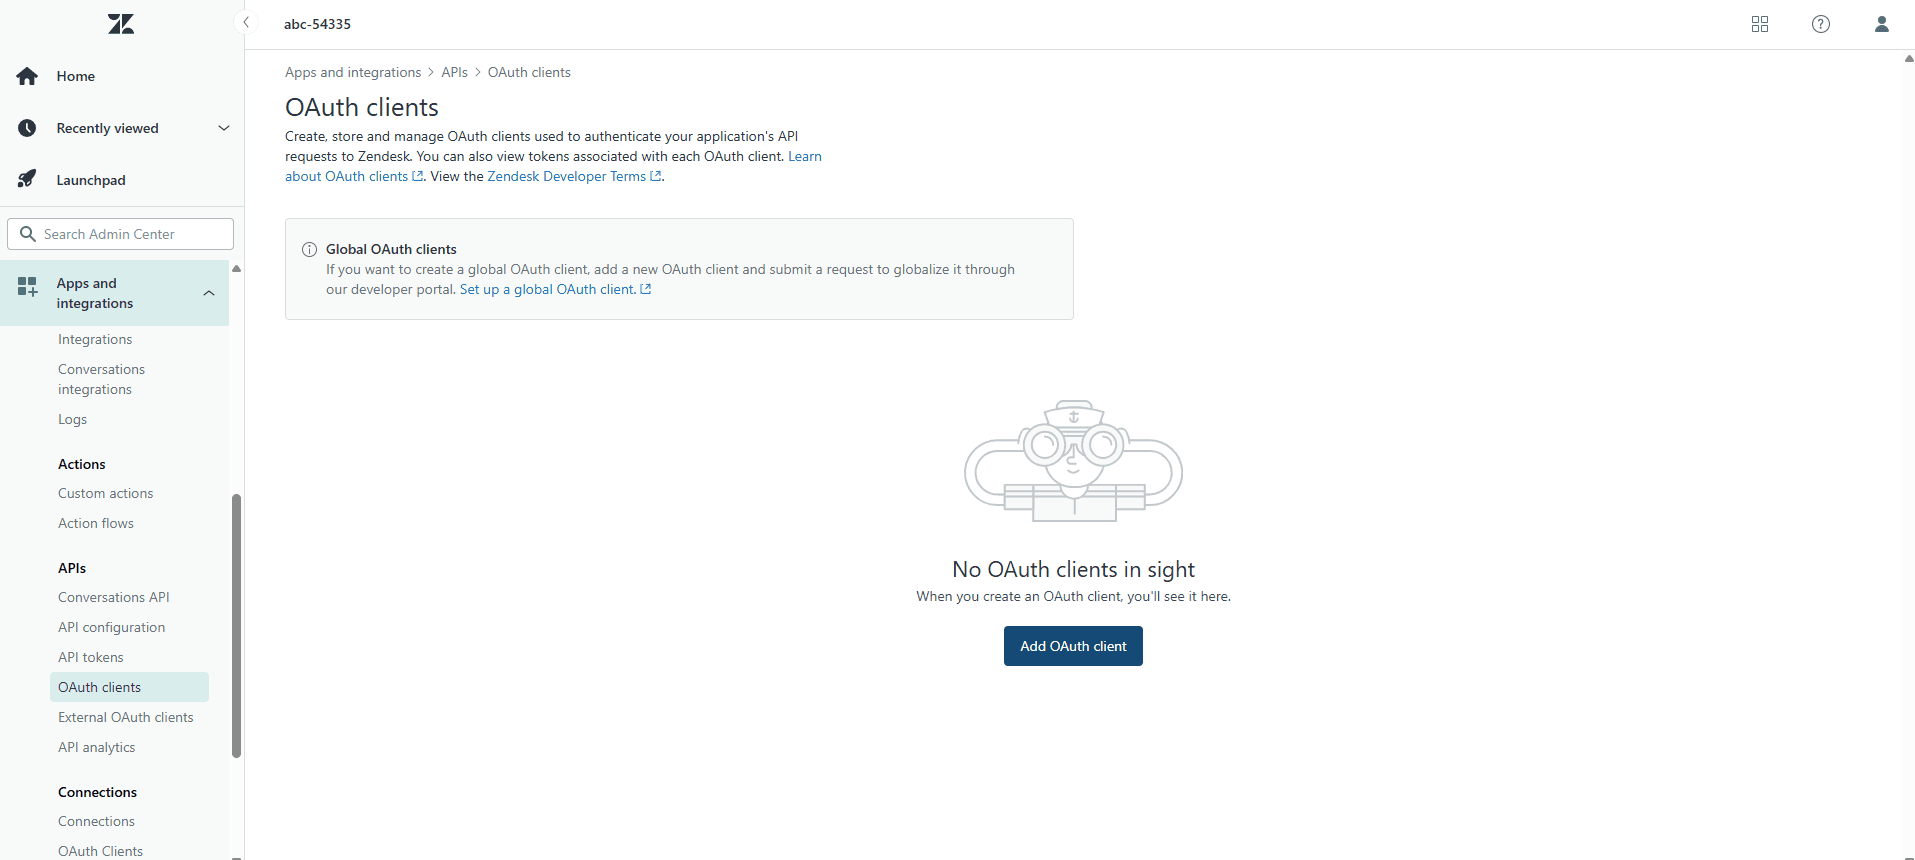
<subdomain>.zendesk.com/admin/homeIn the left sidebar, click Apps and integrations.
Select APIs.
Open the OAuth clients tab.
Click Add OAuth client.
Step 2: Register Your OAuth Client and Generate Credentials
After clicking Add OAuth client, you’ll see the OAuth client creation form.
Fill in the required fields:
Client Name: Example:
Composio-Zendesk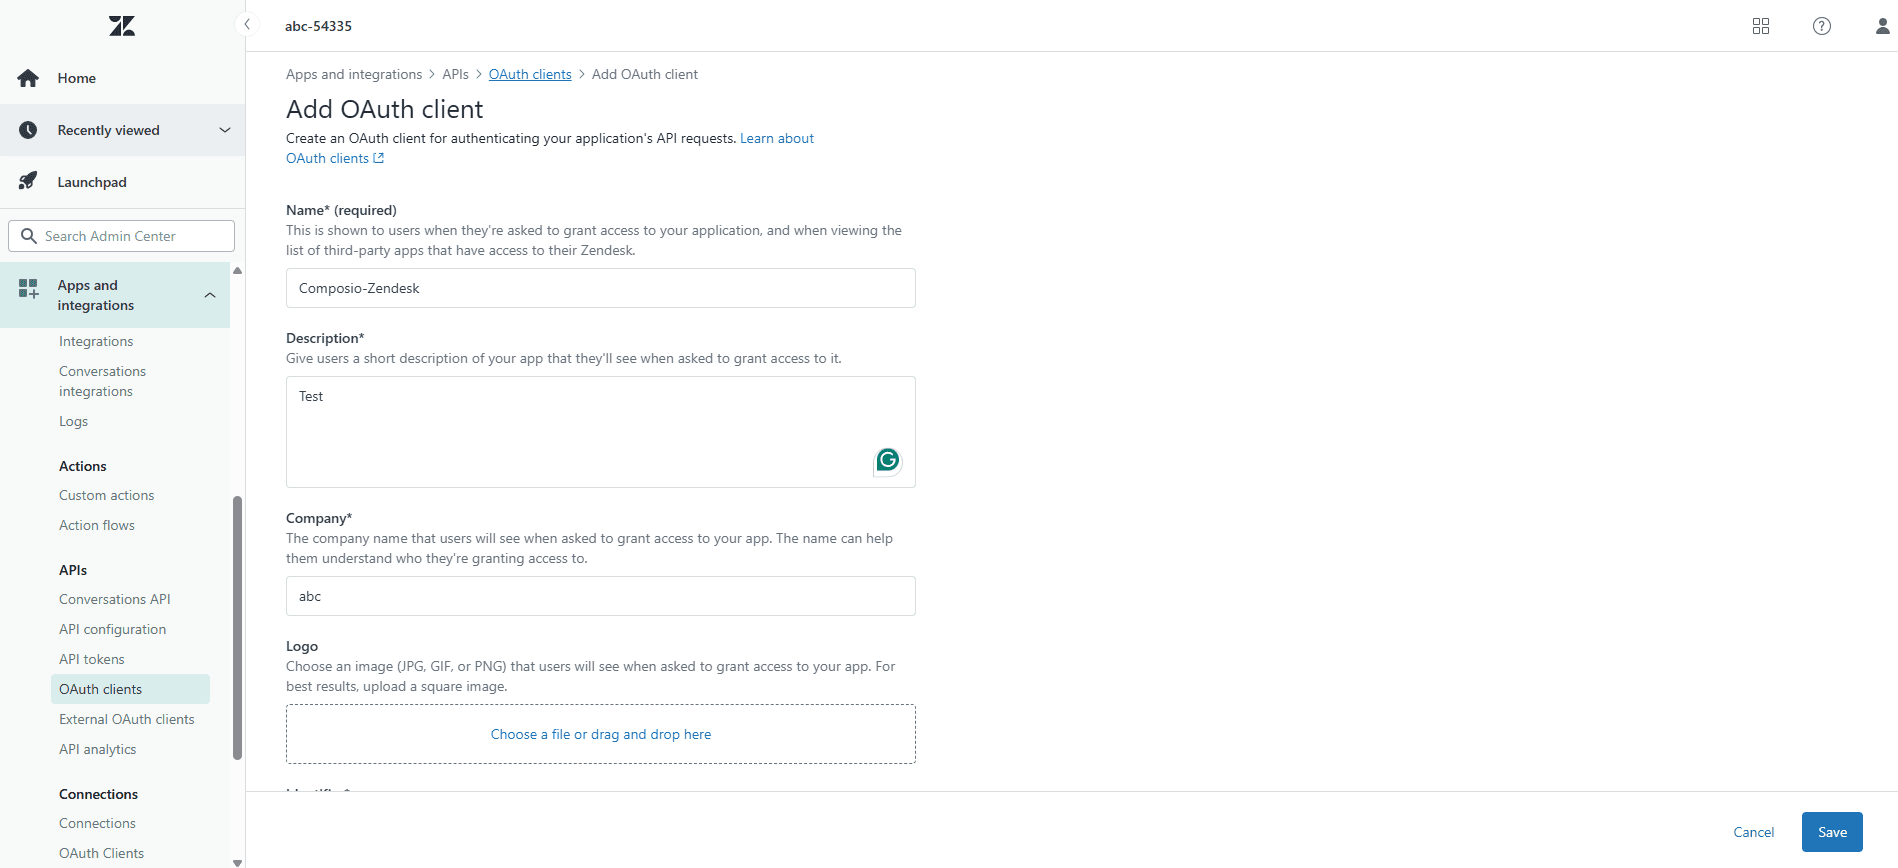
Description: Optional description for your integration
Redirect URLs:
https://backend.composio.dev/api/v1/auth-apps/add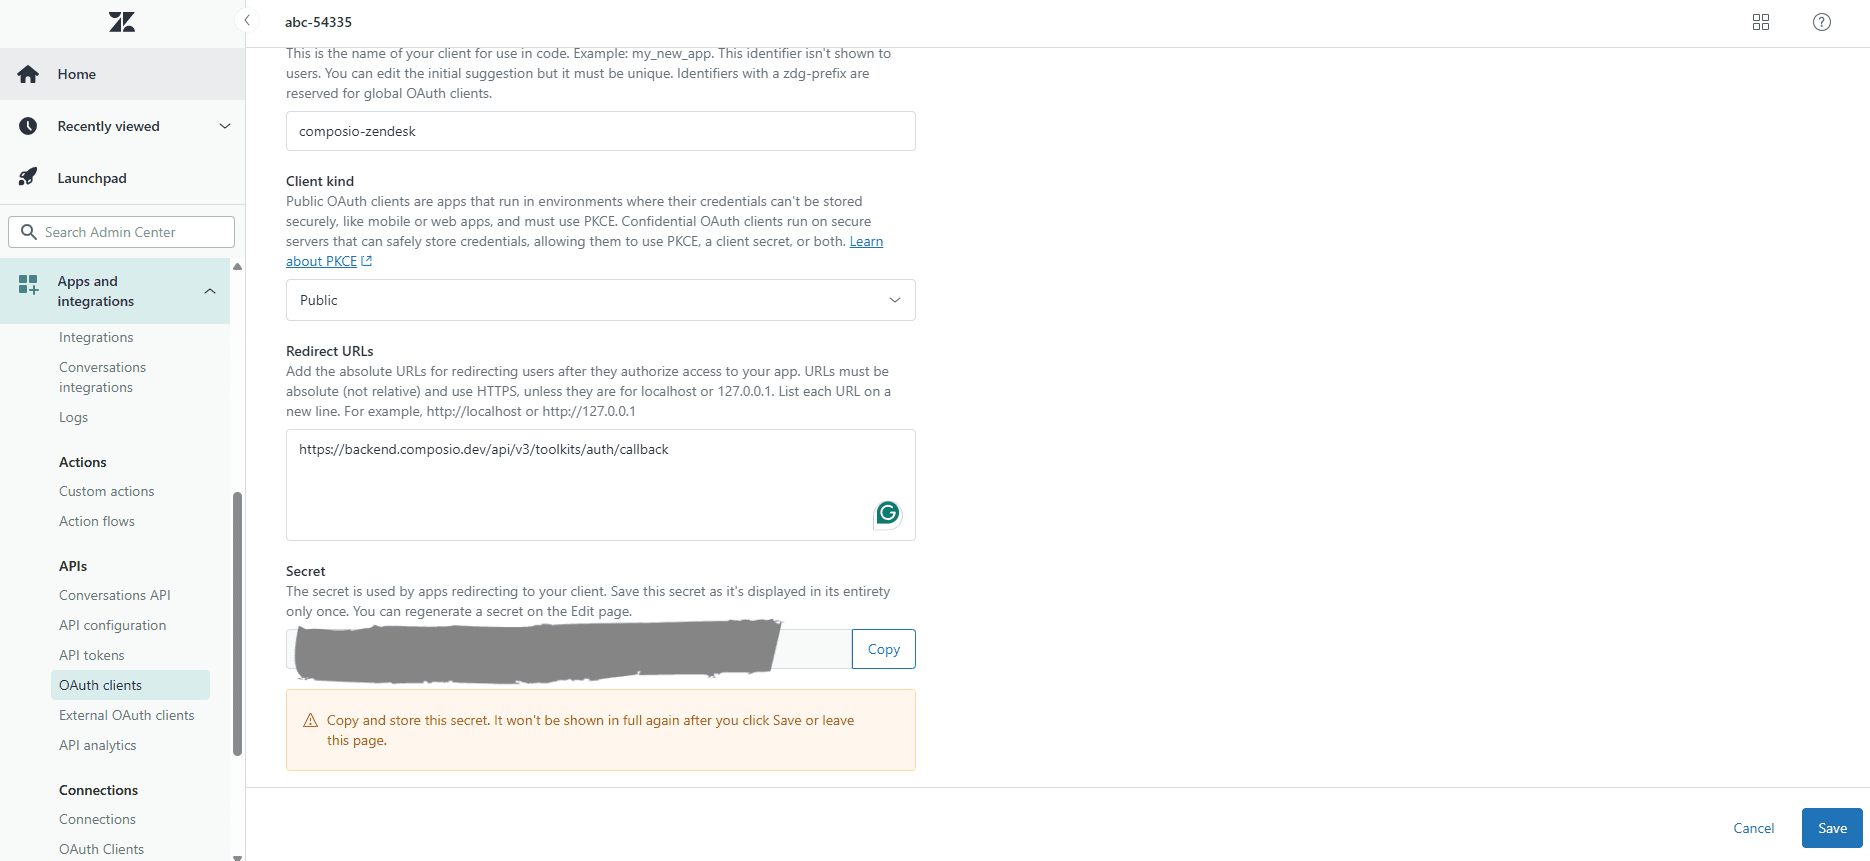
Once saved, Zendesk will immediately generate:
Client ID(Identifier)
Client Secret
Copy these values and store them securely; you’ll need them shortly.
Step 3: Configure Redirect URI
Ensure the following Redirect URL is present in your OAuth client configuration:
https://backend.composio.dev/api/v1/auth-apps/addImportant:
No trailing slash
Must use
https
Step 4: OAuth Scopes
Zendesk does not provide a UI to configure OAuth scopes in the Admin Center.
Instead, OAuth scopes are requested at authorization time as part of the OAuth flow.
Zendesk supports the following OAuth scopes:
read→ Read access to Zendesk resourceswrite→ Create and update Zendesk resourcesdelete→ Delete Zendesk resources
When using Composio:
You do not select scopes in Zendesk
You define scopes in Composio’s Auth Config
Composio automatically includes the selected scopes in the OAuth authorization request
Example scopes configuration in Composio:
read writeHere’s the actual Composio-supported Zendesk scope list:
tickets.read
tickets.write
users.read
users.write
organizations.read
organizations.write
groups.read
groups.write
views.read
views.write
macros.read
macros.write
triggers.read
triggers.write
automations.read
automations.write
webhooks.read
webhooks.write
Note: Zendesk permissions are also constrained by the user’s role (agent, admin, etc.), even if broader OAuth scopes are requested.
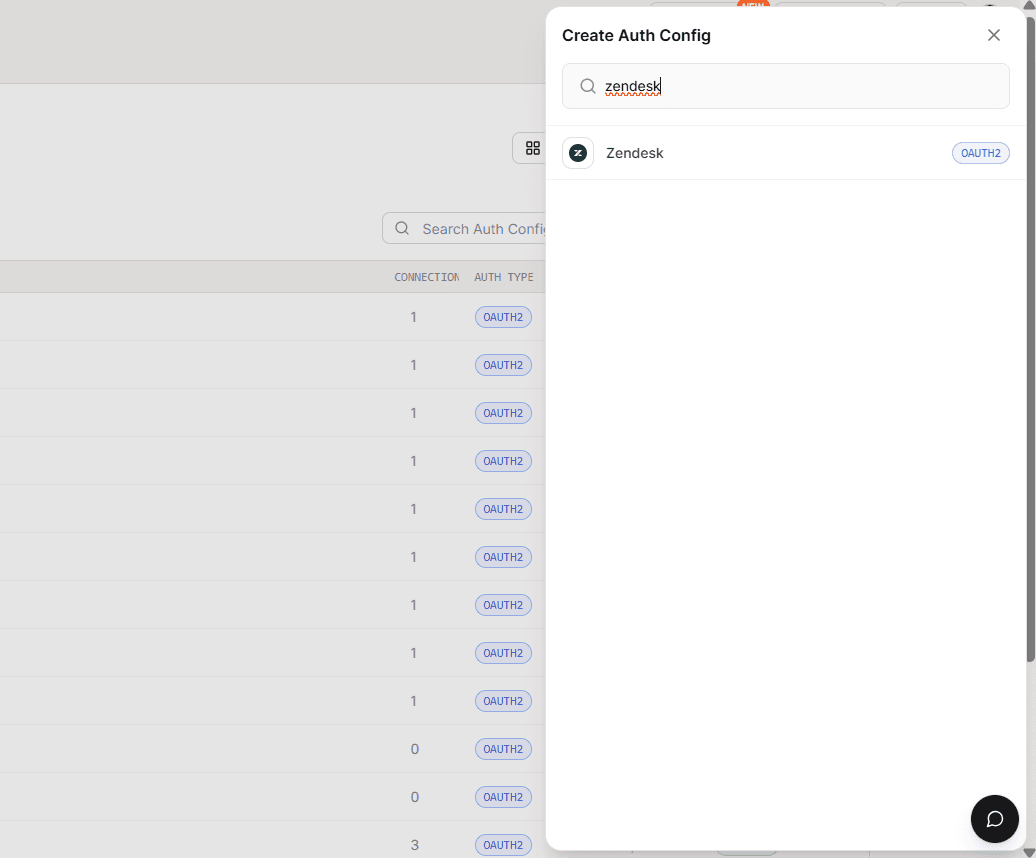
Creating the Auth Config in Composio
With your OAuth credentials ready, navigate to the Composio dashboard to configure Zendesk authentication.
Click Create Auth Config to view all available toolkits.

In the sidebar that opens, choose** Zendesk** for the toolkit. Stick with all the default settings for now, as we'll configure it shortly.
Ensure authentication is set to OAuth2 (not Bearer Token).
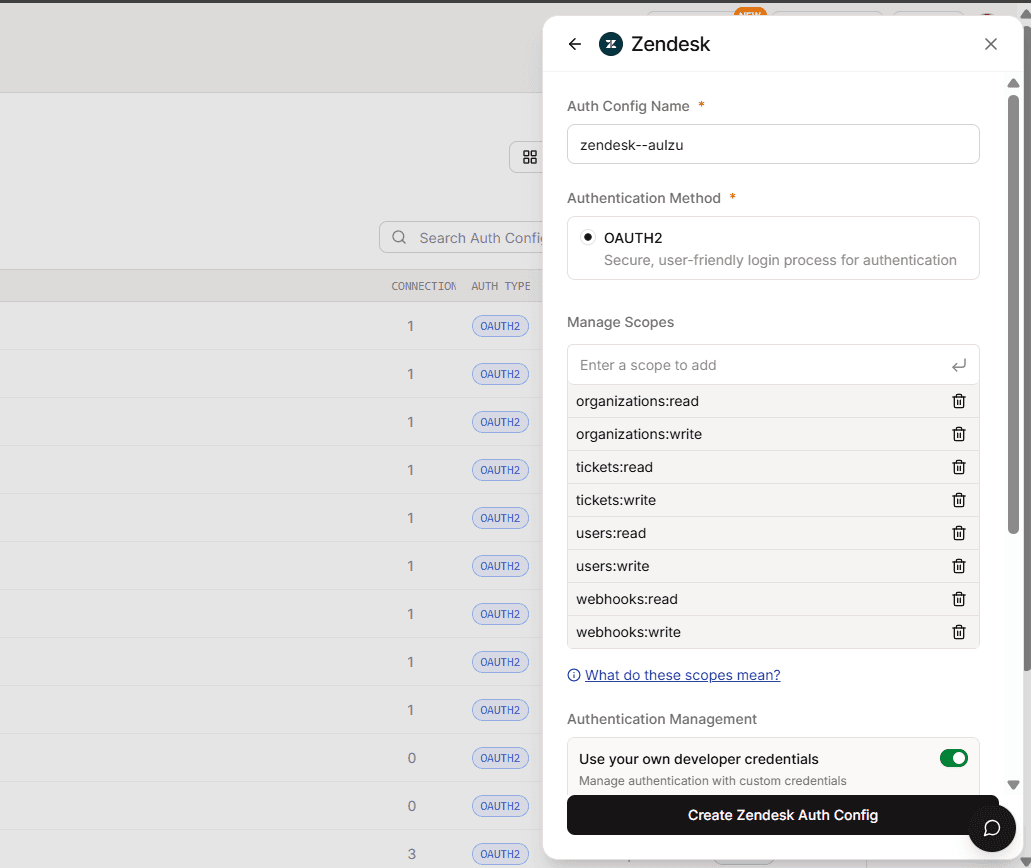
Enable Use your own developer authentication.

Click Create Zendesk Auth Config.

Configure the Auth Config
Open the Manage Auth Config tab.
Paste the Client ID and Client Secret you copied from Zendesk.
Base URL for Zendesk
All Zendesk API requests go through:
https://{your_subdomain}.zendesk.com/api/v2/Replace {your_subdomain} with your Zendesk account subdomain.
How Scopes Are Applied
When a user connects their Zendesk account, scopes are passed as part of the OAuth authorization process.
While using Composio:
Composio automatically manages the authorization URL
You define scopes inside the Auth Config → Scopes field
Composio exposes fine-grained, resource-level scopes
Internally, Composio maps them to Zendesk’s coarse scopes:
*:read→read*:write→writedestructive actions →
delete(if required)
For Zendesk, Composio provides fine-grained resource-level scopes that map internally to Zendesk’s coarse OAuth scopes. These are the scopes you can select inside Composio’s Auth Config, even though Zendesk itself only recognizes the broad read, write, delete scopes.
Final Step
Once everything is set up:
Copy the Auth Config ID (starts with
ac_)
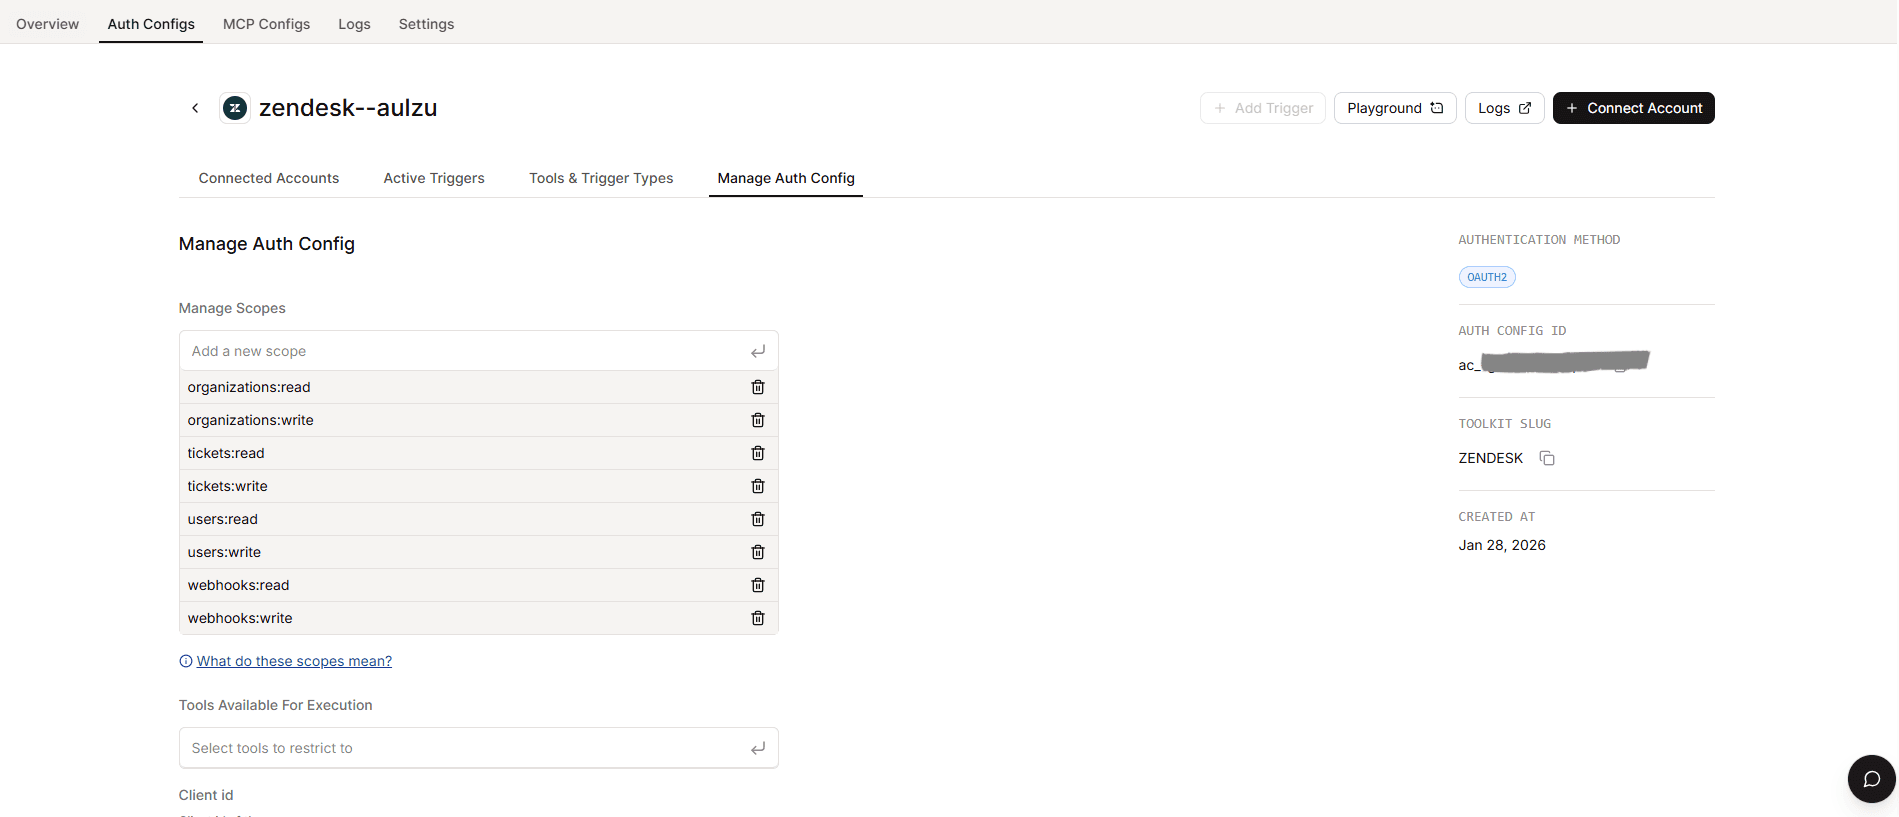
Store it securely using your secret manager
Use it in your application code to authenticate Zendesk via Composio
Your custom Zendesk auth config is now ready to go