In this guide, I’ll walk through the process of setting up OAuth for Microsoft Outlook using the Azure App Registrations portal.
This lets your app connect securely to Microsoft Graph APIs (which power Outlook, OneDrive, Teams, etc.).
Note: You do not need a Microsoft 365 Developer sandbox for this. A free Microsoft personal account is enough to register an OAuth app.
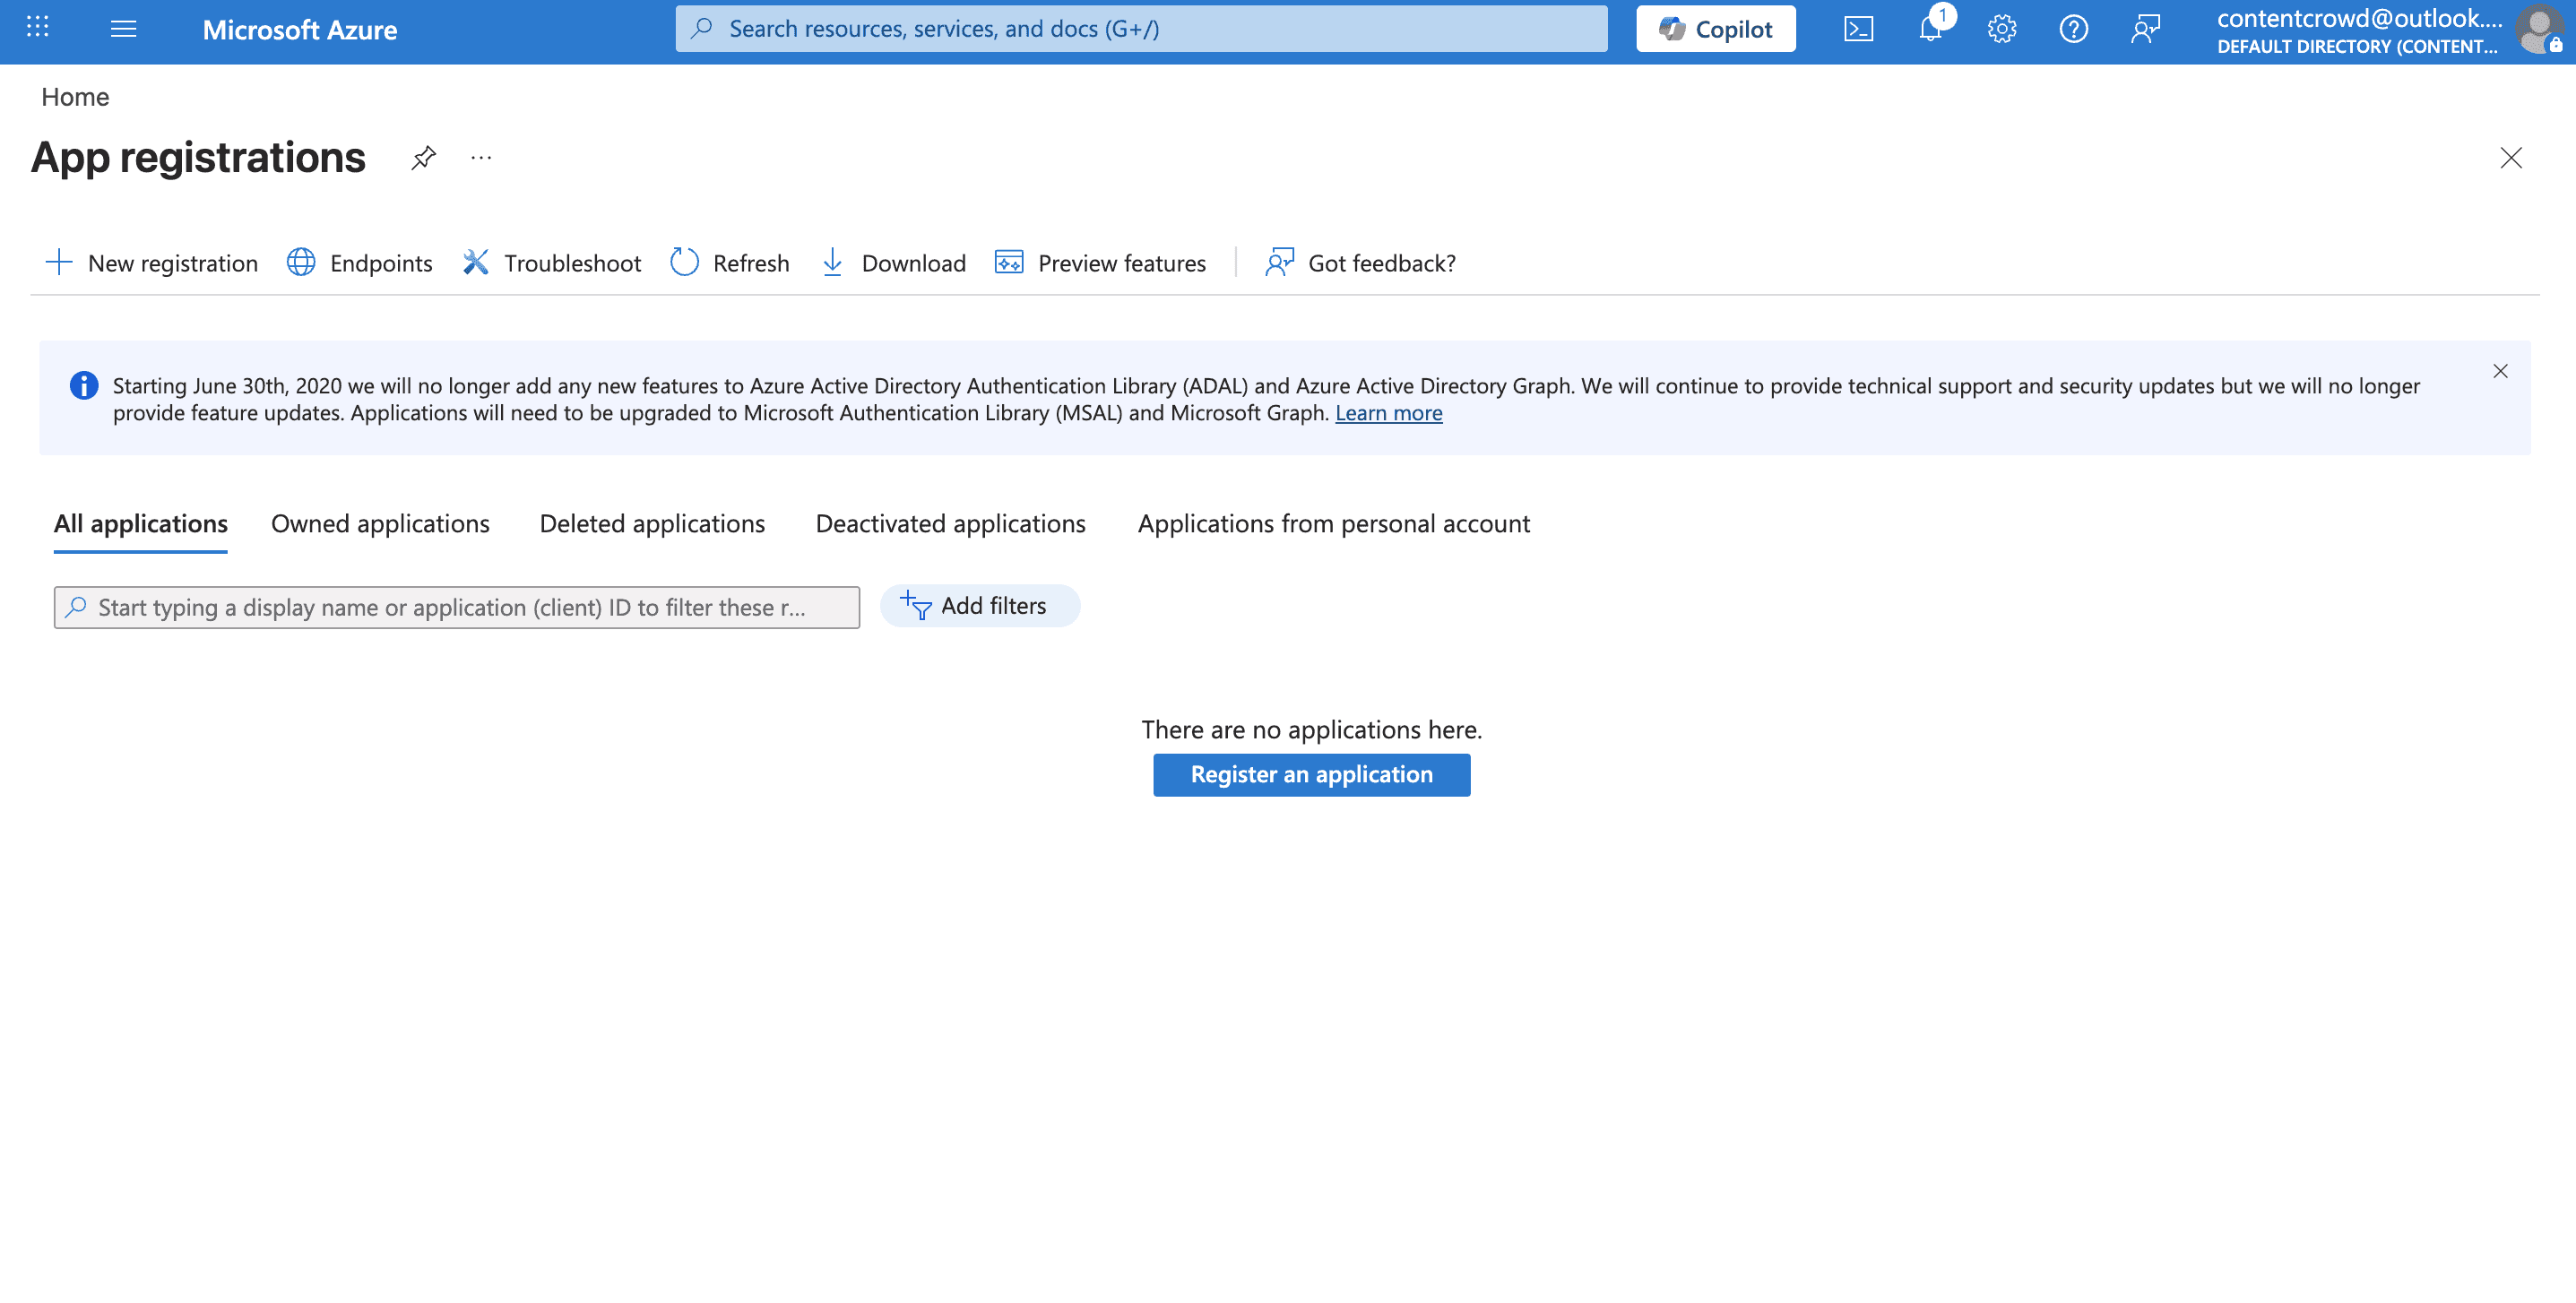
Step 1: Create an Azure App Registration
Go to the Azure Portal.
In the left-hand menu, search for App registrations and click + New registration.

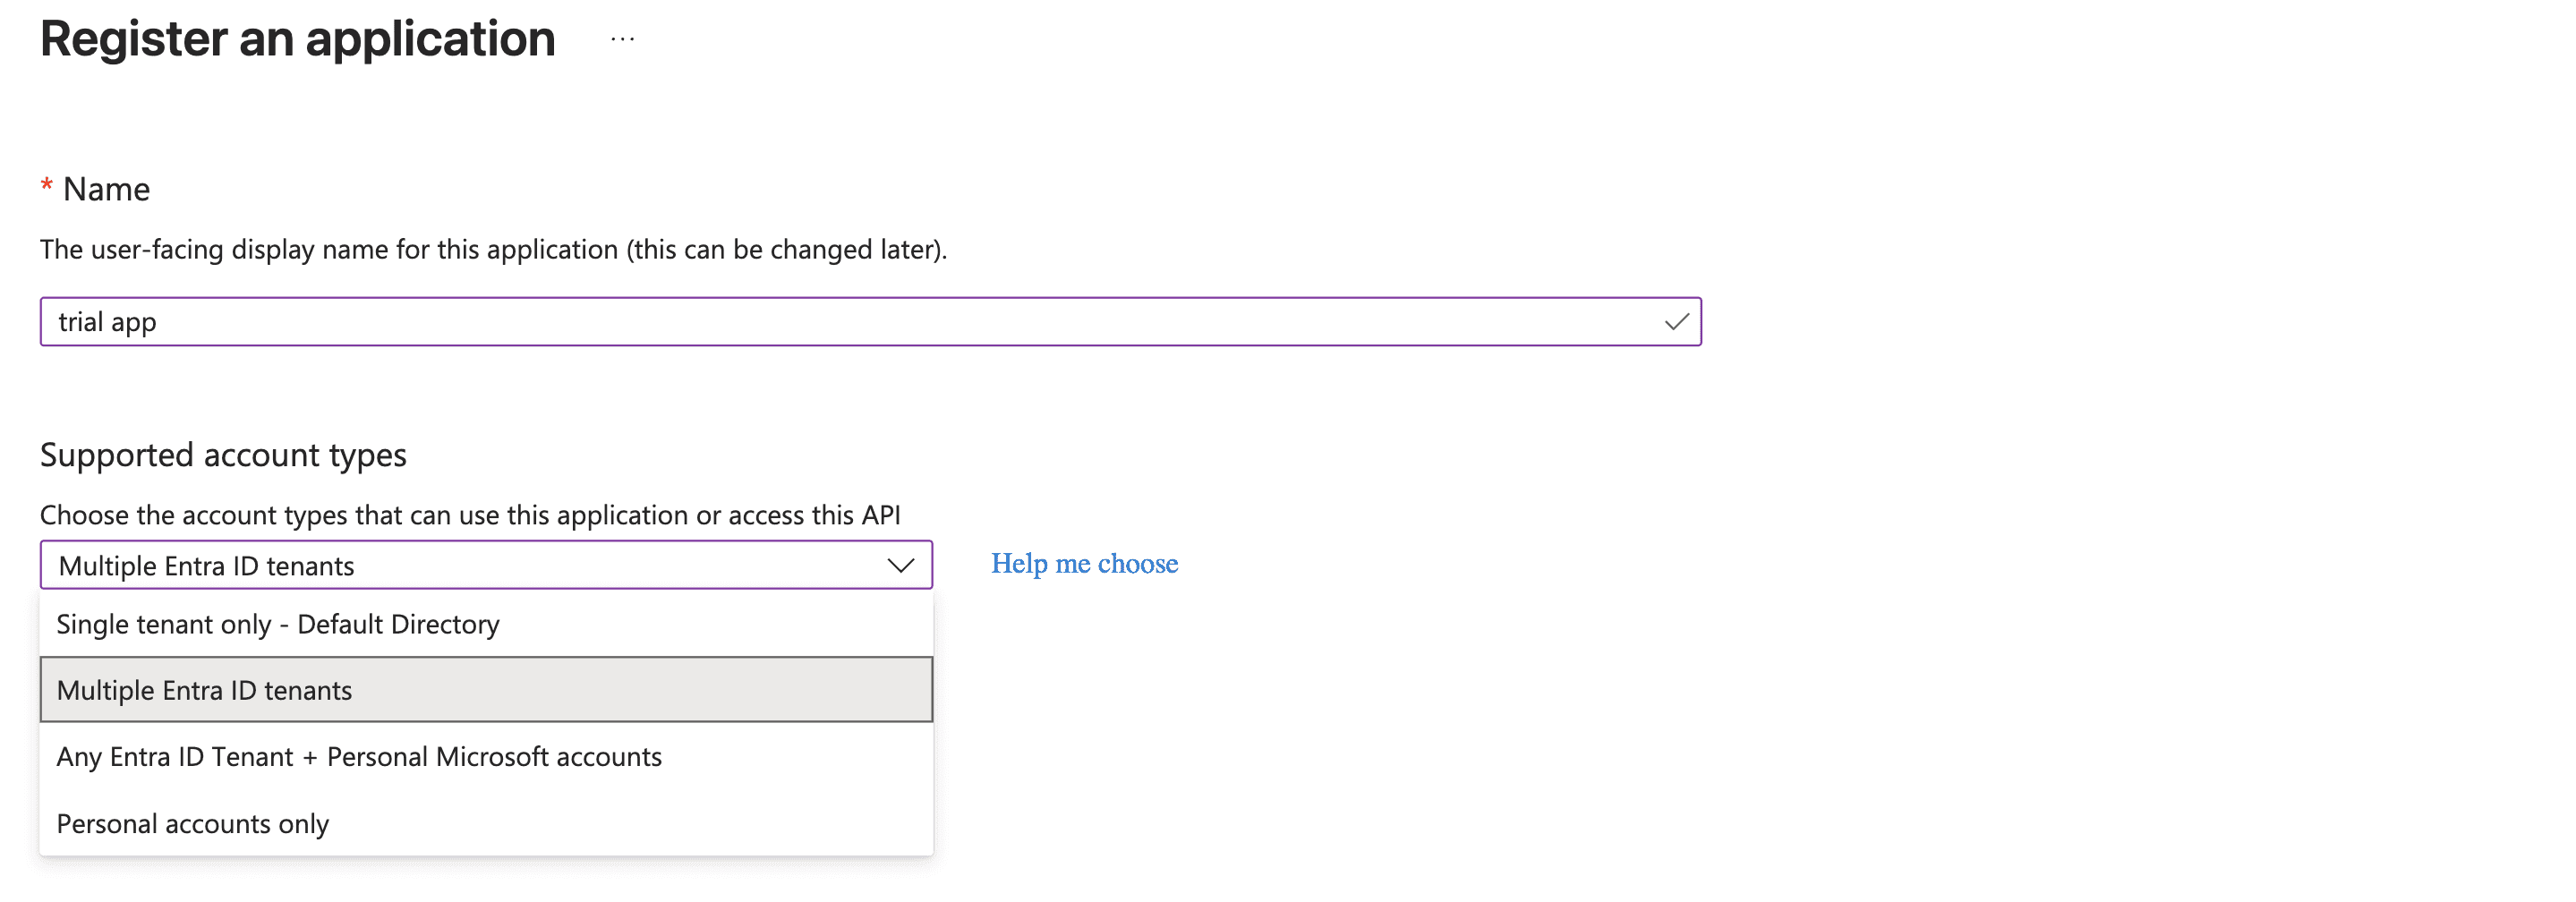
Fill in your app details:
Name: Example →
Outlook IntegrationSupported account types:
Choose Accounts in any organizational directory and personal Microsoft accounts (so both work/school and personal Outlook accounts can log in).
Redirect URI (optional): Choose Web and paste:
https://backend.composio.dev/api/v3/toolkits/auth/callbackClick Register.
Step 2: Generate Client Credentials
Once your app is created, you’ll be redirected to its Overview page.
Copy the Application (client) ID — this is your Client ID.
From the sidebar, go to Certificates & secrets → + New client secret.
Add a description and set expiry (6 or 12 months recommended).
Copy the generated Client Secret and save it securely.
Note : The client secret is Value not the secret ID.

⚠️ Important: You won’t be able to see the secret again once you leave the page.
Step 3: Configure API Permissions
Now, we’ll give the app permissions to access Outlook data.
In the sidebar, click API Permissions → + Add a permission.
Select Microsoft Graph.
Choose Delegated permissions.
Add the required common Outlook-related scopes, such as:
Mail.Read→ Read user’s emailsMail.Send→ Send emails on behalf of the useroffline_access→ Enable refresh tokensopenid profile email→ Basic login profile

Click Add permissions.
Step 4: Authentication
From the sidebar, open Authentication.
Under Redirect URIs, make sure this URL is added:
https://backend.composio.dev/api/v3/toolkits/auth/callbackUnder settings, enable Allow public client flows (this makes it easier to test).
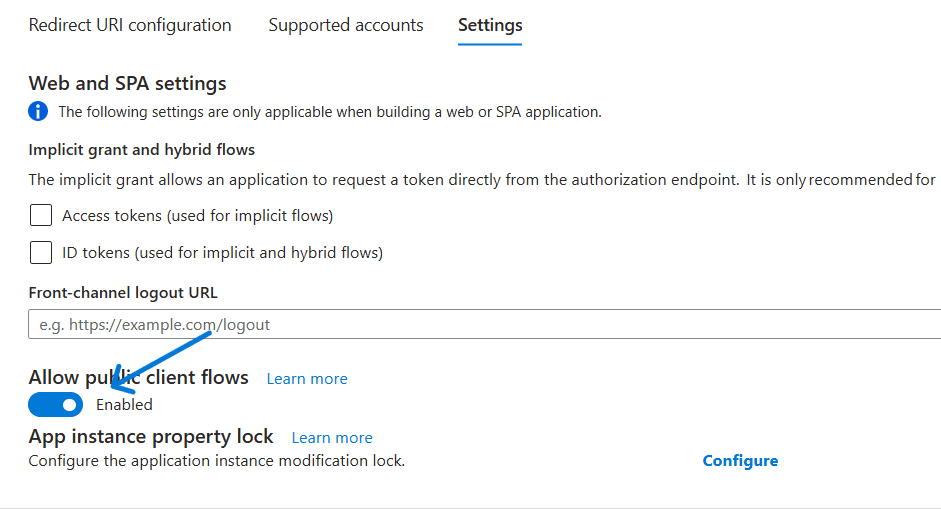
Save changes.
Step 5: Create the Auth Config in Composio
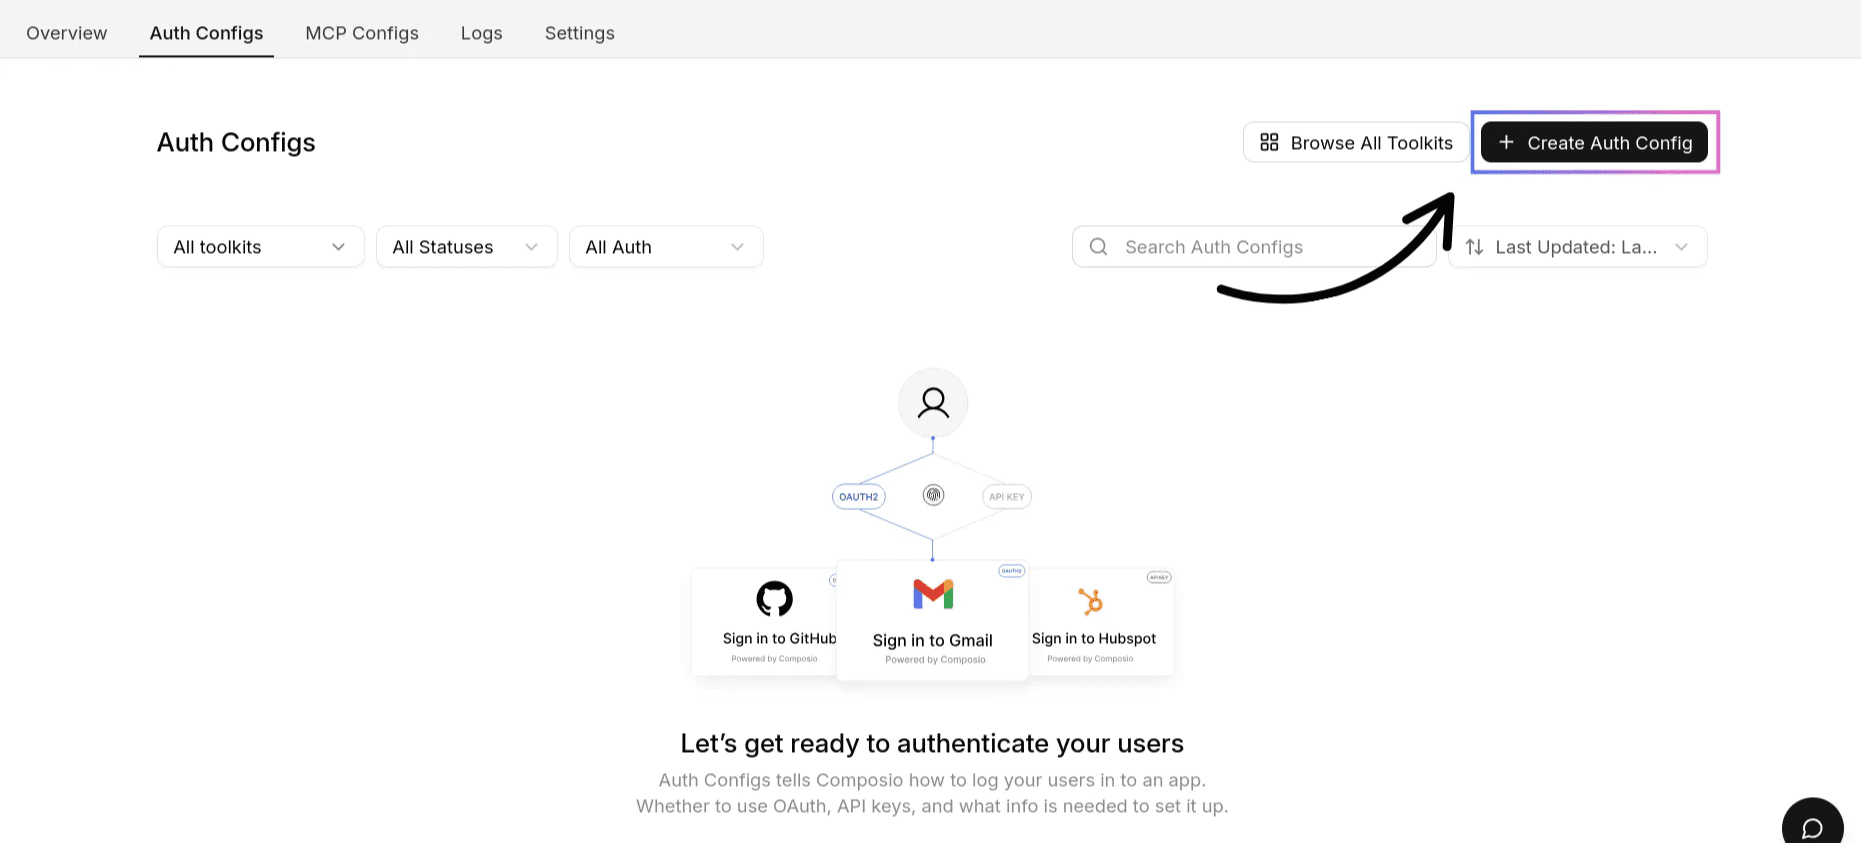
With your Client ID and Client Secret ready, head over to the Composio Dashboard.
Click Create Auth Config.
Select Microsoft Outlook.
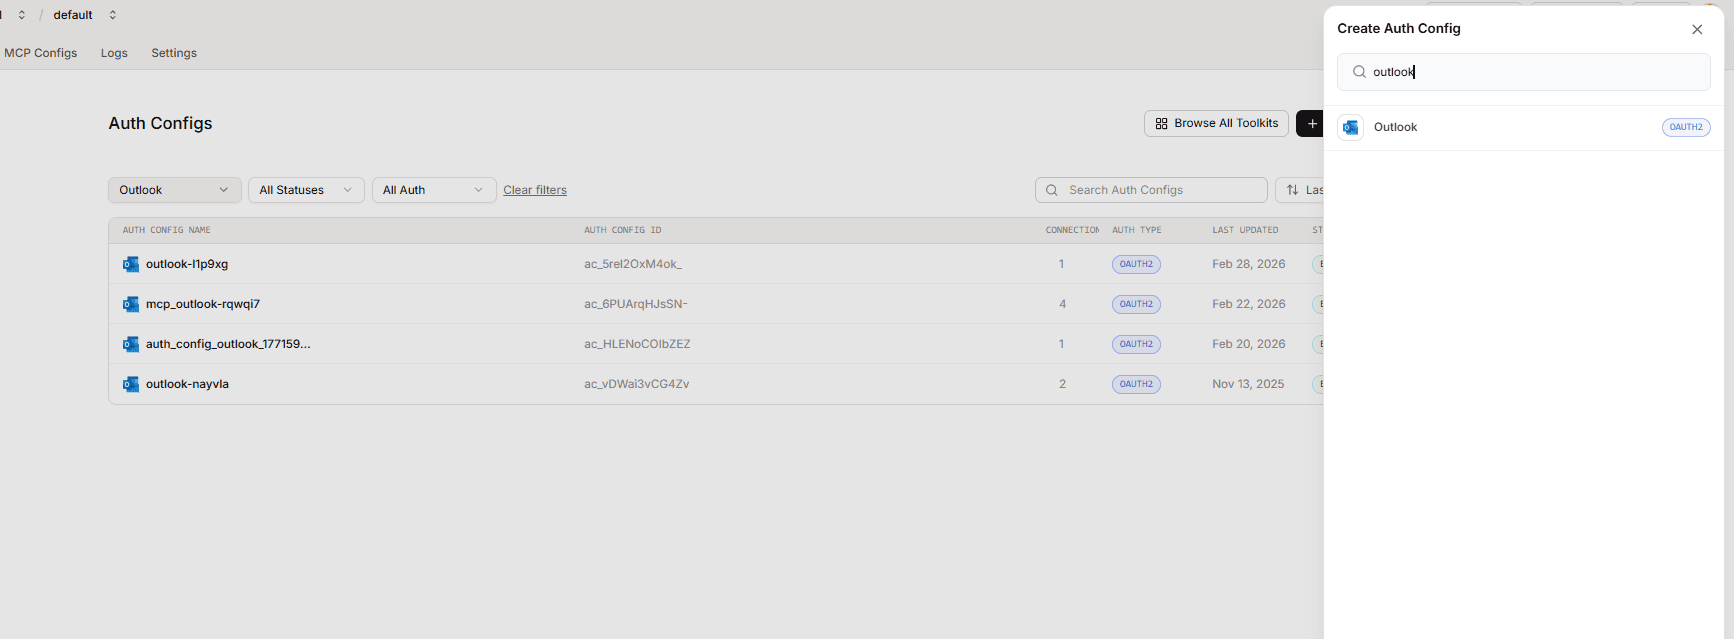
Choose OAuth2 as the authentication type.
Check. Use your own developer authentication.
Paste in your:
Client ID → from Azure App Registration
Client Secret → from Certificates & secrets
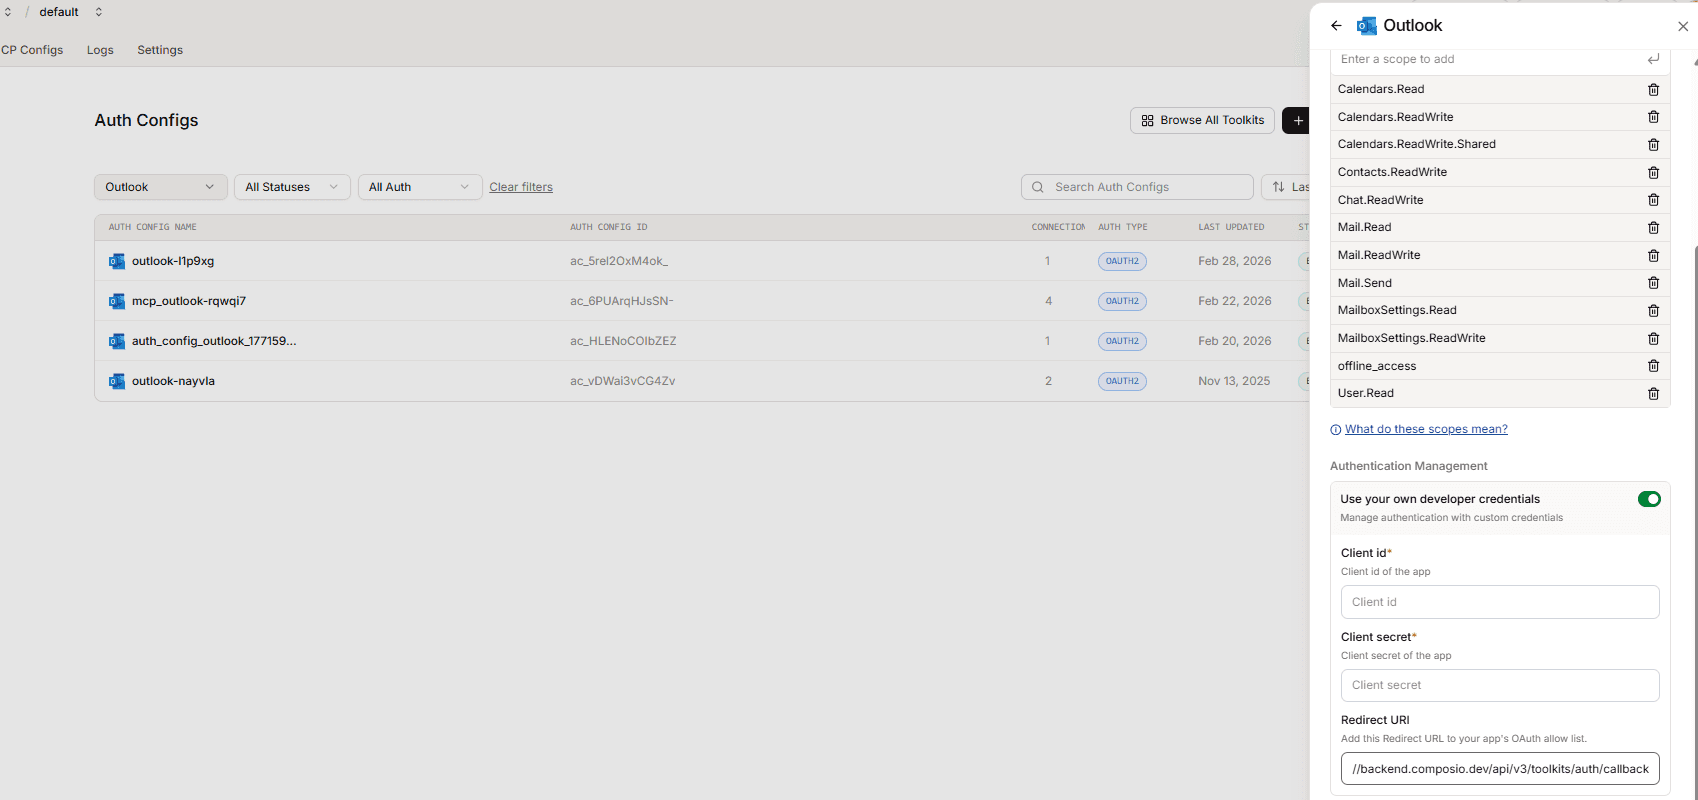
Redirect URI →
https://backend.composio.dev/api/v3/toolkits/auth/callbackClick on create Outlook config.
Step 6: Authorise and Connect
In Composio, click Connect Account to configure Outlook.
You’ll be redirected to Microsoft’s login screen.
Approve the requested permissions (Mail.Read, Mail.Send, etc.).
Composio stores the tokens once authorisation succeeds.
Now you can try using the tool to check the connection.
API Base URL
For Microsoft Graph (which powers Outlook), the base URL is:
https://graph.microsoft.com/v1.0Example endpoints:
List user emails →
/me/messagesSend email →
/me/sendMail
Once done, copy the auth config ID (which starts with ac_) and use it in your application code via a secret manager.
Scopes for Other Microsoft Apps
If you want to integrate with other Microsoft services, you can reuse the same Azure app. Just add the required scopes in both Azure and Composio:
OneDrive →
Files.ReadWrite,Files.read.allTeams →
Channel.Create, Channel.ReadBasic.All, ChannelMessage.Read.All, ChannelMessage.ReadWrite, ChannelMessage.Send, ChannelSettings.ReadWrite.All, Chat.Create, Chat.Read, Chat.ReadBasic, Chat.ReadWrite, Chat.ReadWrite.All, ChatMessage.Read, ChatMessage.Send, Directory.ReadWrite.All, Group.ReadWrite.All, offline_access, People.Read.All, Presence.ReadWrite, Team.Create, Team.ReadBasic.All, TeamMember.ReadWrite.All, TeamsActivity.Read, TeamsActivity.Send, User.Read, OnlineMeetings.ReadWrite**Sharepoint **→
List.Read**Excel **→
Files.ReadWrite Sites.ReadWrite.All offline_access User.Read
Once scopes are added, you can configure additional auth configs in Composio for each service.
Here are some additional steps to follow when connecting to SharePoint:
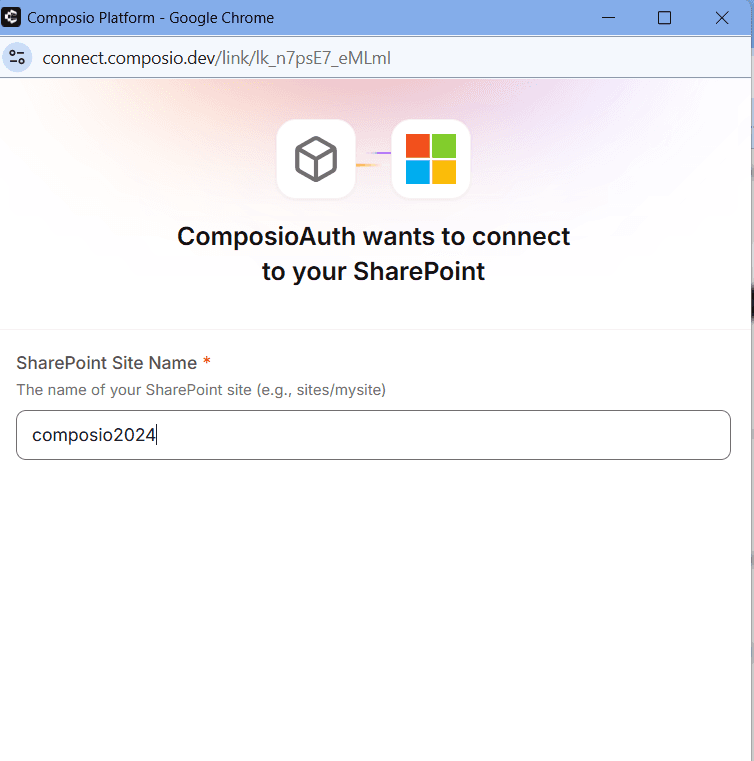
You'll need to enter your SharePoint subdomain, which you can find in your SharePoint dashboard, as shown in the image below.
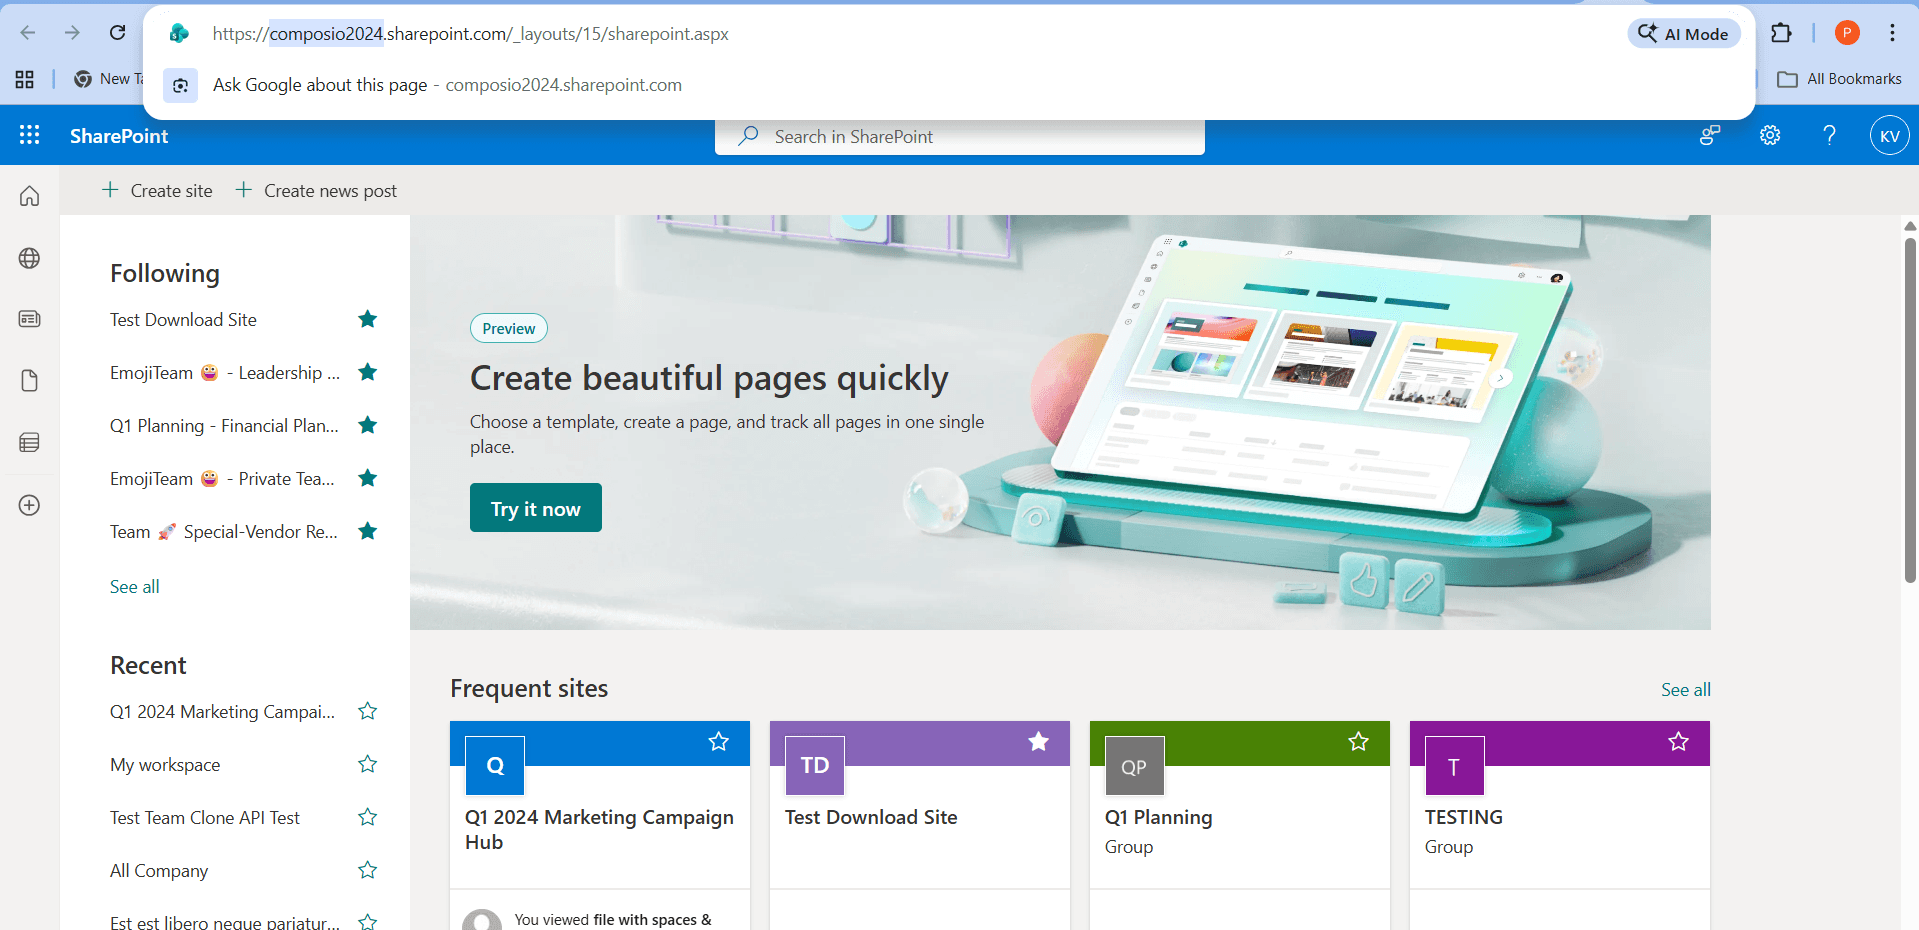
You can now use this subdomain value when connecting your account in Composio.
Additional: Restricting Access to Specific Tenants
If you're using your own custom OAuth app and want to limit access to only your organization's tenant or specific customer tenants, follow the steps below.
When the OAuth app is set to Multiple Entra ID tenants, it uses the /common endpoint, which means any Microsoft organisation could potentially authenticate. To restrict this, you can use the Allowed tenants setting to whitelist only specific organisations.
Step 1: Set Supported Account Type
Go to portal.azure.com and navigate to your app registration.
In the search bar, search for App registrations and click + New registration.
In the following page, you will be asked add your App name and Authentication type.

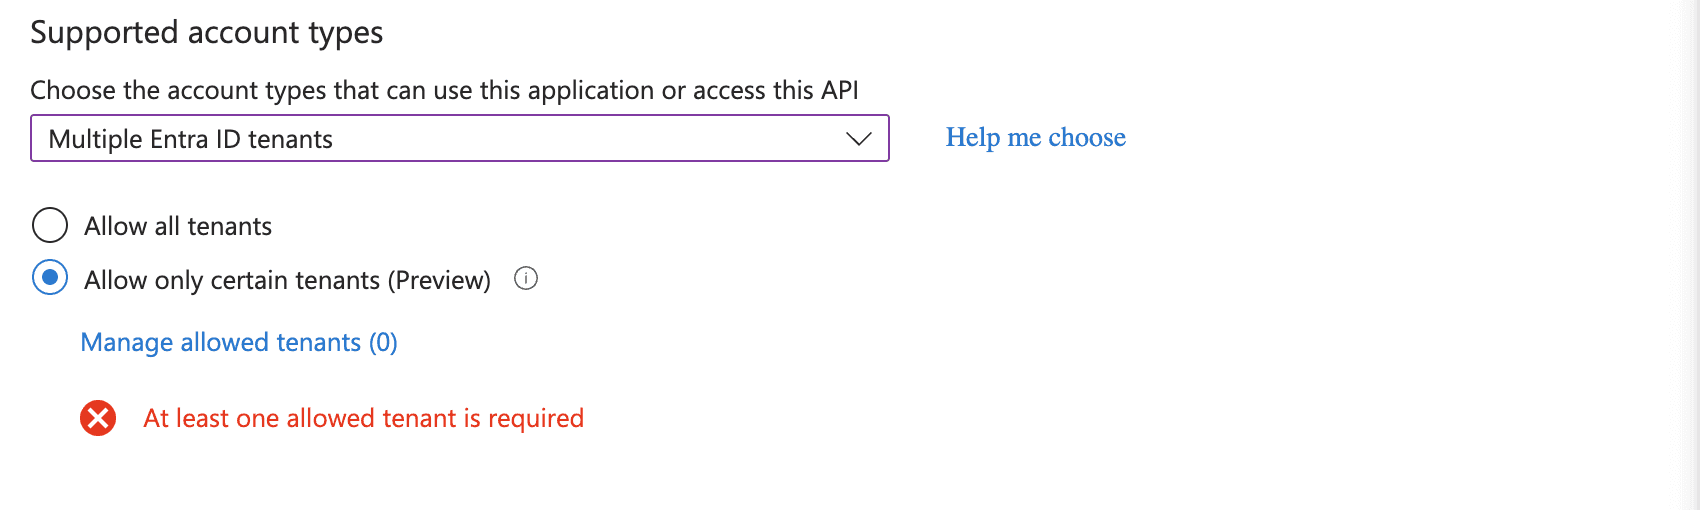
Under Authentication, click the Supported account types tab.
Select Multiple Entra ID tenants.
Step 2: Restrict to Specific Tenants
Under the Supported accounts tab, select "Allow only certain tenants (Preview)".
Click Manage allowed tenants.
Add the Tenant ID of each organisation you want to allow.
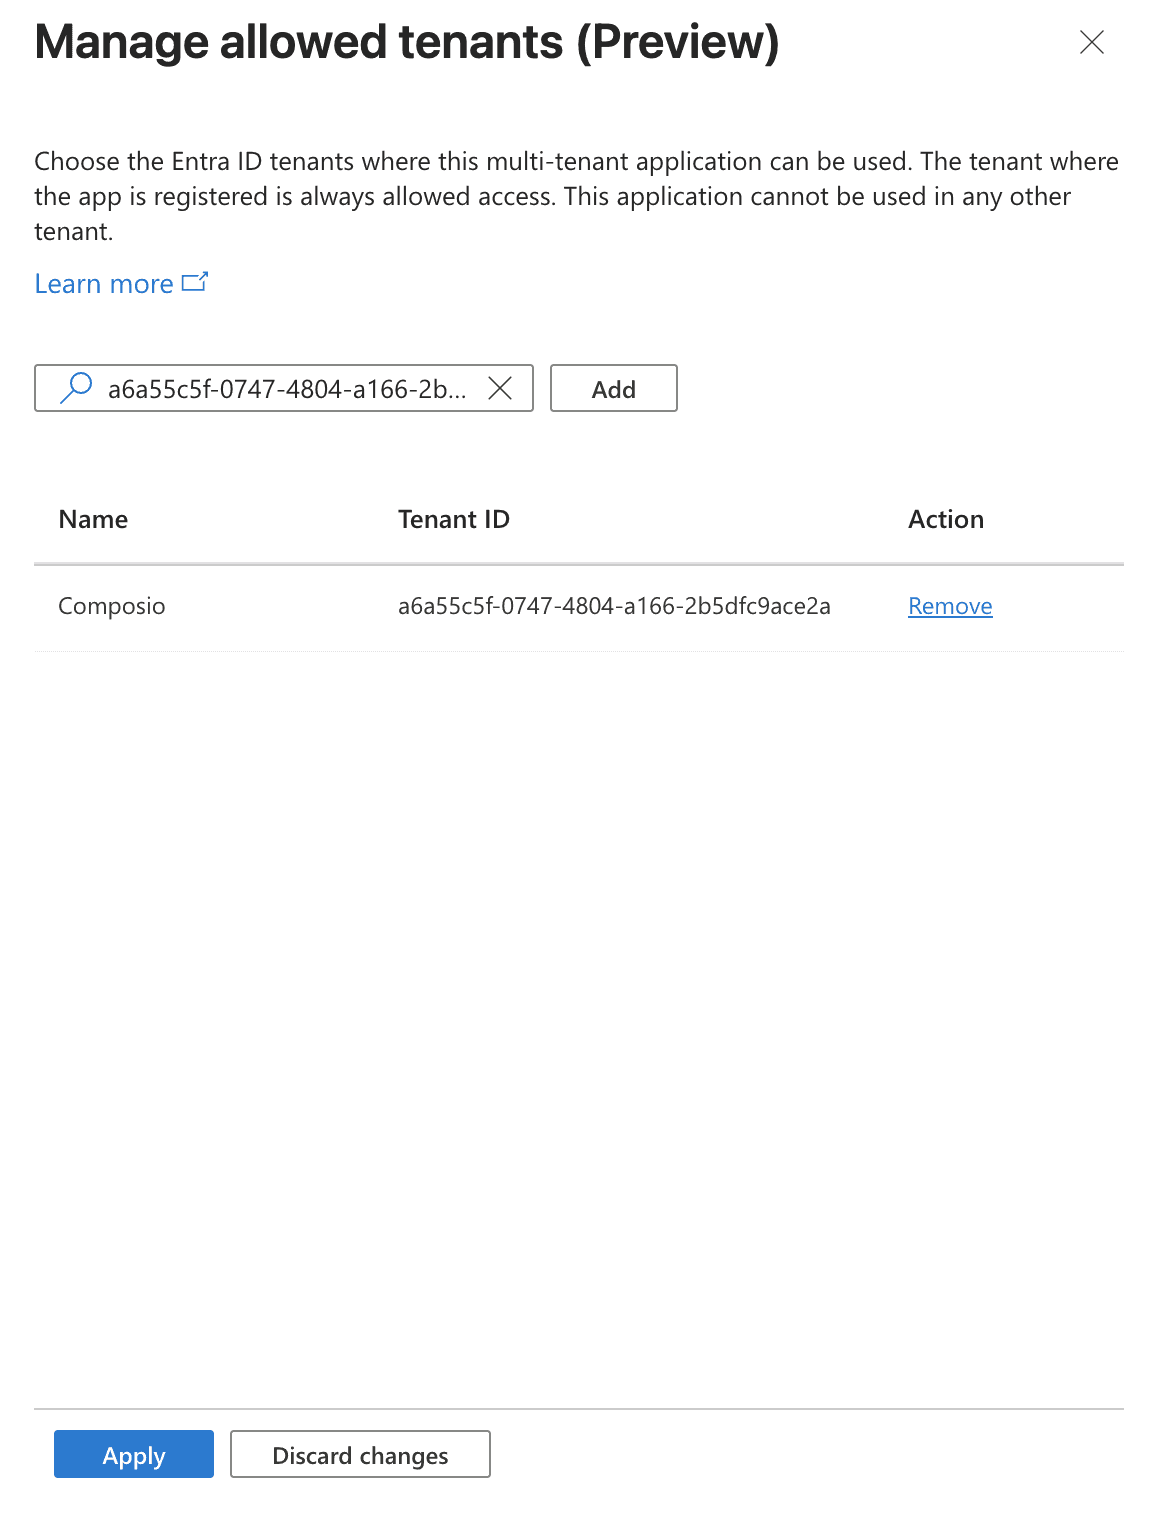
Click Apply.
(Optional) Add call back URL. Select Web and paste your callback URL.
Then click Register.

How to Find Your Tenant ID
Go to portal.azure.com.
Search for Microsoft Entra ID.
Your Tenant ID is listed on the Overview page.
⚠️ Important: If you select "Allow all tenants" instead, any Microsoft organization will be able to authenticate with your app. Only use this if you intend for your app to be publicly accessible.