In this guide, we’ll walk through how to configure authentication for Notion using OAuth 2.0 and API Key with Composio.
Notion supports public OAuth integrations, making it straightforward to set up and test.
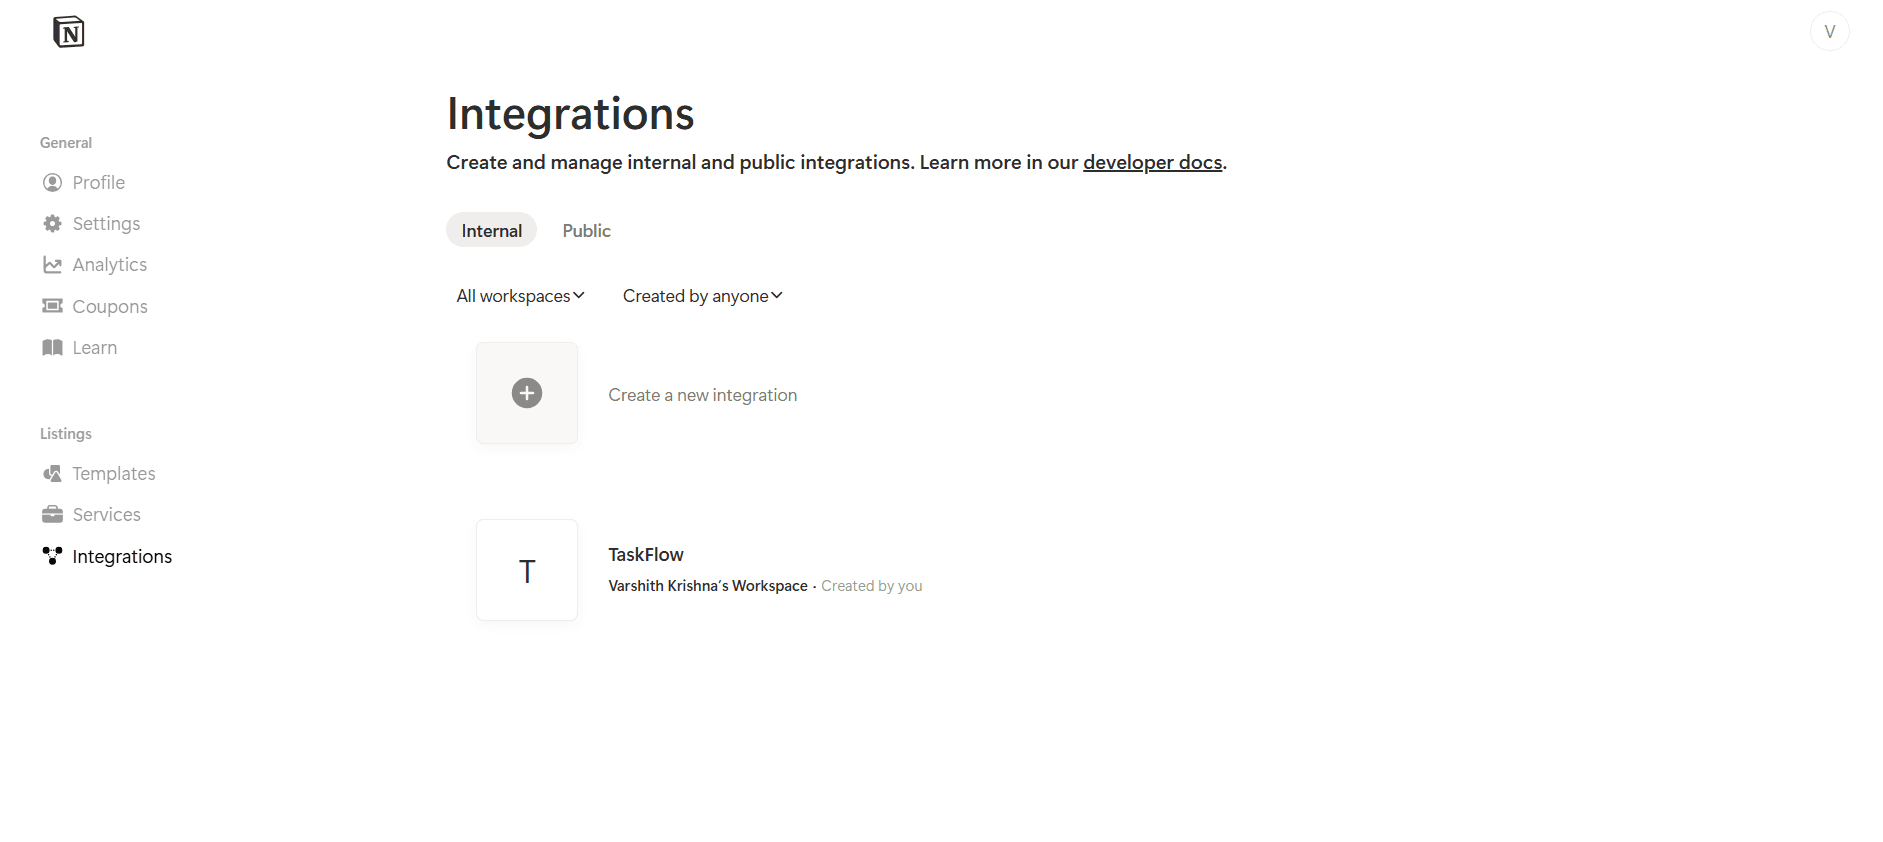
Setting up Notion
In this section, we’ll create a Notion integration to obtain the Client ID and Client Secret.
NOTE:
If you already have a Notion integration with OAuth credentials, you can skip to Creating the Auth Config in Composio.
Step 1: Create a Notion Account (if needed)
If you don’t already have one, sign up here:
https://www.notion.so/A free workspace is sufficient.
Step 2: Create a Notion Integration
Go to the Notion integrations page:
https://www.notion.so/profile/integrationsClick New integration
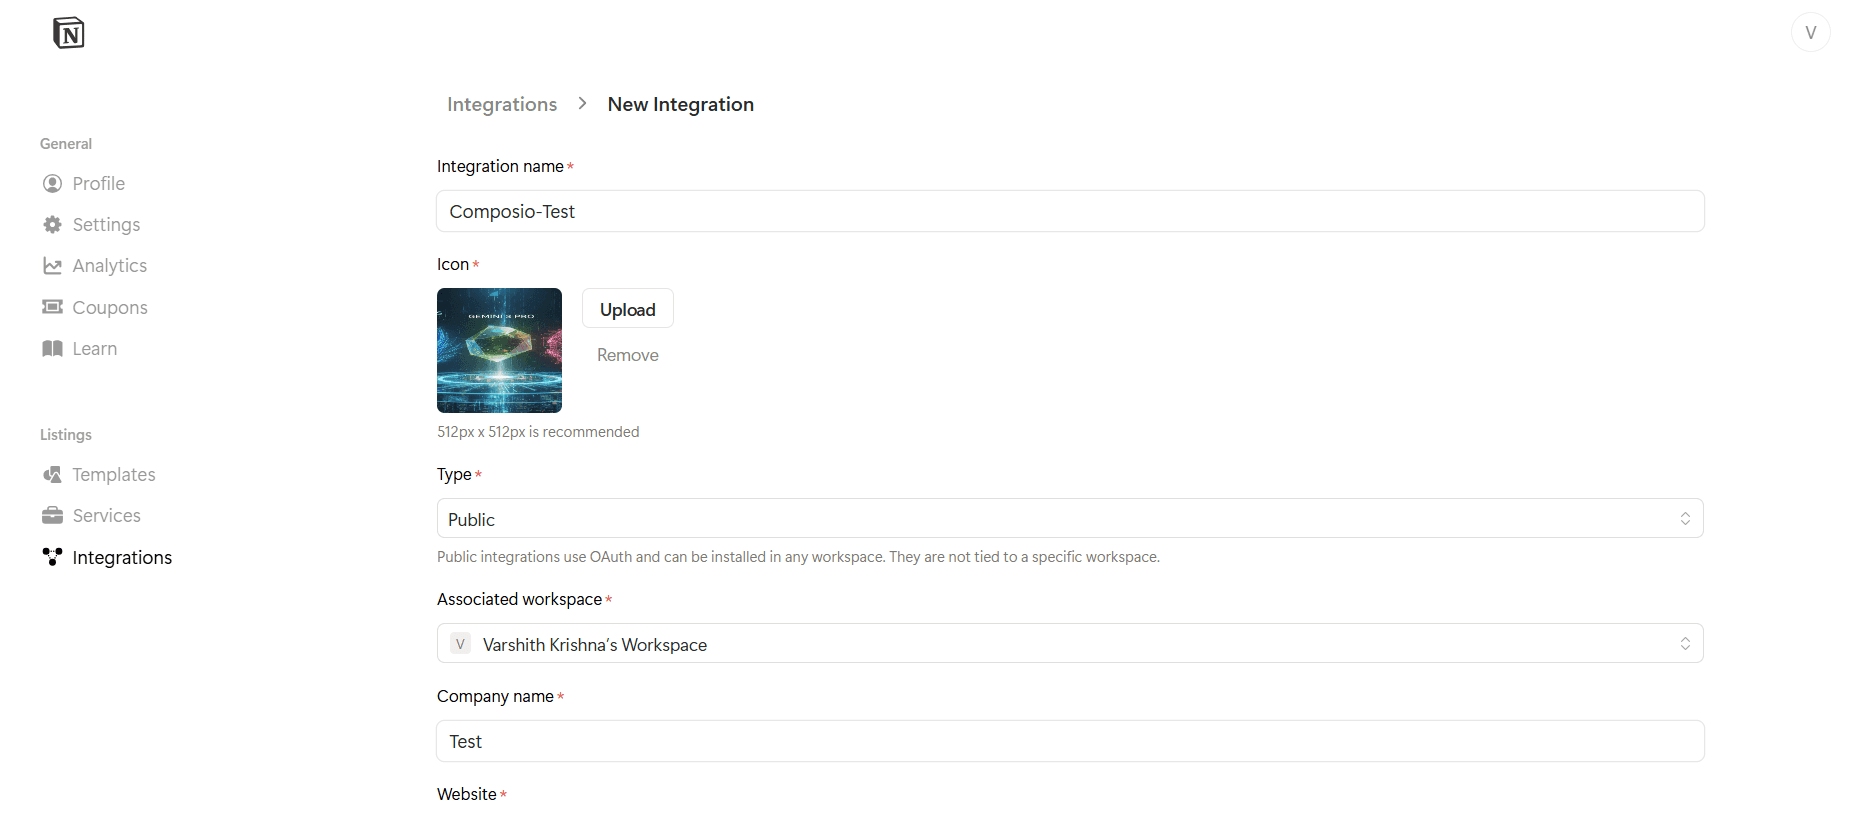
Step 3: Configure the Notion Integration
After creating a new integration, configure the basic details as follows:
Basic Information
Integration Name
Composio Notion IntegrationAssociated Workspace
Select the Notion workspace where this integration will be installed and tested.
Integration Type
Select Public
Why Public?
Public integrations allow OAuth-based authentication and can be connected by multiple users or workspaces. This is required for Composio’s OAuth flow.
Step 4: Configure OAuth Settings
Navigate to the OAuth domains & URIs section in the integration settings.
Add the following Redirect URI:
https://backend.composio.dev/api/v3/toolkits/auth/callback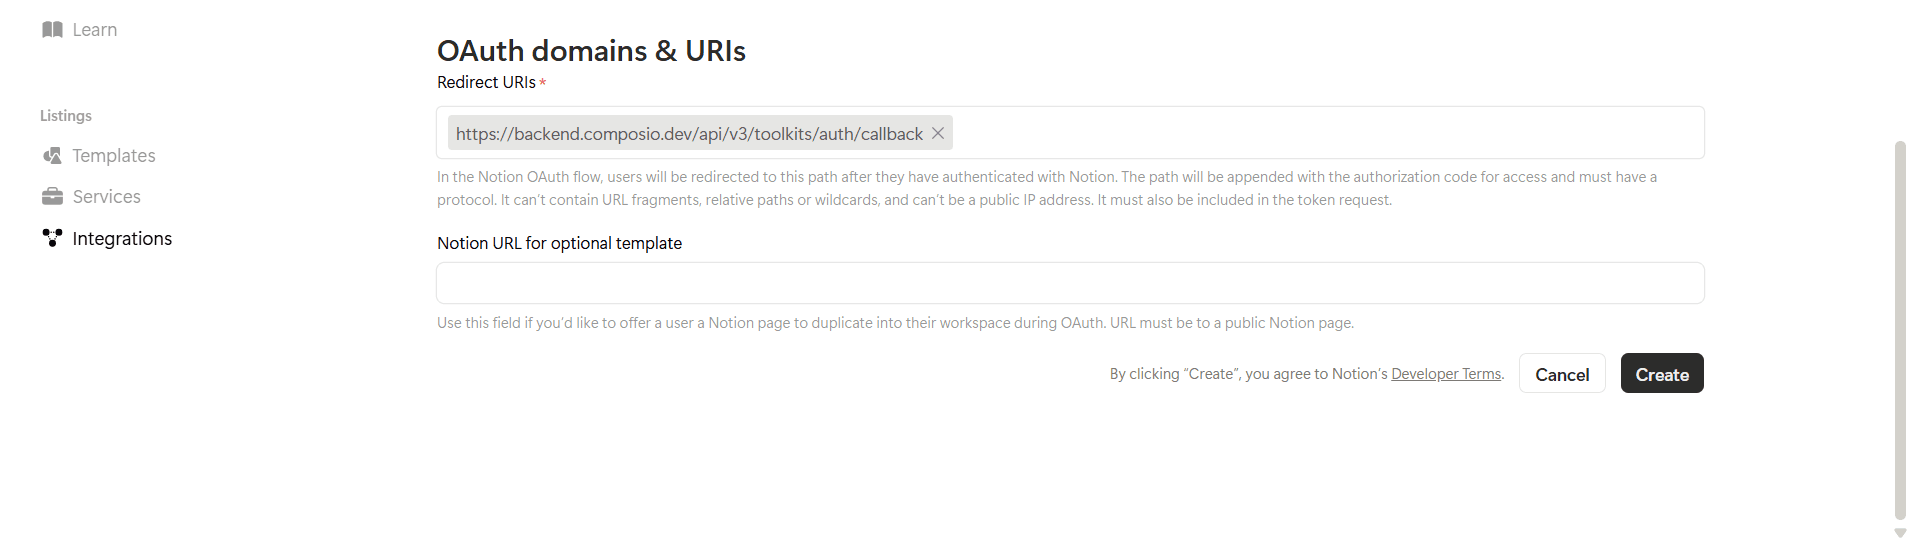
Redirect URI Requirements
Must use HTTPS
Must match the URI exactly
No trailing slash
No URL fragments, wildcards, or relative paths
This redirect URI is required so Notion can return the authorization code to Composio after the user successfully authenticates.
Step 5: Select Capabilities (Permissions)
Notion permissions are configured as Capabilities, not traditional scopes.
Commonly enabled capabilities:
Read content
Update content
Insert content
Read user information
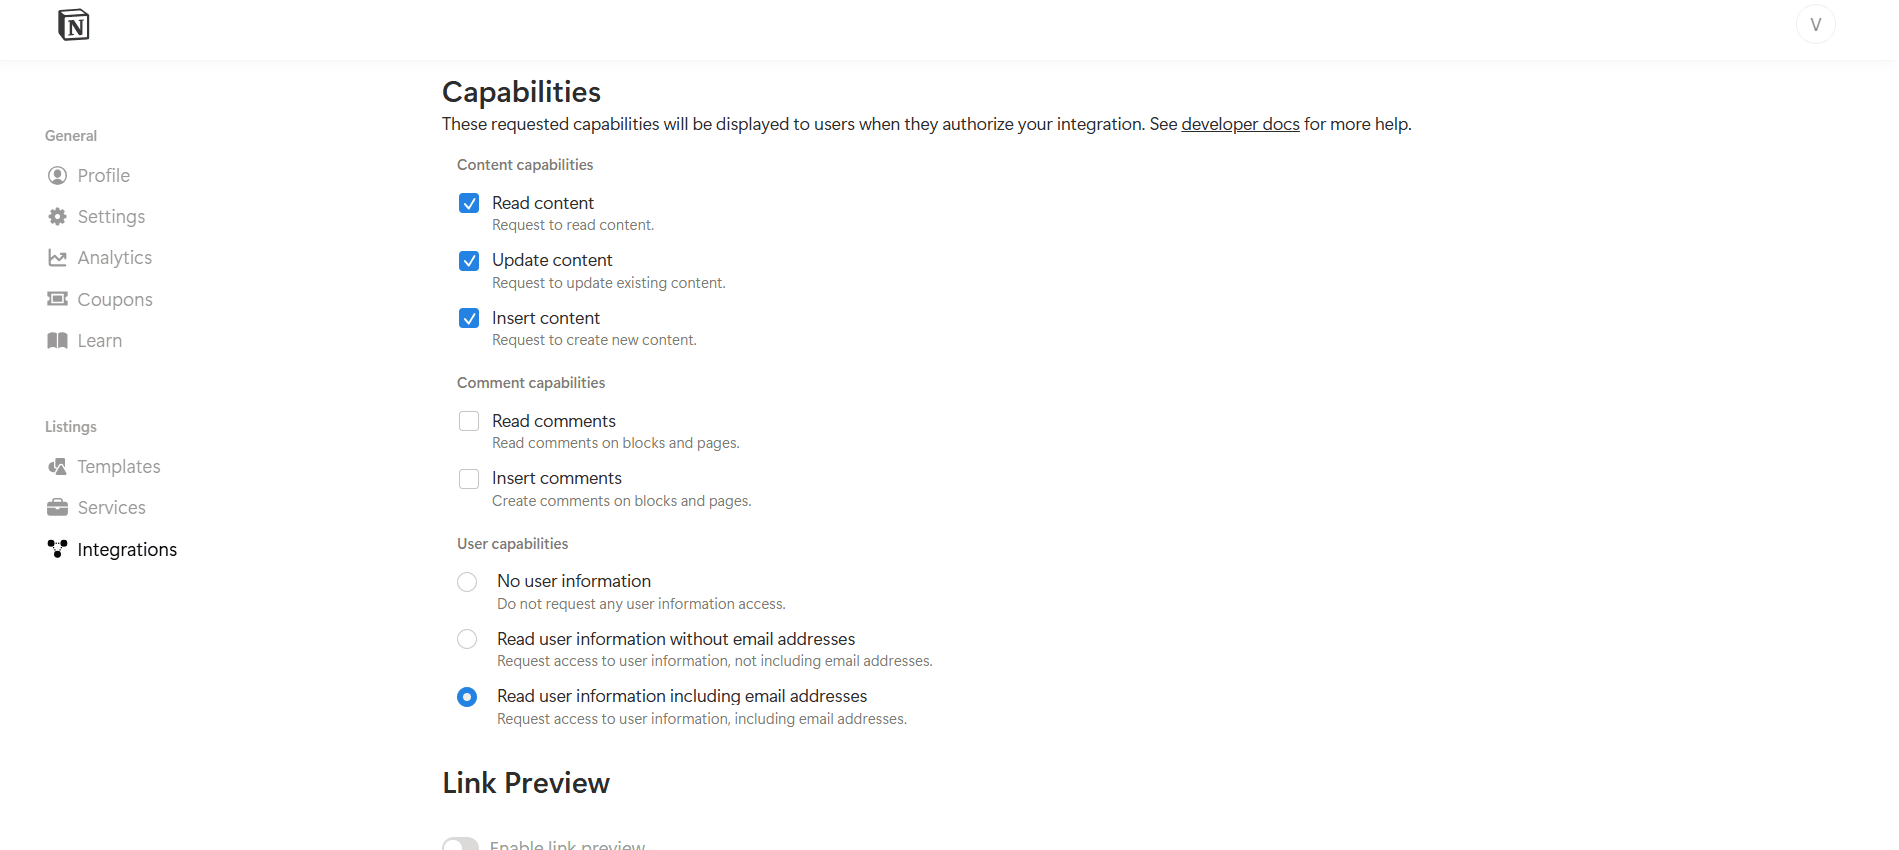
Select only the capabilities your integration requires.
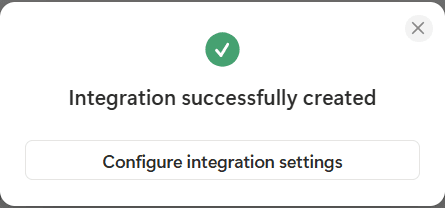
Step 6: Copy OAuth Credentials
Once saved, Notion will generate:
Client ID
Client Secret
Authorization URL
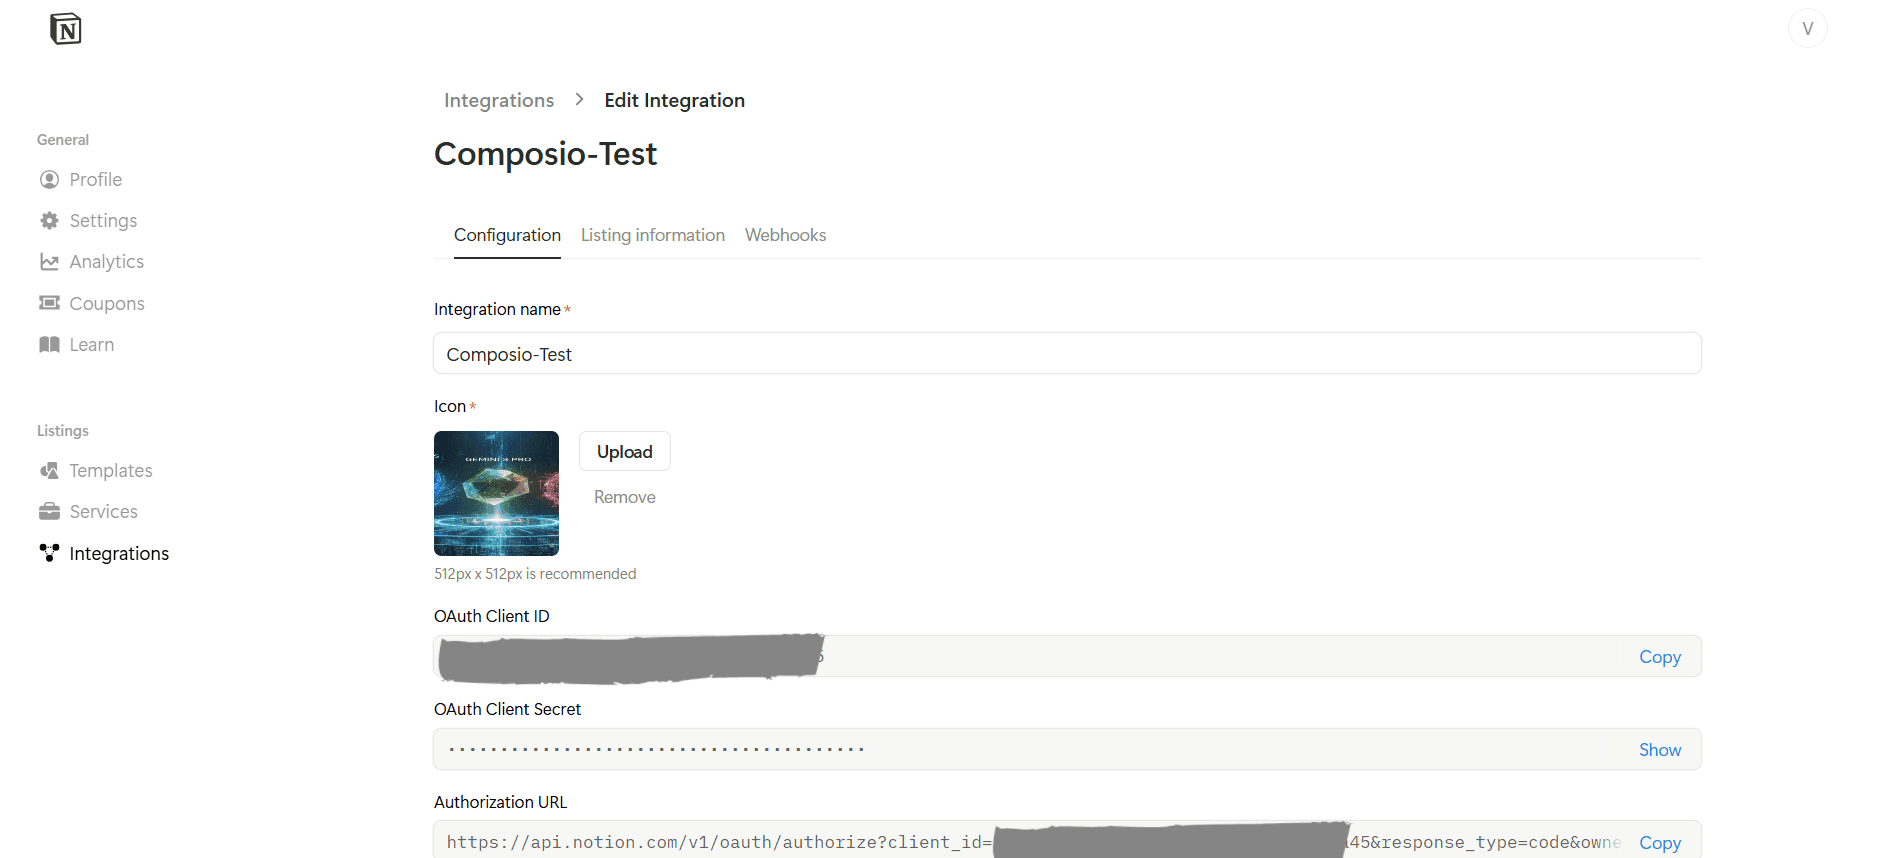
Important:
Store the Client Secret securely. Treat it like a password.
Creating the Auth Config in Composio
Now that your Notion OAuth credentials are ready, configure them in Composio.
Step 7: Create a Notion Auth Config
Go to the Composio Dashboard:
https://platform.composio.dev/Click Create Auth Config

Select Notion from the toolkit list
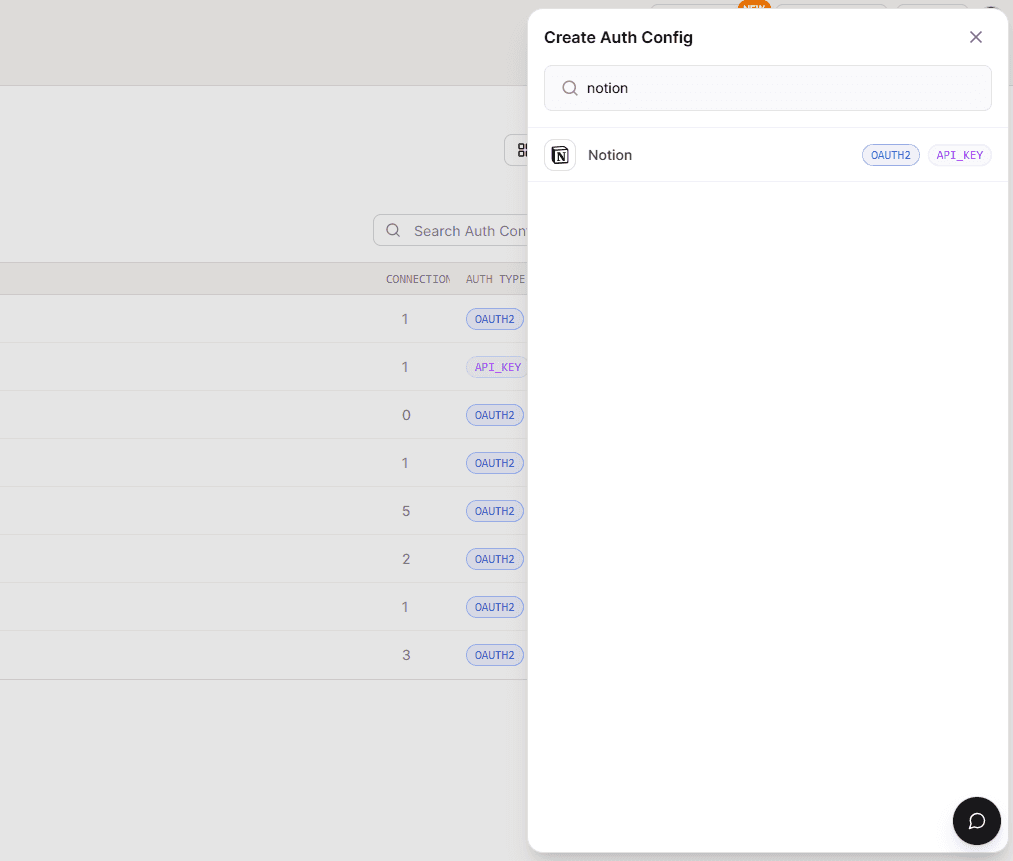
Ensure authentication type is OAuth2
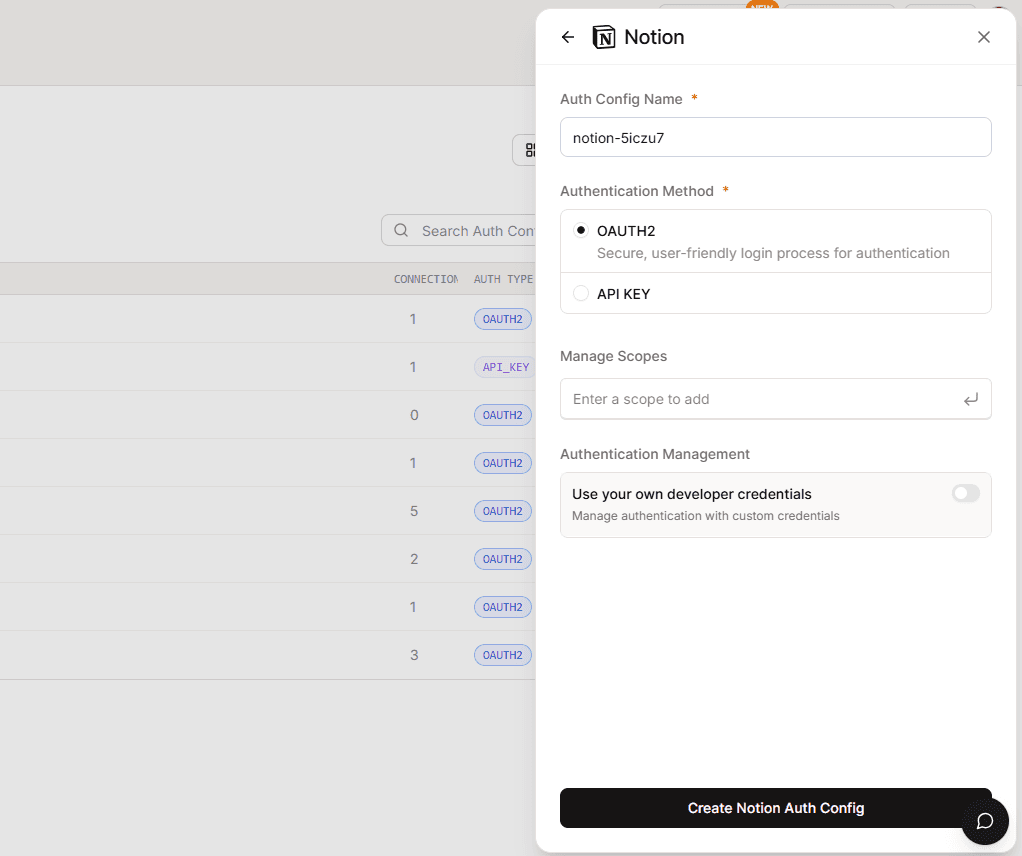
Enable Use your own developer authentication

Click Create Notion Auth Config
Step 8: Configure the Auth Config
Open the Manage Auth Config tab and fill in:
Client ID → from Notion
Client Secret → from Notion
Redirect URI
https://backend.composio.dev/api/v3/toolkits/auth/callback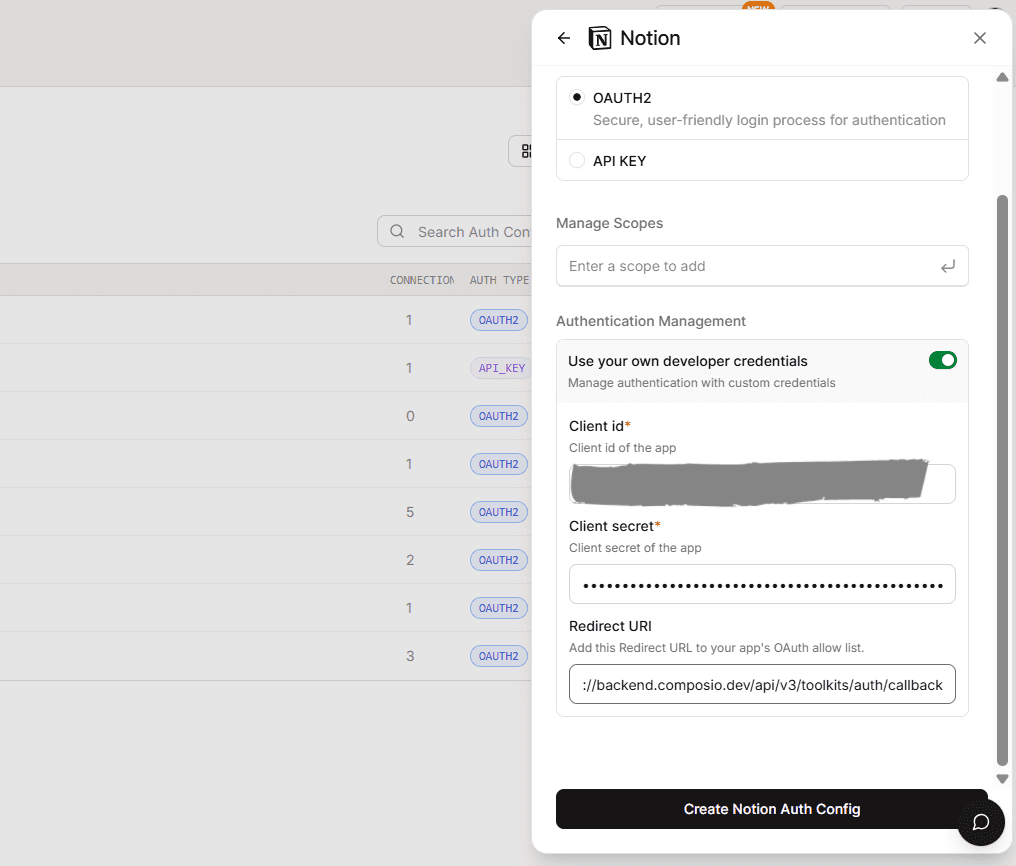
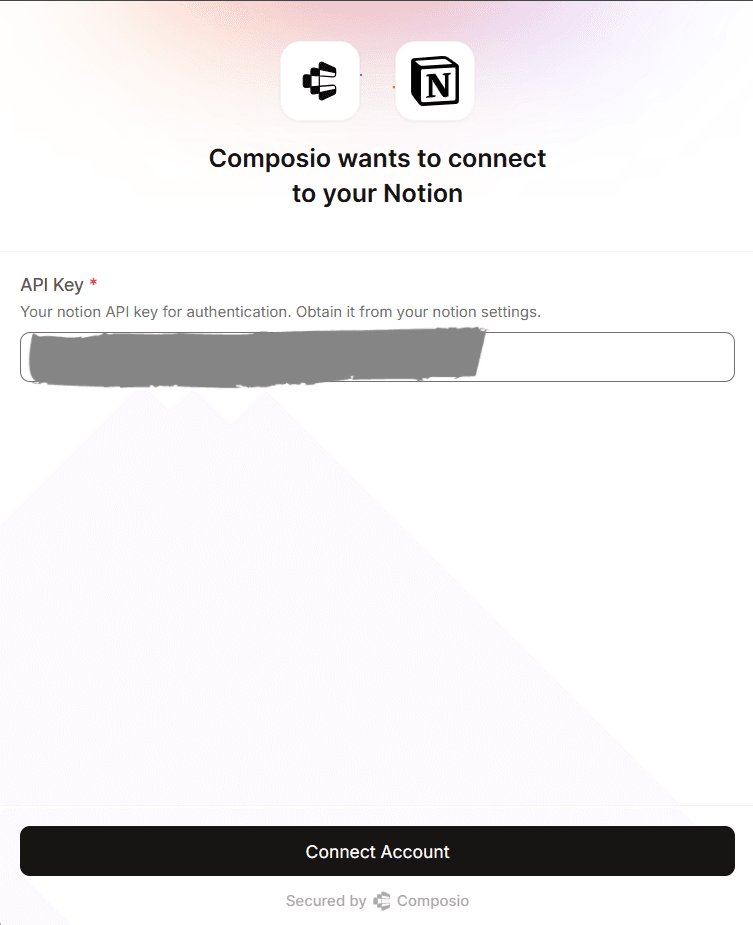
METHOD 2: API Key (Internal Integration Secret) Authentication
In addition to OAuth, Notion also supports API Key–based authentication using an Internal Integration Token. This method is useful for server-to-server use cases or when OAuth is not required.

Important: API Key authentication only works with Internal integrations. Public integrations must use OAuth.
When to Use API Key Authentication
Use an Internal Integration Token if:
You are integrating with your own Notion workspace
You do not need multi-user OAuth access
You want a simpler, non-redirect authentication flow
The integration will be used by a single workspace
Creating an Internal Integration Token
On the Notion Integrations page, click New integration
Enter a name such as:
Composio-API-TestSelect the Associated Workspace
Set the Integration Type to Internal
Click Submit
Once created, Notion will generate an Internal Integration Token.
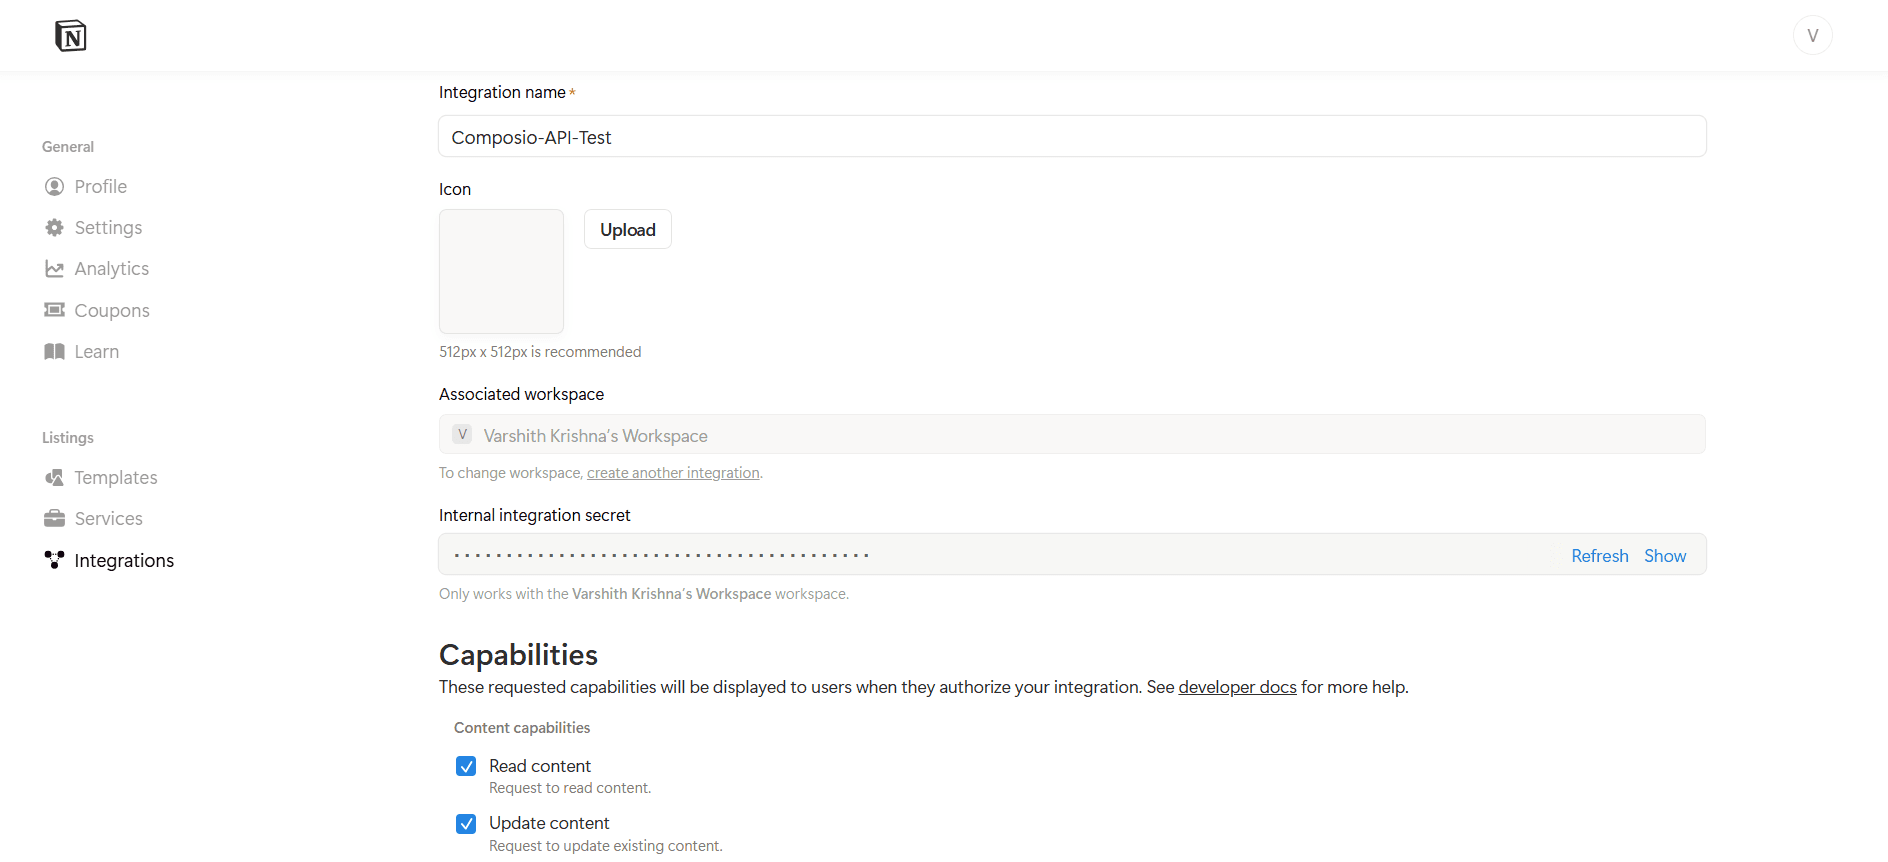
Save the token immediately, it will not be shown again.
Using API Key Authentication in Composio
To configure API Key authentication in Composio:
Choose API Key as the authentication method
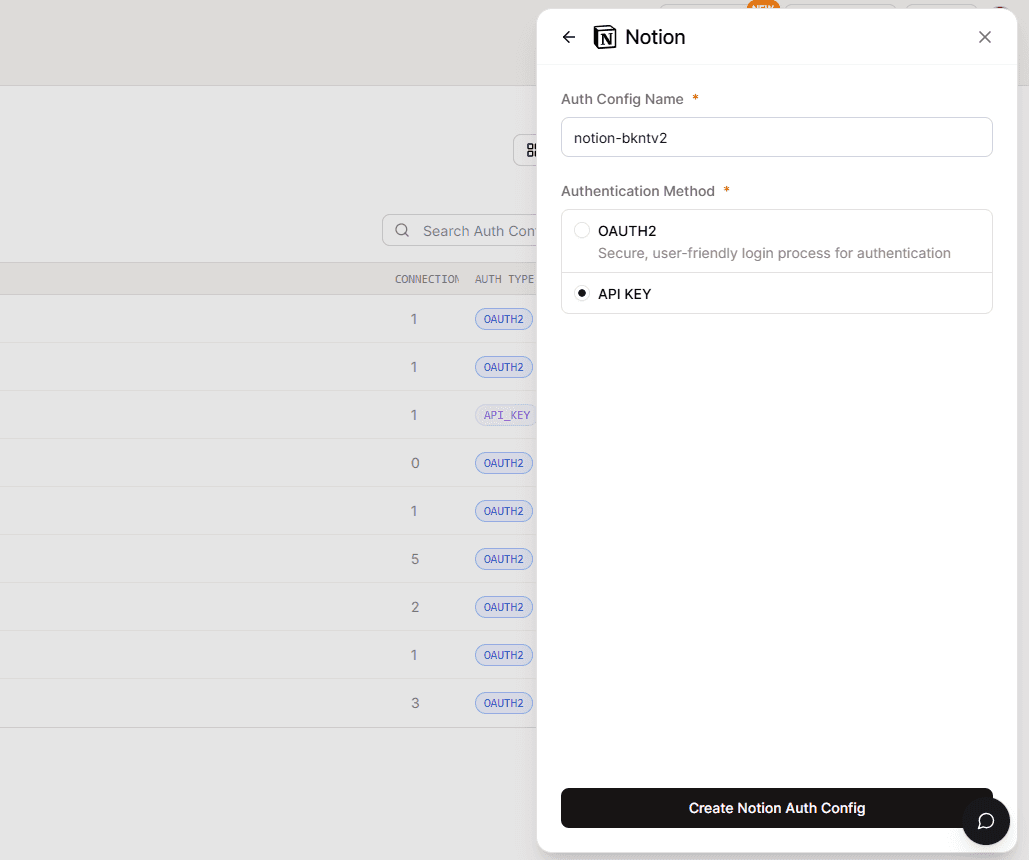
Click Create Auth Config
How OAuth Works with Composio
When a user connects their Notion account:
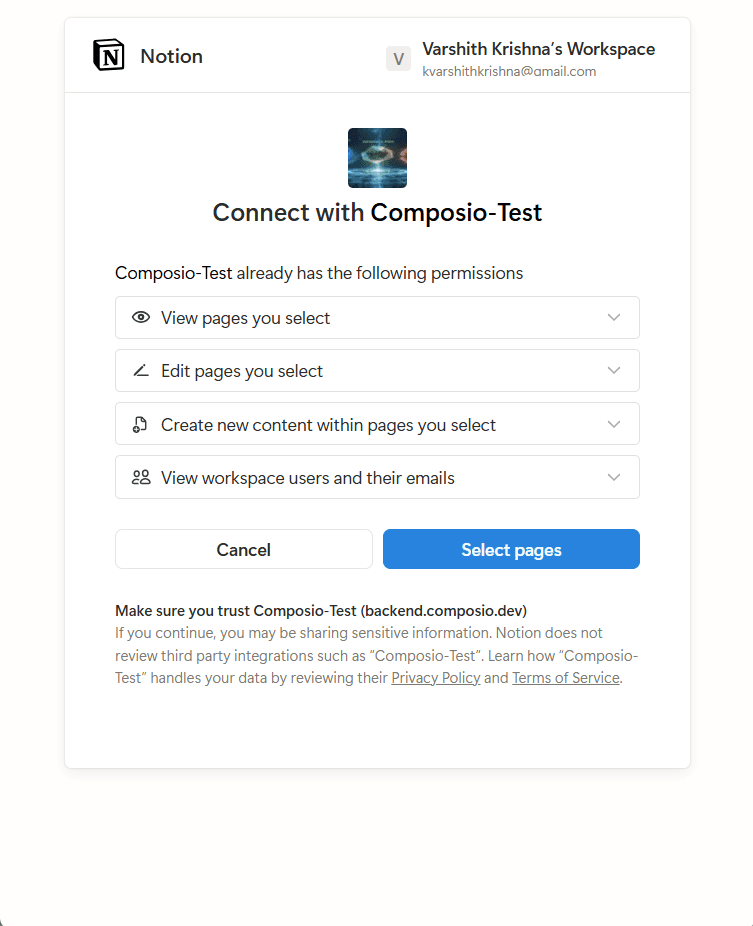
Composio handles the OAuth authorization flow
The user approves access to selected capabilities
Access and refresh tokens are securely stored by Composio
Tokens are refreshed automatically
How Authentication Works (API Key)
The Internal Integration Token is stored securely in Composio
Composio sends the token in the request headers
No OAuth redirect or user consent flow is involved
Access is limited to explicitly shared pages only
Base URL for Notion API
All Notion API requests are sent to:
https://api.notion.com/v1Test Notion Connection (Optional)
You can verify the connection using Composio Playground.
Open your Notion Auth Config
Navigate to the Playground
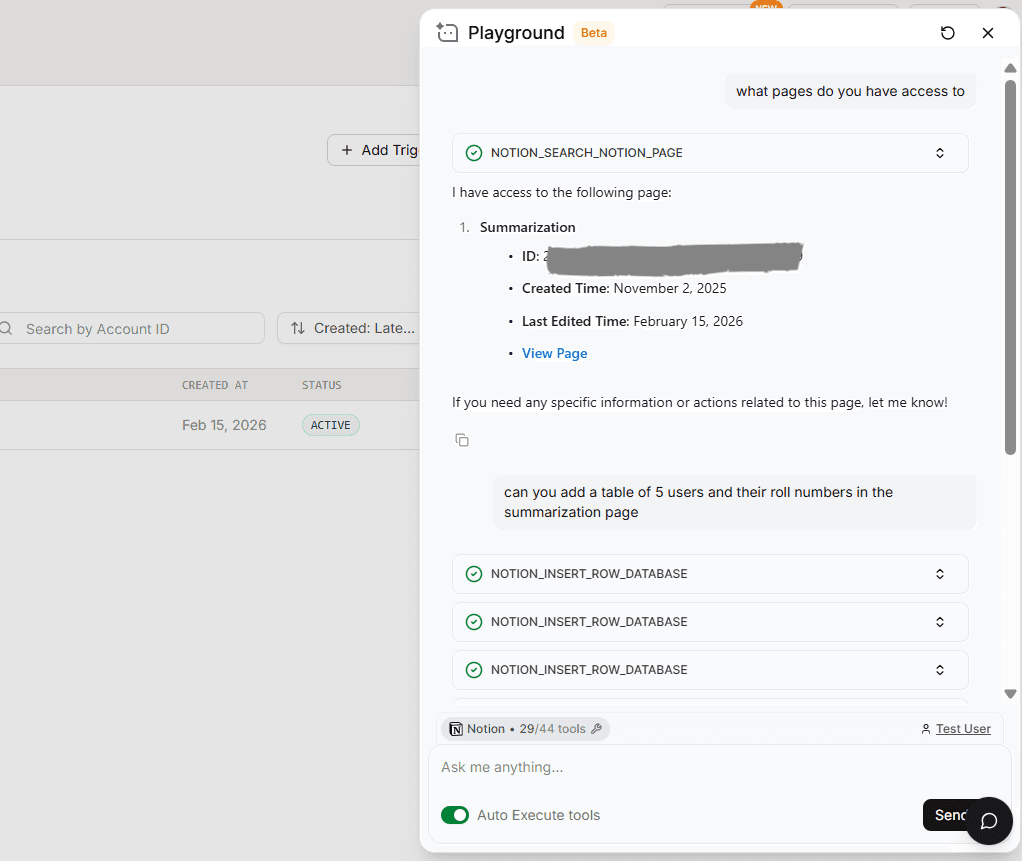
If configured correctly, Composio will successfully access your Notion workspace.
Final Step
Once everything is set up:
Copy the Auth Config ID (starts with
ac_)
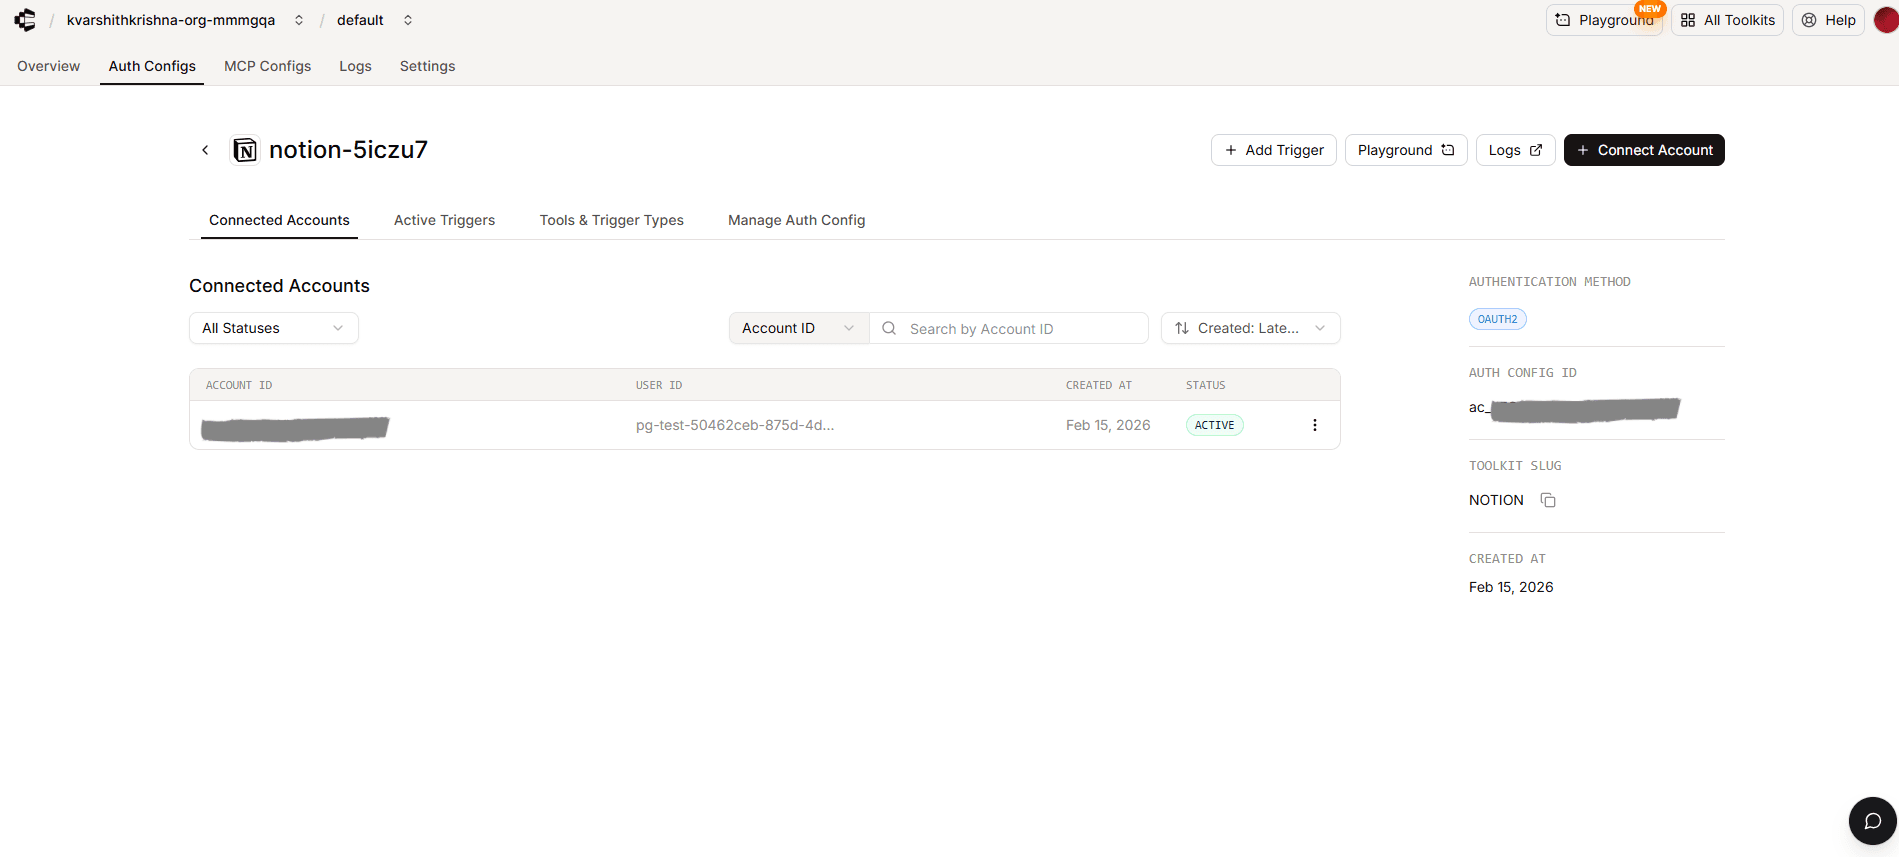
Store it securely in your secret manager
Use it in your application code to authenticate Notion via Composio
Your Notion integration is now ready to use!